
LEVEL 2 D-P-001 TASK REPORT
5 / 2 / 2026
Mechanical Design
Assembly & Simulation
This mechanical gripper design utilizes a direct-drive linear sliding mechanism to actuate a symmetrical jaw system. Unlike traditional rotary lead-screw designs, the central green shaft is constrained to a linear sliding motion, acting as a plunger that drives the interconnected linkage assembly.

Computational Fluid Dynamics
The aerofoil designed in Level 1 – Task 2(a) was imported into Autodesk CFD and analyzed using a wind tunnel simulation. The airflow velocity was set to 28 m·s⁻¹, and suitable boundary conditions were applied.
The simulation was carried out to study the airflow around the aerofoil and to calculate the lift force generated. The results obtained from the simulation were analyzed, and a report was generated using Autodesk CFD. The generated report.
Generative Design: Generative Design
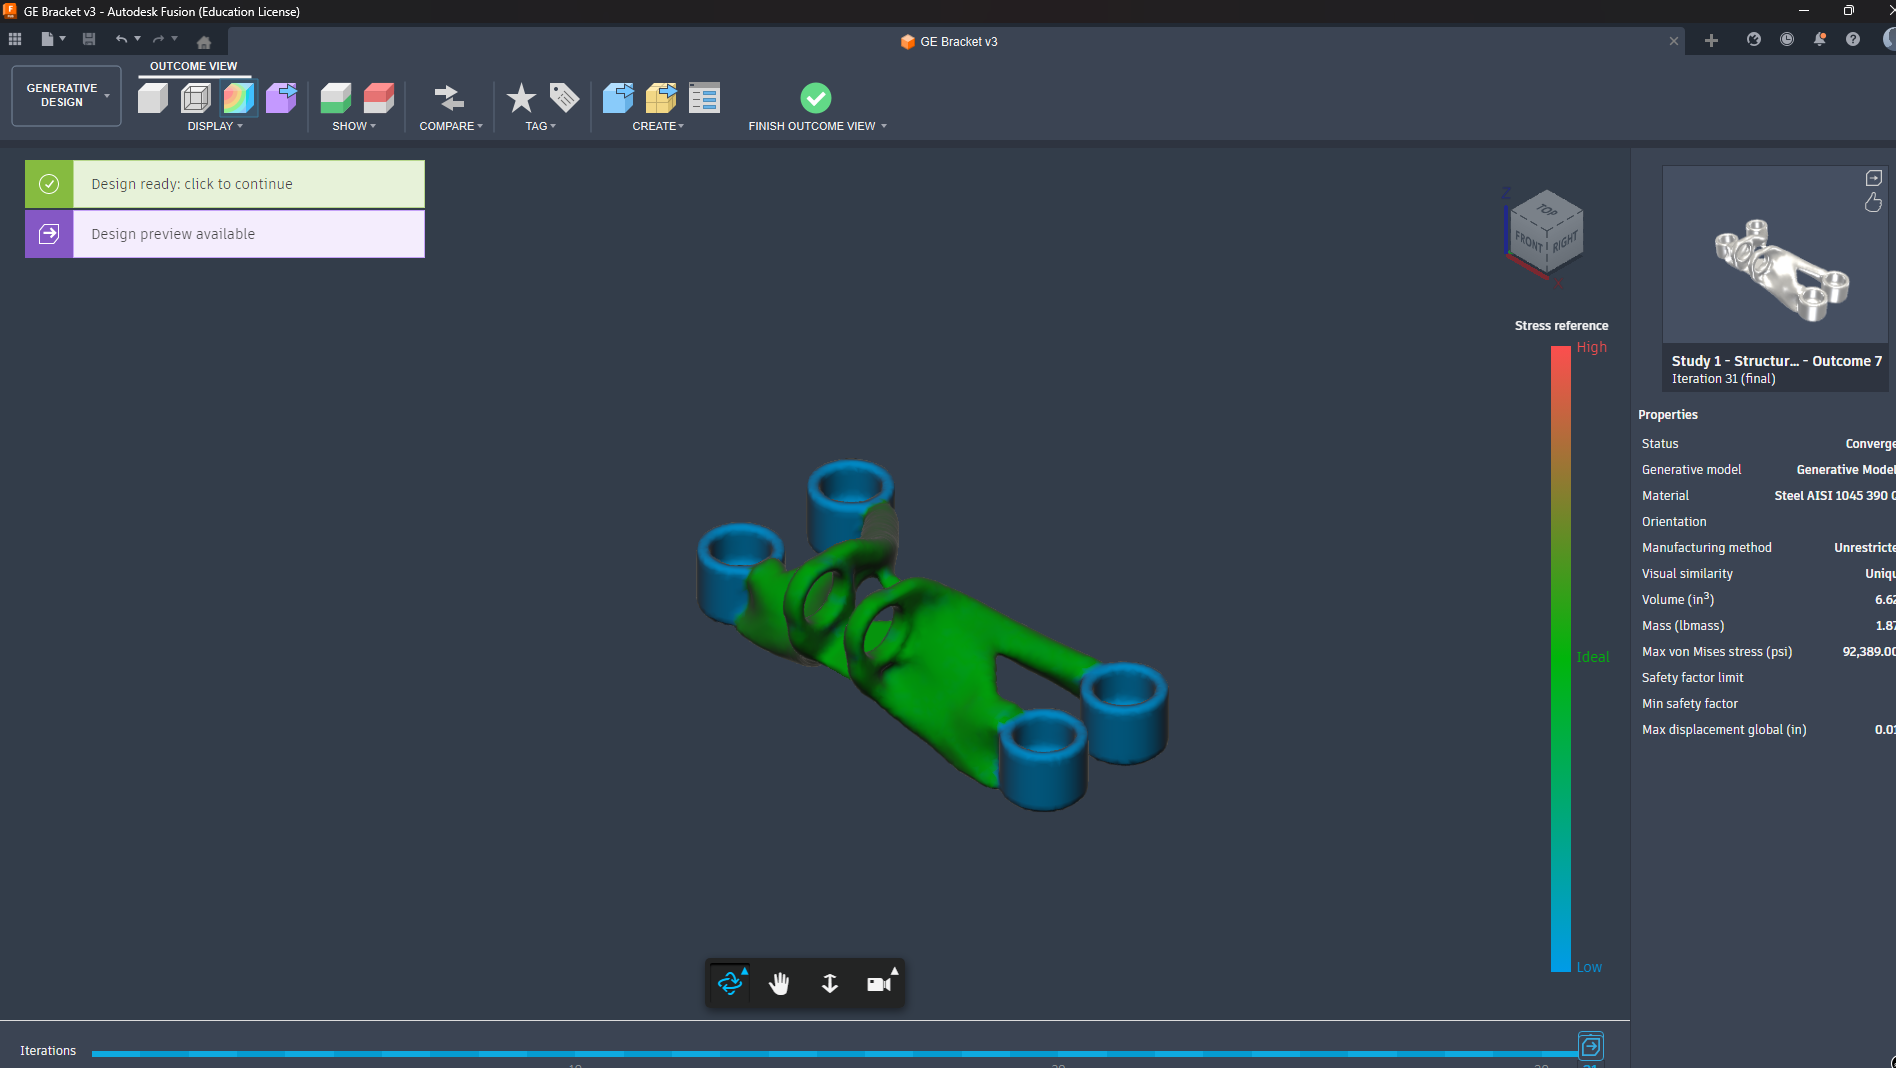
I imported the GE Bracket sample into Fusion 360’s Generative Design to see how it can optimize the bracket shape. First, I selected the important areas like the bolt holes and the pin region as Preserves, so Fusion wouldn’t modify them. Then I added Obstacles so the design won’t grow into spaces where bolts or other parts need clearance. After that, I applied the actual loads and constraints the bracket will experience in real use.

Piston and crankshaft mechanism
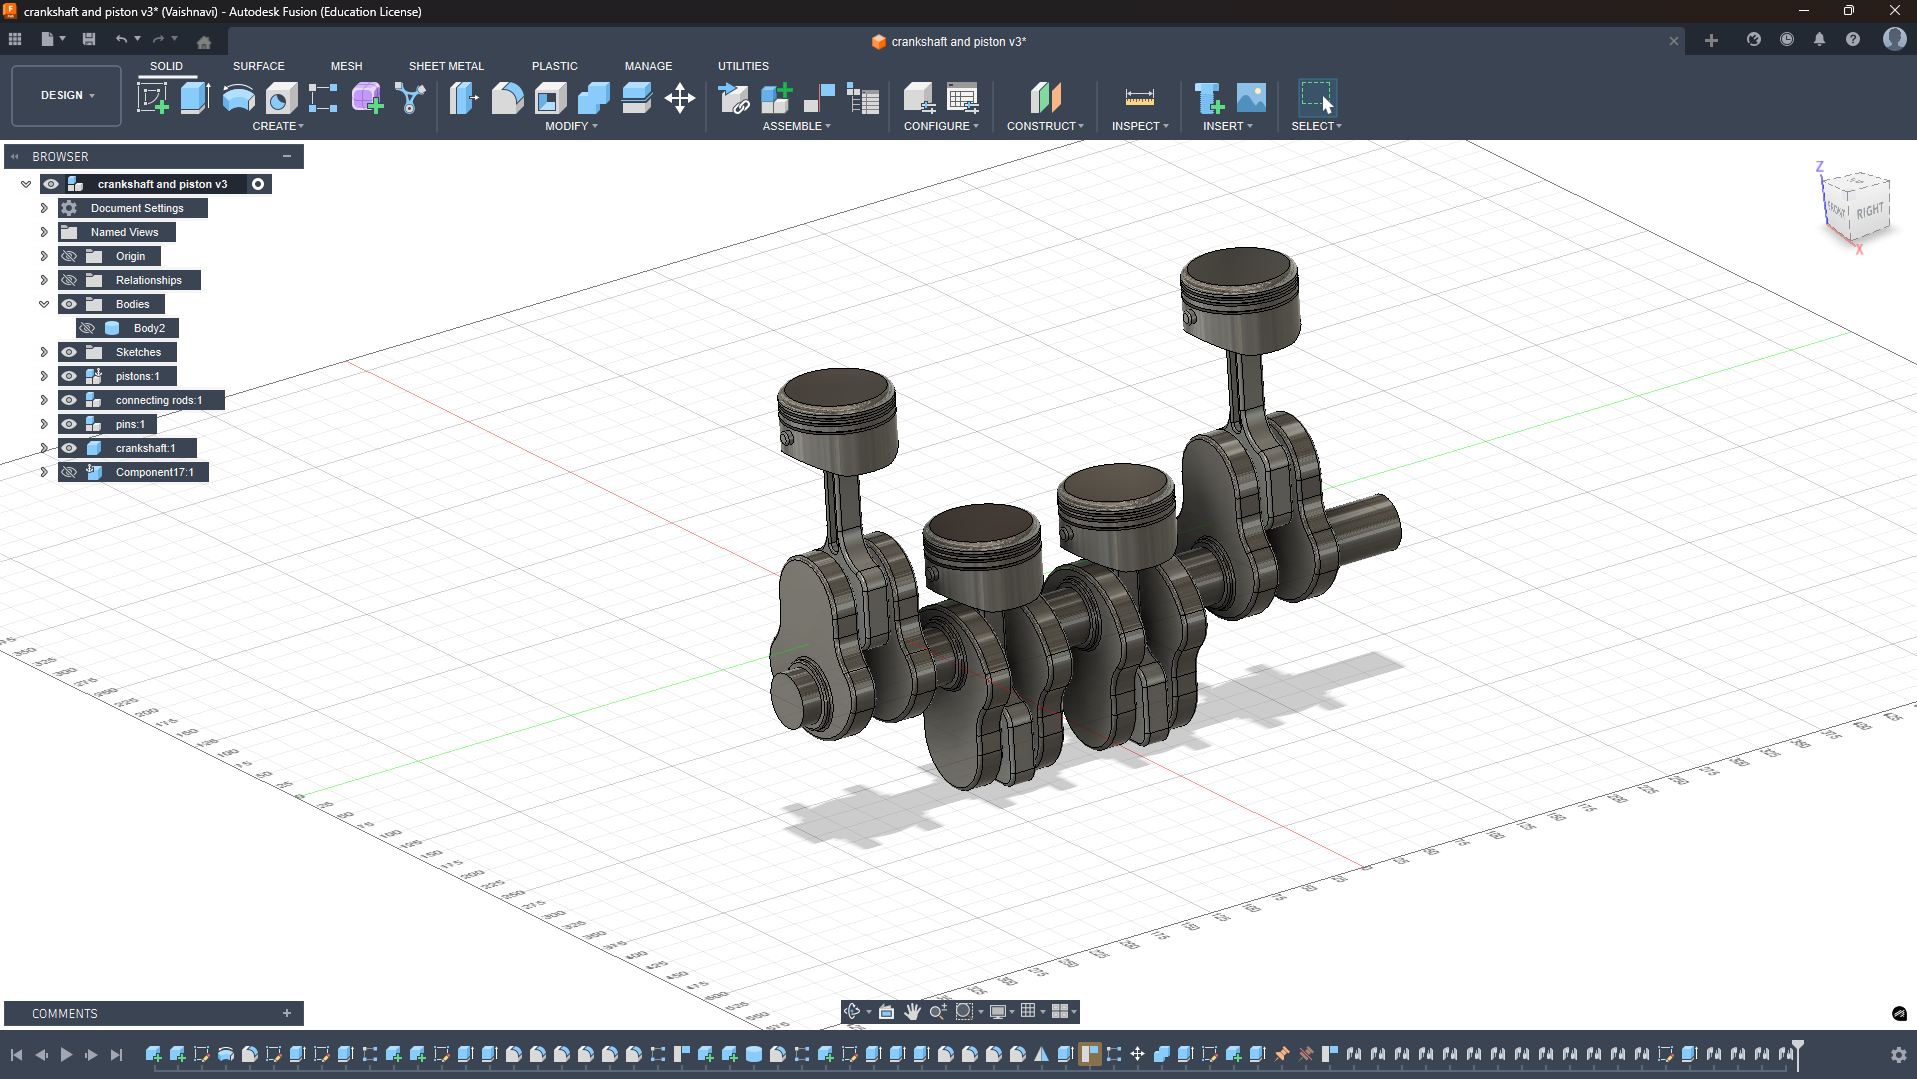
I designed piston, connecting rod, crankshaft, and cylinder individually in Fusion 360 using proper dimensions. Then I assembled everything into a working slider-crank mechanism with correct mates and motion links. I ran motion simulation to check smooth piston up-down movement, crankshaft rotation, and connecting rod swinging through full cycle.
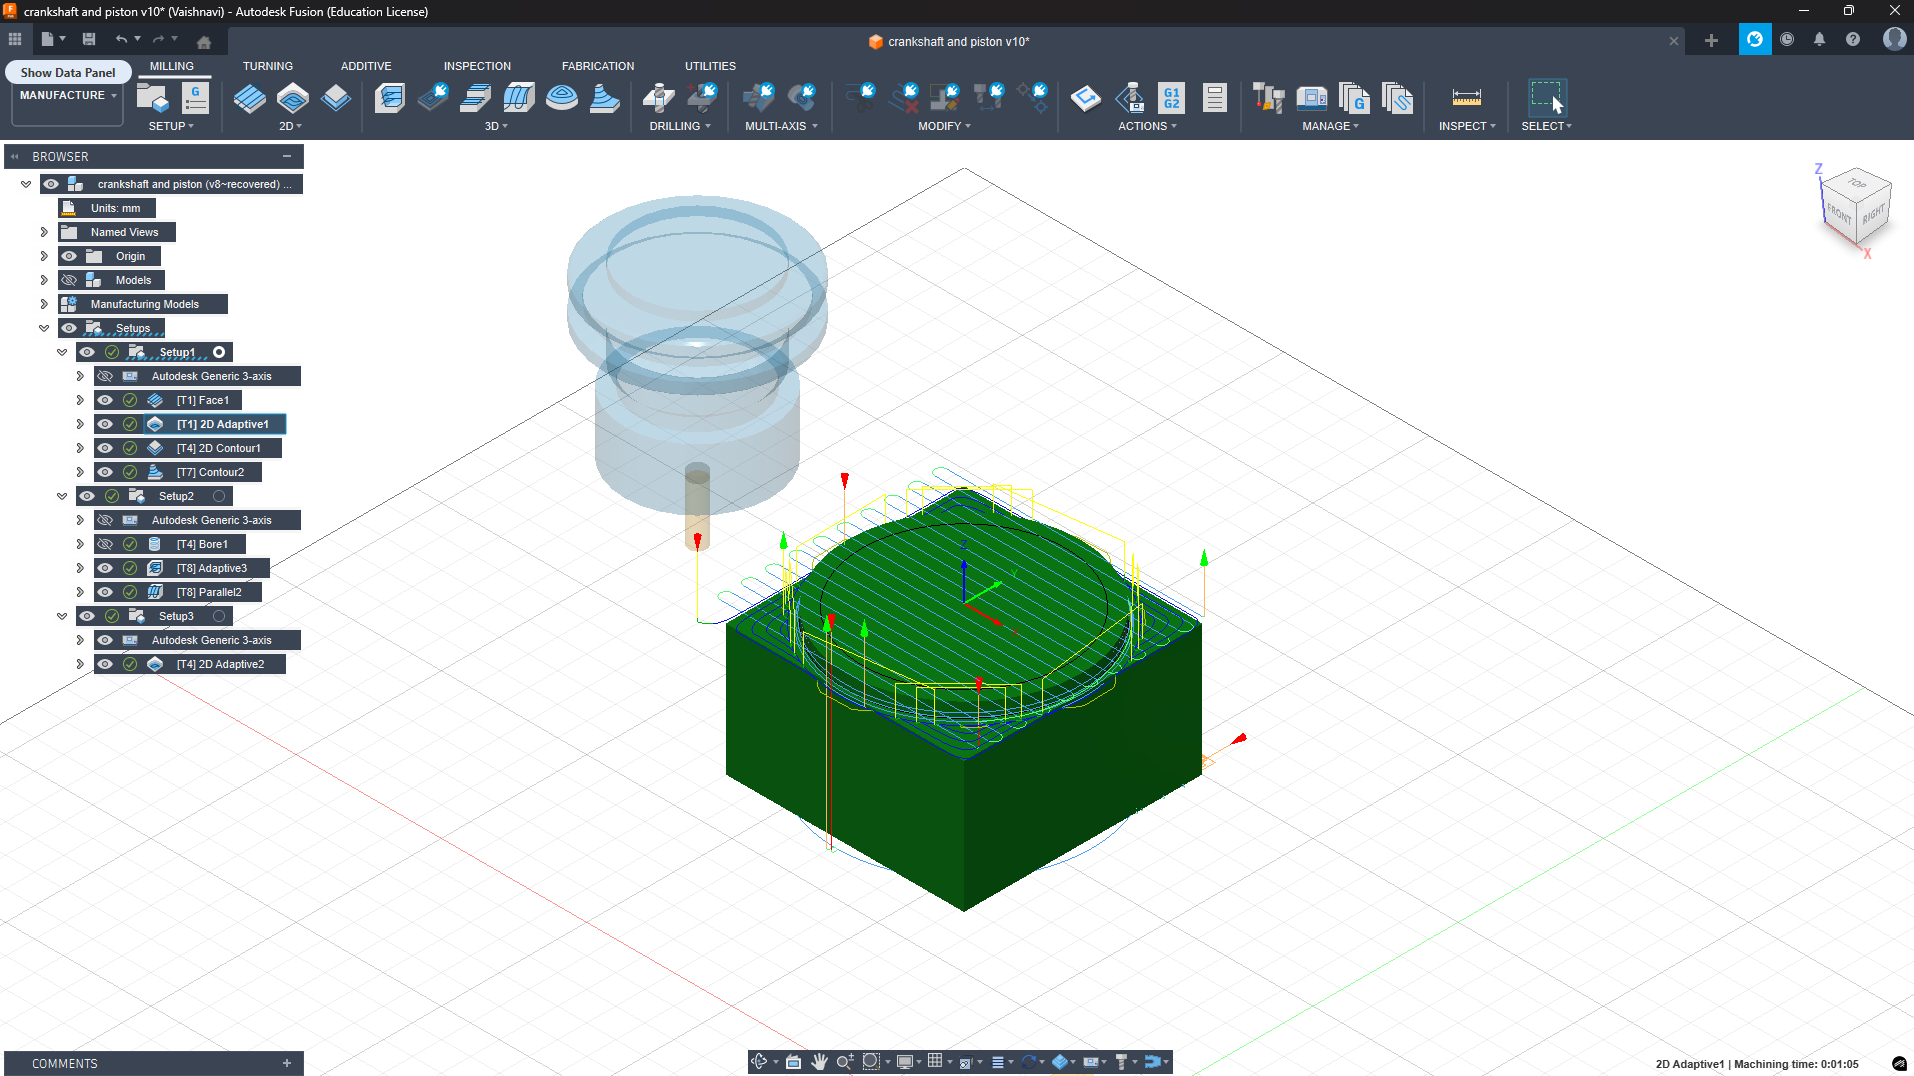
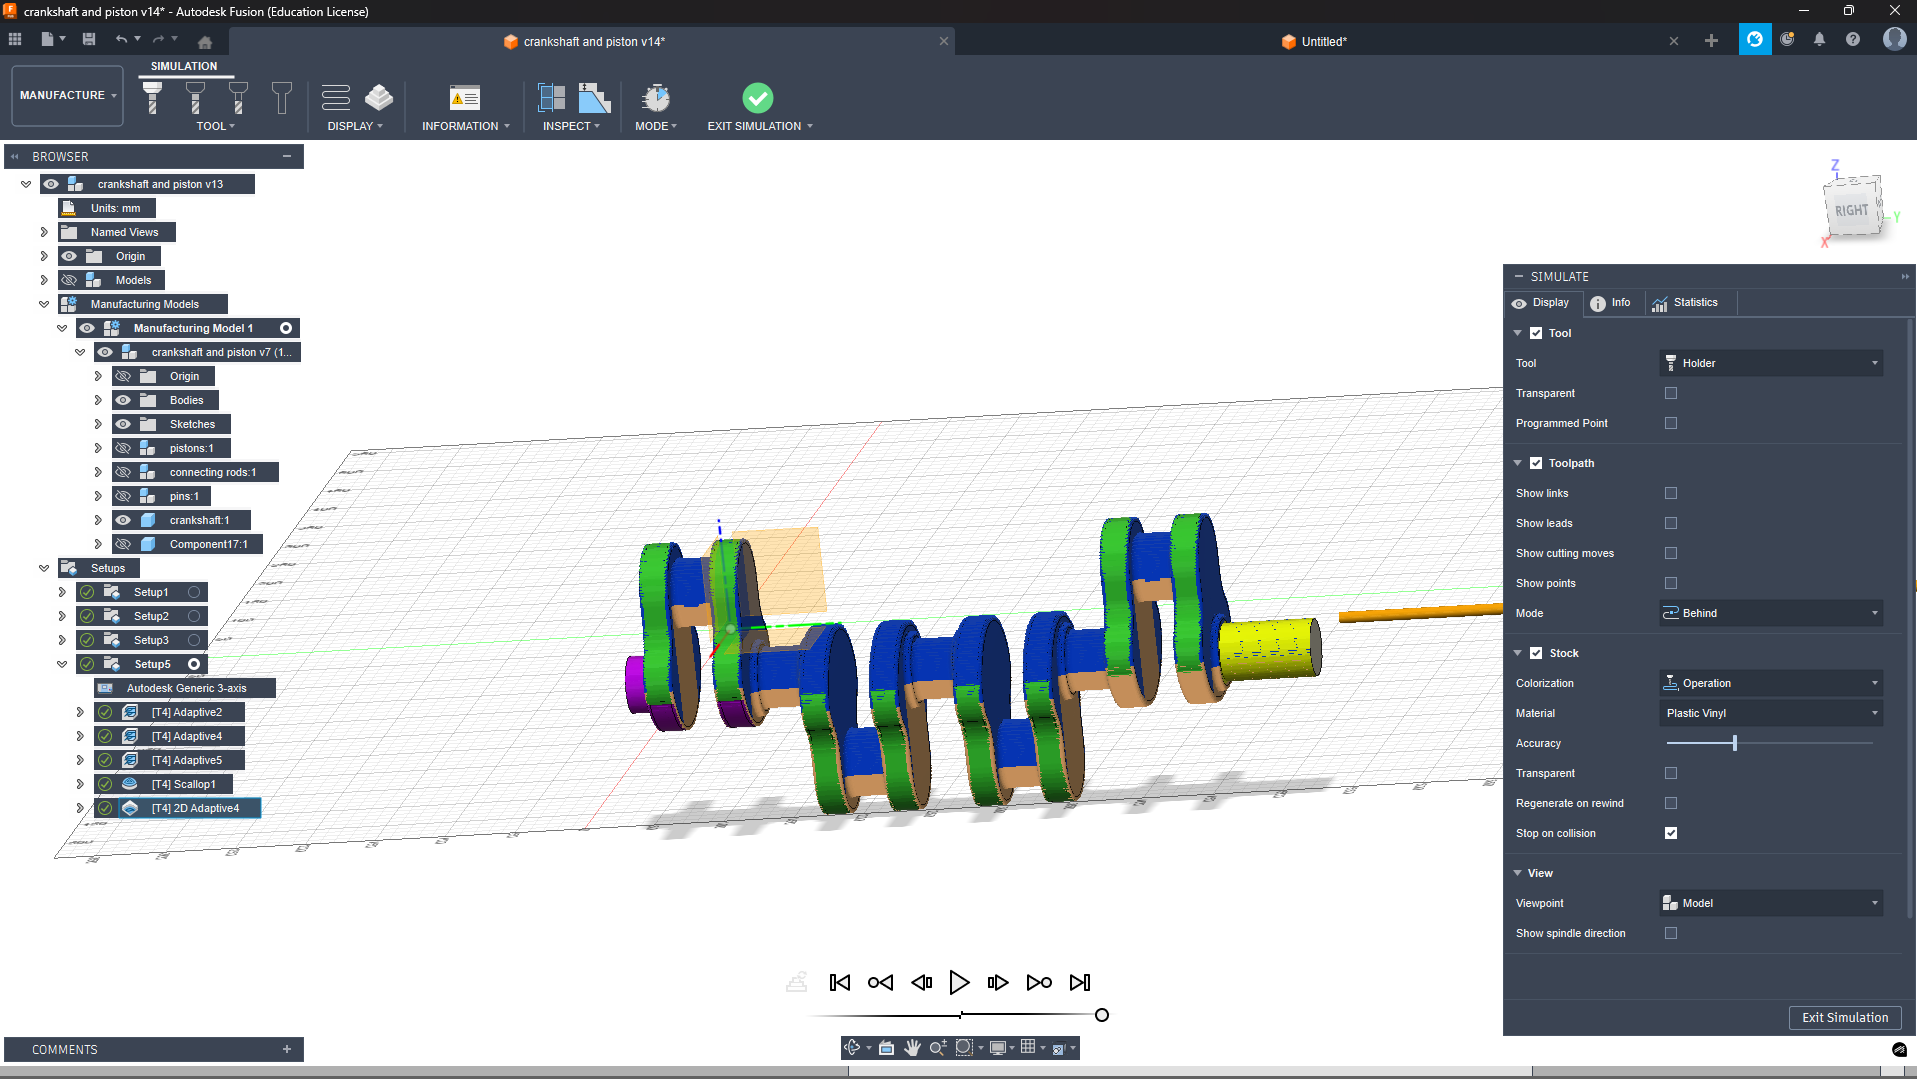
ToolPath for the piston
Animation and rendering
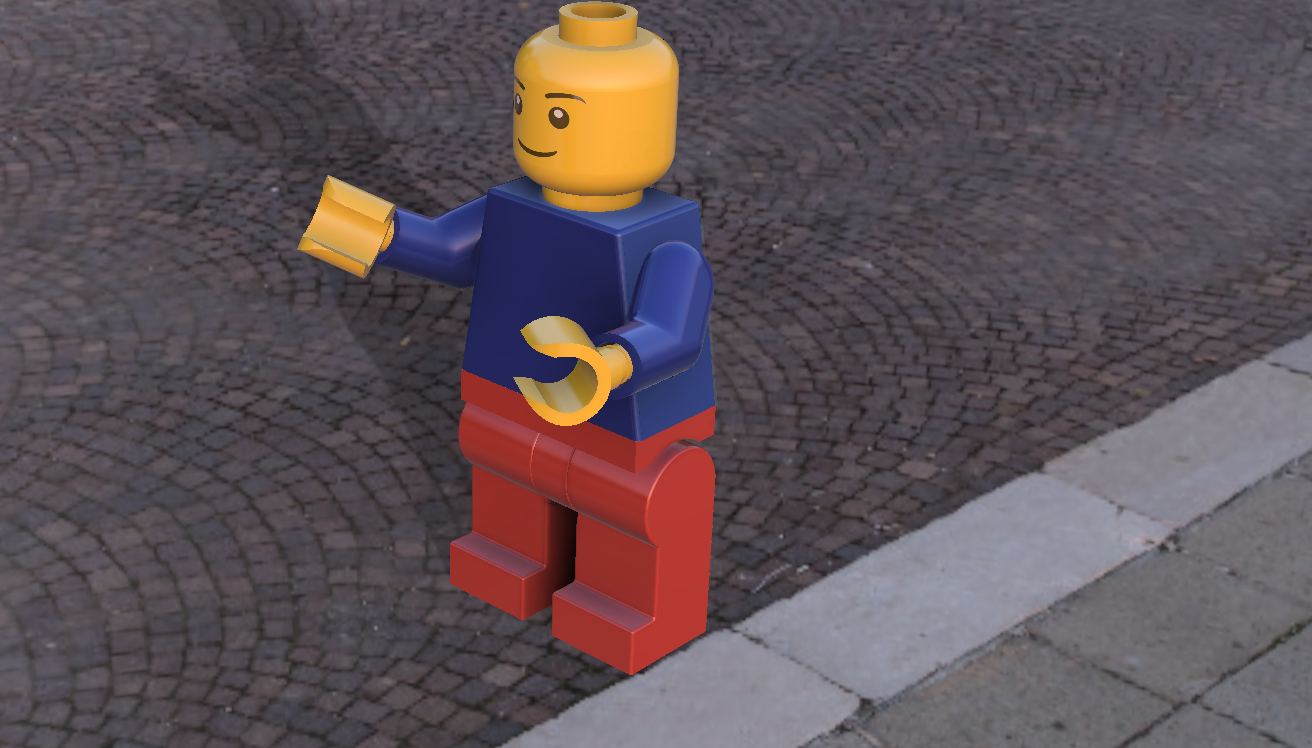
For this task, I designed and assembled the Lego man in Fusion 360 by creating its individual parts and applying appropriate joint relationships, such as revolute joints for the arms and legs, to simulate realistic motion. Using motion studies, I explored how these joints interact and understood the movement constraints of the assembly, successfully animating actions like walking and waving.
I rendered the Lego parts and selected an outdoor environment with a cobblestone street. To enhance realism, I set the lighting to sunset timing, which created natural shadows and a warm ambience. The final render placed the Lego man in a lively outdoor setting, making it appear integrated with the environment, and this process helped me gain a deeper understanding of both animation and rendering tools in Fusion 360.
Introduction to Laser Engraving
What is Laser Engraving?
Laser engraving is a process that uses a focused laser beam to vaporize and remove a thin layer of material from a surface, creating a permanent mark or design. It's like using an invisible, super-hot pencil that burns or melts away material to leave a lasting image or text.
How Laser Engraving Works
Basic Principle
The fundamental principle of laser engraving is straightforward: laser beam + material = permanent marking. A highly focused beam of light is directed at a material's surface, where it generates intense heat that physically alters or removes the material, creating a lasting design or text.
The Physics: Heat Generation and Material Removal
When the laser beam strikes the material surface, it concentrates enormous energy into a tiny spot—often smaller than the width of a human hair. This concentrated energy instantly heats the material to temperatures that can reach thousands of degrees Celsius. At these extreme temperatures, the material undergoes one of three changes:
-
Vaporization: The surface material instantly turns from solid to gas and disappears, leaving a cavity or depression.
-
Melting: The material melts and is blown away by assist gas, creating clean, precise cuts.
-
Ablation: Thin layers of material are removed one at a time, allowing for controlled depth and detail.
The depth and appearance of the engraving depend on the laser's power, speed, and the number of passes over the same area.
Step-by-Step Process for Laser Engraving
Step 1: Design Preparation & File Conversion
- Create or import design using graphic software (CorelDRAW, Adobe Illustrator, AutoCAD)
- Convert to compatible file formats such as SVG, DXF, or AI vector files
- Ensure designs are optimized for laser processing with proper line weights and details
Step 2: Machine Setup & Safety Checks
- Turn on the laser engraver and ensure it's located in a well-ventilated area
- Clean optics and remove any foreign objects from the machine
- Wear laser safety glasses and implement proper ventilation to manage fumes and smoke
Step 3: Material Selection & Placement
- Choose appropriate material based on your design and laser type (wood, acrylic, leather, glass, metal)
- Place material flat and secure on the work table to prevent movement during engraving
Step 4: Focus Adjustment & Positioning
- Adjust laser focus to the exact material surface height for sharp, clean engravings
- Use auto-focus feature if available, or employ a manual focal gauge depending on machine type
Step 5: Configure Critical Laser Parameters
- Set laser power (percentage of maximum output) based on material type and desired depth
- Adjust speed in mm/s for desired engraving depth and clarity
- Set frequency and number of passes if needed for deeper or more detailed engravings
- Always consult the manufacturer's manual for recommended starting settings
Step 6: Test Engraving (Recommended)
- Run a test on scrap material or a small section first
- Fine-tune settings to prevent mistakes and ensure optimal results on your final piece
Step 7: Execute the Engraving
- Click the "Start" or "Engrave" button in the laser control software
- The laser head follows the programmed path with micron-level precision
- Process duration varies from minutes to hours based on design complexity, size, and material
Step 8: Cooling & Material Removal
- Allow the engraved material to cool completely before handling
- Carefully remove the material from the machine
- Clean away dust and debris with a soft cloth to reveal the final engraved design
Step 9: Post-Processing & Finishing (Optional)
- Apply finishing touches like polishing, sealing, or protective coating if desired
- Enhances appearance, durability, and protection against environmental wear
Materials That Can Be Engraved
Laser engraving is versatile and works effectively on numerous materials:
- Wood (most common for beginners and educational projects)
- Acrylic and plastic
- Leather and textiles
- Glass and mirrors
- Metal (with appropriate laser type)
Different Lasers for Different Materials
Not all lasers are suitable for every material. The choice of laser depends on your project needs.
CO₂ Lasers
- Best for non-metallic materials: wood, acrylic, leather, glass, plastic
- Most versatile and commonly used in educational and small business settings
- Ideal for the Marvel lab keychain project on acrylic or wood
Fiber Lasers
- Specialized for metal engraving and cutting
- Works exceptionally on stainless steel, aluminum, brass, and copper
- Faster and more precise than CO₂ lasers when working with metals
Diode Lasers
- Compact and budget-friendly for hobbyists and beginners
- Best suited for wood, leather, and simple plastic projects
- Lower power output (5-40W) compared to CO₂ and fiber lasers
Key System Components
A typical laser engraving system consists of three essential parts:
-
Laser Source: Generates the high-energy light beam (CO₂ lasers for organic materials, fiber lasers for metals)
-
Optical System: Focuses and directs the laser beam to the exact point on the material using precision mirrors and lenses
-
Control System: The computer and software that coordinate the laser movement, power settings, and speed with micron-level accuracy
Advantages of Laser Engraving
Laser engraving delivers highly precise, permanent markings that won't fade or wear away, making it ideal for product identification and custom designs. The non-contact process is fast, repeatable, and versatile, working on virtually any material—from wood and acrylic to metals and glass—without damaging surfaces or wearing out tools.
Additional key benefits include:
- High precision with micron-level accuracy
- Permanent and durable markings resistant to fading and wear
- Non-contact operation eliminates tool wear and surface damage
- Exceptional speed and repeatability for consistent production
- Material versatility across wood, metals, plastics, glass, and leather
- Cost-effective compared to traditional mechanical engraving
- Easy automation integration for modern manufacturing workflows
Conclusion
Laser engraving represents a powerful and versatile technology that bridges the gap between traditional craftsmanship and modern digital manufacturing. Its precision, permanence, and ease of use make it invaluable in both educational settings and industrial production environments. Whether creating custom keychains for lab branding or permanent product identification markers, laser engraving offers a reliable, efficient solution that continues to revolutionize how we mark and customize materials.