
COURSEWORK
SAS's IOT-001 course work. Lv 1
| SAS | AUTHOR | ACTIVE |
marvel level 0
16 / 3 / 2026
MARVEL REPORT
TASK 1: 3D Printing
Objective
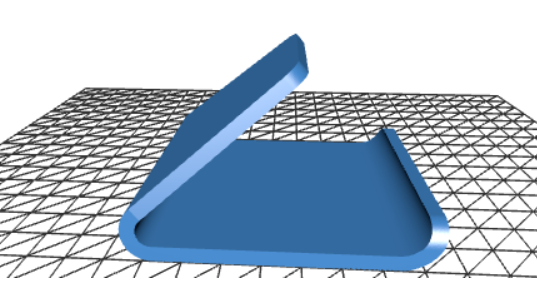
To understand the basic working of a 3D printer and how a digital model is converted into a physical object
1.3D printing is a method of making objects layer by layer using a digital design created in CAD software.
2.The design is saved as an STL file and then opened in slicing software like Cura, which converts it into instructions for the printer.
3.The printer melts plastic filament (commonly PLA) and pushes it through a nozzle to build the object step by step.
4.I learned that settings like bed temperature, print speed, and cooling fan affect the quality of the final print.
After printing, the model may need small finishing steps like sanding or cleaning to make it smoother.
NOTE:the stl file is taken from the web but i learnt how to slice and convert into g code
and im learnig to create the 3 D models at present
i have got a universal phone stand
 \
\
link to stl file
file here
TASK:2 API
Objective : To learn about API and how to use it in other applications.
The API(apllication programming interface) is an thing which allows the differnt applications to communicate with eachother.
Let's say that application abc needs a part data from application (or) orginisation xyz then the xyz uses the api to share the data with the abc ,where a api is given to the abc which pulls a request to the and get that data so the xyz need not share the mechnaism of the obtained bata but inplace shares only the data.
wheather website yt rec
I have created a wheater app by using api from a website(link listed below)
wheather website link
It improves efficiency, allows reusability, provides flexibility, adds security, and makes it easy to integrate with other services. We can use it when we have limited hardware resources. It's like when we are limited by resources but we want a particular application we go for api instead of the full application.
the code and all files of the websitefiles
TASK 3: Working with Github
Objective: To learn to use github, how to collaboration and cloud storage works.
I learnt about GitHub integrated workflows (GitHub actions), Issues, and pull requests with this task.
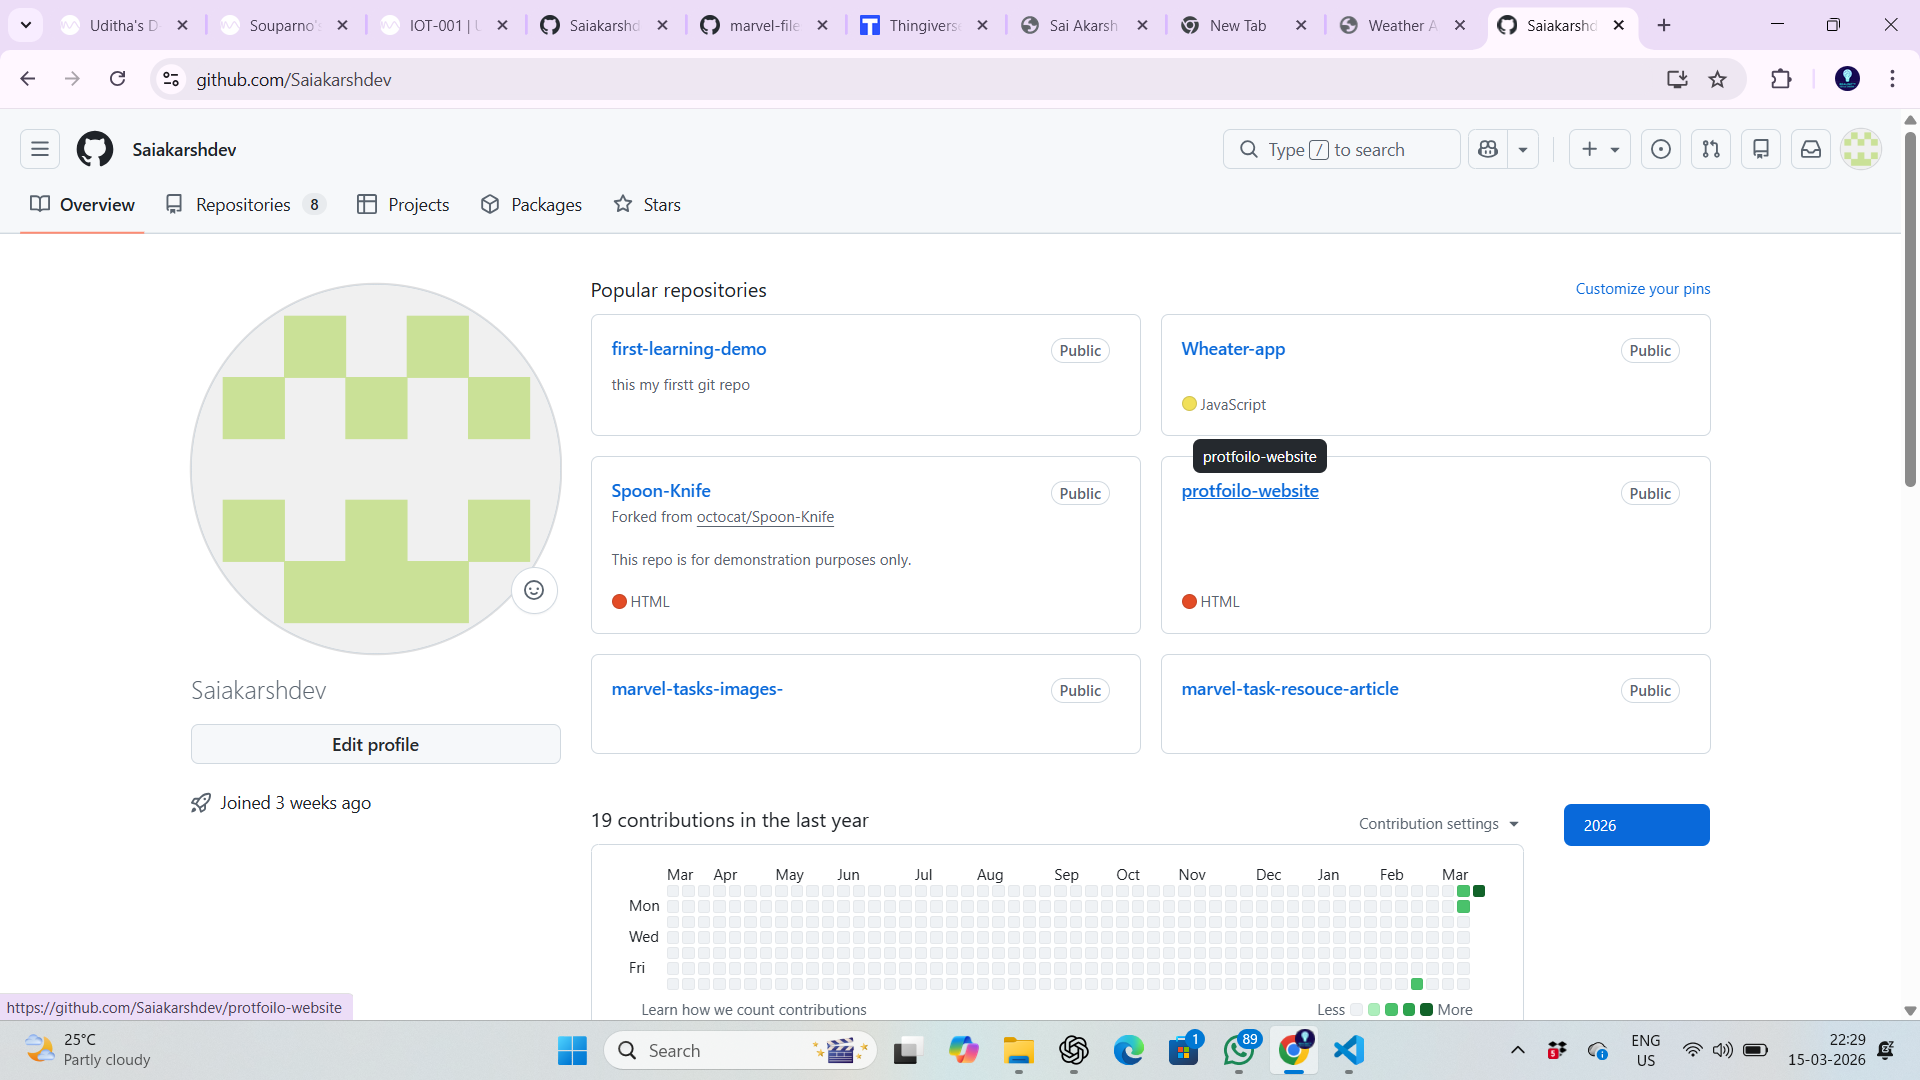
1.I have created a git hub account and learnt about the repo
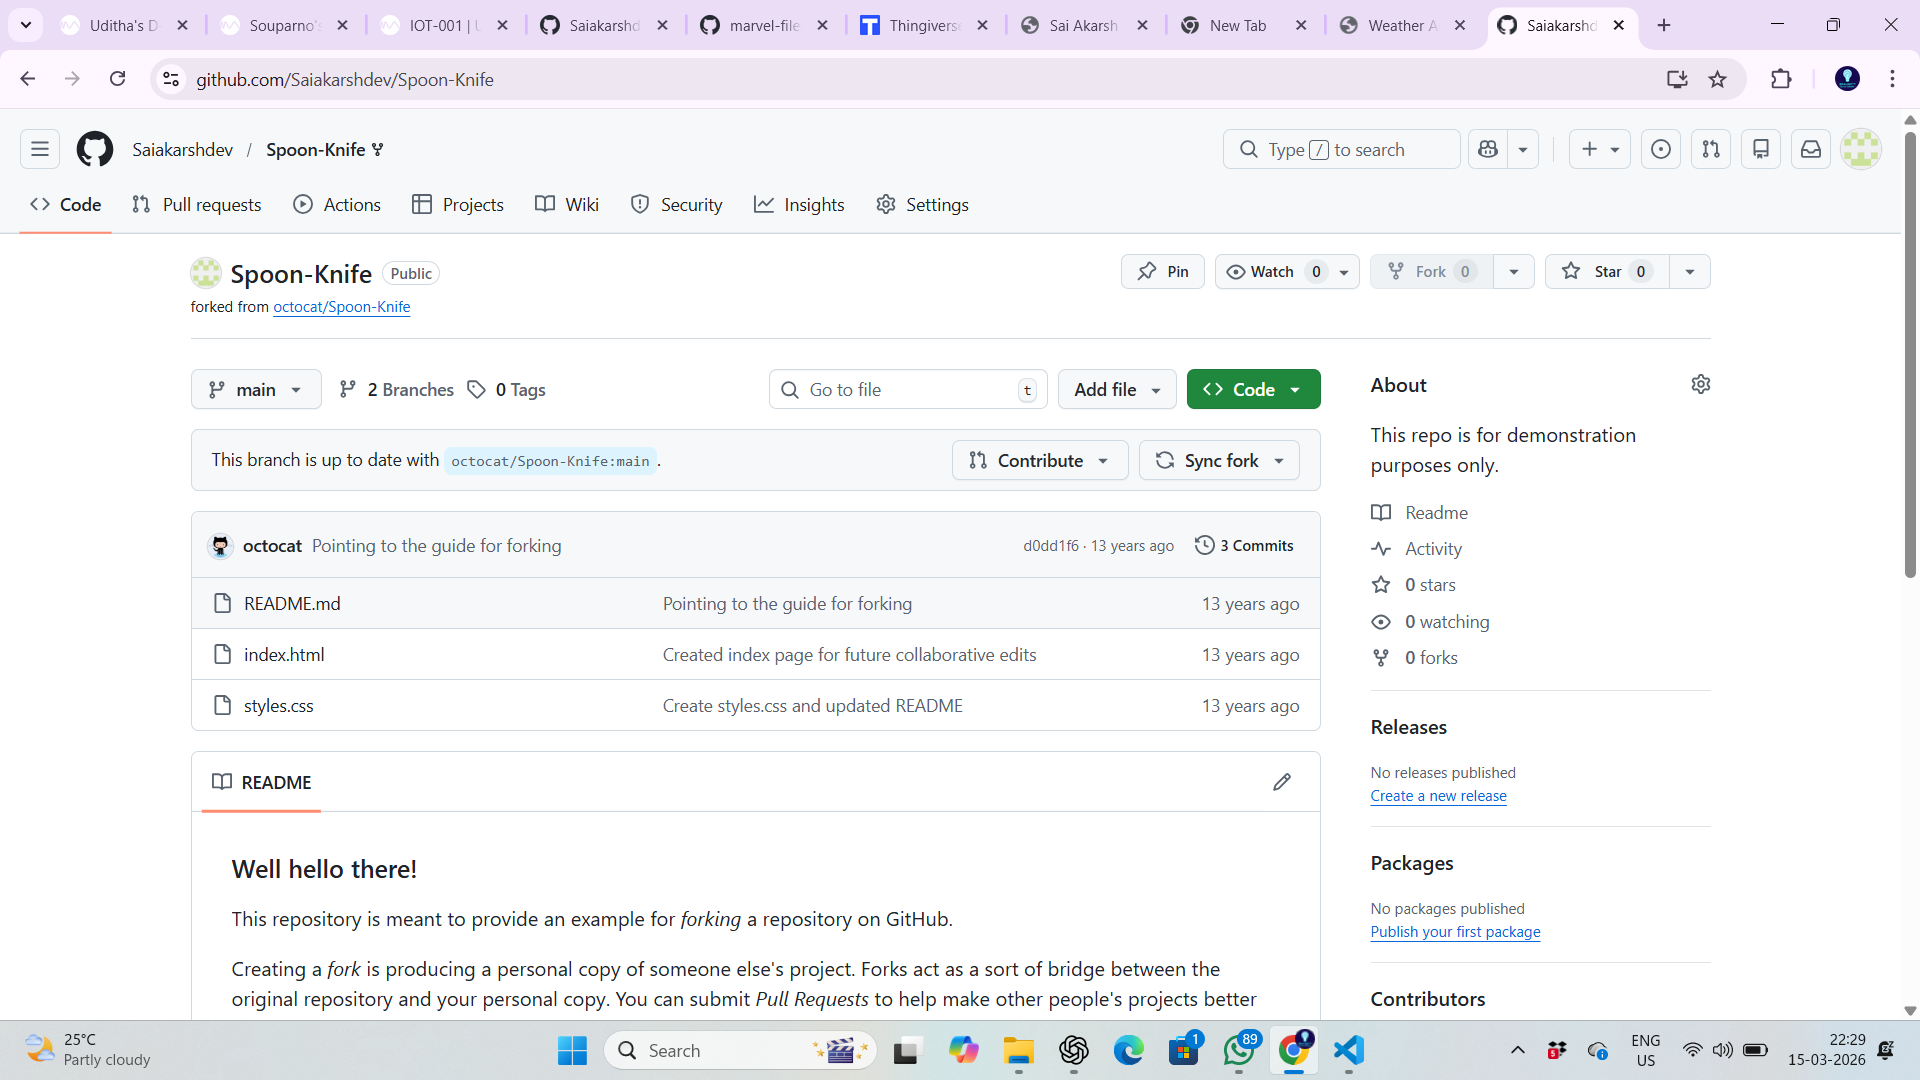
2.i have forked the marvel spoon kinfe into my account
3.i used the git bash to fork it in my local system
4.i have created a new branch of it
5.i just changed some lines and saved it in local system
6.i commited the and modifed using the vs code
7.then i pushed it to the pull request for the git bash
TASK 4: Command Lines on Ubuntu
i learnted about the ubantu command lines and the the the ubantu os upto adecent level
at the first i learnt that all the basics like
1.history of ubantu and the siginifacne of it in the old time
2.i learnt basic command lines to navigate(adddress) through out the os
3.i learnt some more complex function to create ,delete,to shown and feed the data in the files
4.lerant some extra functions also like moving the files and acessing the hidden files\
through this i bulid astrong and baic foundation about the ubantu
next for the task
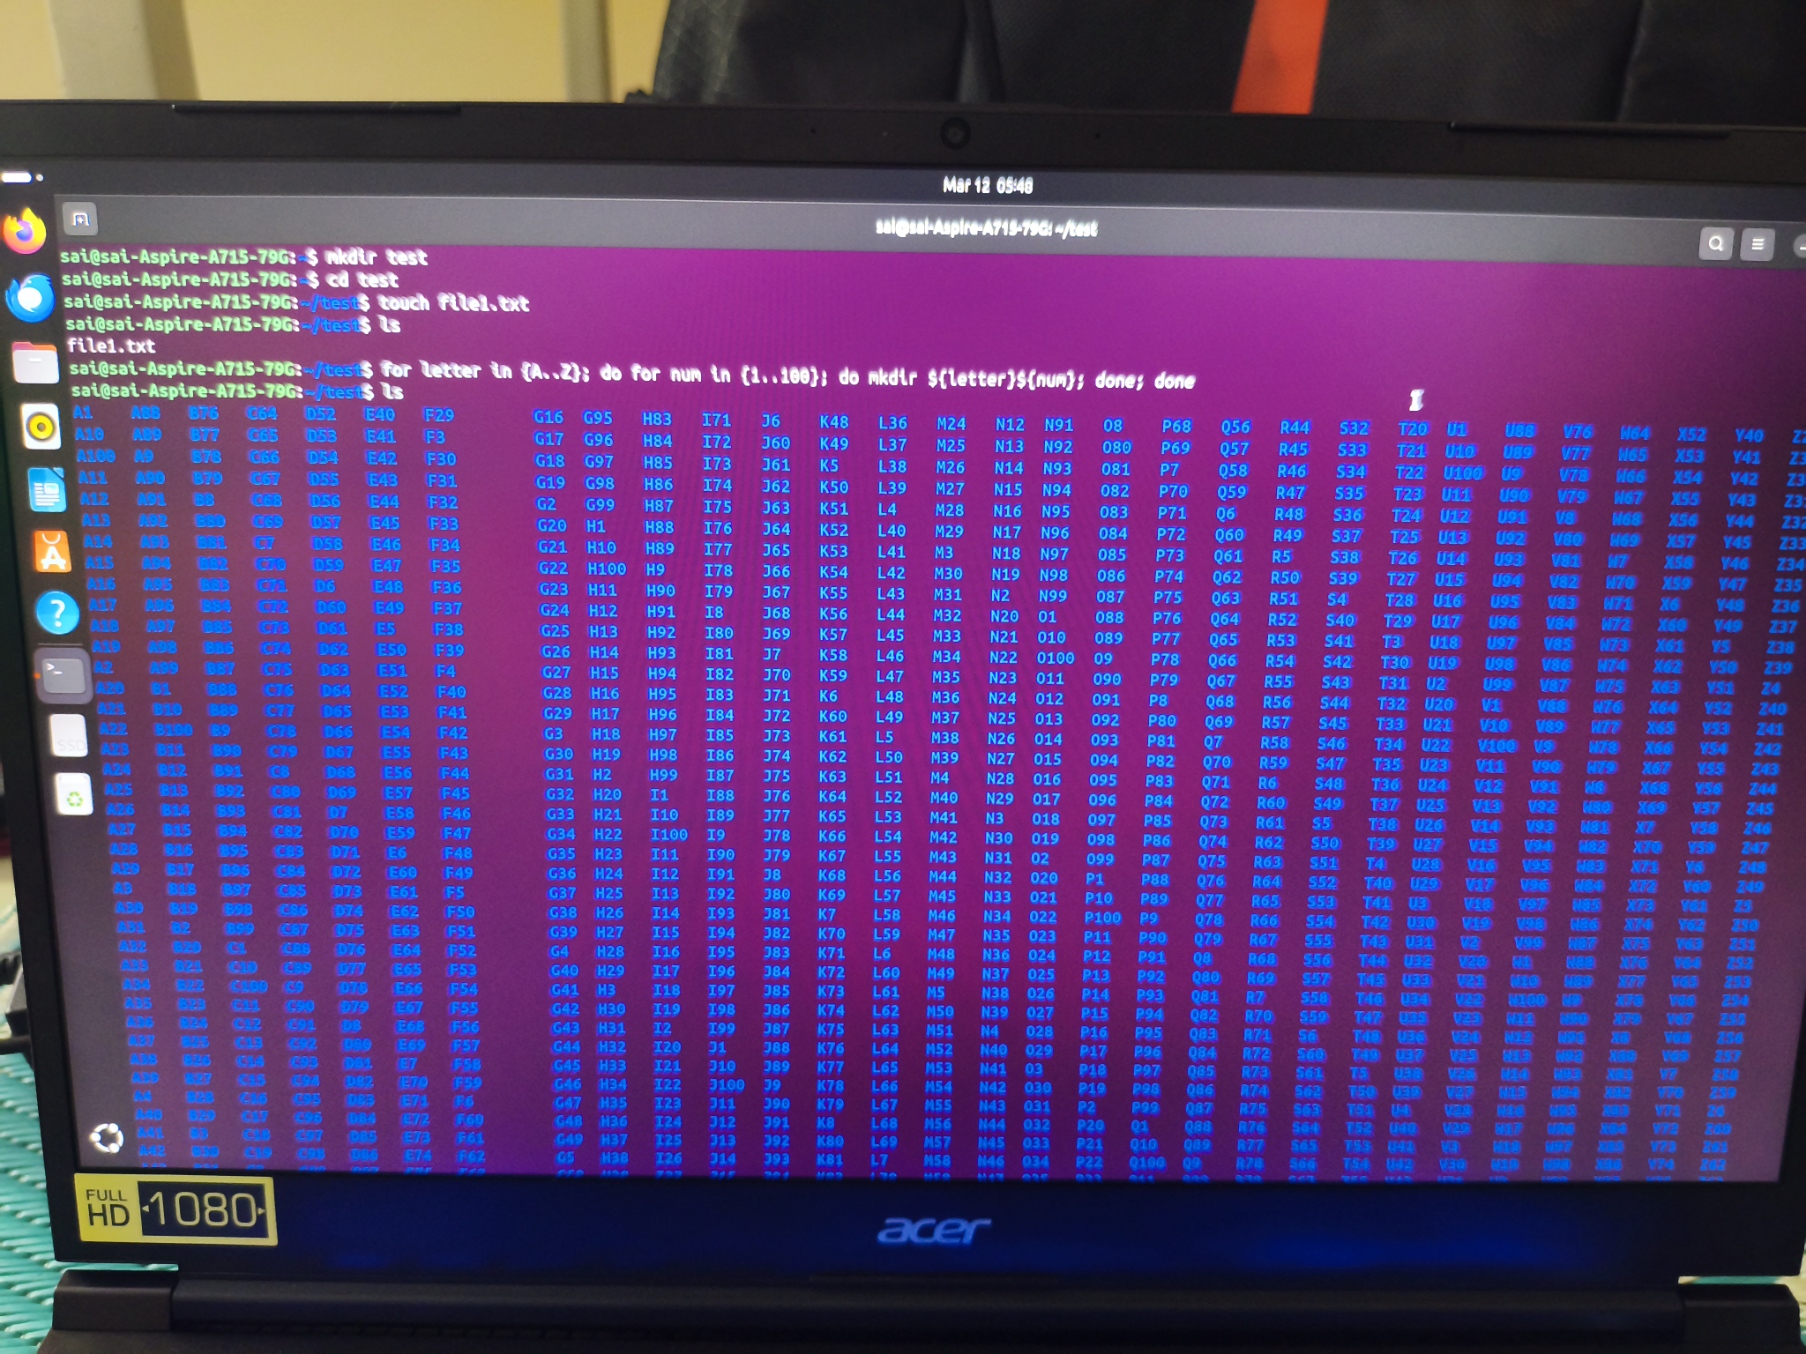
1.i made new directory named test
2.Changed the directory into the test folder
3.i created a blanck text file and listed file in the directory
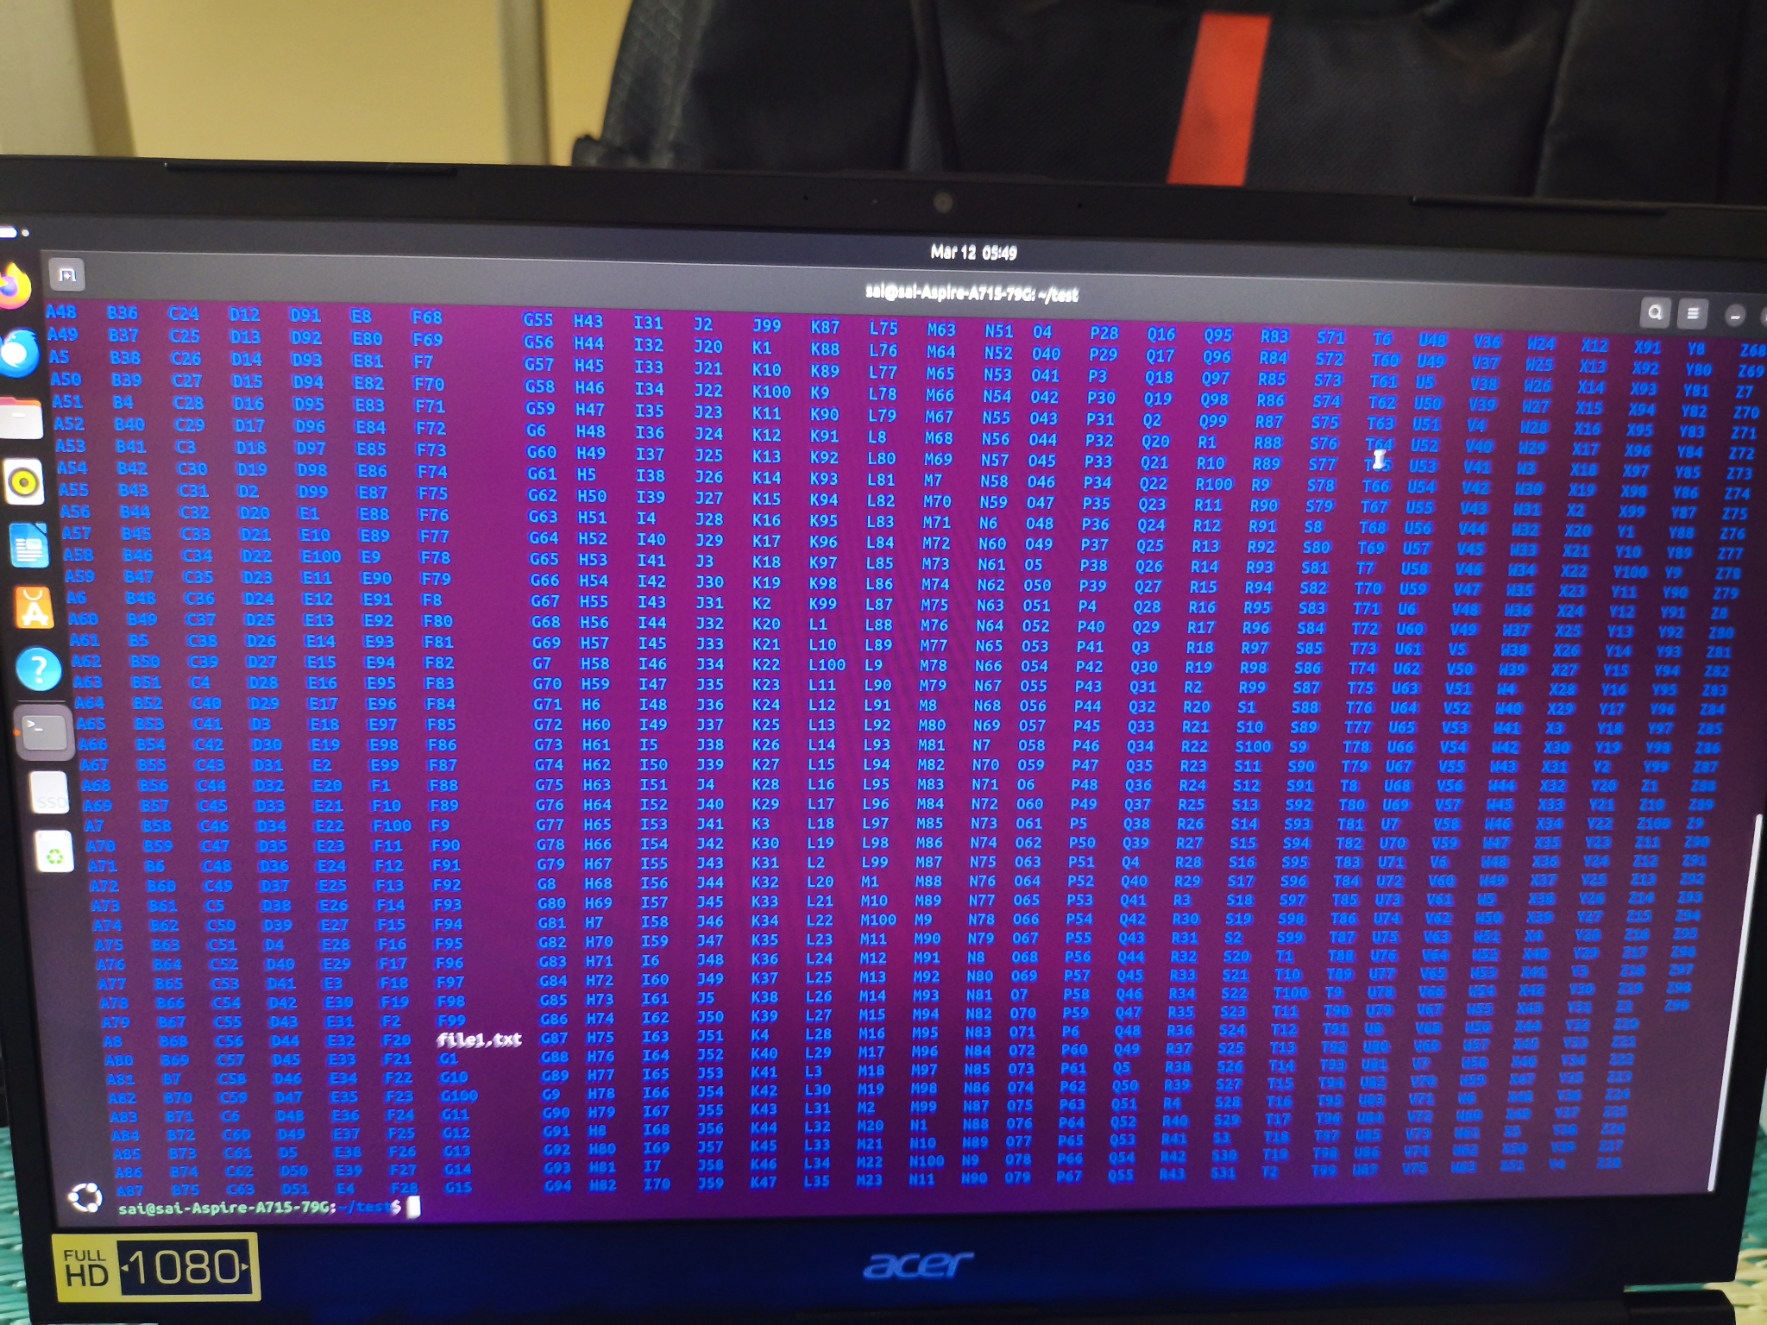
4.then i created 2600 files from name A1 to Z99 using a looping statement
5.Listed the files inside the folder
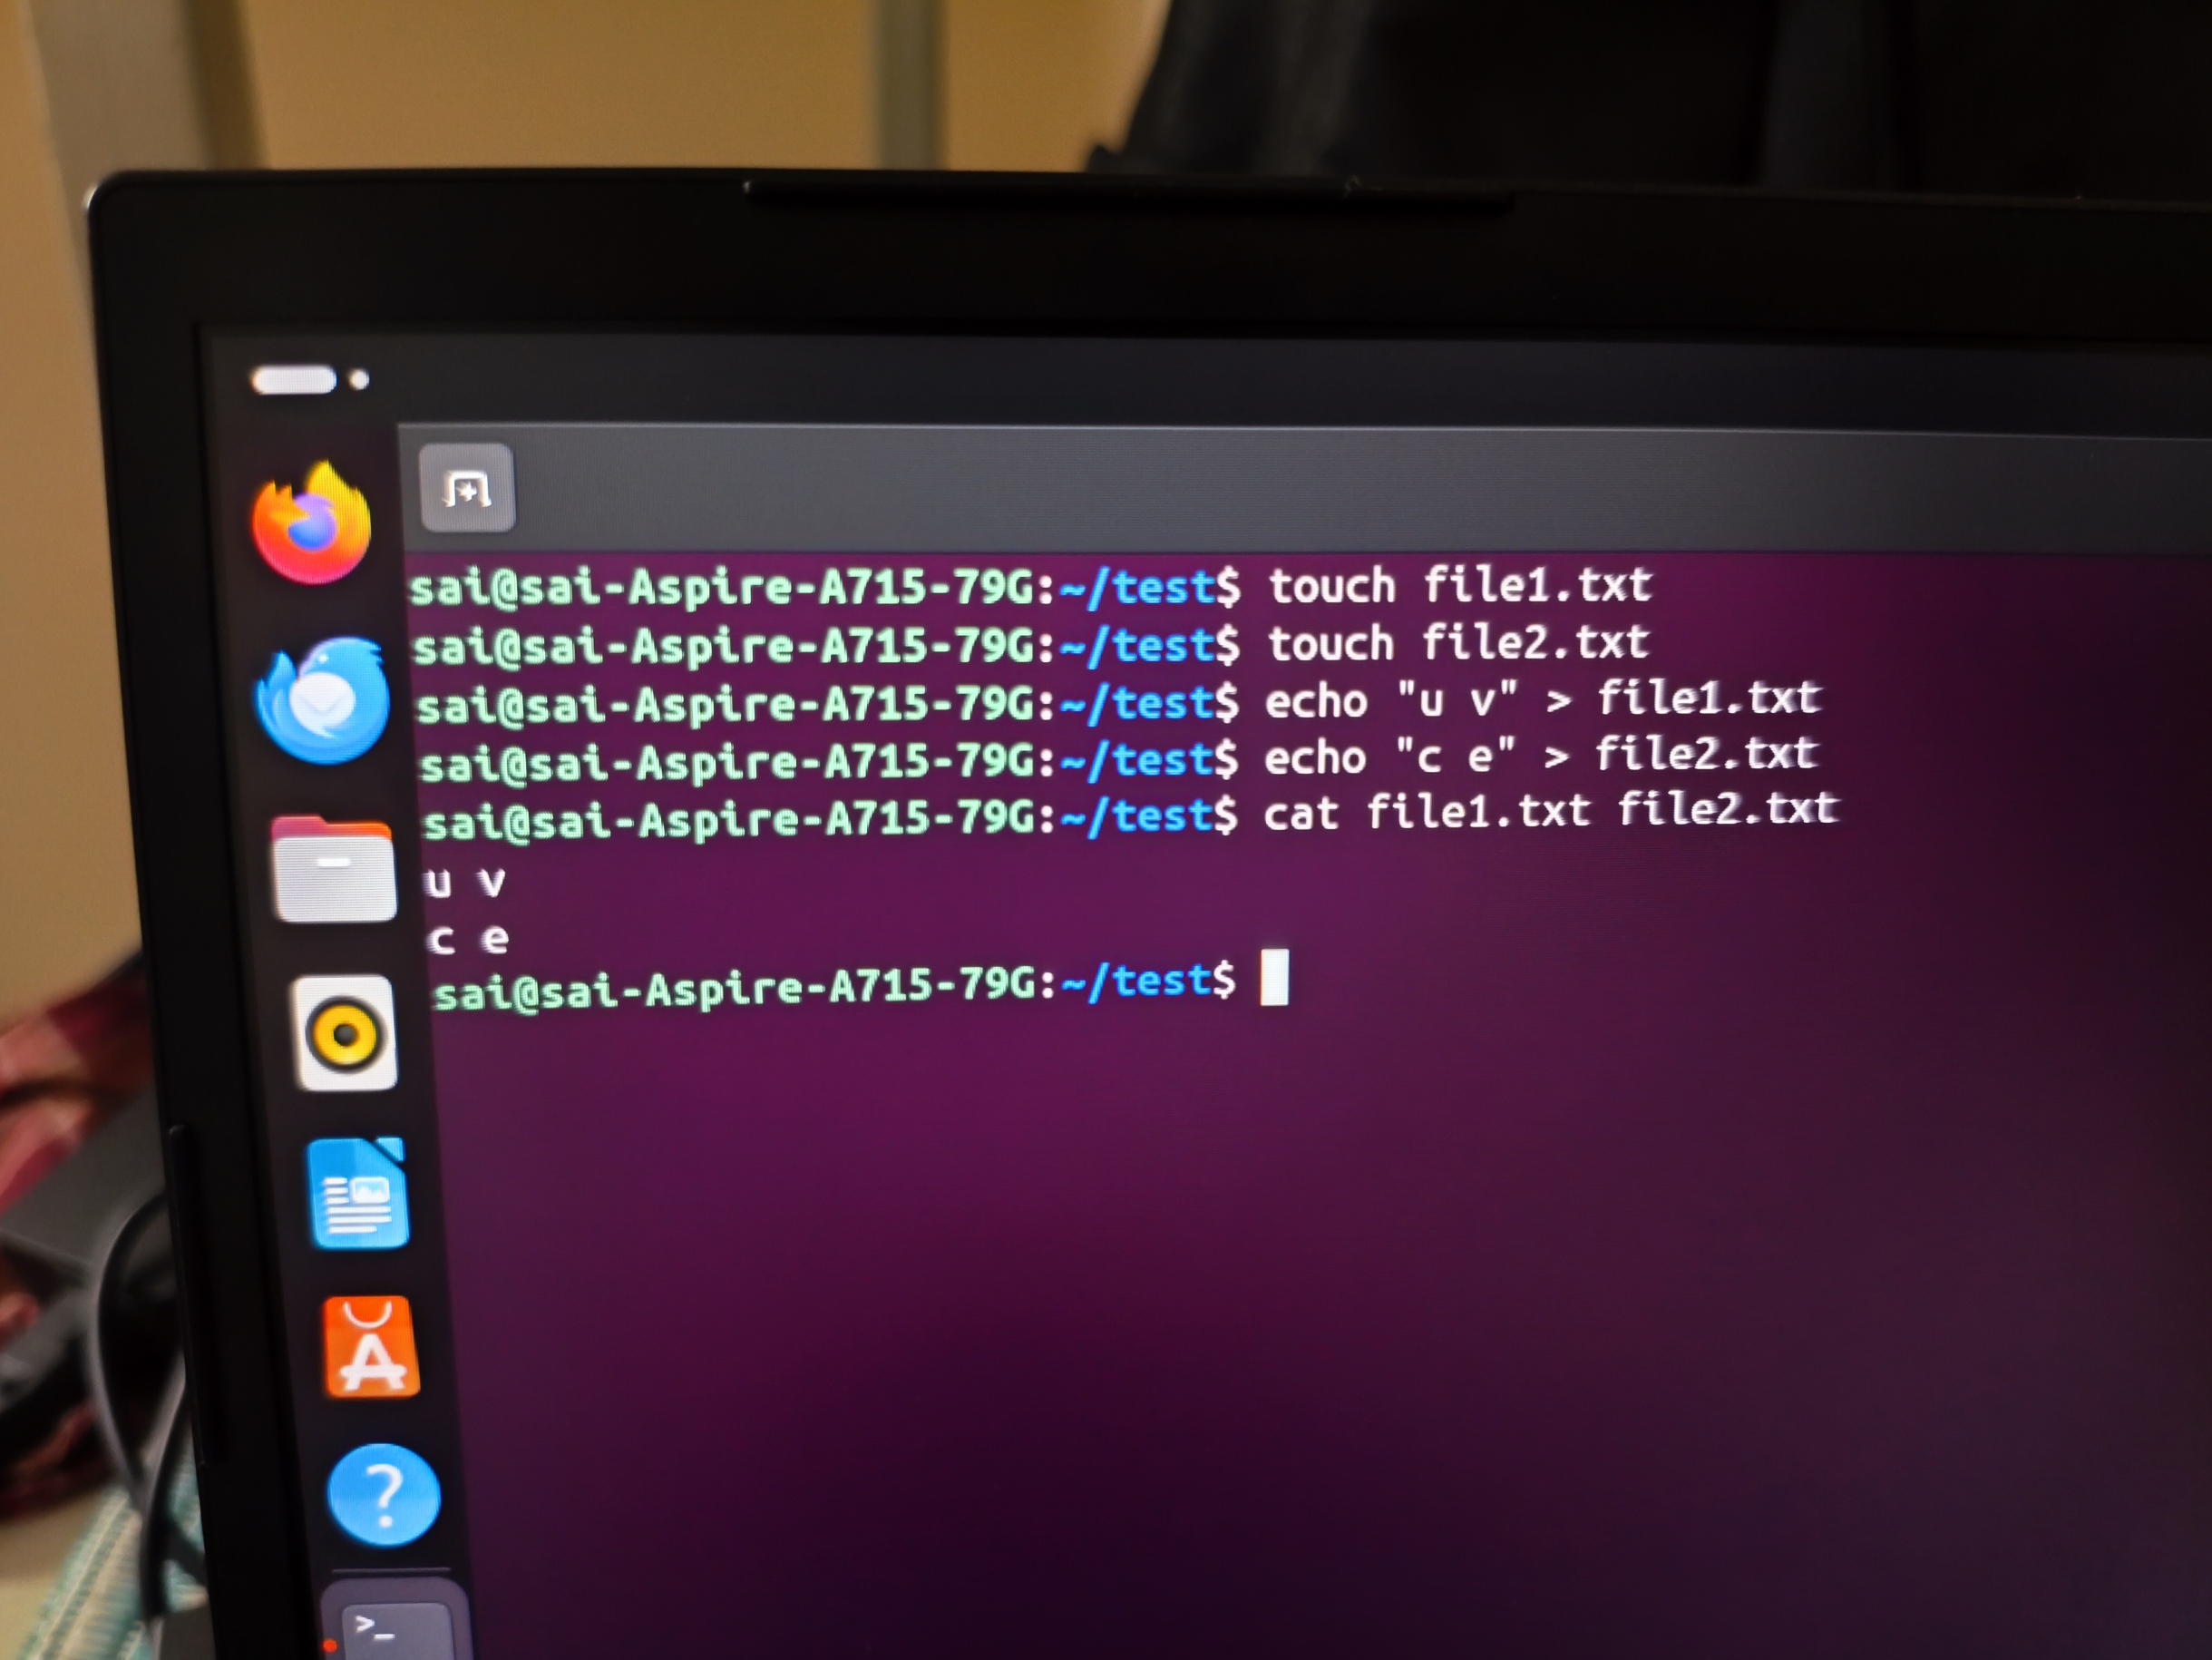
6.Finally I concatenated two text files using a command

| Task | Command |
|---|---|
Create a folder named test | mkdir test |
Change directory into test | cd test |
| Create a blank file | touch file1.txt |
| List files in the folder | ls |
| Create 2600 folders by lopping satements | for letter in {A..Z}; do for num in {1..100}; do mkdir ${letter}${num}; done; done |
| Concatenate two text files | cat file1.txt file2.txt |
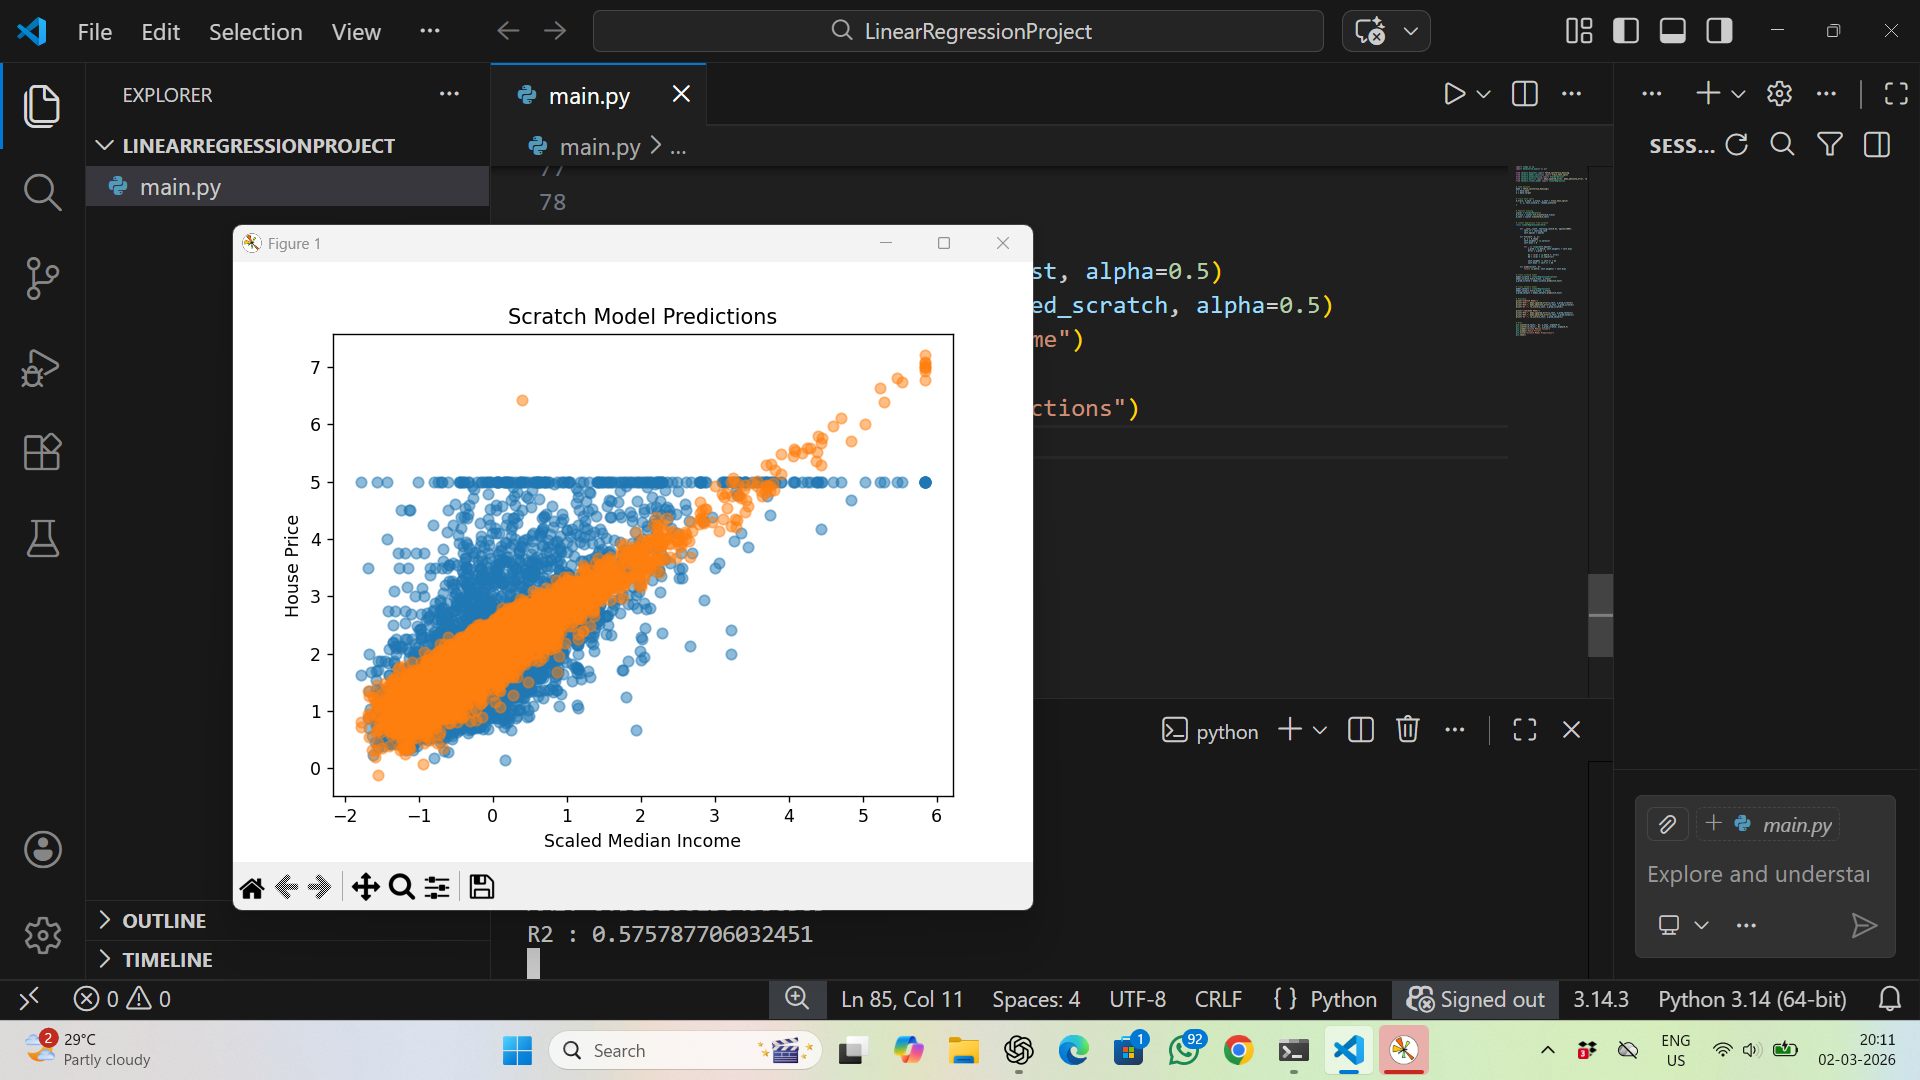
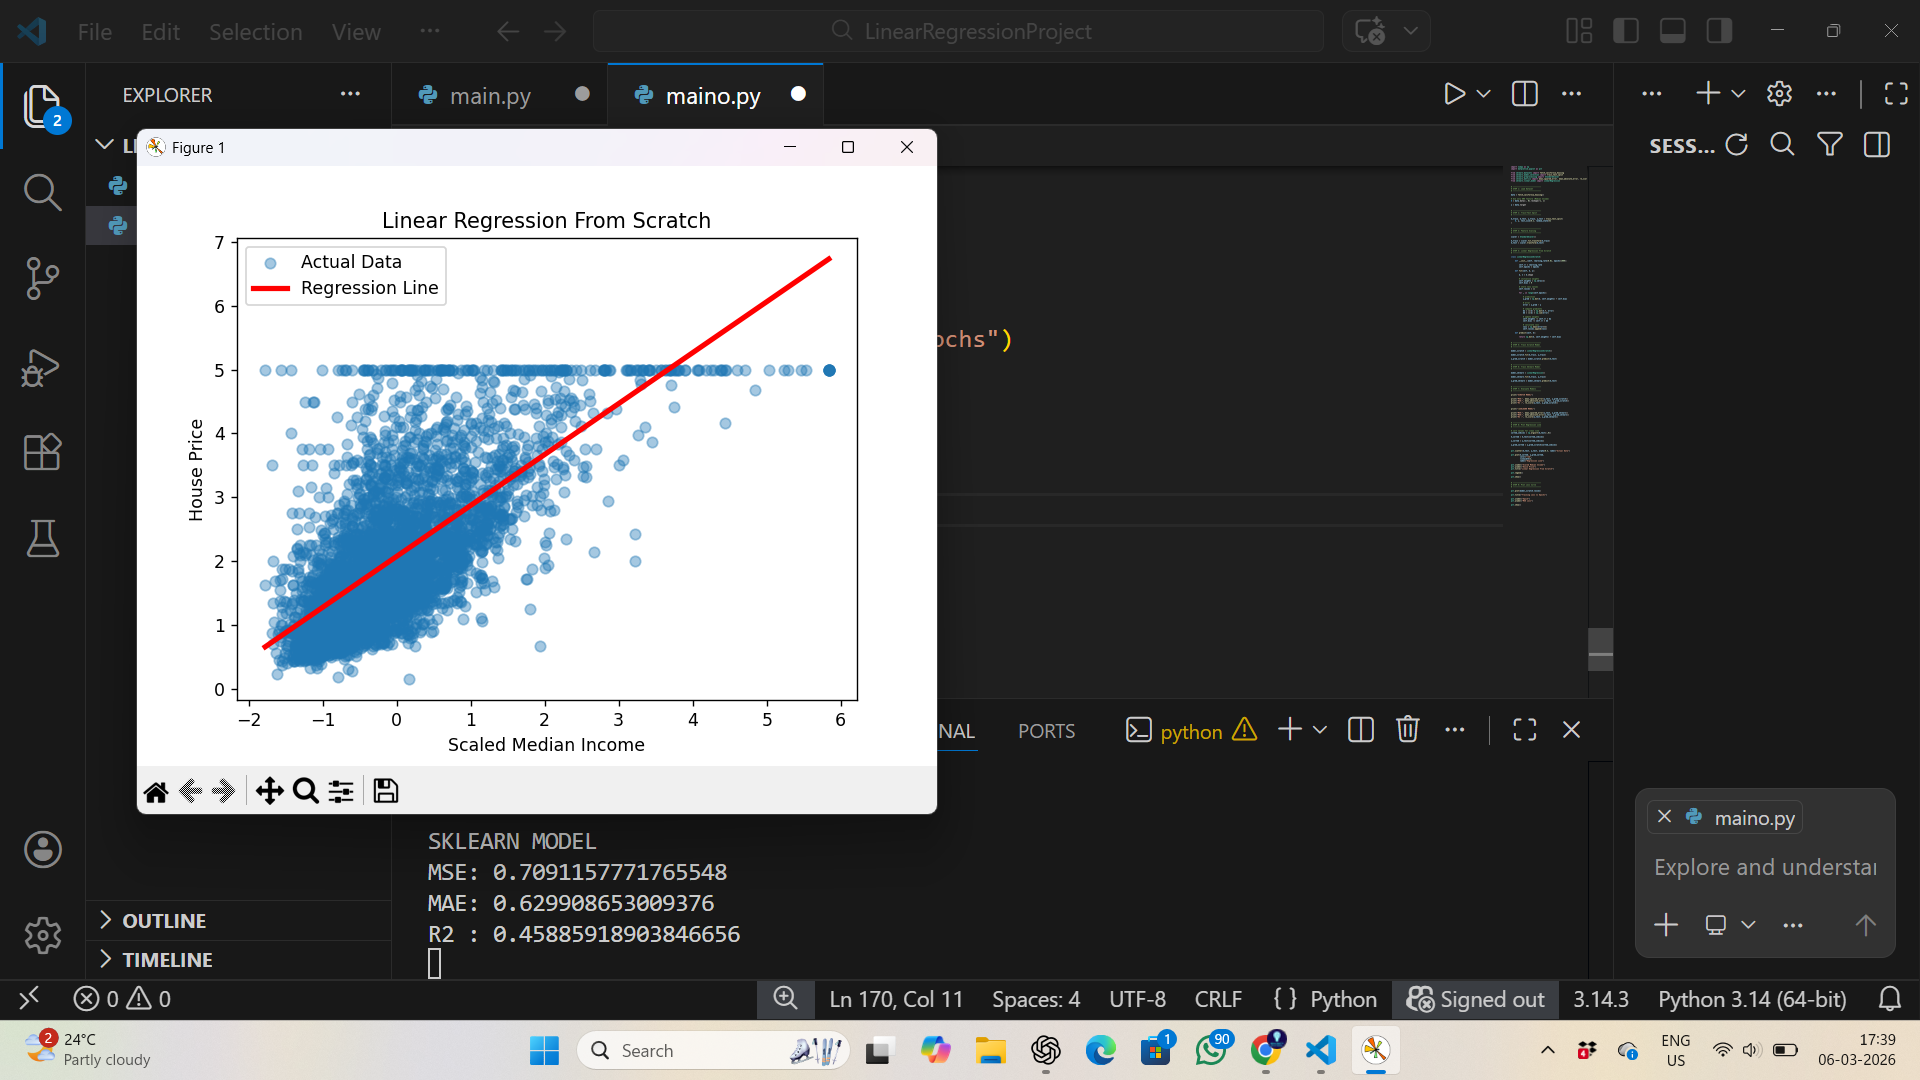
Task 5 : Build Your Own Brain -Linear Regression from Scratch
objective :
To learn what is the linear regresssion and devlope a very basic ai model woeking on the regression princple for the given data set
linear regression
this means perdicting a contionus value in the sequnce (or) order of any given particular data
the brain formula
y=wx+.......+b
where,
y=perdicted value
b=bais
w=weight
x=feature
the wheights suggest the imporantace or the signicance should be given to the particular parameter while the predictin from the data set\
mean squared error(MSE)
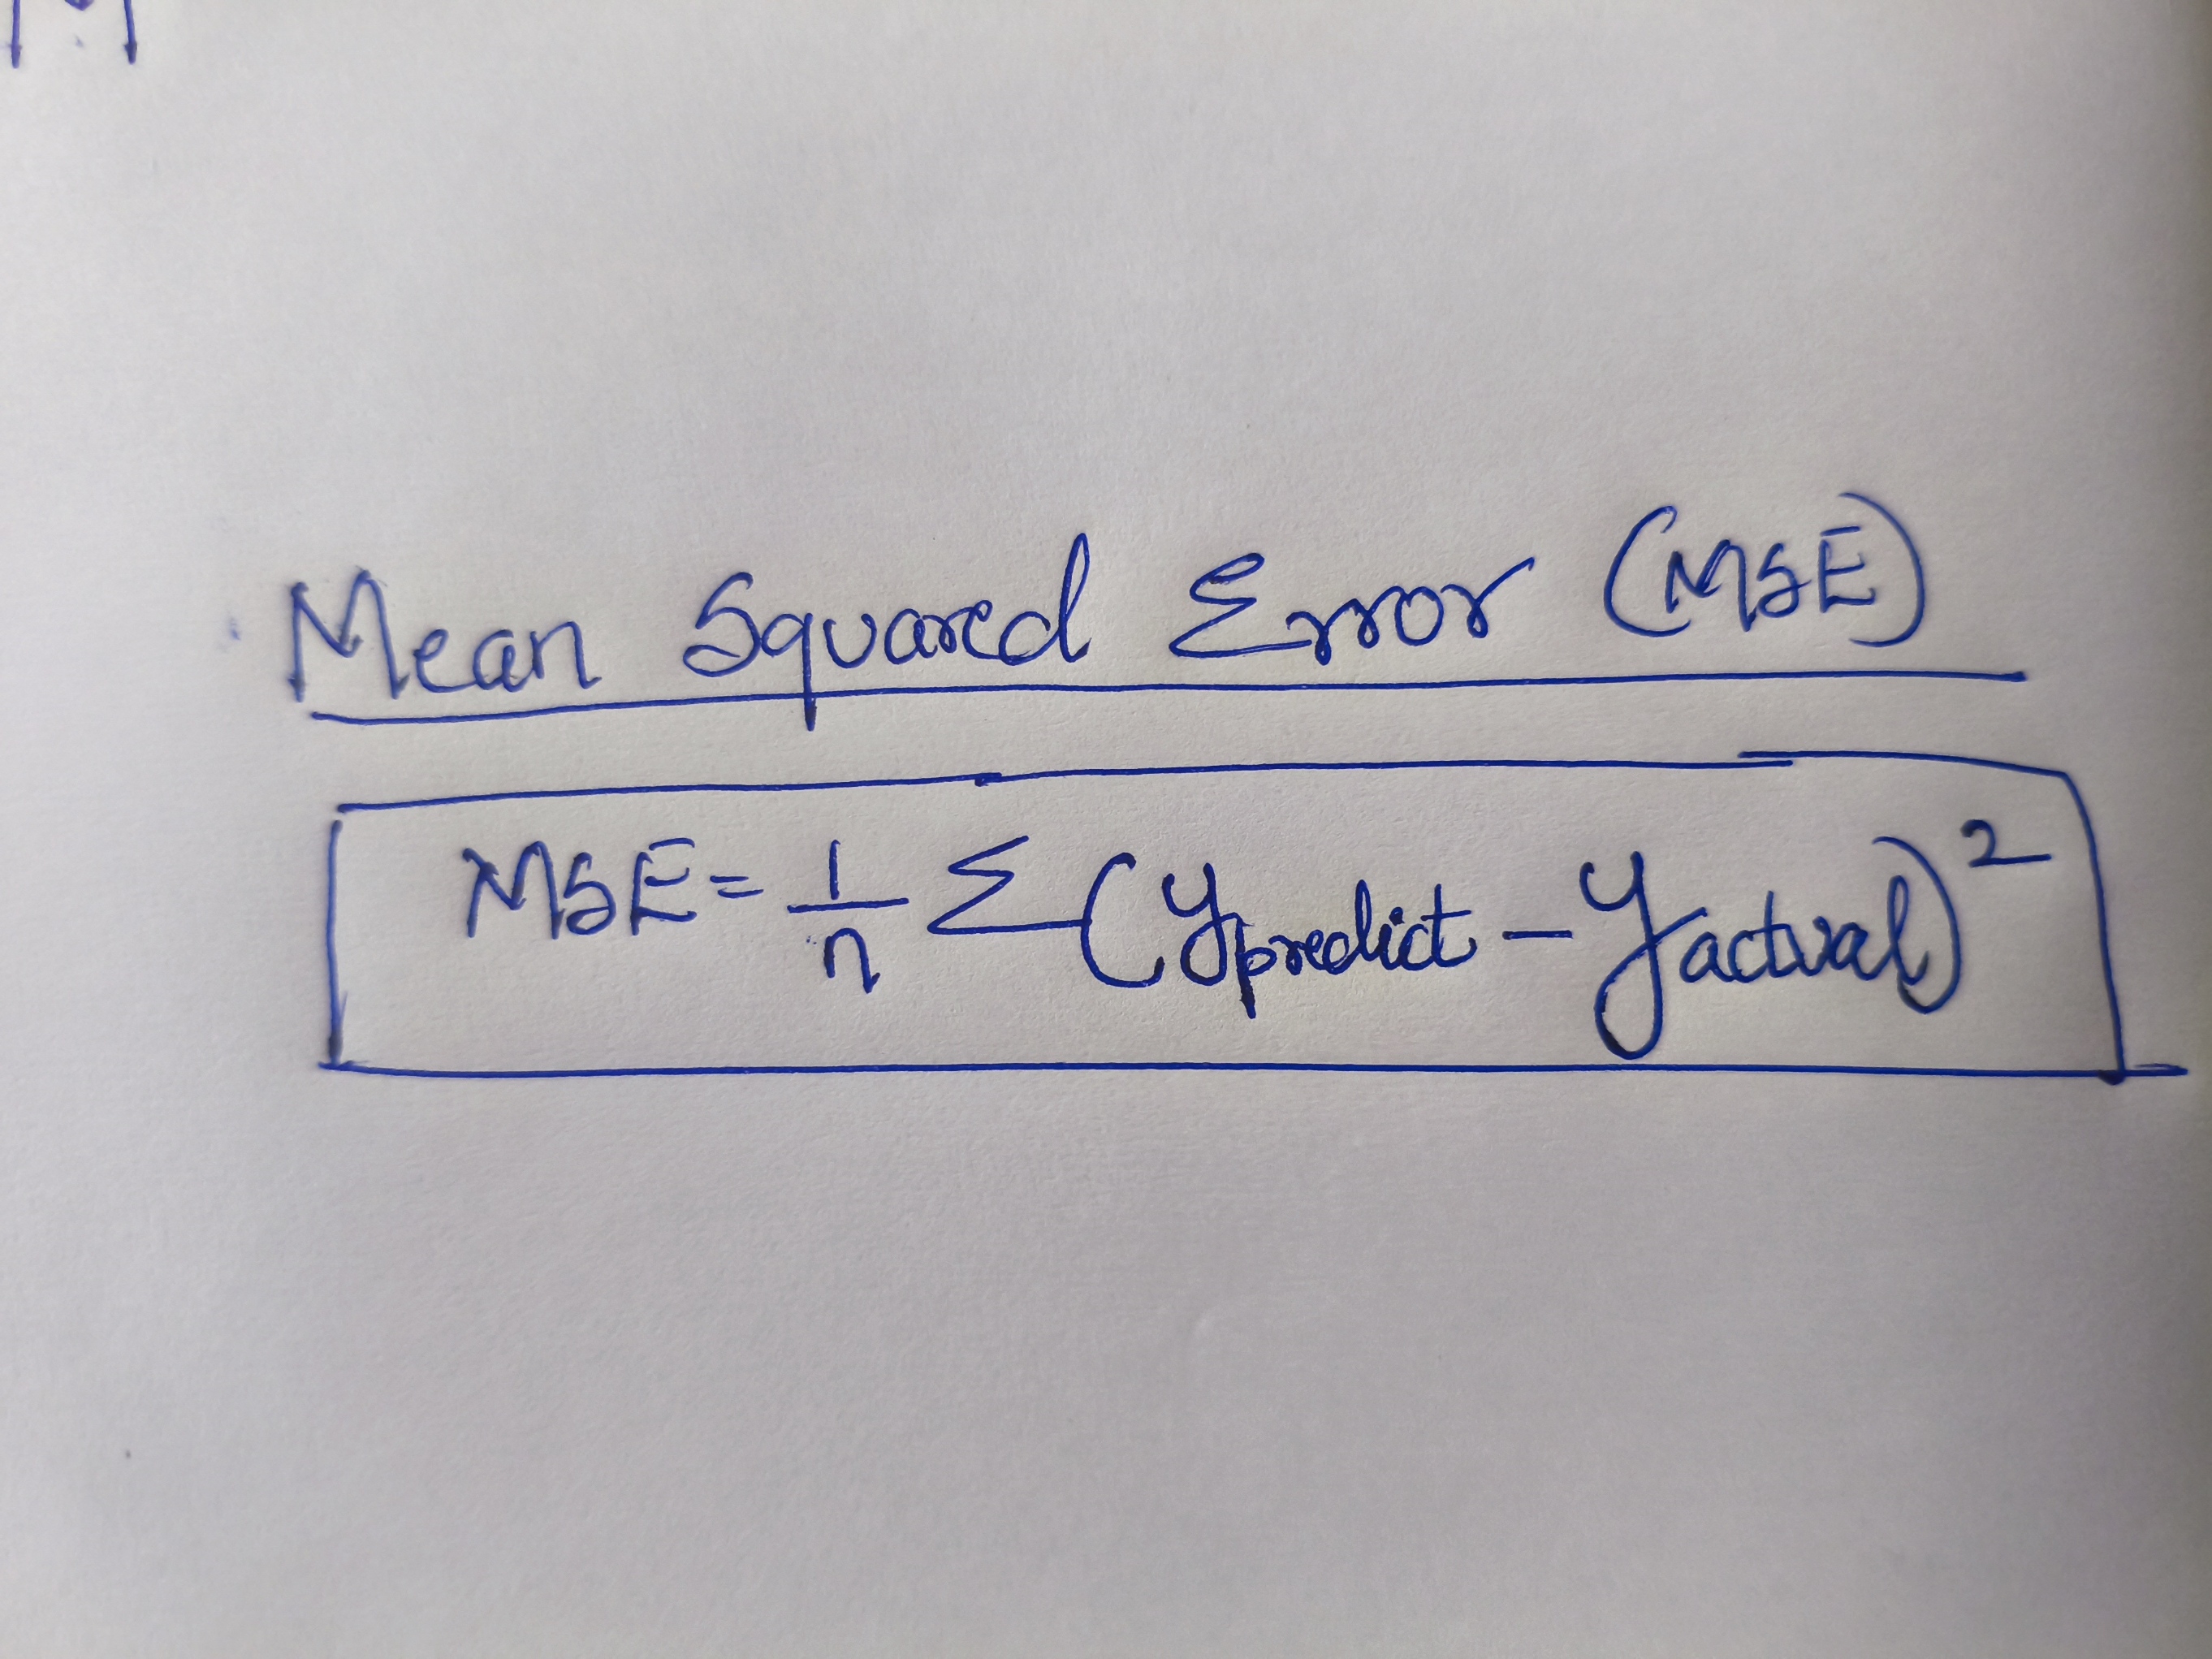 1.it makes the erros postive
2.punishes large mistakes more
we should target to get the minimum mse by changging the values of the weight for the best prediction
so inshort in very ml model we should try to minimize the MSE
gradient desent
it is the process which involves of enpolys various methods and checks the MSE , then changes it's value accordingly to get the best outcome
working priniciple:
1.Start with random weights
2.Calculate error
3.Move weights slightly in direction that reduces error
4.Repeat thousands of times\
The Update Rule(slope)
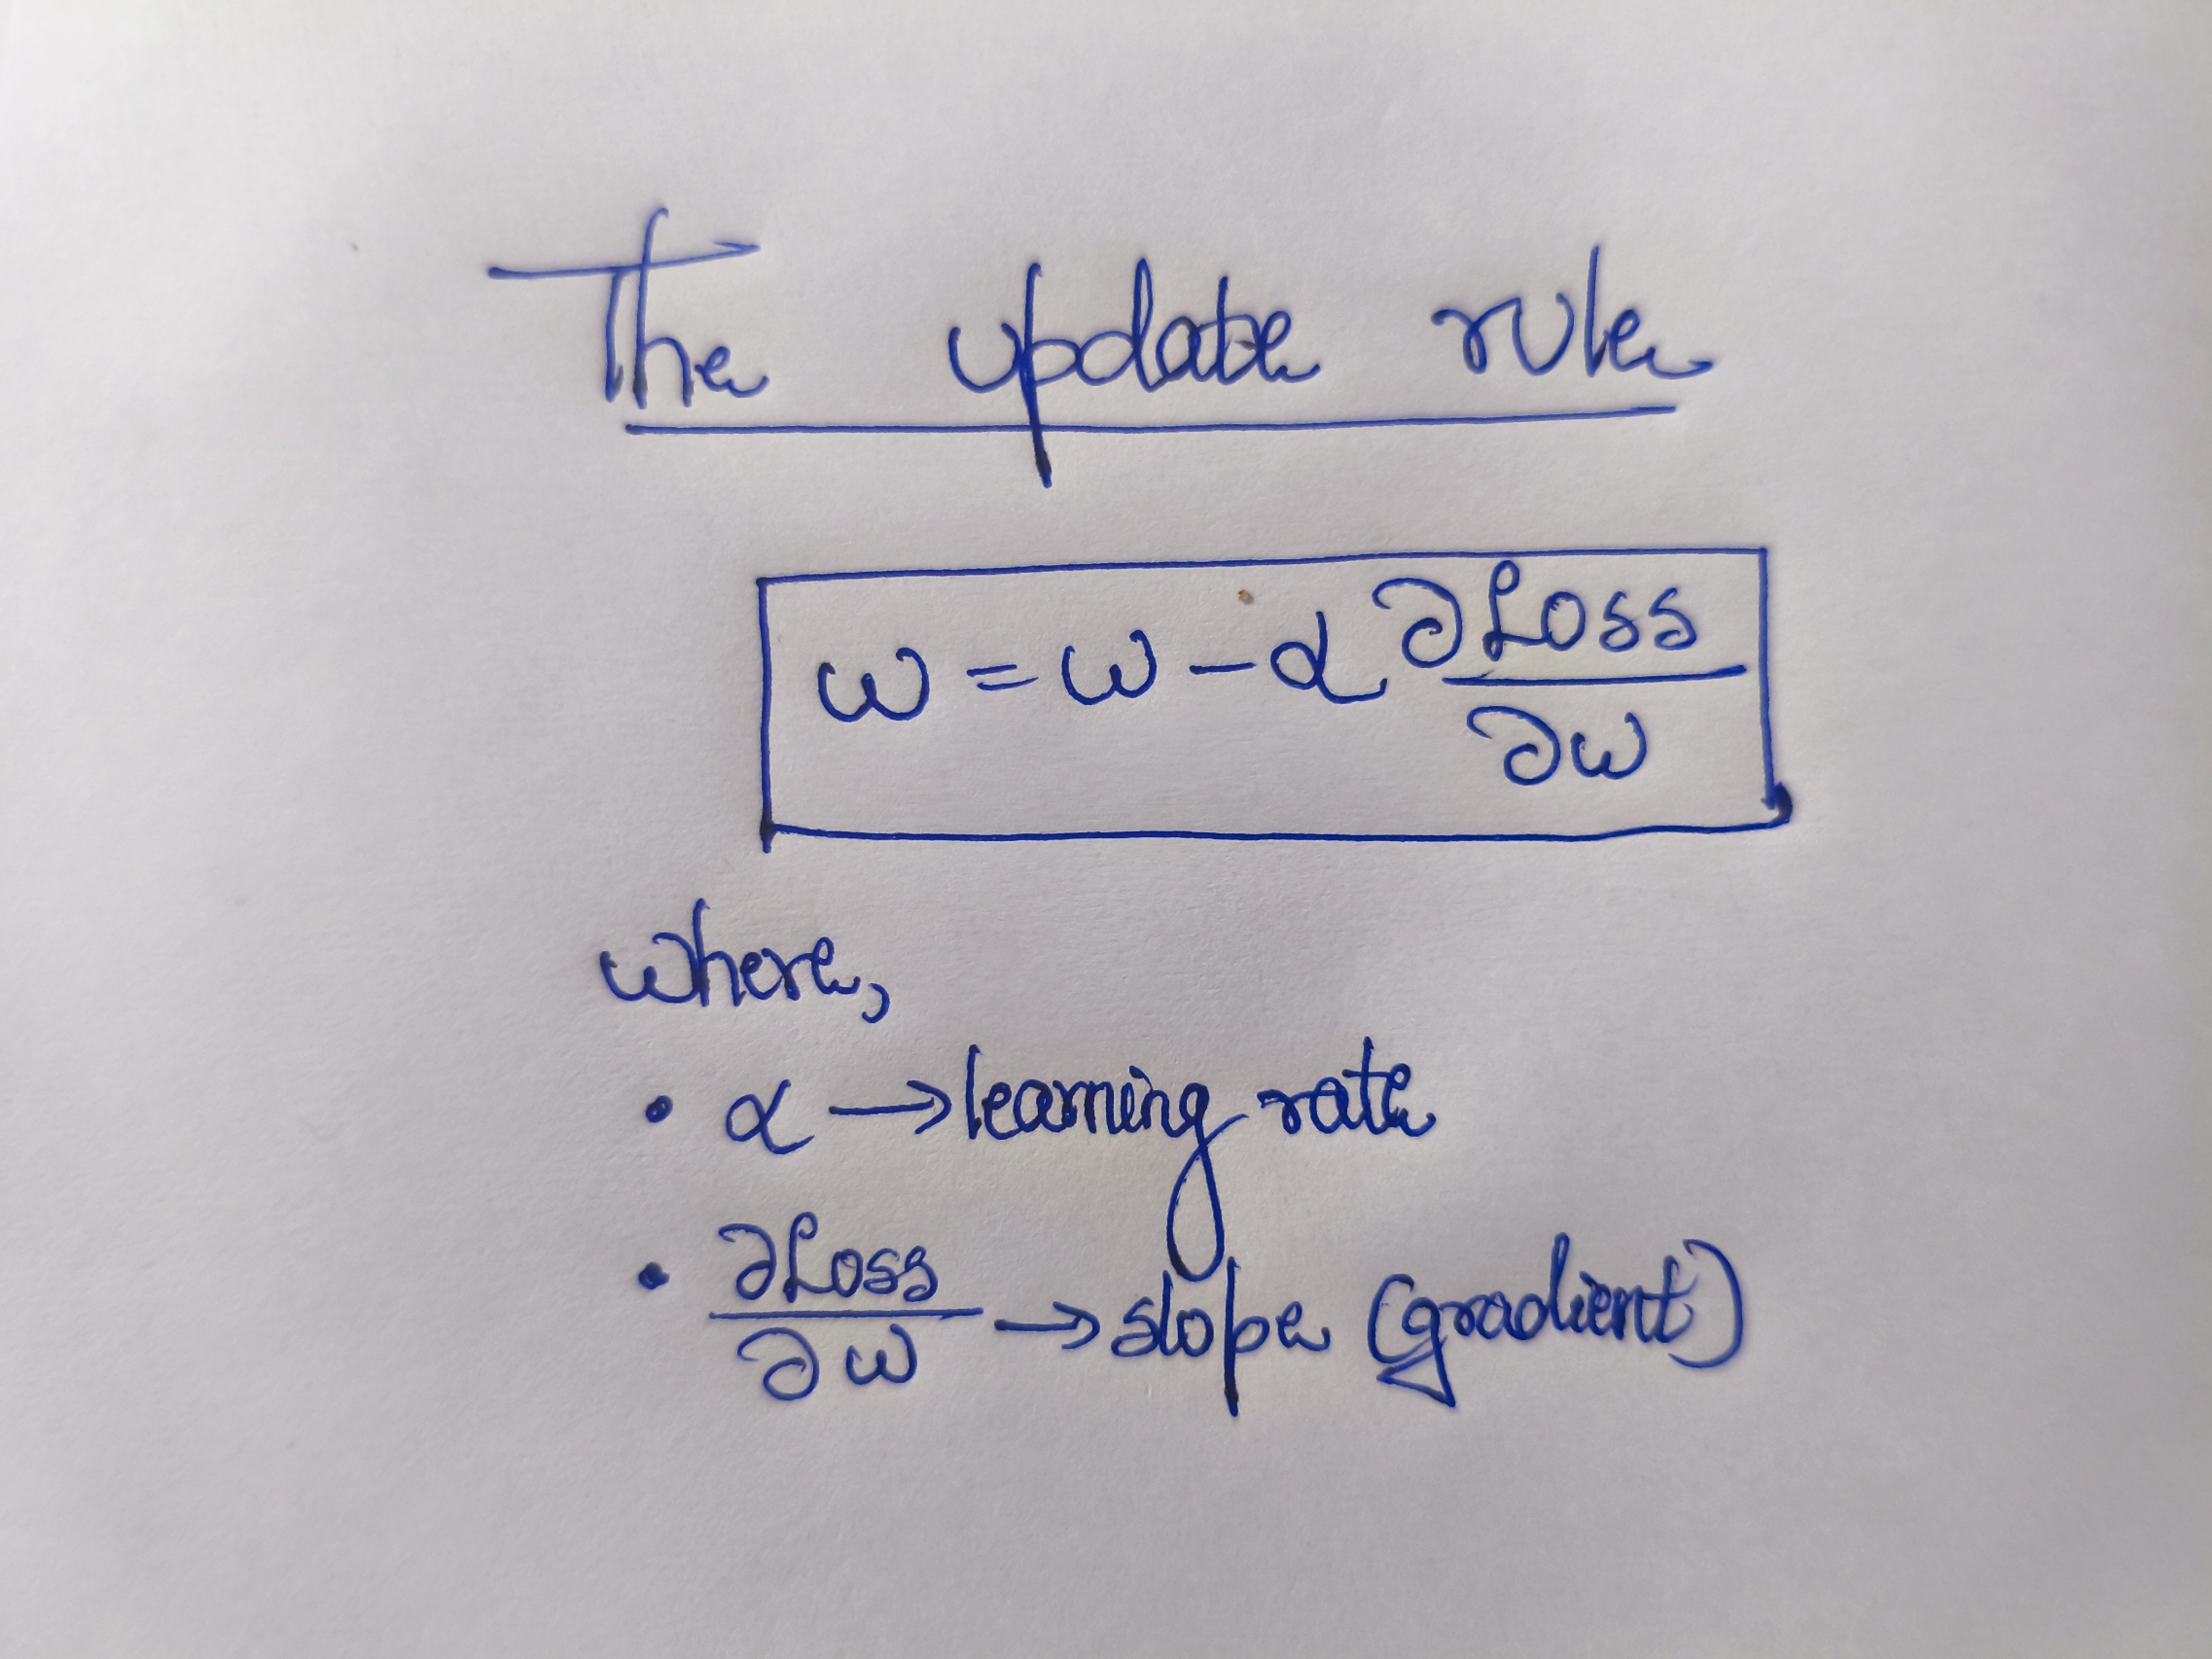 If slope positive → move left
If slope negative → move right
If slope positive → move left
If slope negative → move right
implemetation
for multiple parameters consideration
 for single parameter consideration
traning data of gradiant desent

Task 6 : The Matrix Puzzle — Decode with NumPy & Reveal the Image
Objective
this task was to decode a scrambled matrix and reveal a hidden image using NumPy and Matplotlib and for the array manipulation techniques such as reshaping and transposingand then visualize the final decoded the matrix
1.the scrambled matrix was loaded using NumPy. The total number of elements was checked and the array was reshaped into a square 2D matrix, since images are stored as grids of pixel values.
2.After reshaping, the matrix still appeared incorrectly oriented. Based on the hints, operations such as transpose and flip were applied to adjust the orientation. After testing a few combinations, the matrix aligned correctly.
3.the matrix was visualized using Matplotlib’s imshow() function, which displayed the decoded matrix as an image and revealed the hidden picture.
Tools Used
- NumPy – for reshaping, transposing, and flipping the matrix
- Matplotlib – for visualizing the matrix as an image
output
1np 1
TASK 7: Create a Portfolio Webpage
For this task, I built a personal portfolio website using HTML, CSS and JavaScript. I created a simple webpage that introduces me and shows my work.
The website contains basic sections such as about me, my skills, interests and projects. While designing it, I tried to keep the layout clean and make sure the page works properly on different screen sizes.
After completing the webpage, I uploaded the files to GitHub and generated a link so that the website can be accessed online.
my website preview
yt p
Portfolio Website Link:
web port
TASK 8: Writing Resource Article using Markdown
objective
to write a Resource Article on our unders ating and write in the markdown lanaguage to master and know it more
My resource article is about the rise of the remote work and I discussed briefly all things about in my article as I have an entrepreneurial mindset. So I decided to write an article about generalized topic in the industry, which is the work from home, also called as the remote work. I discussed all and put my views forward in it as a part of the Marvel task. I written it in the markdown format in as this resource article.
Link to my article: click here
Task 9 : Tinkercad
Objective
The objective of this task was to create a Tinkercad account and get familiar with the platform. A simple circuit using an ultrasonic sensor was simulated to measure the distance between an obstacle and the sensor, and the output was viewed on the serial monitor.
Components Required
The following components are required for this project:
- Arduino Uno
- Jumper Wires
- Ultrasonic Distance Sensor
- Micro Servo
Working Principle
- The ultrasonic sensor emits ultrasonic sound waves through its transmitter.
- These waves travel through the air, hit an object, and reflect back.
- The receiver detects the reflected waves and measures the time taken for the echo to return.
- Using this time value, the distance between the sensor and the object can be calculated.
Link to my Tinkercad Simulation
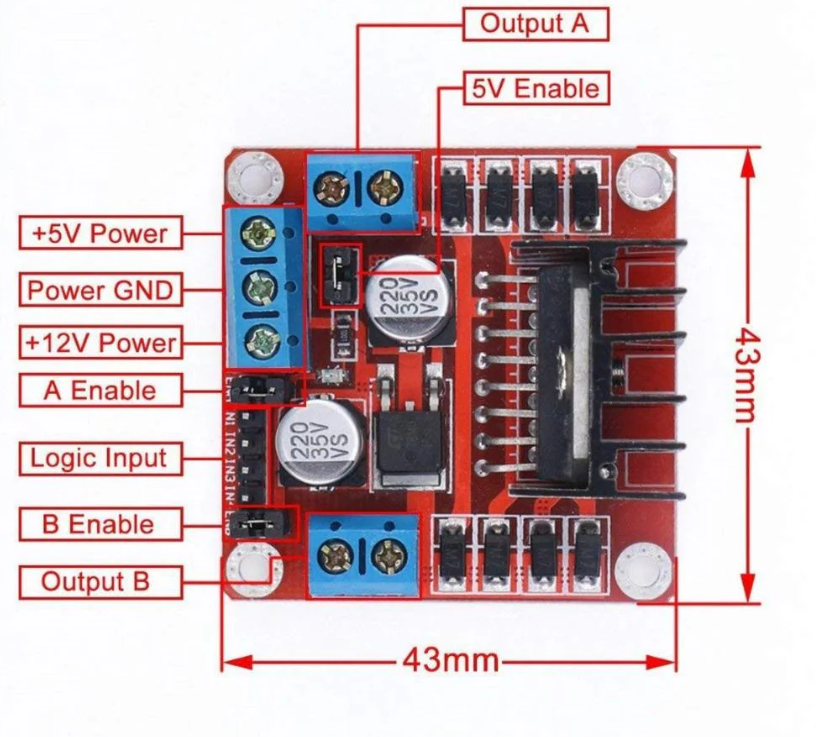
TASK 10: Speed Control of DC Motor
Objective
this task was to understand how to control a DC motor using an Arduino and the L298N motor driver. By using an Arduino UNO and an H-Bridge L298N module, the speed of a 5V BO motor was controlled using PWM signals. The circuit was first simulated in Tinkercad and then implemented using hardware.
Components Required
- Arduino UNO
- L298N Mo5tor Driver
- DC Motor (5V BO Motor)
- Power Supply (5V)
- Jumper Wires
- Breadboard
Working Procedure
all the compnents are connect as shown in the above image
- The Arduino sends control signals to the L298N motor driver.
- The IN1 and IN2 pins of the L298N recive the orientation of the motor.
- the Arduino uses a method called PWM and control the sepped of the DC motor.
- The L298N uses an H-Bridge circuit which imples that can transmit the singles in any directions(two)
- By changing the PWM duty cycle, the speed of the motor can be adjusted.
- The circuit was first tested in Tinkercad and then implemented using actual hardware.
Pulse Width Modulation (PWM)
in simple words it is voltage supplied is directly proportional to speed of motor and The proportion of time the signal stays ON is called the duty cycle. By changing the duty cycle, the effective voltage supplied to the motor changes, which allows us to control its speed.
0% duty cycle→ Motor OFF\
50% duty cycle → Motor runs at medium speed\
100% duty cycle → Motor runs at full speed \
In Arduino, PWM signals are generated using specific digital pins and are commonly used for motor speed control and brightness control of LEDs.
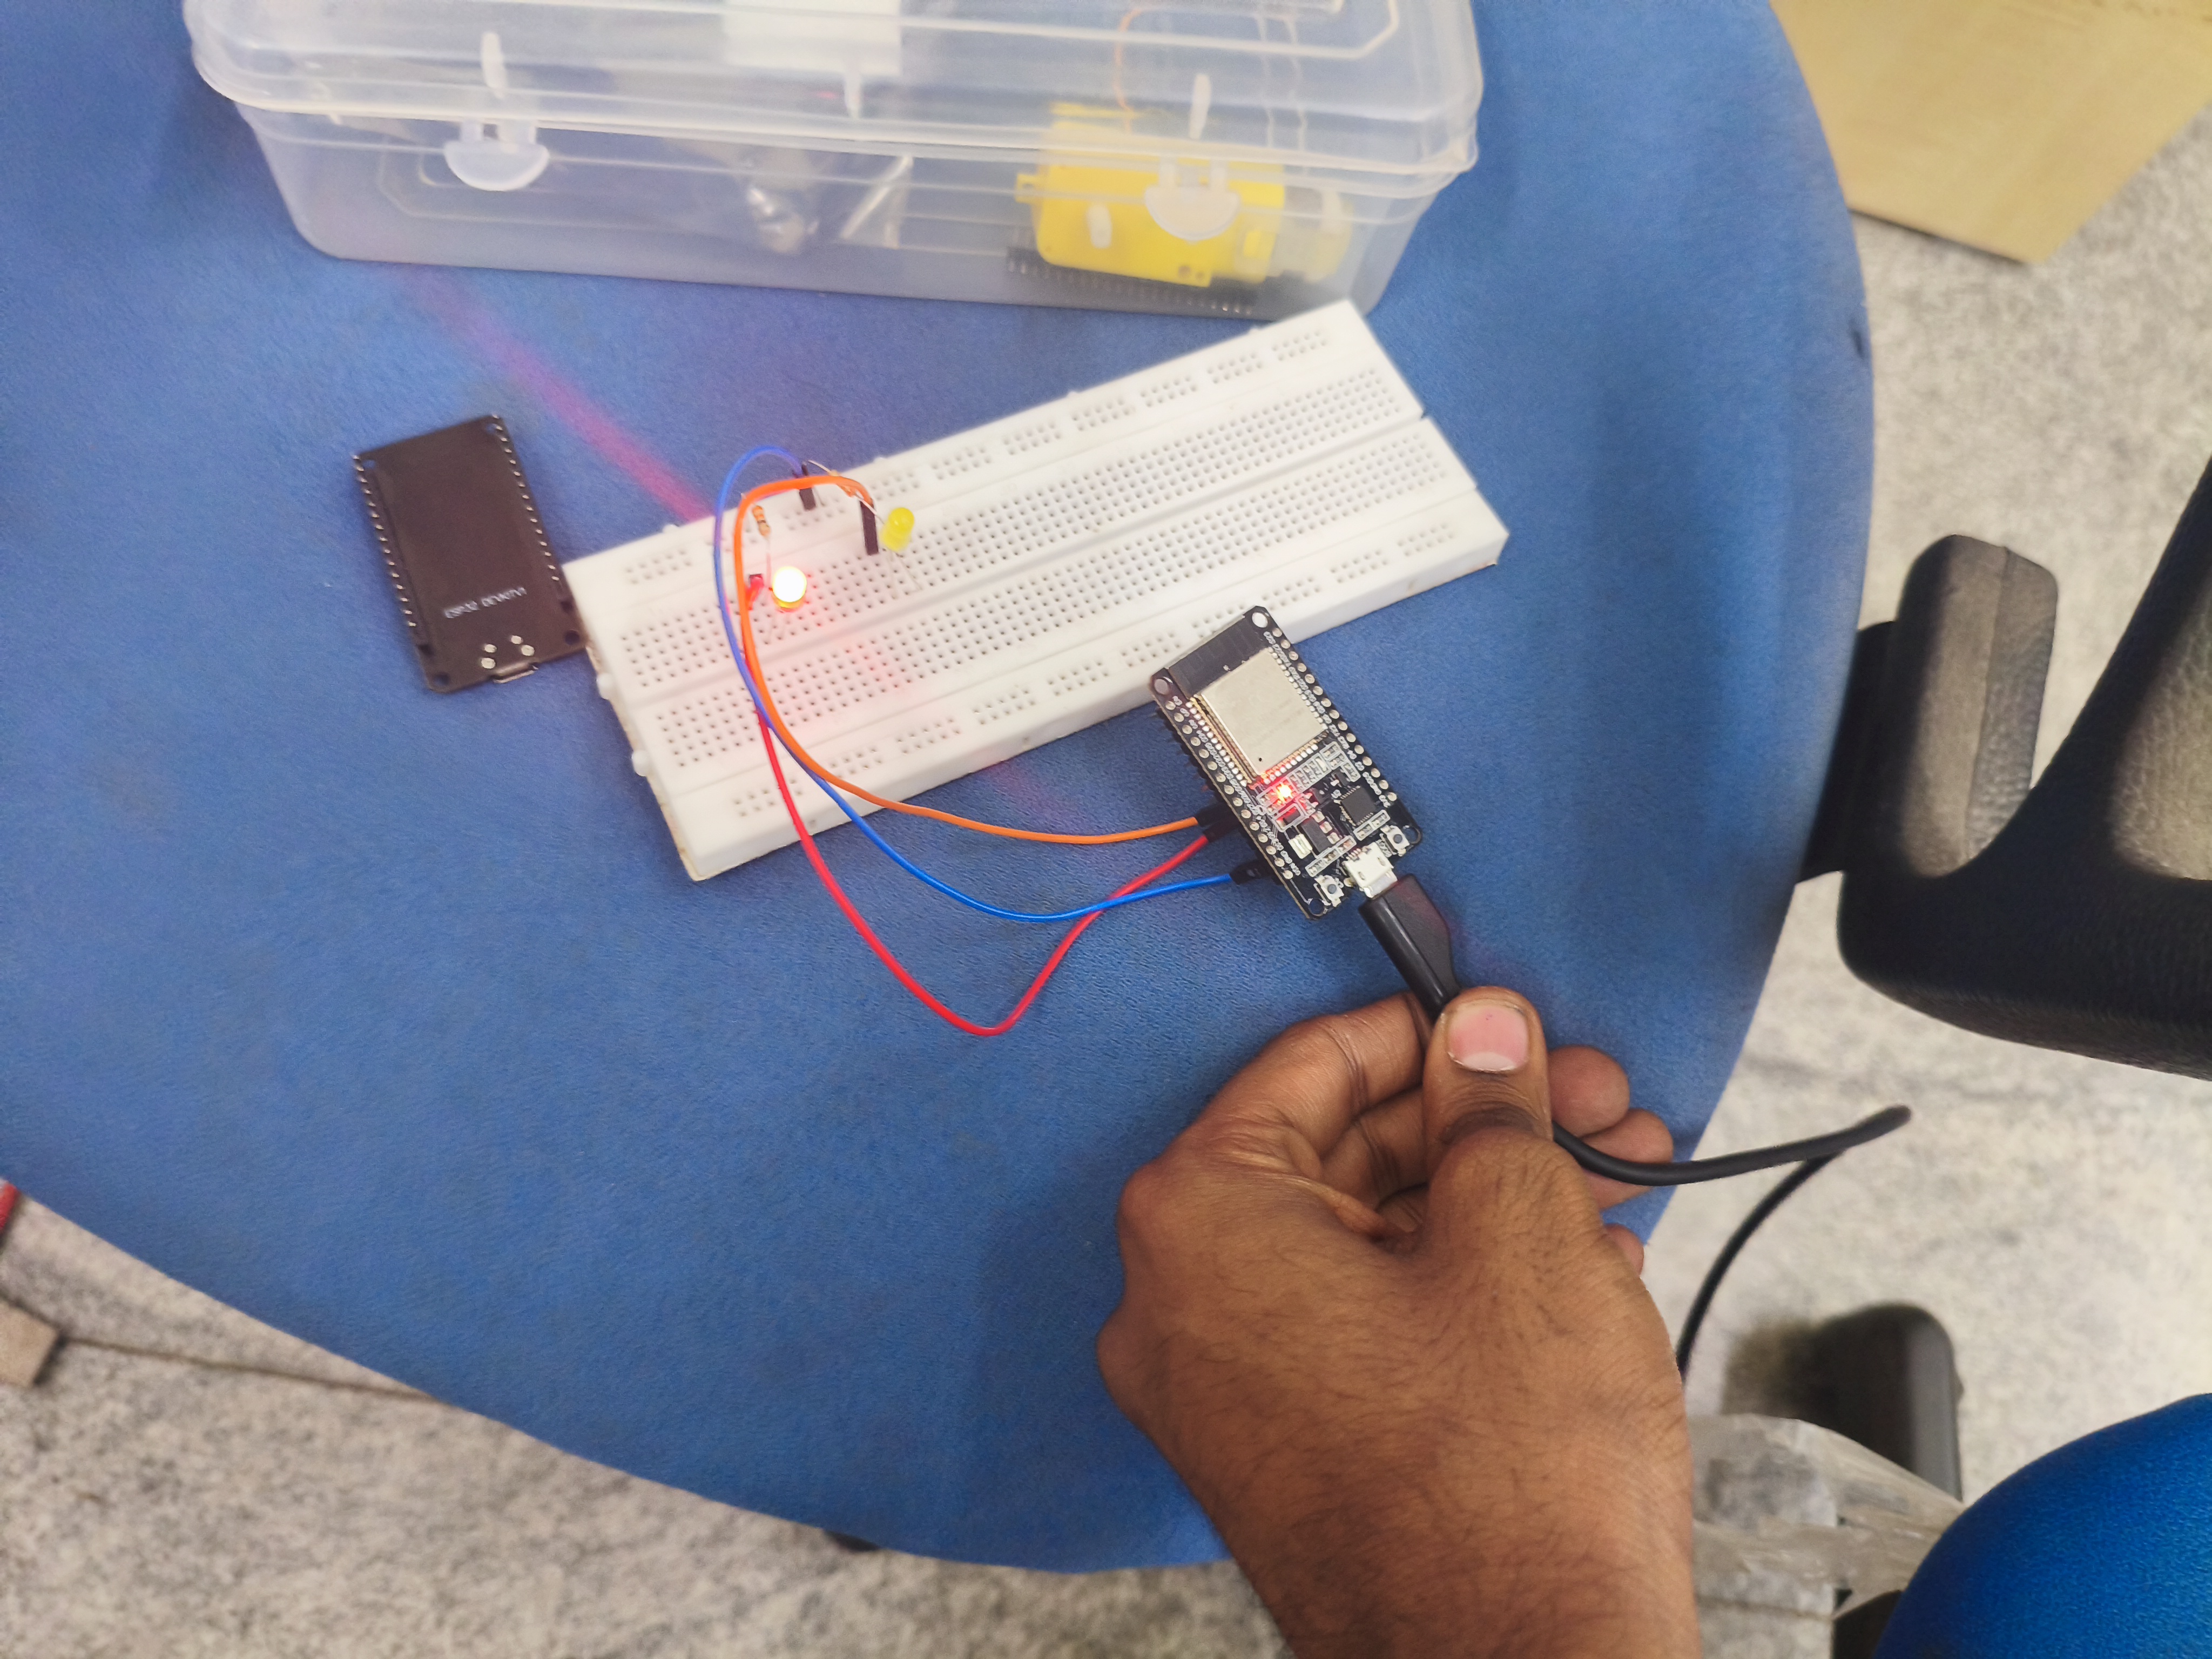
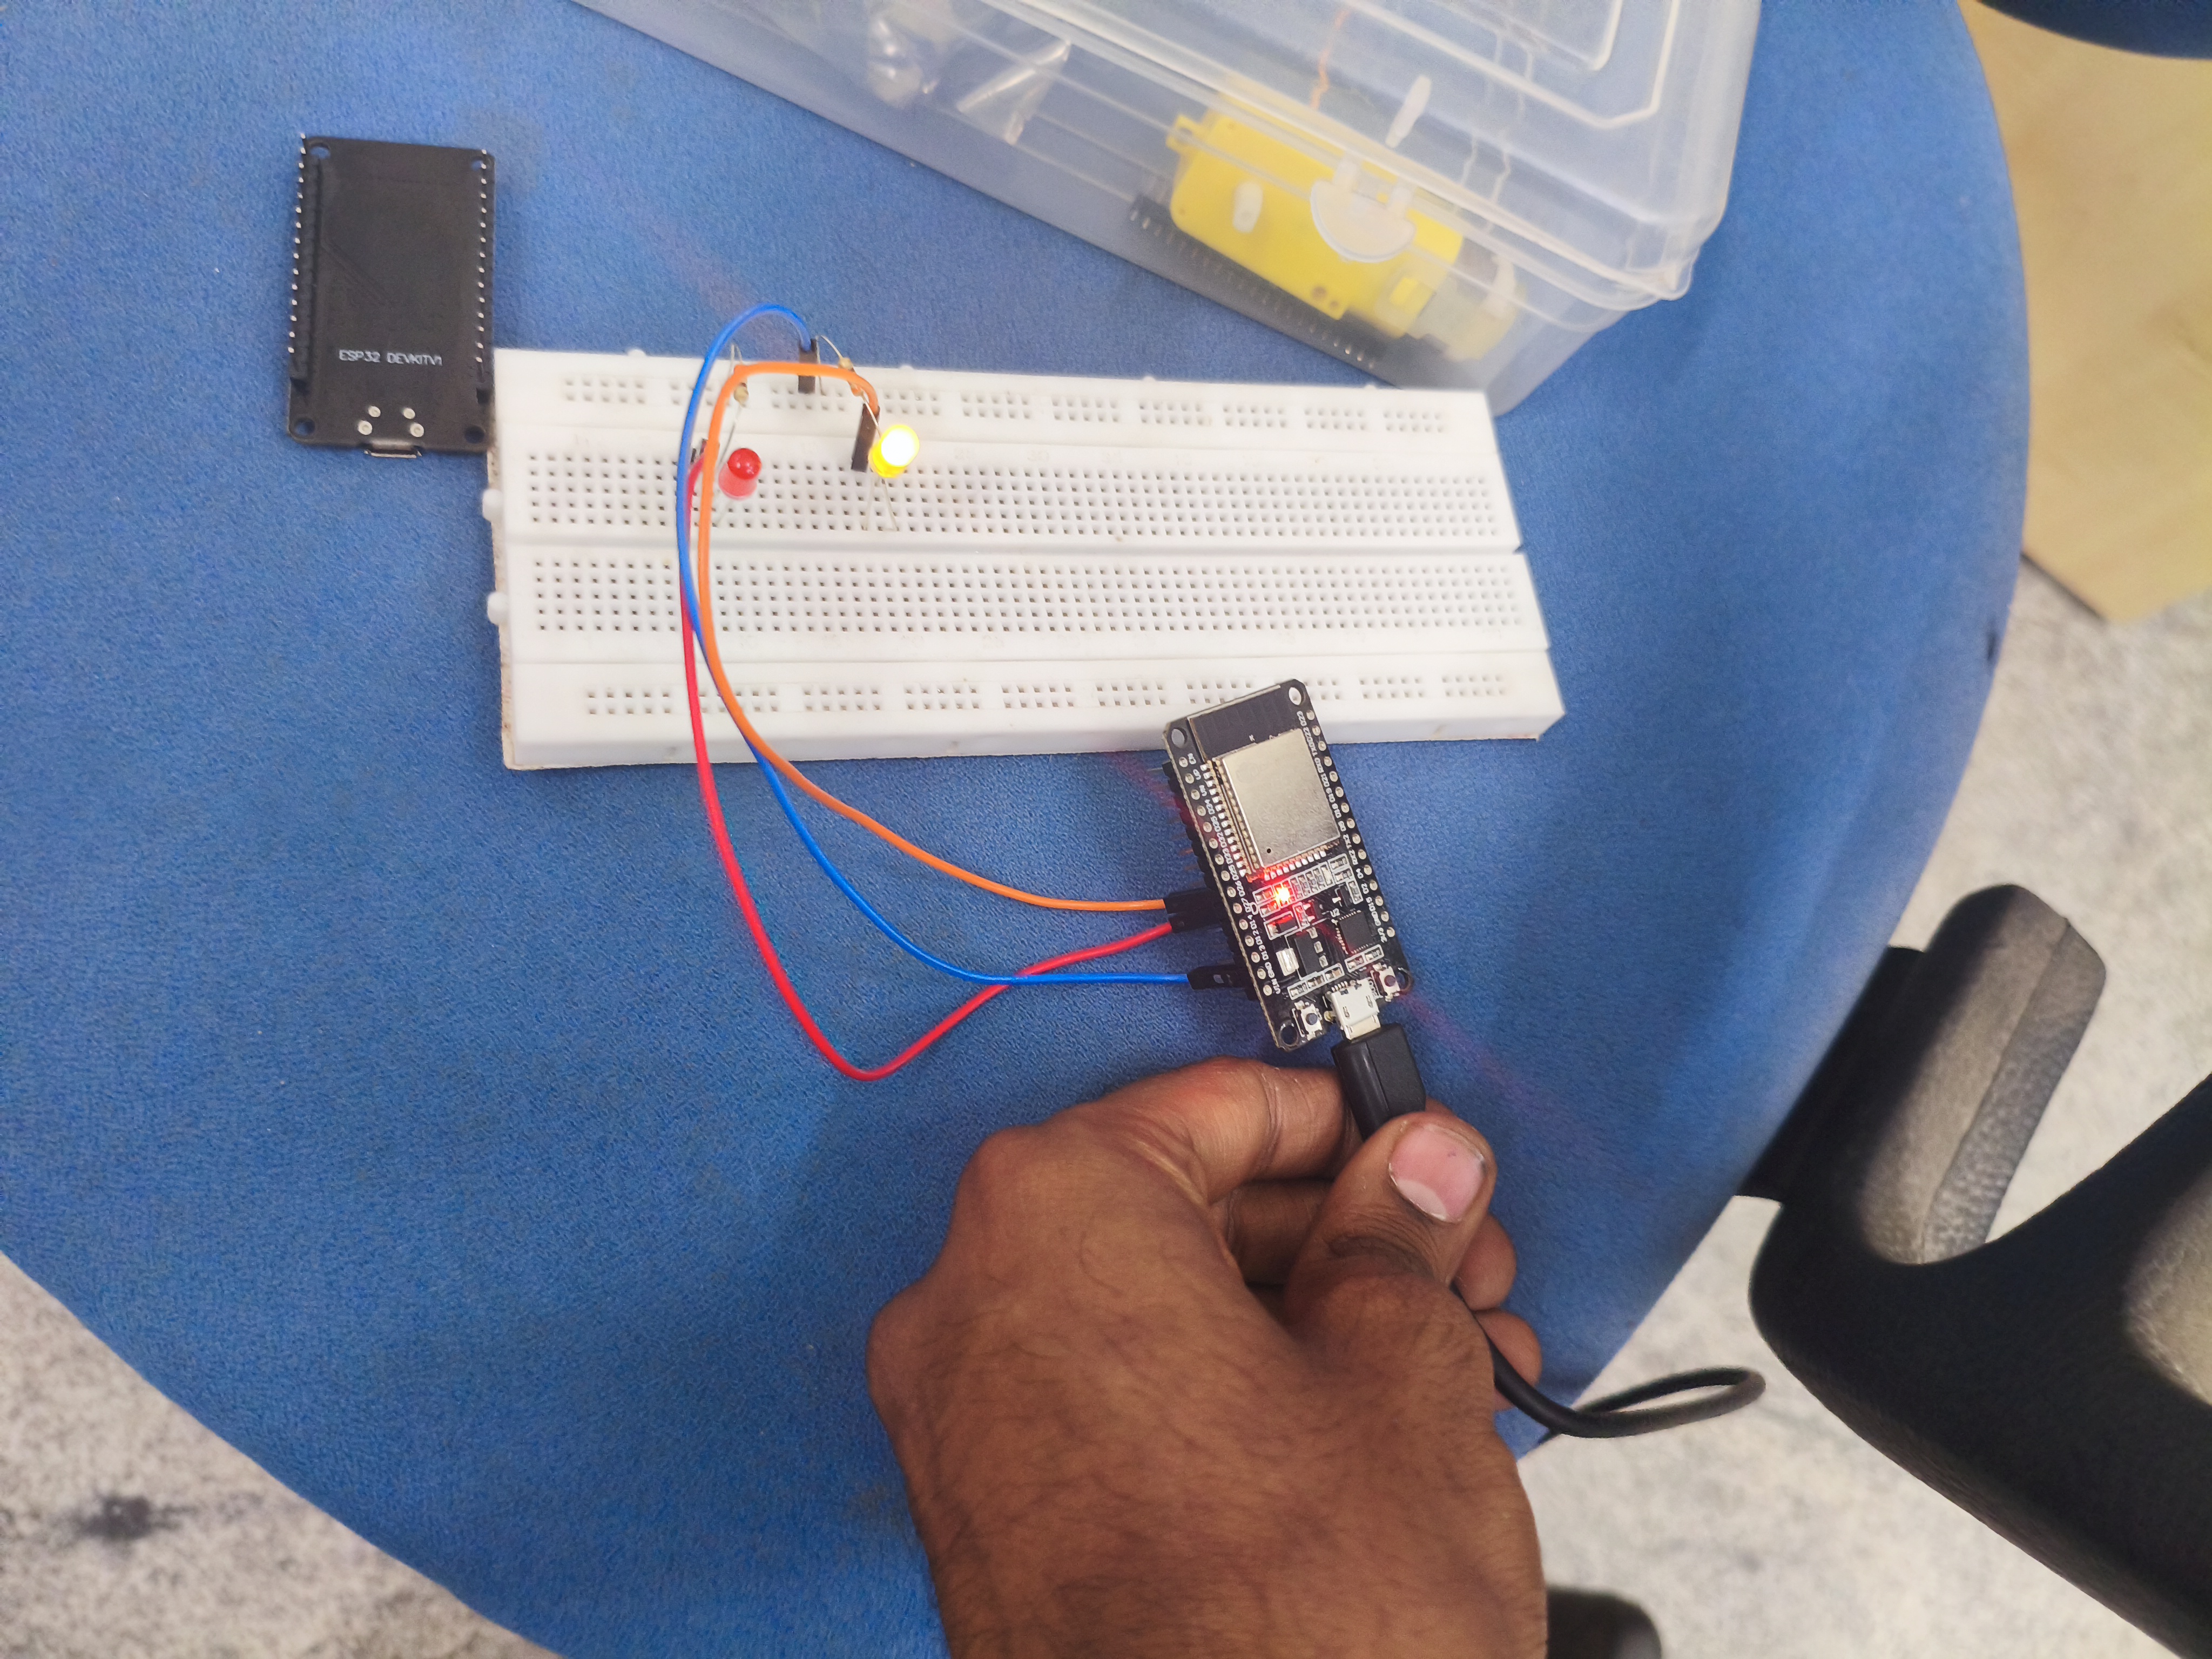
TASK 11: LED Toggle Using ESP32
Objective
This task is to understand the working of the ESP32 microcontroller and learn how to create a simple standalone web server using it. The web server is used to control an LED connected to the GPIO pins of the ESP32.
Through this task, i also learn how to configure the Arduino IDE so that it can upload programs to the ESP32 board.
Working Process
- I configured the Arduino IDE so that it can work with the ESP32 board by installing all the libraries and boards required for the IDE to compile and upload programs to the esp32
- I copied the code from the refernce link and understood it and then pasted it.then
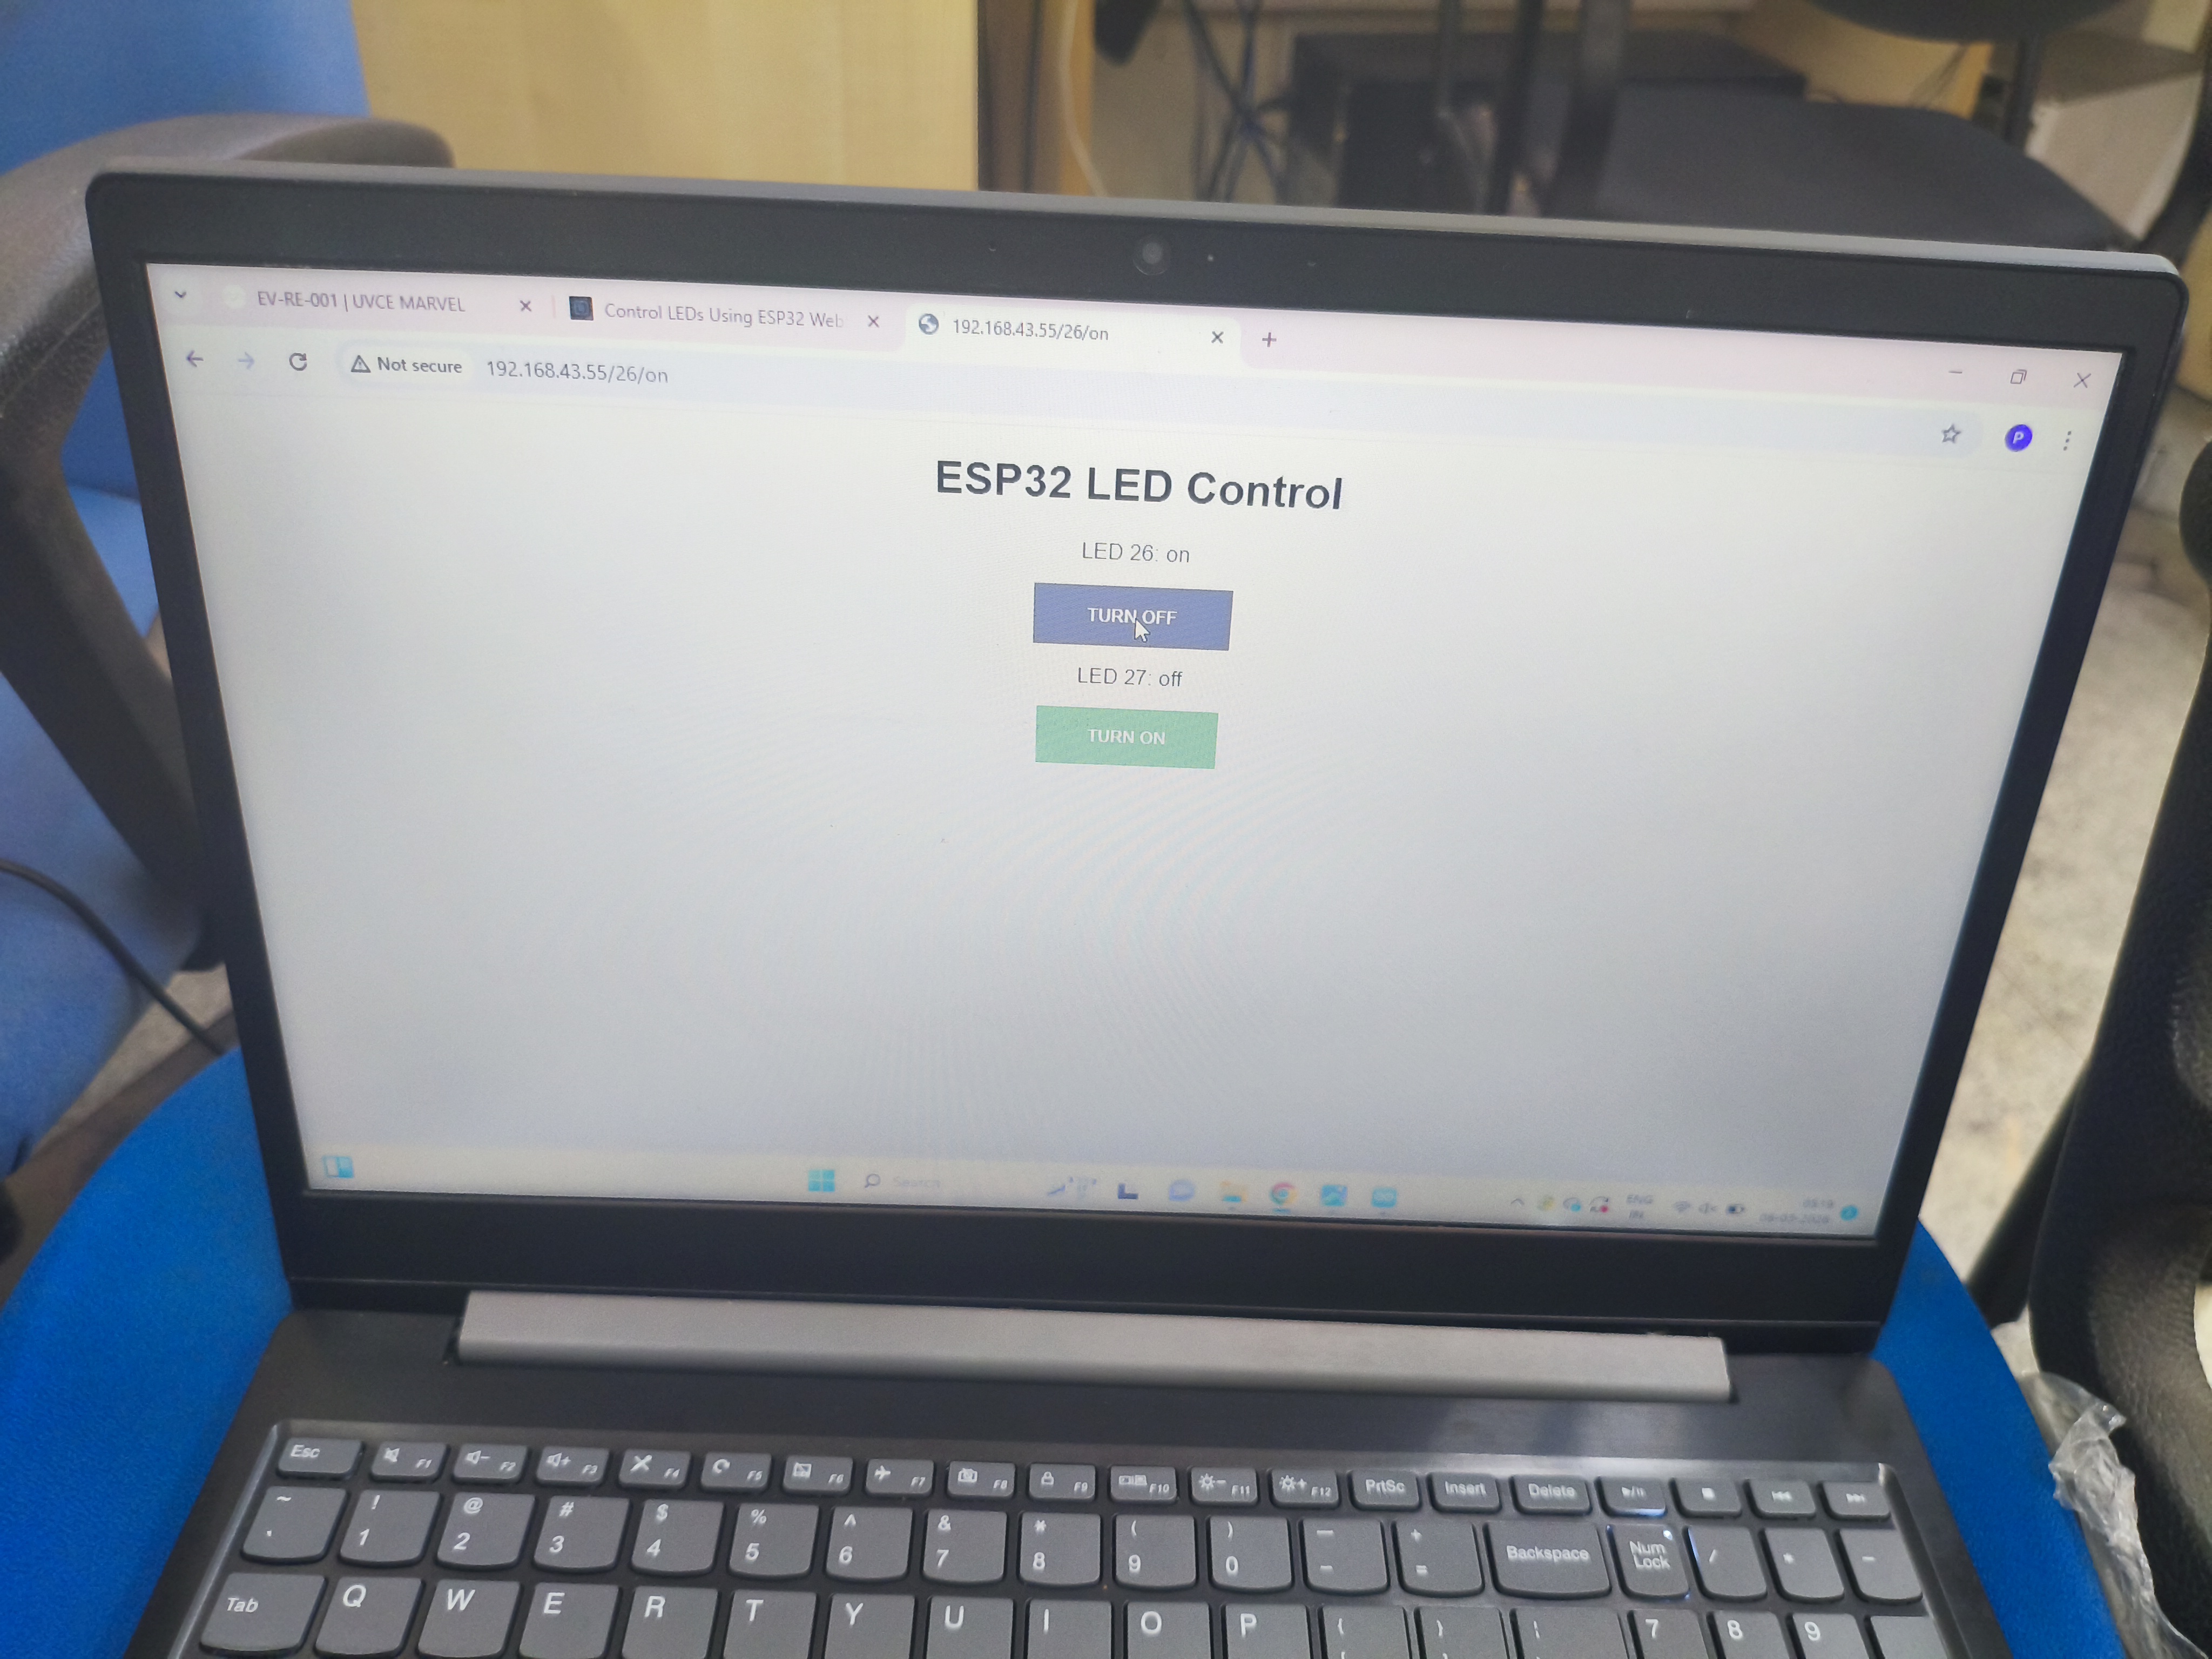
In the code, I gave my Wi-Fi network name (SSID) and password so that the ESP32 could connect to the same Wi-Fi network. - Once the ESP32 connects to Wi-Fi, it gets an IP address.
By typing this IP address in a web browser on my phone or laptop (connected to the same Wi-Fi), a simple webpage appears. - This webpage contains two buttons: ON and OFF.
These buttons are used to control the LED connected to the ESP32. - When the ON button is clicked, the browser sends a request to the ESP32.
by the help of the esp32 GPIO pin, which turns the LED ON. - When the OFF button is clicked,by the help of the esp32 GPIO pin and the LED turns OFF.
In this way, the LED connected to the ESP32 can be controlled from a browser using Wi-Fi.
Reference
https://microdigisoft.com/control-leds-using-esp32-web-server-in-arduino-ide/
Demo Video

for task 12-19click here