
COURSEWORK
Umesh's AI-ML-001 course work. Lv 3
| Umesh Solanki | AUTHOR | ACTIVE |

LEVEL-1 Final Report
3 / 10 / 2024
TASK 1: 3D Printing
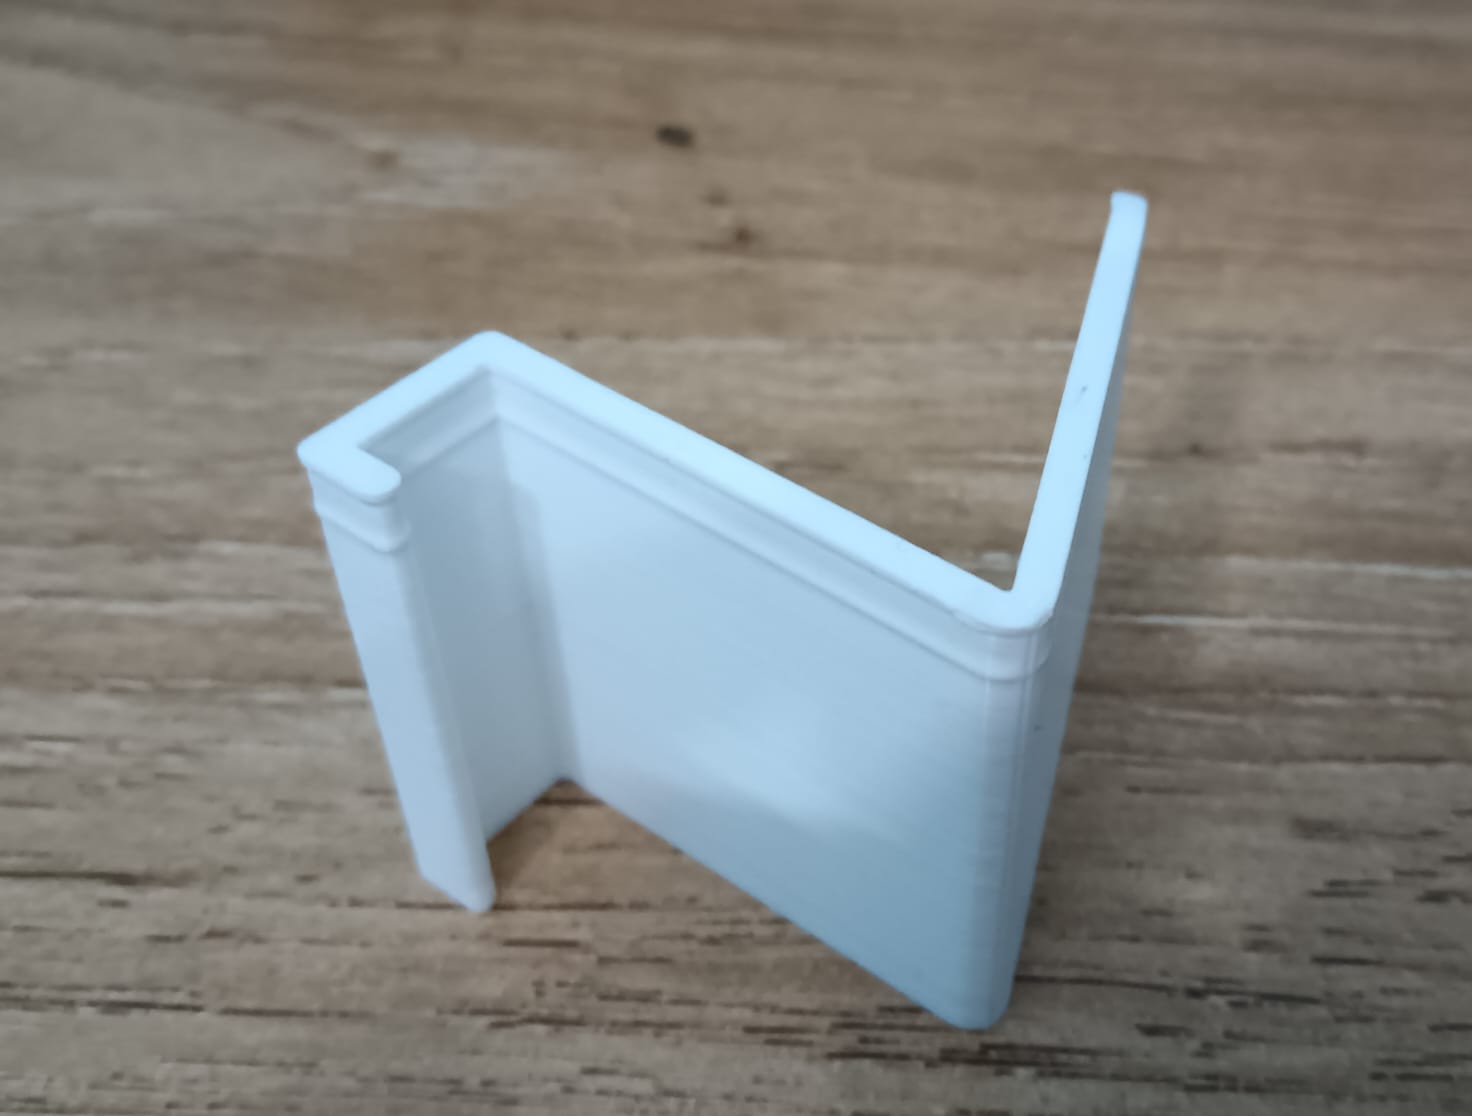
I have made a 3D model using autodesk software and Creality ender 3 printer. In this software we can design different 3d models using simple geometry. The file in which I have edited the file is saved as .stl format. The .stl file is opened in Ultimaker Cura software and spliced it for further 3d printing.Splicing is the process of combining multiple 3d model into a single printable file.. The .gcode file obtained after splicing is transferred to the 3d printer machine . The Nozzle Temperature should be 180-220°C and Bed Temperature - 55-70°C so that the filament is melted and solidified appropriately. After slicing the time taken to print the object and amount of filament required is displayed and we made necessary changes and chose the appropriate settings.After the duration of printing time we get our model ready.
Github link: https://github.com/umeshsolanki2005/3D-printed-mobile-stand.git
TASK 2: API
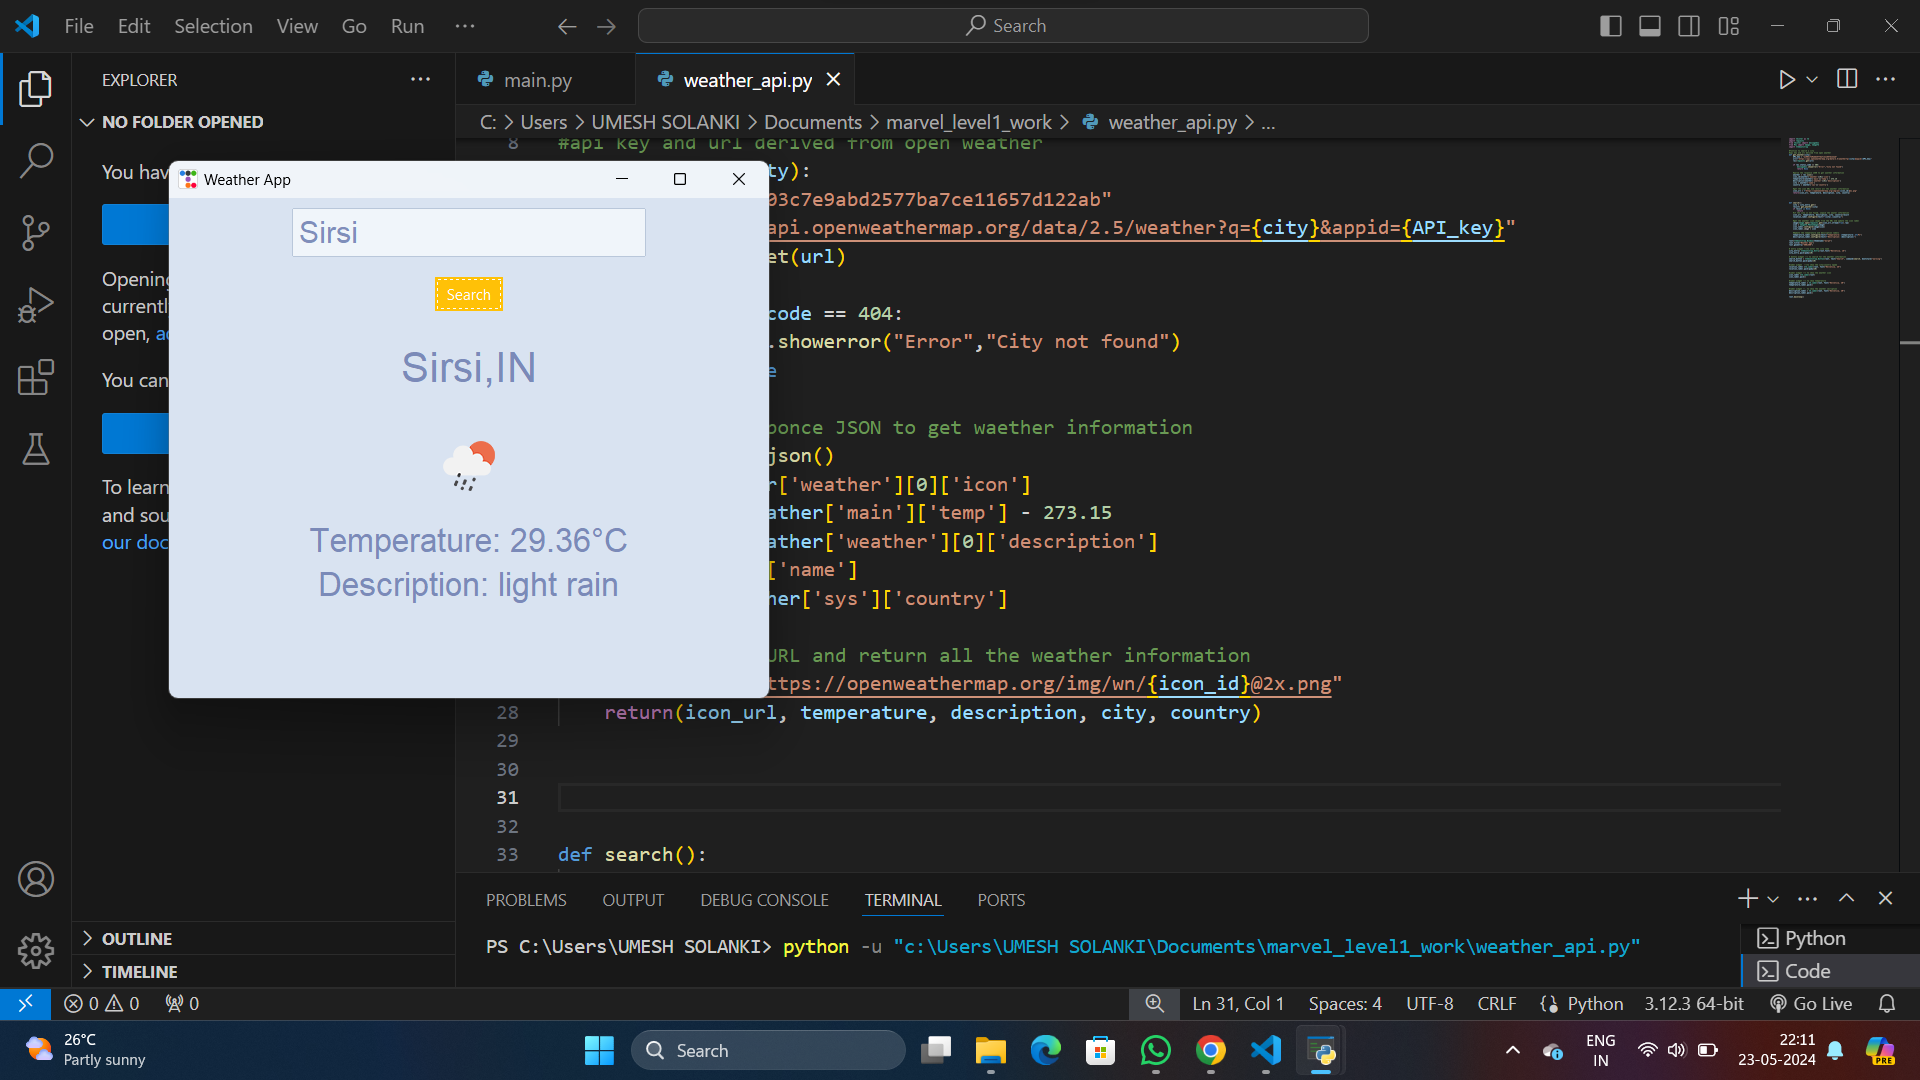
I created a weather web application where users can fetch the weather data using the search option. Application Programming Interface(API) is a set of rules and protocols that allows different software applications to communicate with each other. I have used some free API which I got from Open weather website. I have Purely used python for entire tasks from GUI for fetching API. I have made use of the tkinter library which is used for creating Graphical User Interface(GUI). I have used a request library for making http requests.I have Also used a ply library which is used for implementing lexers and parsers ( for reading and interpreting the text).The API is free on the OpenWeather website.
https://github.com/umeshsolanki2005/Weather-app-using-api.git
TASK 3:WORKING WITH GITHUB
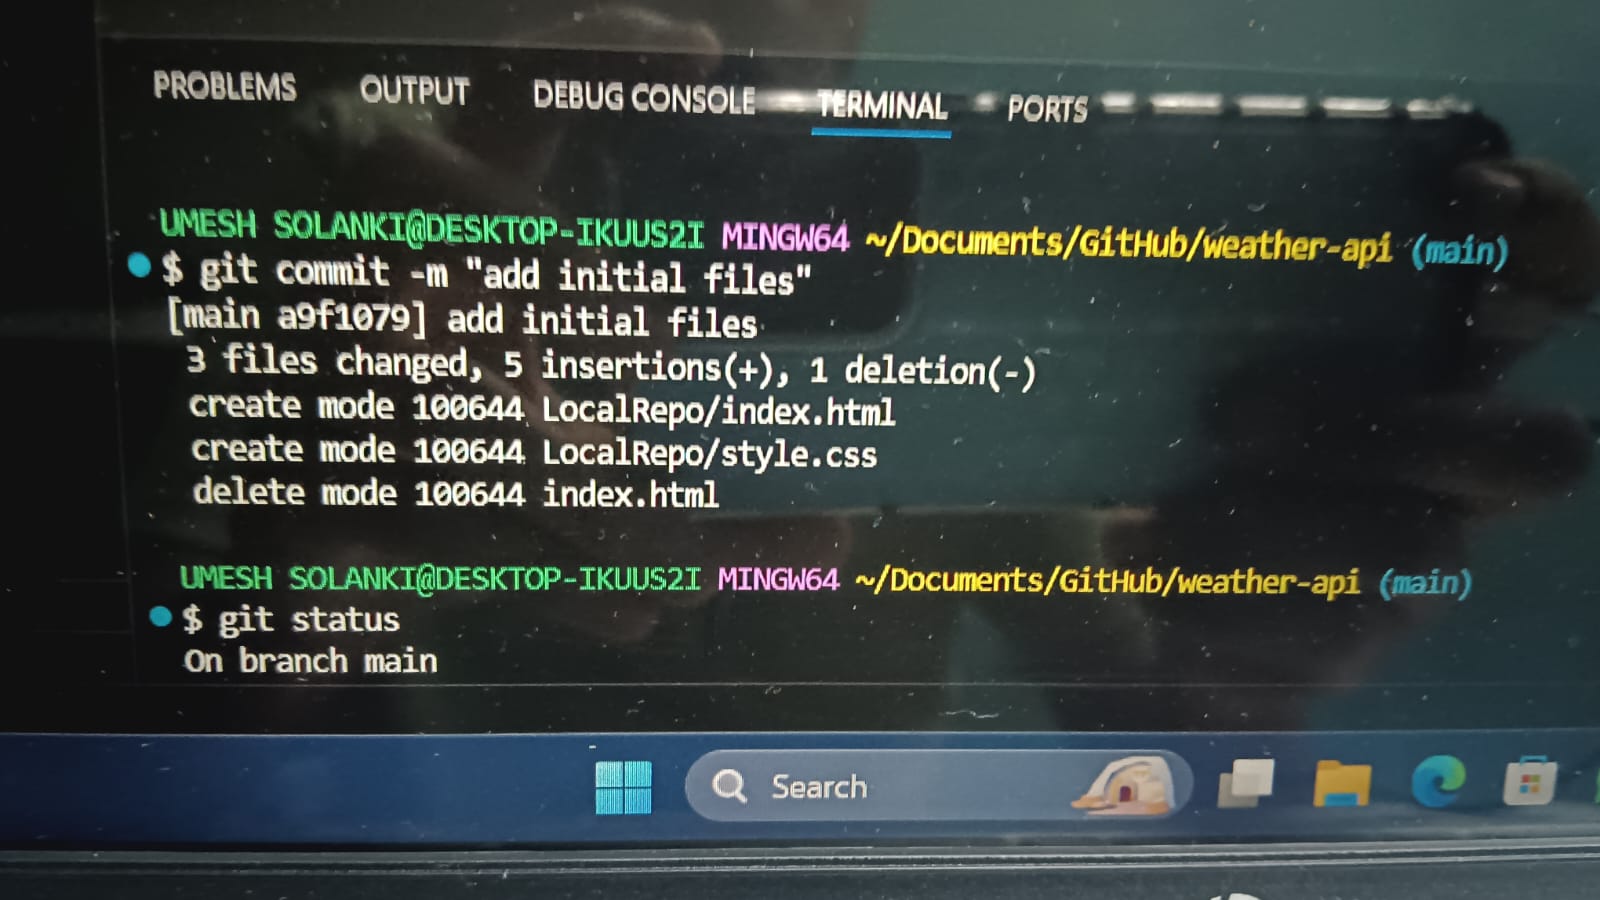
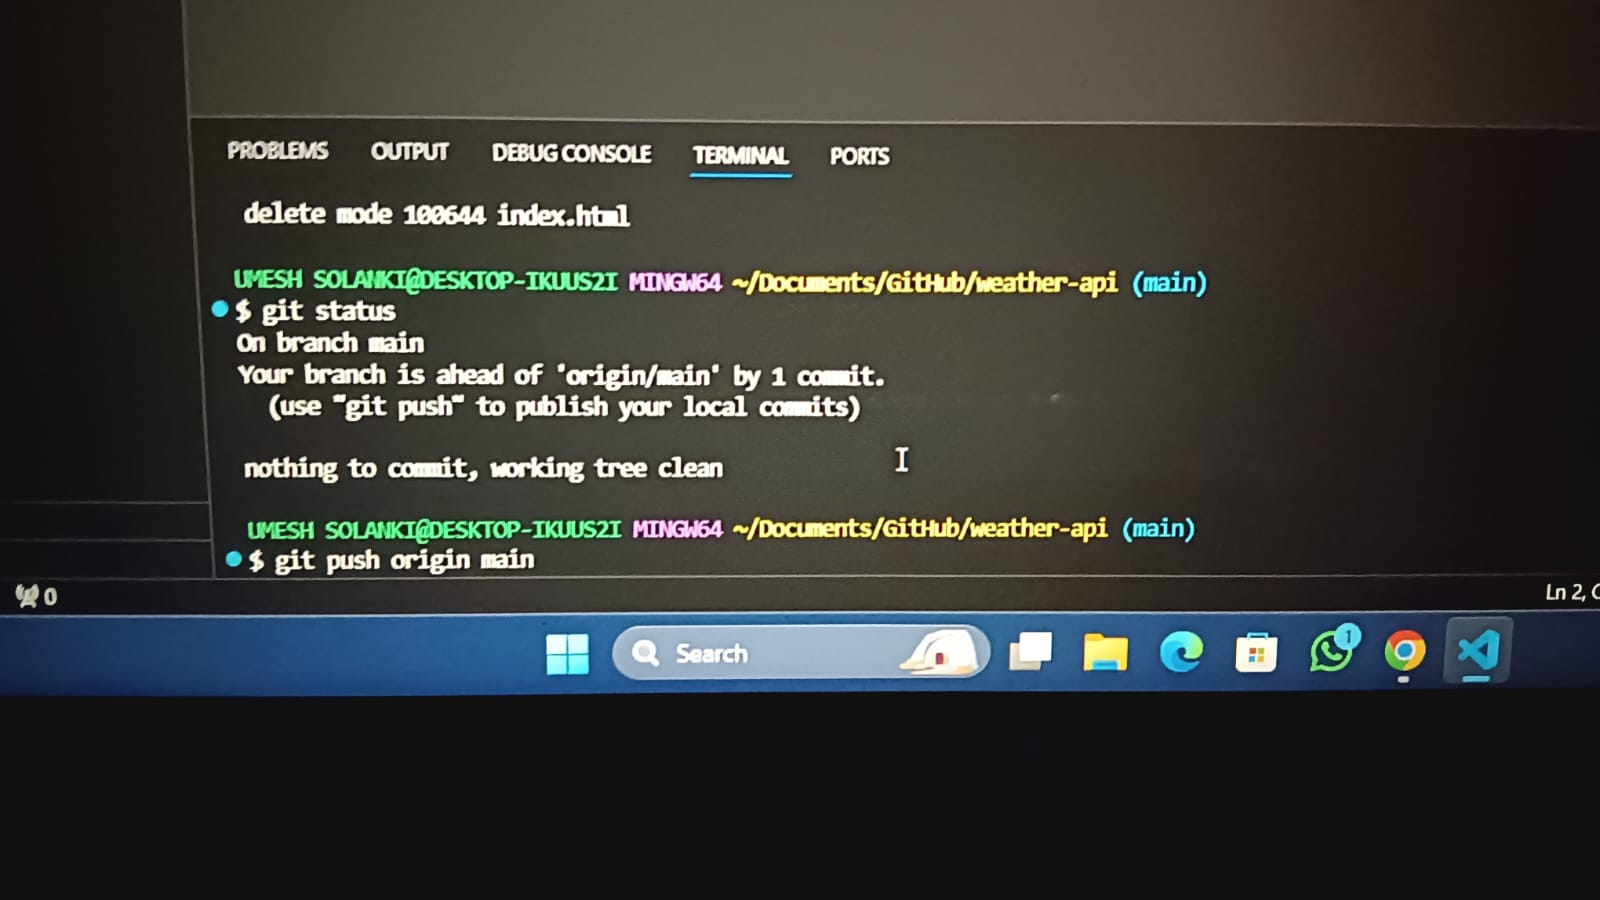
From the given task I Learned how to work with github, How multiple users can work on the same project simultaneously and commit change. The task was to fork the given file which had an error, resolve it, commit changes and make a pull request to add it to the main branch. Firstly I have Forked the files into my github account. Forking is something to copy the code of some other user, and make changes and make it more useful and convenient. After successful forking of the Spoon Knife Project I cloned the code using https and copied the same into the git bash that is on local repo. There was an error in the python file. I have resolved it and committed the changes by adding and committing the file.Now the file is in the local area. It has to be pushed into github by git push command. Now the file is not in the main branch to add it to the main brain I had created pull request . As and when the project owner accepts the request the change is added to the main branch. https://github.com/umeshsolanki2005/git-task
TASK 4: WORKING WITH PANDAS AND MATPLOTLIB LIBRARIES
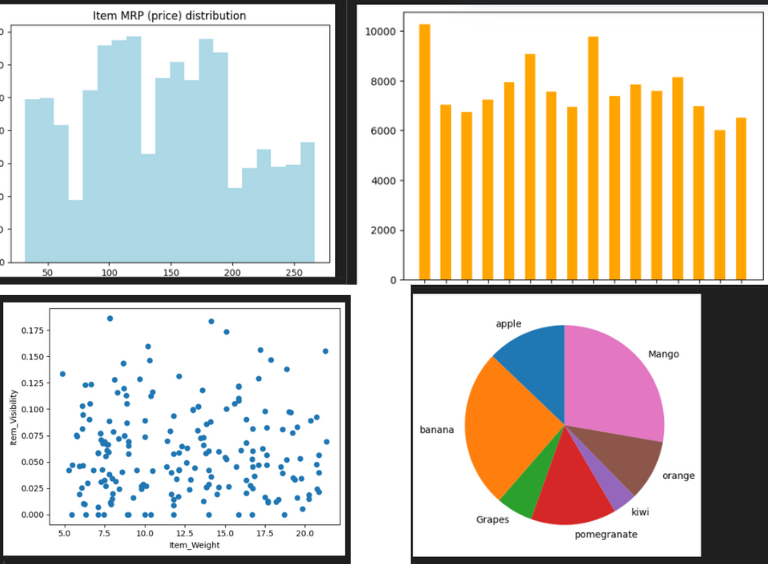
I have created a jupyter notebook in my VS code text editor and wrote code . Firstly I imported pandas and matplotlib libraries using pip command then I read the bigmart data which is in .csv format. I wrote code to plot many graphs like the usual graph , Histogram, outlier of histogram, scatter plot, pie plots etc.
Github link:https://github.com/umeshsolanki2005/Woking-with-pandas-and-matplotlib.git
TASK 5: KAGGLE CONTEST
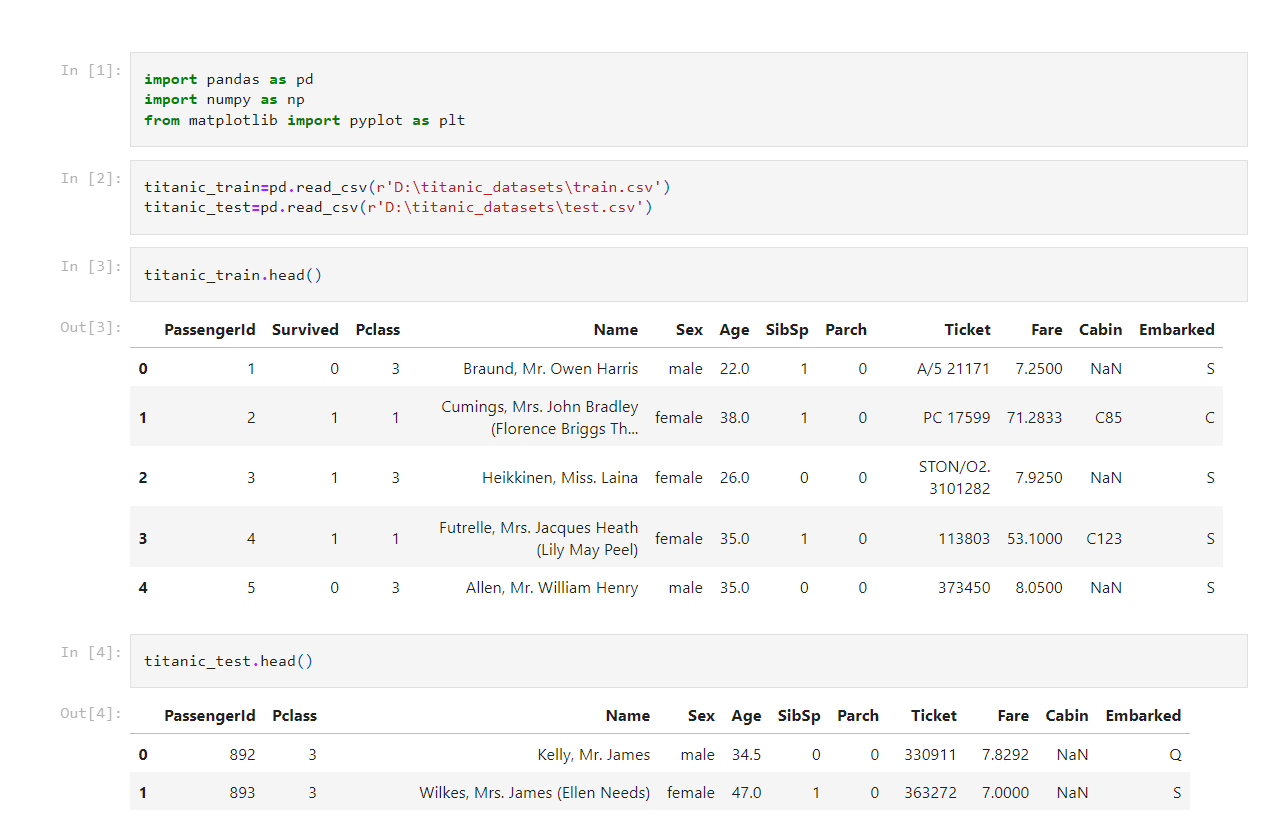
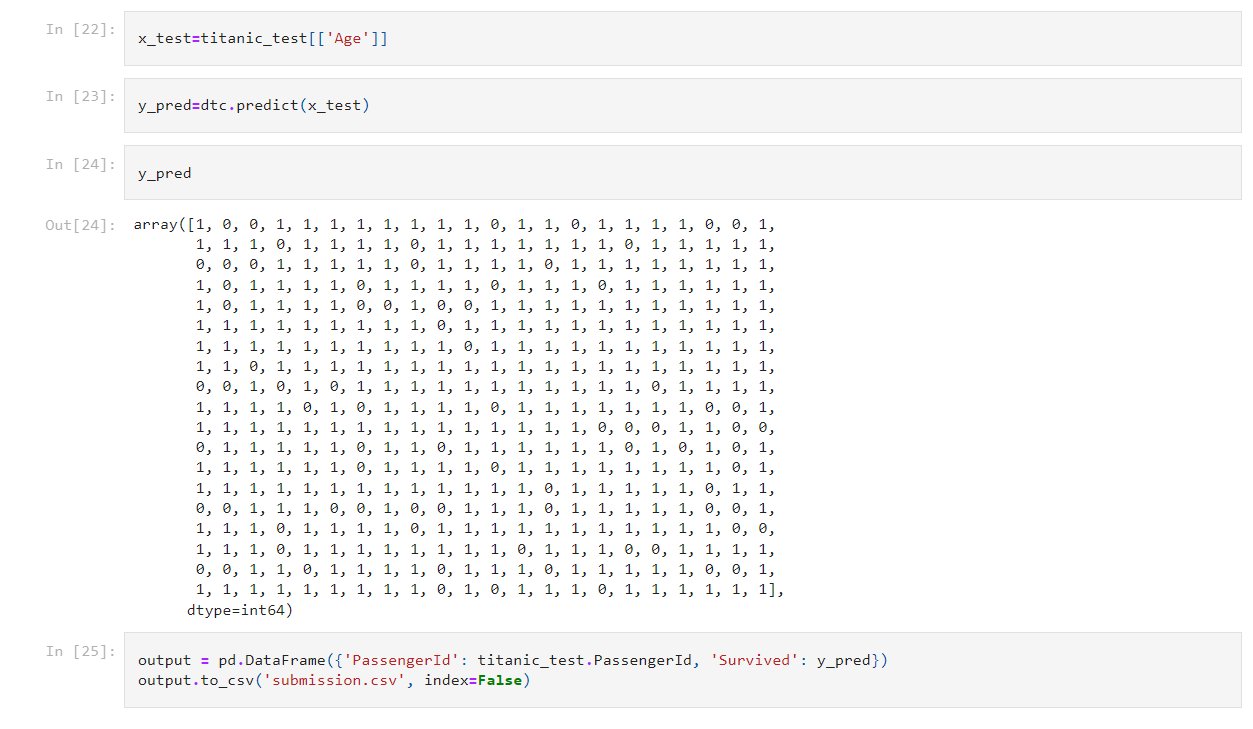
Under this task I made a kaggle account and learnt how to work with the projects related to data science and machine learning. And Participated in the Titanic ML competition – the best, first challenge for me to dive into ML competitions and familiarize myself with how the Kaggle platform works.The competition is simple: use machine learning to create a model that predicts which passengers survived the Titanic shipwreck.Here I have used python language. I have made use of pandas and matplotlib to visualize and analyze the train.csv file . I have used the “age” factor for calculating survival percentage. I have used the “Decision Tree Classifier” algorithm. It is a machine learning algorithm . It creates a model that predicts the value of a target variable by learning simple decision rules.It returns predicted values and the csv file is saved. I uploaded it to the kaggle website to see the accuracy of the model and I got about 77% of the accuracy with the actual data.
Github Link: https://github.com/umeshsolanki2005/Titanic-Regression-Model.git
TASK 6: CREATE A PORTFOLIO PAGE
I have created my portfolio page using HTML( Hyper Text Markup Language) and CSS( cascading Style Sheet) . I used many html tags to create links, add images , to write heading etc. And used Css for styling the fonts, colors , widgets, background color etc.
GitHub Link: https://github.com/umeshsolanki2005/My-Portfolio.git

TASK 7: WRITING RESOURCE ARTICLE USING MARKDOWN
Markdown is an easy-to-use markup language that is used with plain text to
add formatting elements (headings, bulleted lists, URLs) to plain text without the use of a formal text editor or the use of HTML tags. Markdown is device agnostic and displays the writing format consistently across device type. I have written an article about Chandrayaan 3.
GitHub Link: https://github.com/umeshsolanki2005/Markdown-Tutorial.git

TASK 8:Speed Control of DC Motor
I used the basic electrical circuit for controlling DC motors, and understood the control DC motors using the L298N motor driver and the Arduino board.Learnt about the different components used and their functions/applications. Made the connections as shown and uploaded the code into the arduino(micro controller) using arduino compiler Got incomplete output repeatedly due to insufficient voltage in the battery, this problem was solved by using a dc voltage converter with 12v output the push button reverses the direction of rotation when pressed while the potentiometer controls the speed of the dc motor.
GitHub Link: https://github.com/umeshsolanki2005/speed-control-dc-motor.git

TASK 9:SOLDERING PREREQUISITES
I followed following steps in soldering:
Insert the LED leads into the circuit board holes and bend the leads outward at a 45-degree angle.
Turn on the soldering iron and set the heat control to 400'C. Hold the tip of the iron to the copper pad and resistor lead for 3-4 seconds to heat the joint.
Touch the solder to the joint, not directly to the iron tip.
4 .Remove the soldering iron and let the solder cool naturally, without blowing on it. Once cool, snip the extra wire from the leads.

Task 10:ACTIVE PARTICIPATION
I participated in the Annual National Level technical extravaganza “IMPETUS 24.0”. In this fest i participated in the event called “Map” which was about writing the code by given input and output. I had also participated in “Mock Placement '' Event where I got the knowledge about how placement rounds happen and all .
overall the experience was so good.
https://drive.google.com/file/d/1zaqkTsjaN2azXmLczk1EnPqySrv5cvjp/view?usp=drive_link
https://drive.google.com/file/d/1Si_9K_Rwi6uoNvkTG76IEDf6s9quwAzp/view?usp=drive_link
