
COURSEWORK
Tejashree's AIR-001 course work. Lv 2
| Tejashree H N | AUTHOR | ACTIVE |
2 / 10 / 2025
TASK 1 3D PRINTING:
Objective :
To understand the working of 3D printer, from online sources. To learn about the Bed temperature and other printer settings.
Learnings and Outcomes :
Optimal PLA Printing Settings\
Nozzle Temperature:
For most PLA filaments, the ideal nozzle temperature is between 190°C and 220°C. Starting at 200°C is a good baseline, but you can adjust based on the specific brand and color for the best results.
Bed Temperature:
While PLA can be printed on an unheated bed, using a heated bed set between 50°C and 60°C is highly recommended to improve first-layer adhesion and prevent the corners of your print from lifting (warping).
Printing Speed:
A standard printing speed of 40-60 mm/s provides a great balance between print time and quality. For outer walls or highly detailed sections, slowing down to 20-30 mm/s can significantly improve the surface finish.
Cooling Fan:
After the first one or two layers, your part cooling fan should be running at 100%. Proper cooling is essential for PLA to harden quickly, which allows for sharp details, clean bridges, and steep overhangs.
First Layer Settings:
To ensure a successful print, make the first layer slightly slower and thicker than the rest. A common practice is to set the first layer speed to 20 mm/s and the layer height to 0.3 mm for excellent bed adhesion.
Post-Printing Procedures:
Once your print is complete, parts can be finished in several ways. PLA can be easily sanded for a smooth surface, primed and painted with acrylics, or joined together using cyanoacrylate (superglue) or a two-part epoxy.
TASK 2 API
Objective :
Using any API of your choice, build a user interface (web app, mobile app, etc.) to make calls and display information.
Learnings and Outcomes:
I got to know about APIs(Application Programming Interface). An API, or Application Programming Interface, is a set of rules that allows different software applications to communicate with each other. It acts as a mediator, basically just like restaurant. I have built a weather app using html.

click here for the website
click here for the github repository
click here for the video.
TASK 3 WORKING WITH GITHUB:
Objective :
Familiarize yourself with GitHub integrated workflows such as GitHub Actions, Issues, and pull requests. Visit the provided git repository and perform the tasks stated in the README file.
Learnings and Outcomes :
1.I have learnt how to fork the given repository to my repository
2.I have familiarised myself with basic github operations like: 1.Branches 2.Forking 3. Pull requests
3.I have learnt how to create and delete repositories
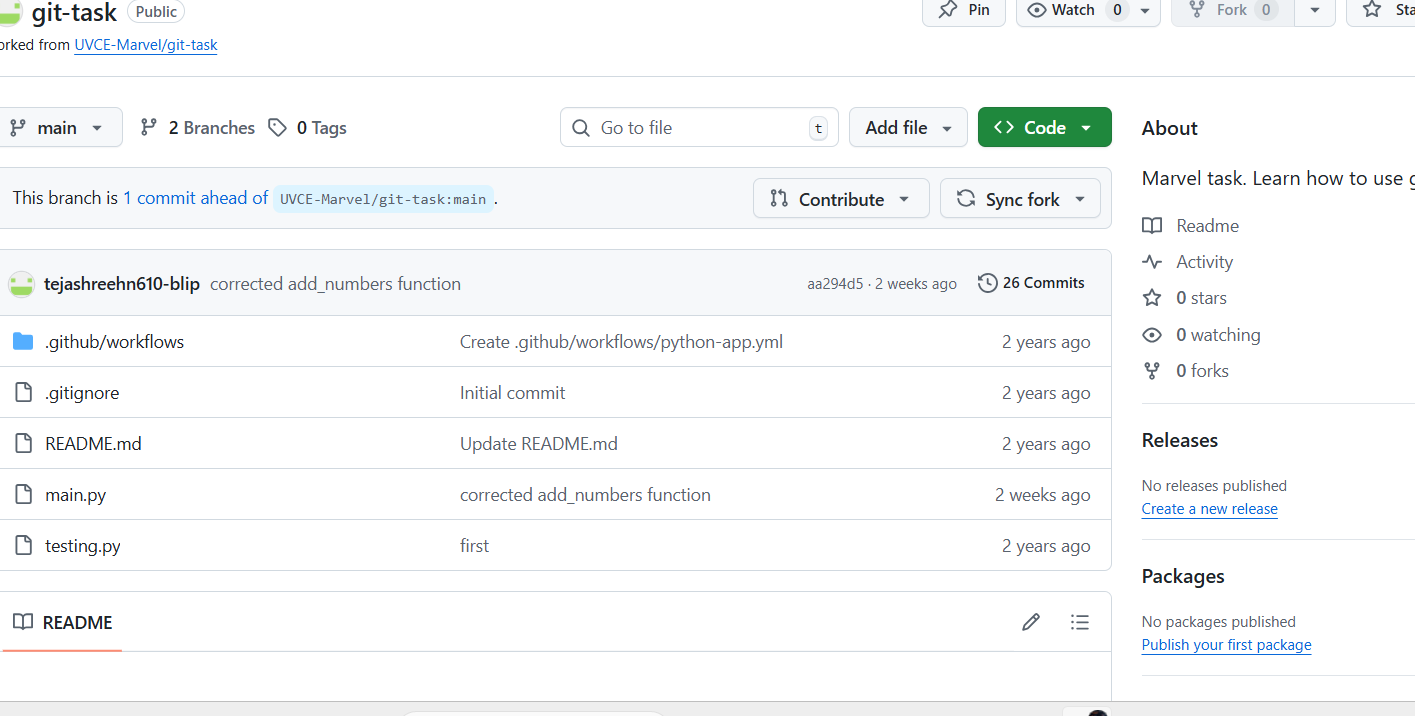

click here click here to see the changes i have done.
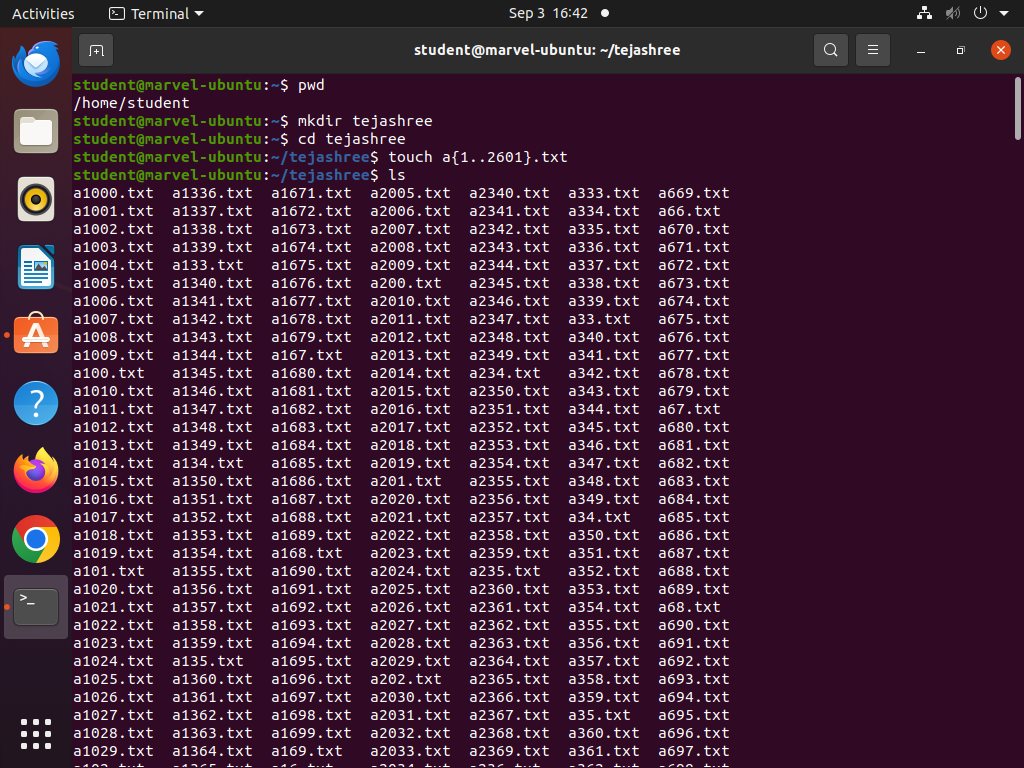
TASK 4 COMMAND LINE ON UBUNTU:
Objective :
Get familiar with Command lines on Ubuntu
Procedure:
- 'mkdir' to create folders.
- 'cd' to navigate directories.
- 'touch' to create blank files.
- 'ls' to list files.
- create multiple folders efficiently using loops.
- 'cat' to concatenate text files.
Using these basic commands, I completed the subtasks.\
Outcomes :
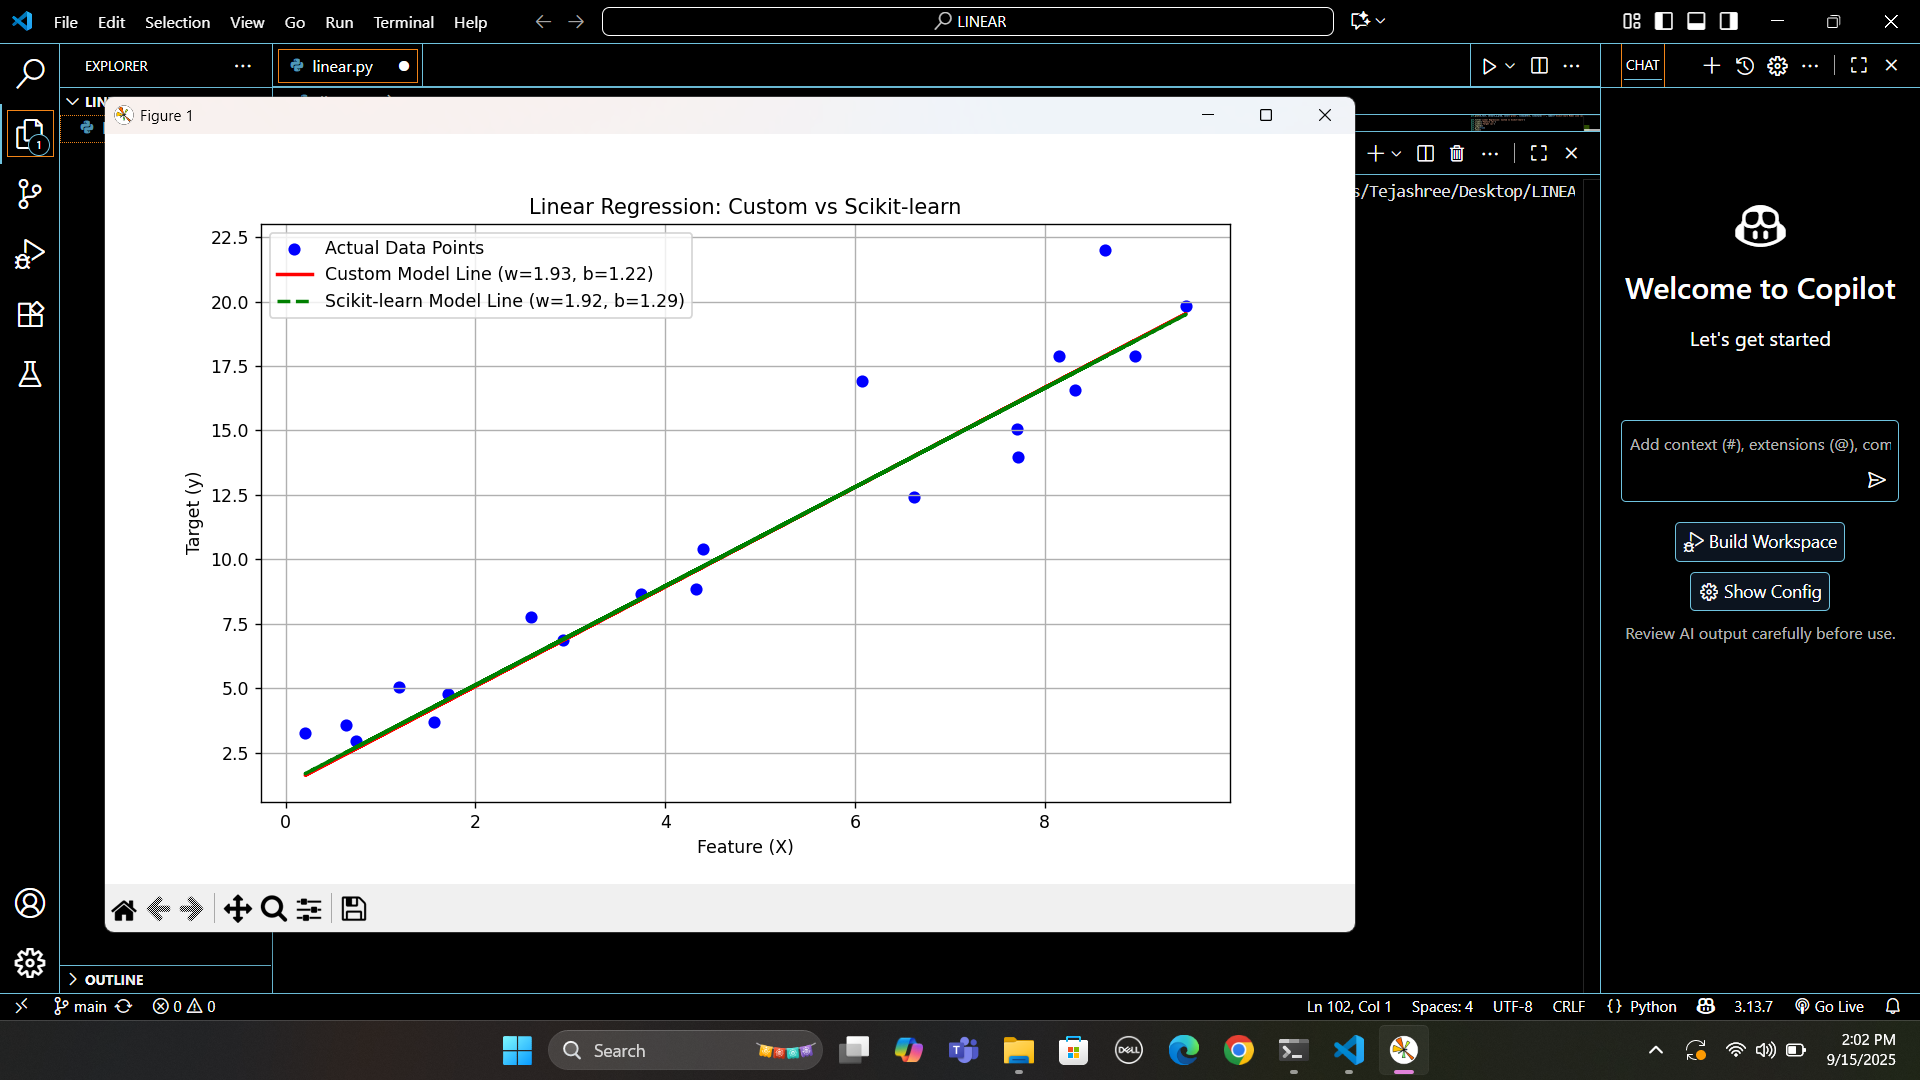
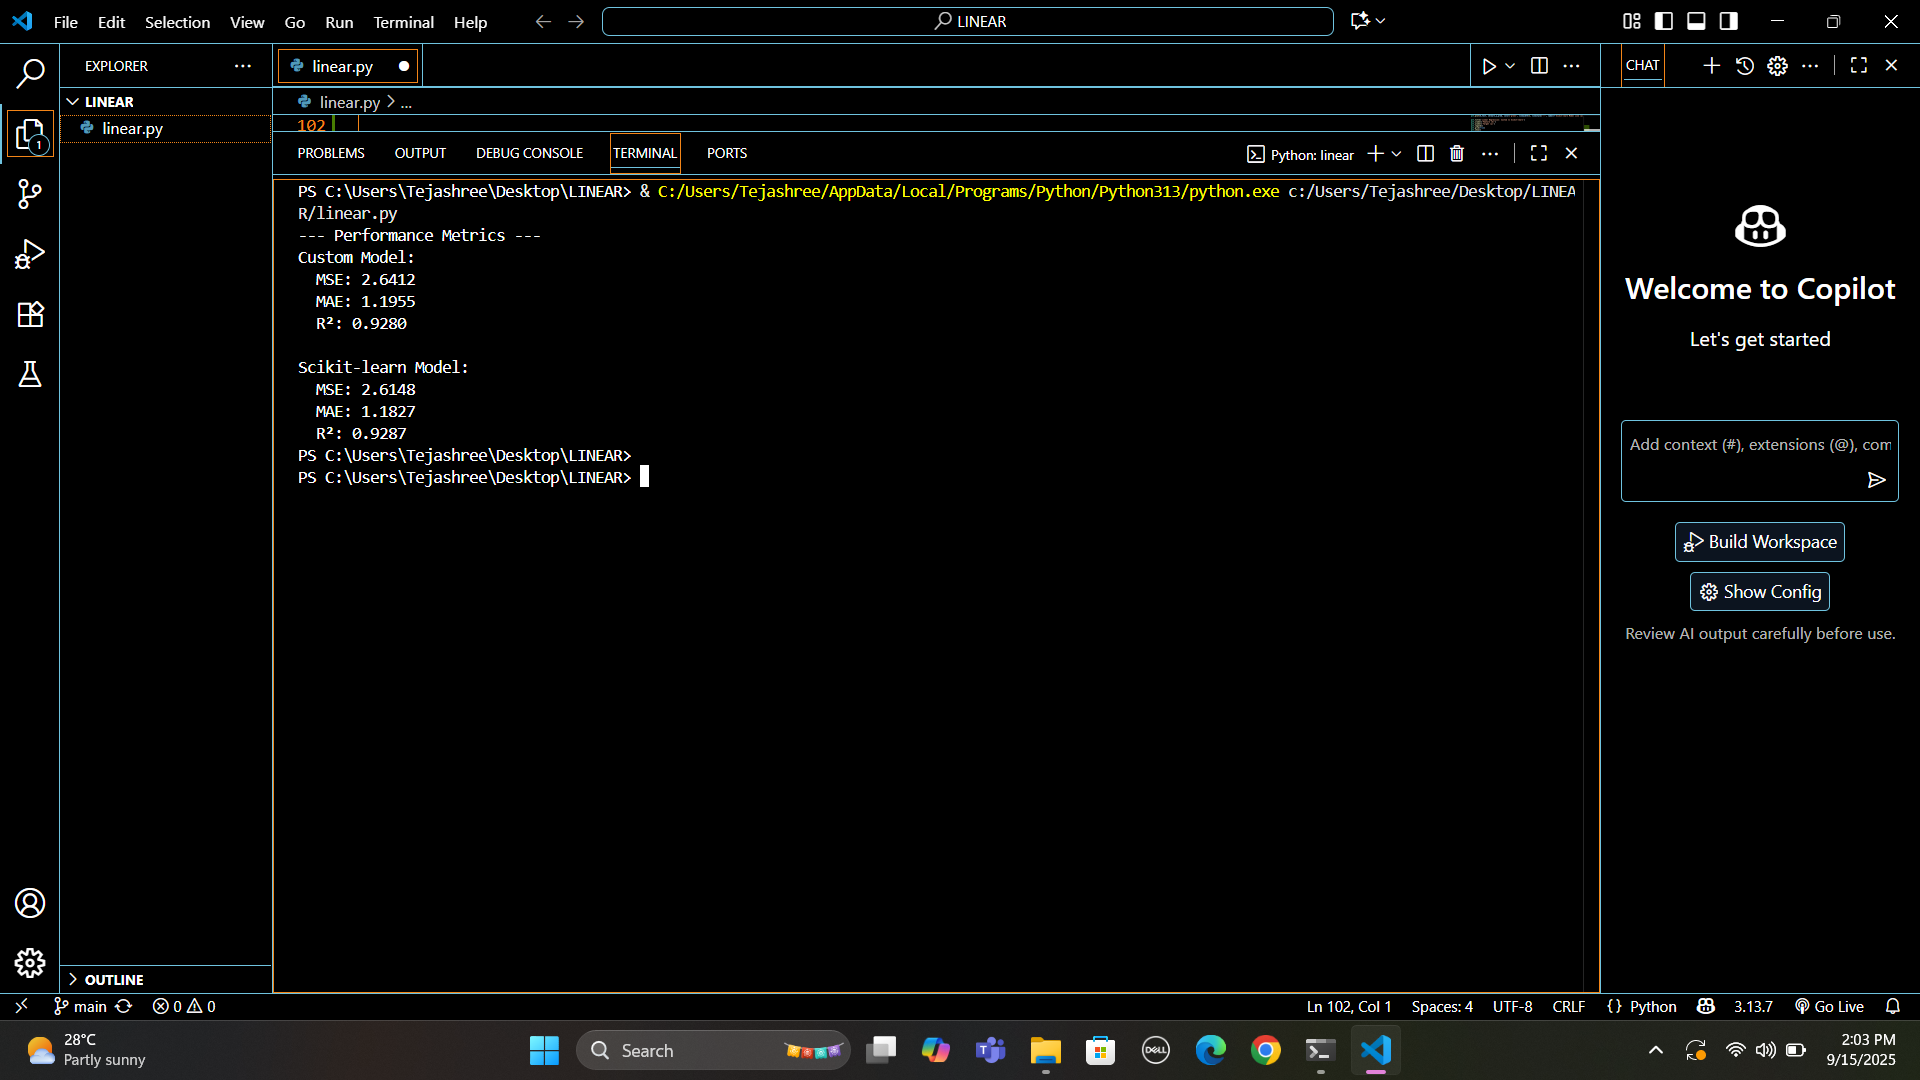
TASK 5: LINEAR REGRESSION FROM SCRATCH
Objective : Dive into the core of machine learning by implementing Linear Regression from scratch using , and compare its performance with the scikit-learn implementation. Use the California Housing dataset to evaluate your model on real-world data.
Learnings and Outcomes :
Linear Regression is a machine learning algorithm used to predict continuous values based on given input data. It assumes a linear relationship between the dependent variable (output) and independent variables (inputs). The equation for a simple linear regression is:
y=mx+b
Where ,y is the predicted value,m is the slope(weight in linear regreesion),x is the input values.
Linear regression is commonly used in predicting house prices, sales forecasting, and risk analysis.
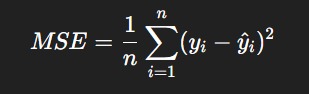
To measure how well the model is performing, error metrics are used. The Mean Squared Error (MSE) calculates the average of the squared differences between actual and predicted values:
Similarly, the Mean Absolute Error (MAE) calculates the average of the absolute differences:
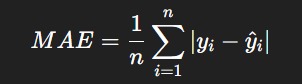
Here yi is the actual value ,other one is predicted value and n is the total number of data points.
To make the model accurate,gradient descent is used to minimize the error by adjusting the slope(weight) and intercept.formula for gradient descent is,
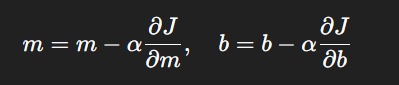
Where, alpha is the learning rate controls the step size. By continuously updating these values, the model finds the line of best fit, which gives the most accurate predictions.
Here is the github linkclick here
TASK 6 THE MATRIX PUZZLE :
Objective :
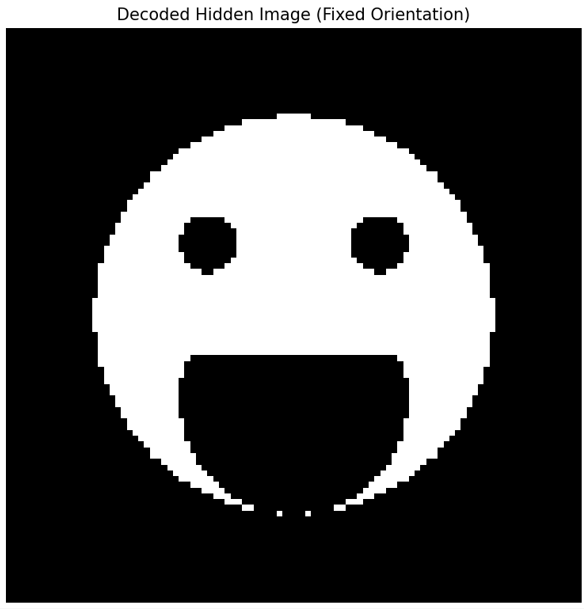
Get hands-on with NumPy and Matplotlib by solving a visual puzzle. You’ll be given a scrambled matrix, and your mission is to decode it into a hidden image using NumPy operations and visualization techniques.
Learnings and Outcomes :
Familiarized with numpy operations like reshaping, slicing, transposing, and flipping arrays to decode a jumbled matrix into a hidden image ,this task gave me practical experience with numpy. Additionally ,I learned how to use Matplotlib's imshow() function to visualize data ,making sure that the dimensions and orientation are correct for a clear display. This exercise improved my knowledge about data manipulation and numerical computing concepts. All things considered ,it improved my capacity to use python libraries for practical applications such as data visualization and image processing
here is the repositoryclick here
TASK 7 CREATE A PORTFOIO WEBPAGE:
Objective :
Create a website to showcase your portfolio, including information about yourself, interests, projects, and social media profiles. Ensure the site is responsive and pushed to a git repository. Use any CSS framework of your choice.
Outcomes :


click here to view the files I used for making my webpage.
TASK 8 WRITING RESOURCE ARTICLE USING MARKDOWN:
Objective :
Write a technical resource article on a particular use case or application of UAVs.
Learnings and Outcomes :
I wrote a resource article on miami international airport.
 click hereto see my resource article.
TASK 9 TINKERCAD
Objective :
Create a Tinkercad account and familiarize yourself with the application. Simulate a simple circuit using an ultrasonic sensor to estimate the distance between an obstacle and the sensor, and display the results on the serial monitor. Create a radar system using an ultrasonic sensor and servo motor to detect objects within a certain range.
Procedure :
Components for the task

The circuit connections
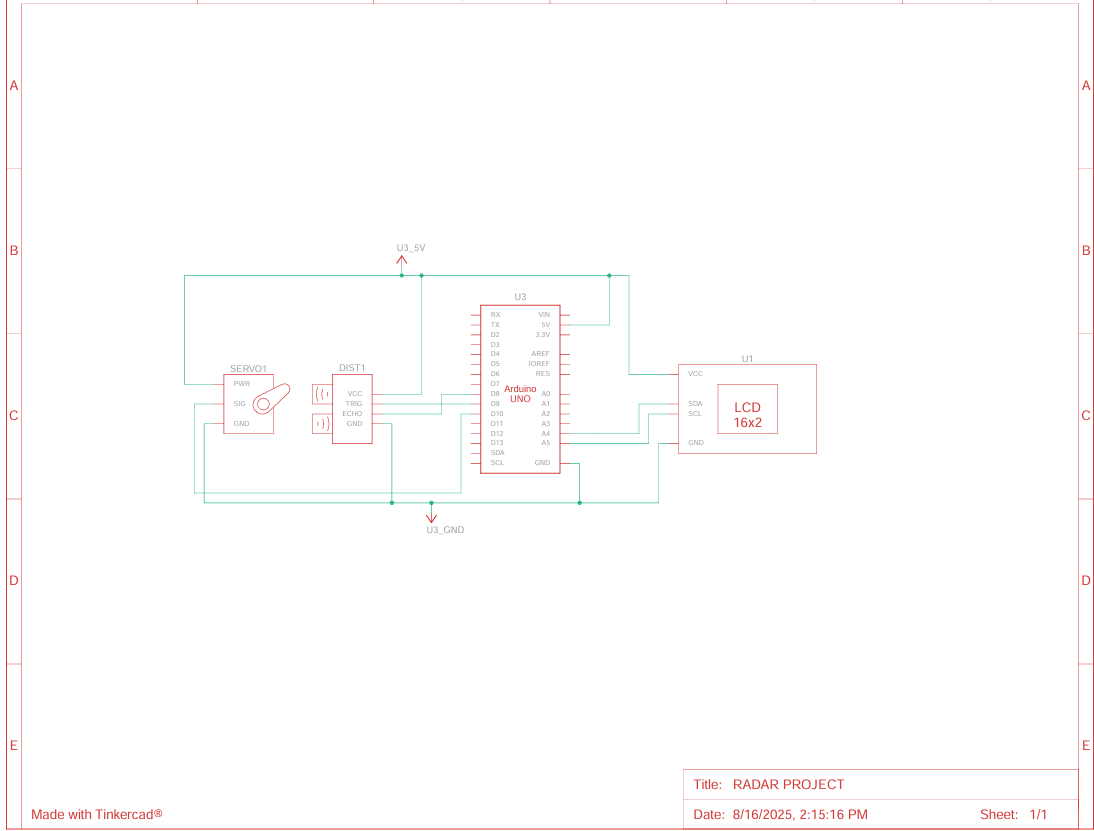
The look after the connection:
.png?raw=true)
Learnings And Outcomes :
1.Working of the Ultrasonic sensor:
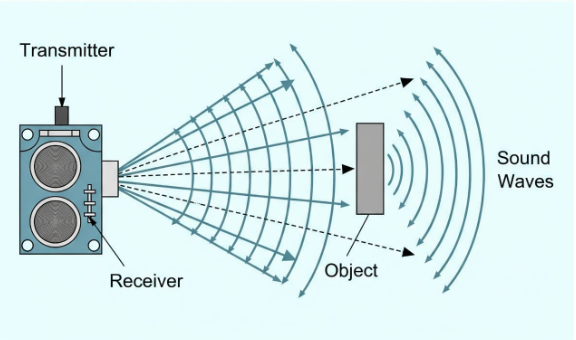
Ultrasonic sensor works on the principle of ECHOLOCATION
It uses sound waves that are "ultra" sonic, meaning they are at a frequency higher than humans can hear (typically above 20 kHz).
1.Transmission: The transmitter component of the sensor emits a short burst of ultrasonic sound waves. These waves travel outward in a cone-like shape.
2.Reflection: When these sound waves encounter an object in their path, they bounce off its surface.
3.Reception: The reflected waves, or "echoes," travel back towards the sensor and are detected by the receiver component.
To know the distance between the target and the sensor, the sensor calculates the amount of time required for sound emission to travel from transmitter to receiver. The calculation is done as follows:
D=T*c/2
where, ‘T’ corresponds to time measured in seconds,
'c' corresponds to speed of sound= 343 m/s
2. About Servo motors and RADAR Technology :
A servo motor is a motor that provides precise angular control, allowing it to rotate to and hold a specific position using feedback. Radar (Radio Detection And Ranging) uses radio waves to detect objects by transmitting a signal and analyzing its returning echo.
click here to view my Tinkercad circuit.
TASK 10 SPEED CONTROL OF DC MOTOR:
Objective :
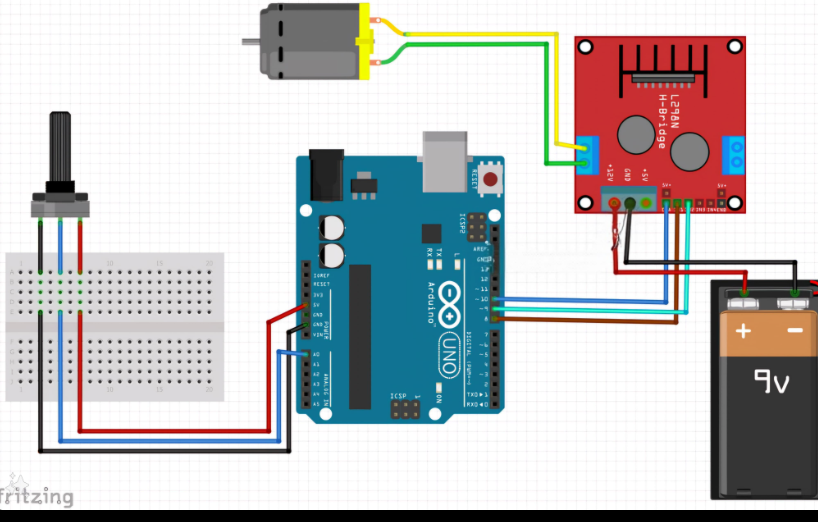
Understand the control DC motors using the L298N motor driver and the Arduino board. Using an UNO and H-Bridge L298N motor driver, control the speed of a 5V motor.
Procedure :
I basically followed this circuit connections
Learnings and Outcomes :
First i learnt about the output, input and enable and power pins of L298N motor driver .I learnt about which pins control speed and which control direction .I also learnt about the pins of potentiometer .I familiarized myself withe the concept of PWM and duty cycle.
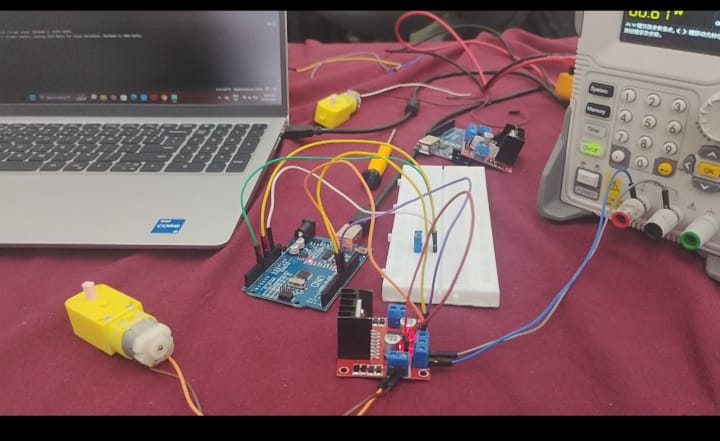
click here for the video.
TASK 11 LED TOGGLE USING ESP32:
Objective :
Learn how to use an ESP32 to create a standalone web server that controls an LED connected to the ESP32 GPIOs. Use the Arduino IDE to code and upload the program to the ESP32.
Procedure :
At the first I made the connections as shown in the below image , the required components are 2 LEDs,ESP32,breadboard, and two 330ohm resistors.
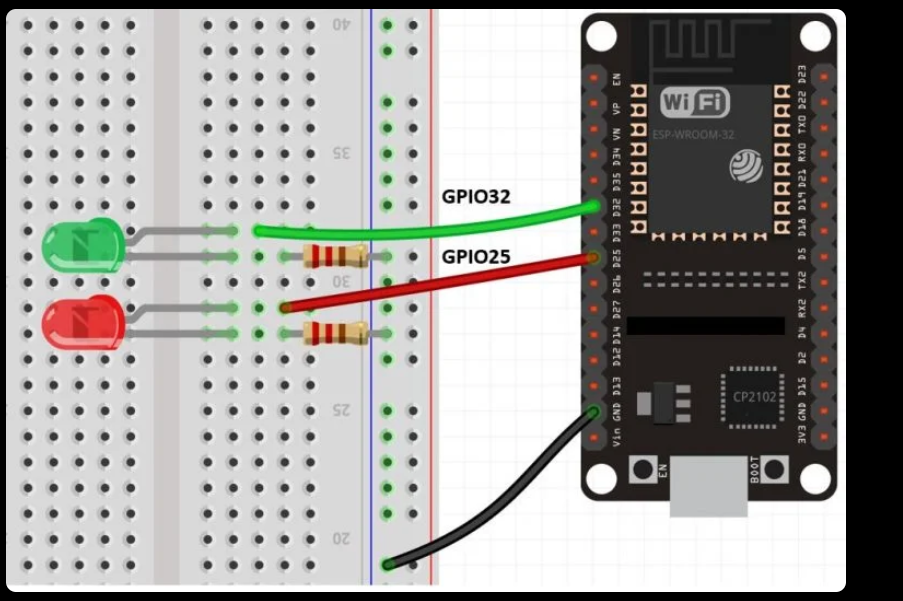
and then i copied the required code to Arduino IDE, and entered the mobile hotspot credentials into the code. And then the IP address will occur later ,from IP address we can control led, then i pasted the IP address to the browser and finally toggled the LED's.
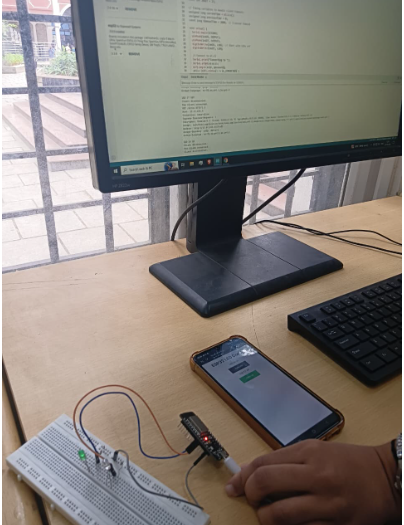
Learnings and Outcomes :
The image of the circuit i did in lab is shown below
click here for the video .
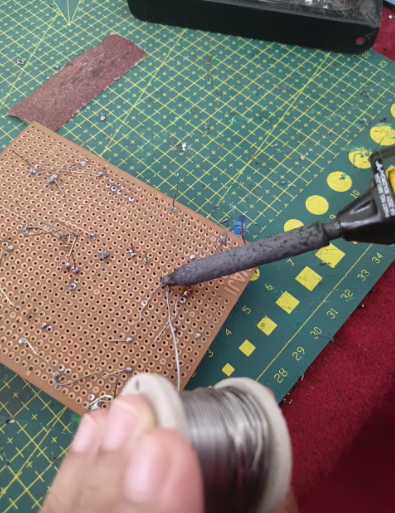
TASK 12 SOLDERING PREREQUISITS:
Objective :
To Learn about the soldering equipment and perform basic soldering on a perf board, for example a LED circuit.
Learnings and Outcomes :
I have soldered the resistor. I inserted the resistor leads through the holes of the perf board. And then after heating the soldering gun i placed it at the hole where the resistor was inserted and then by feeding solder wire into the joint the soldering was completed .And then checked that a stronger solder is formed or not .
To continue reading my report(TASK 13-15 & DOMAIN SPECIFIC TASKS) click here