
COURSEWORK
Zoya's AI-ML-001 course work. Lv 1
| Zoya Khanum | AUTHOR | ACTIVE |
LEVEL 0 REPORT
18 / 3 / 2026
Task 1: 3D Printer
Aim
To understand the working principle of a 3D printer and learn how digital designs are converted into physical objects.
Key Learnings From the Task
- Here, I learned the basic concept of 3D printing. Also leanred the functions of main components like extruder, nozzle, print bed, and stepper motors.
- Learned that STL files contain the 3D model, and they are converted into G-code using slicing software so that the printer understands how to print the object in step-by-step layer deposition.
- I also learned the importance of bed leveling and temperature settings for good print quality.
- So the process is:
3D Model → STL file → Slicer → G-code → 3D Printer
This task help me understand about the workflow of a 3D printer and also about the important settings to be done before starting the printing process.
Task 2: API
Aim
To understand what an API is, learn how it works, and build a simple interface that fetches and displays data using an API.
Key Learnings
- I learned what an API (Application Programming Interface) is and how it allows different applications to communicate with each other.An API is a set of rules and protocols that allows different software applications to communicate with each other.
- I understood how APIs are used to request and receive data from external services.
- Using API, I built a user interface of a weather API which fetched real-time data from an external service.
By this task, I understood how to send a request to the weather API using the API key and city name. Also learned how API data can be displayed on a webpage to show live weather information.
Check my work on the given link Weather API
Task 3: Working With Github
Aim
To understand the basics of Git and understand how it is used to manage and track changes in a project.
Key Learnings
During this task, I got introduced to Git and why it is useful when working on projects. I learned that Git helps in keeping track of different versions of the code so changes can be managed easily. I also got to know how to create and work with a repository.
While doing the task, I used some basic Git commands like add, commit, push, and pull which are used to save changes and update them in the repository. I also understood how branches are used so that new features or fixes can be worked on separately without disturbing the main code.
Overall, this task helped me understand the basics of Git and how it is useful for version control and collaboration while working on projects. Also in this task, I created a fork of Github repository, fixed the error in the main file and made a new pull request. Open the fork repository.
(bug-fix)
Task 4: Get familiar with the command line on Ubuntu
Aim
To get familiar with Ubuntu and understand how basic commands can be used to navigate and work i a Linux environment.
Key Learnings
Through this task, I got introduced to Ubuntu and how it is used as an operating system. I learned that many tasks in Ubuntu are done through the terminal using commands instead of a graphical interface.
I understood how to navigate between directories, create folders, and manage files using basic commands. I also learned the difference between absolute and relative paths and how they are used while moving through directories.
I followed the below sub-tasks
- Created a folder named test
- Changed directory into that folder
- Created a blank folder and listed the files present in the folder
- Created 2600 folders in the test folder
- Then, concanated the two files and displayed them on the terminal.
Task 7: Create a Portfolio Webpage
In this task, I worked on creating my own portfolio website to showcase my projects and basic information. I learned how a simple website can be structured using HTML, CSS and basic web development concepts.
While doing this task, I also understood how a project can be pushed to GitHub and managed through a repository. I worked with branches and commits while updating the website files. I also successfully pushed the complete website code to GitHub repository.
Task 9: Tinkercad
Aim
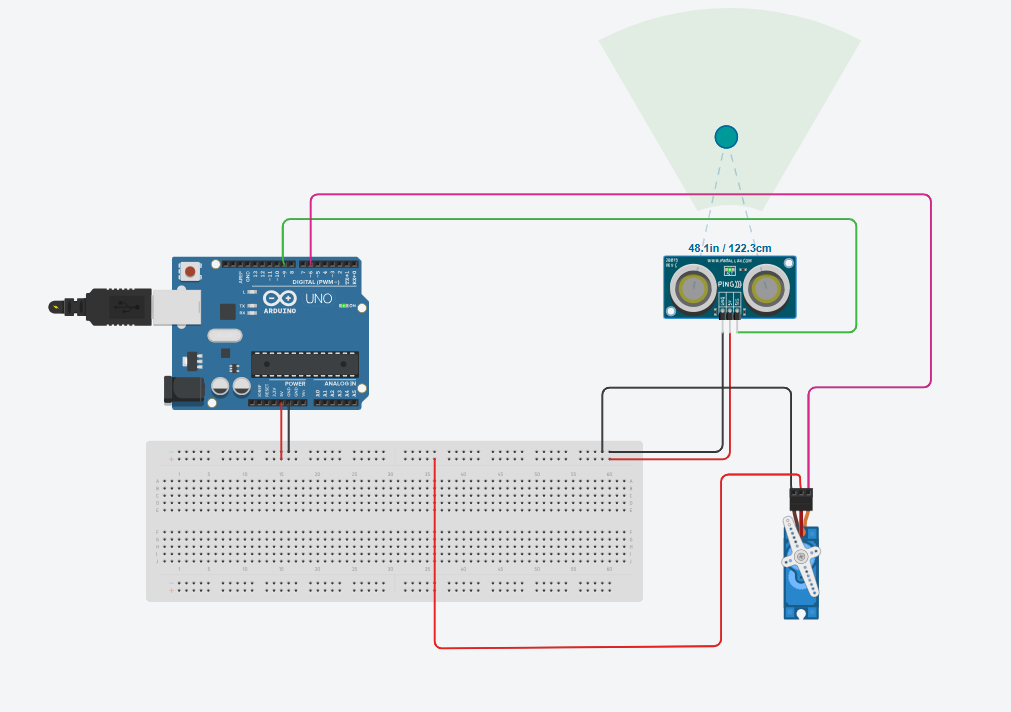
To get familiar with the tinkercad application, understand the circuits in it and stimulate a simple circuit using ultrasonic sensor.
Key Learnings
TinkerCAD is a free-of-charge online platform that empowers users to create 3D designs, simulate circuits, and prototype electronics in a user-friendly environment, making it a ideal tool for both beginners and experienced makers. I created a Tinkercad accound and got familiar with the circuits using the given reference.
In this task, I worked with an ultrasonic sensor in Tinkercad and understood how it is used to measure distance. I learned that the sensor works by sending ultrasonic waves and receiving the reflected signal, based on which the distance is calculated. Overall, this task helped me understand the basic working of an ultrasonic sensor and how it can be used in real-life applications like distance measurement.
.jpeg)
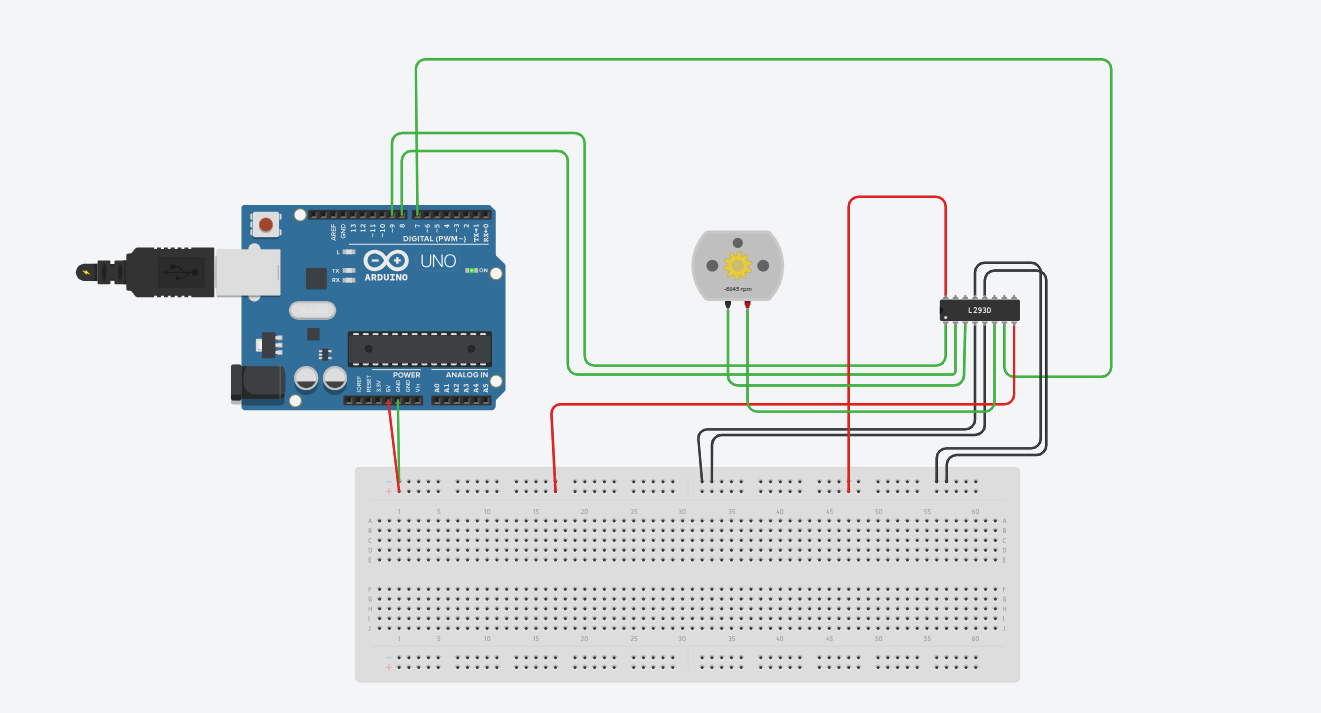
Task 10: Speed Control of DC Motor
Aim
To understand how the speed of a DC motor can be controlled using different techniques.
Key Learnings
In this task, I worked on controlling the speed of a DC motor and understood how its speed can be varied by changing the input conditions. I learned that the speed mainly depends on the voltage supplied to the motor.
While doing the setup, I got to know how components like motor driver (L298N) and Arduino are used to control the motor. I also understood how PWM (Pulse Width Modulation) is used to vary the speed by controlling the effective voltage.
Overall, this task helped me understand how motor speed control works practically and how it can be applied in real-world applications like robotics and automation.

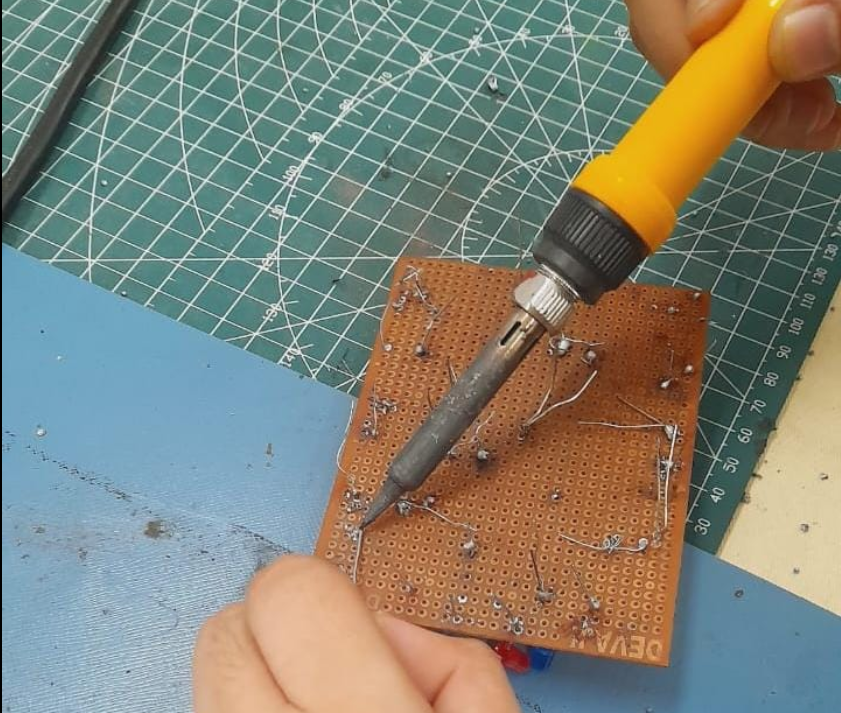
Task 12: Soldering
Soldering is the process of joining electronic components together by melting a metal alloy called solder around the connection points. This creates a permanent electrical and mechanical bond between parts, which can also be reversed using de-soldering techniques when needed.
Task 13:
Aim
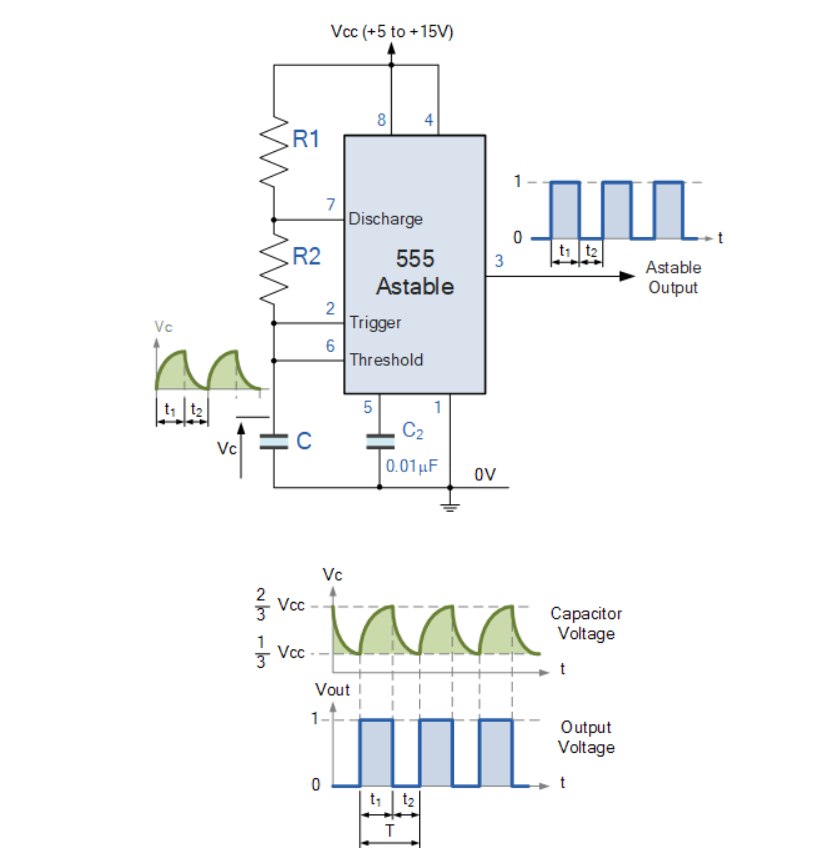
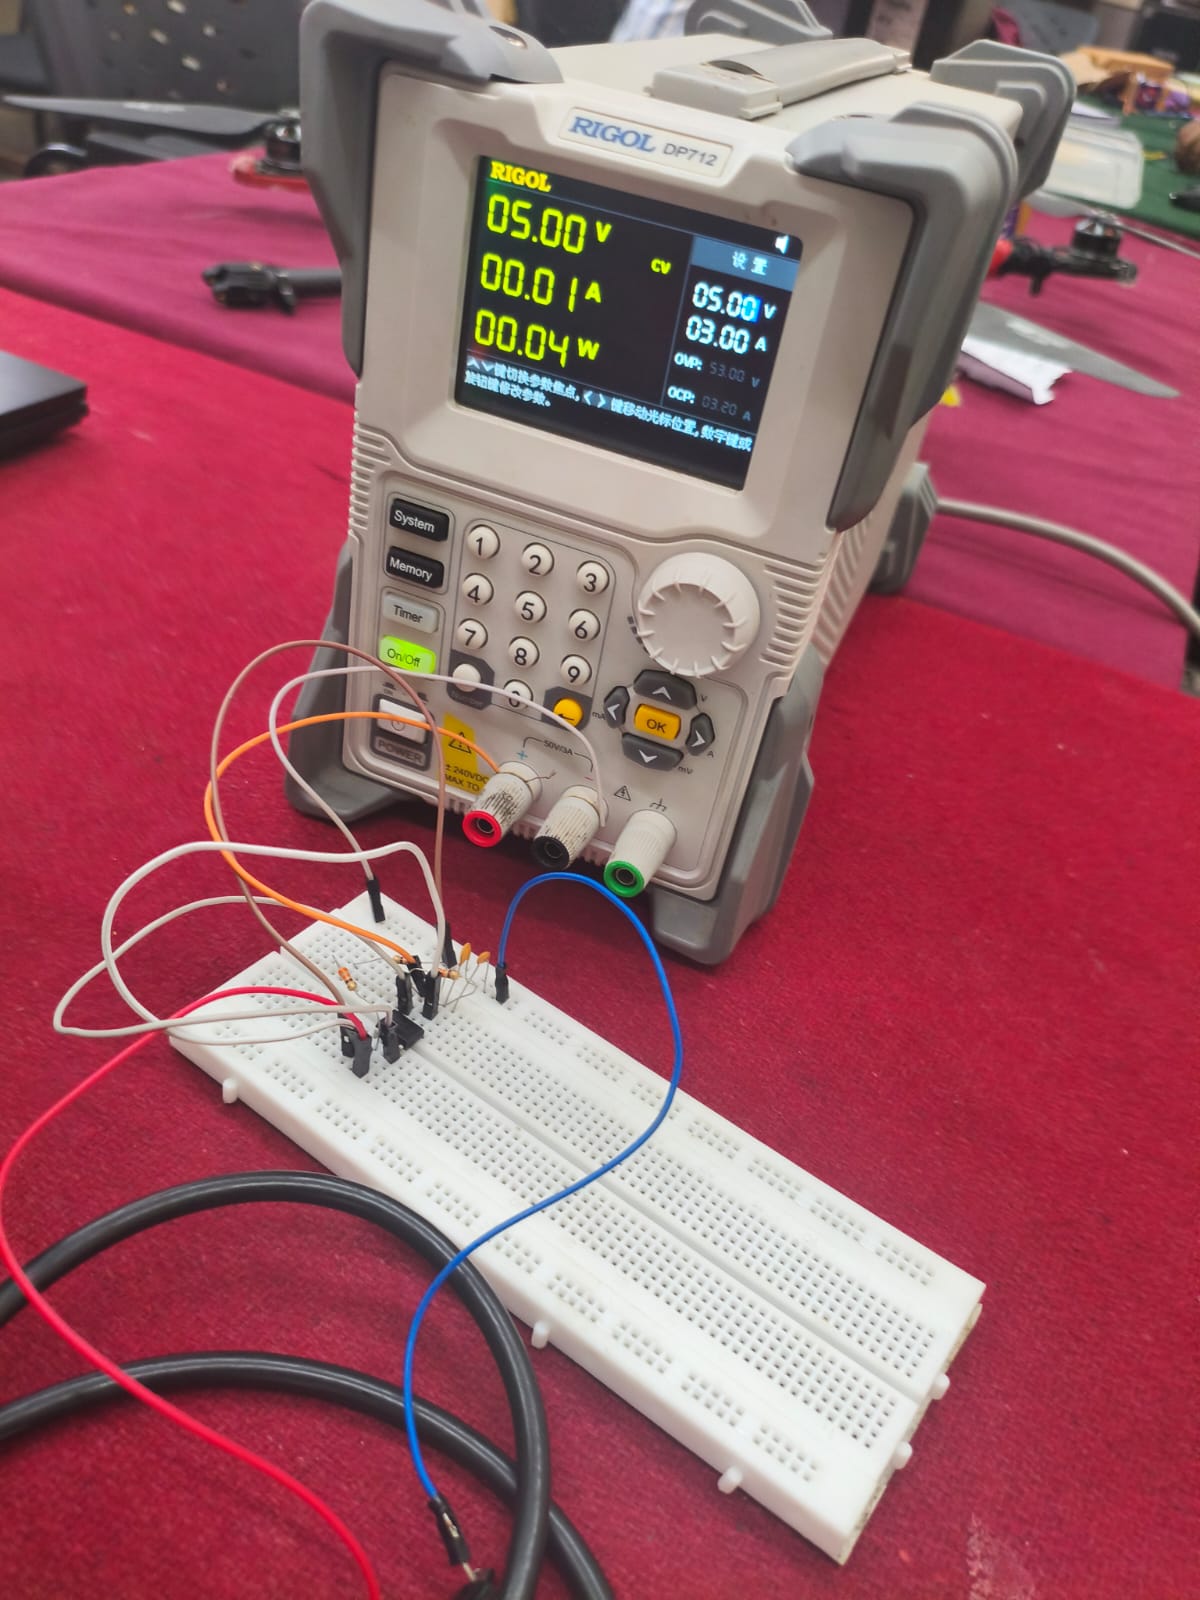
To understand the working principle of the 555 timer IC and study its different modes of operation such as astable and monostable.
Key Learnings
In this task, I gained a clear understanding of the working of the 555 timer IC and its importance in electronic circuits. I learned that it can operate in different modes such as astable mode (continuous signal) and monostable mode (one-time pulse).
I also understood how the charging and discharging of a capacitor plays a key role in determining the timing of the output. By varying the values of resistors and capacitors, the frequency and time period of the signal can be controlled.
Additionally, I learned how the 555 timer can be used to generate square waves, delays, and pulses, making it useful in applications like blinking LEDs, timers, and basic signal generation.
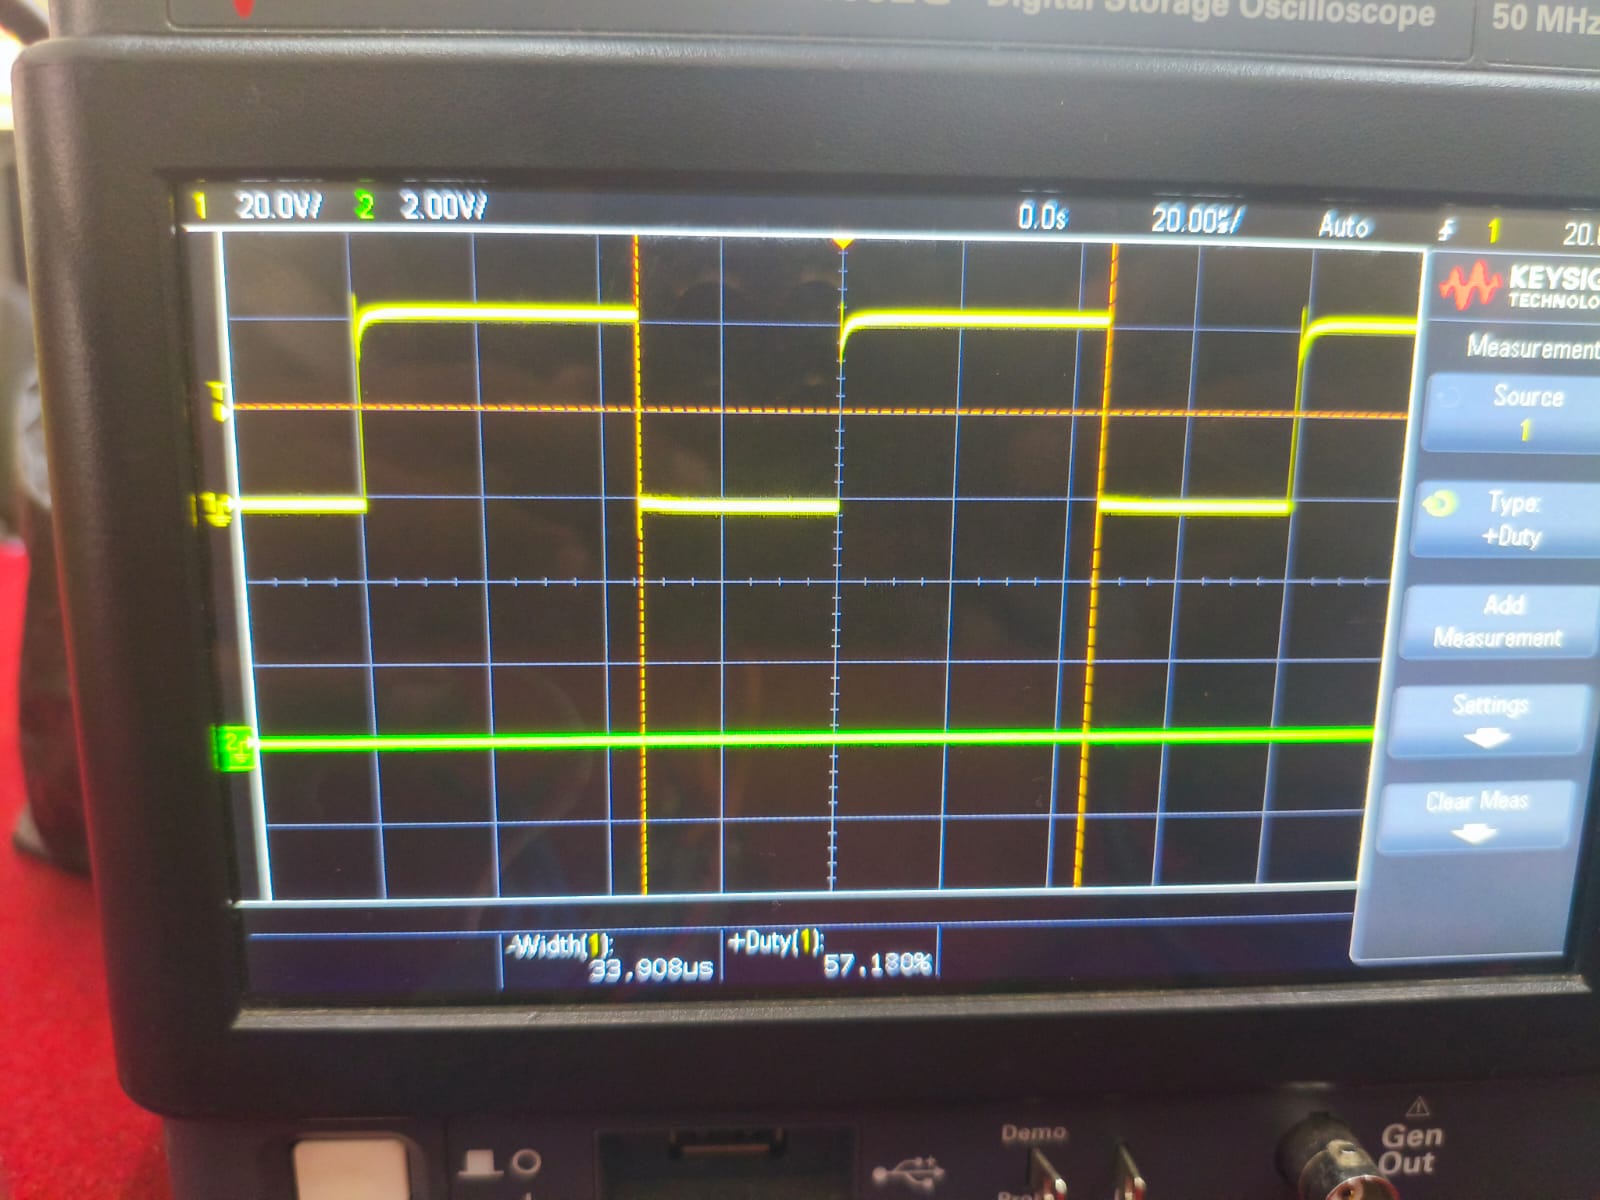
Also, designed a 555 astable multivibrator with duty cycle 60% forming square waves like output.
Task 14: Karnaugh Maps and Deriving the logic circuit
A Karnaugh Map (K-map) is a graphical method used to simplify Boolean expressions in digital electronics. It is a table-like diagram where all possible input combinations are arranged in a way that makes it easy to group similar values (usually 1s).
For 2 variables (A and B) Truth Table (with Output Y)
A   B   Y
0   0   0
0   1   1
1   0   1
1   1   0
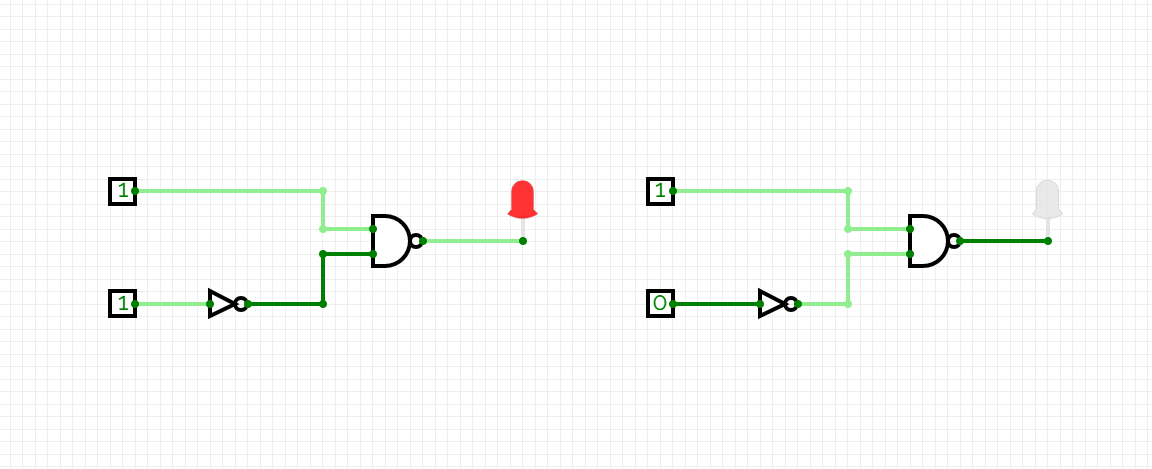
In this task, we had to make a simple burglar alarm using simple logic circuits. The alarm triggers (LED blinks) under two specific conditions:
- When the door is open (0) and key is not pressed (1) - unauthorized entry attempt.
- When the door is closed (1) but a key is pressed (0) - indicating a wrong key being used.
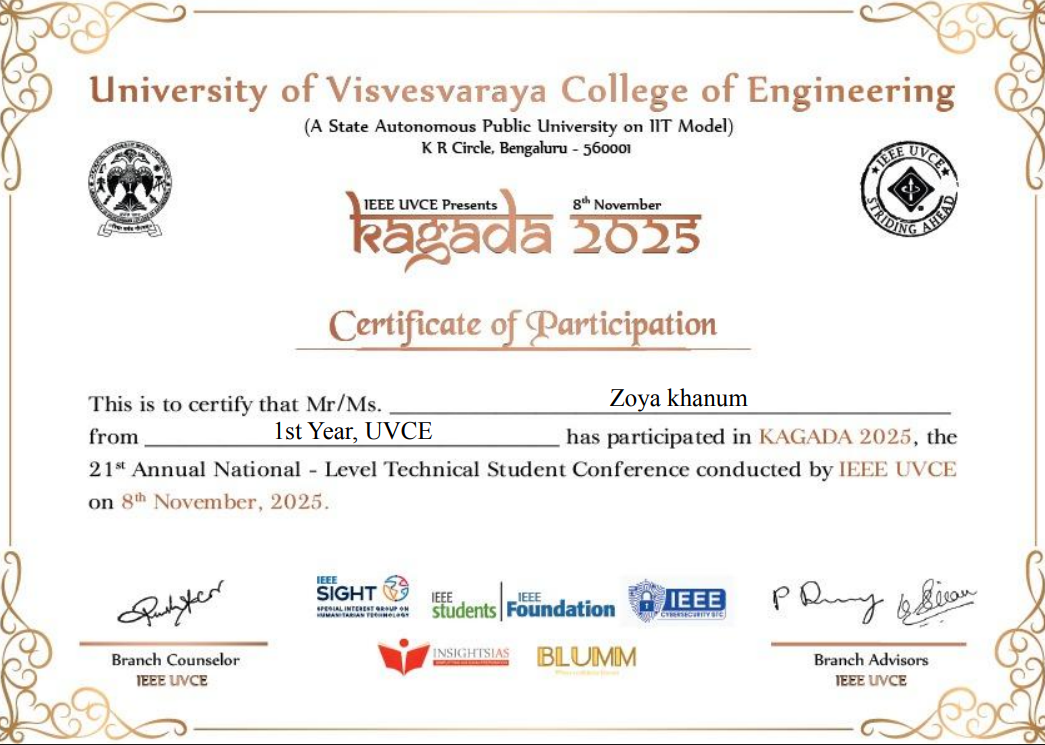
Task 15: Active Participation
Participated in Poster Presentation in KAGADA 2025.
Task 16: Datasheets report writing:
L293D Motor Driver Datasheet Report
1. Introduction
The L293D is a popular quadruple high-current half-H driver IC used to control DC motors and stepper motors in robotics and embedded systems. It allows bidirectional control of motors, meaning you can make them rotate forward and backward, and it can also handle multiple motors simultaneously.
2. Features
- Can drive two DC motors or one stepper motor.
- Operating voltage for motor (Vcc2): 4.5V – 36V
- Logic voltage (Vcc1): 5V
- Peak current per channel: 600 mA
- Built-in flyback diodes for protection against back EMF.
- Supports PWM for speed control.
- Can be directly interfaced with microcontrollers like Arduino, Raspberry Pi, etc.
3. Internal Circuit & ICs
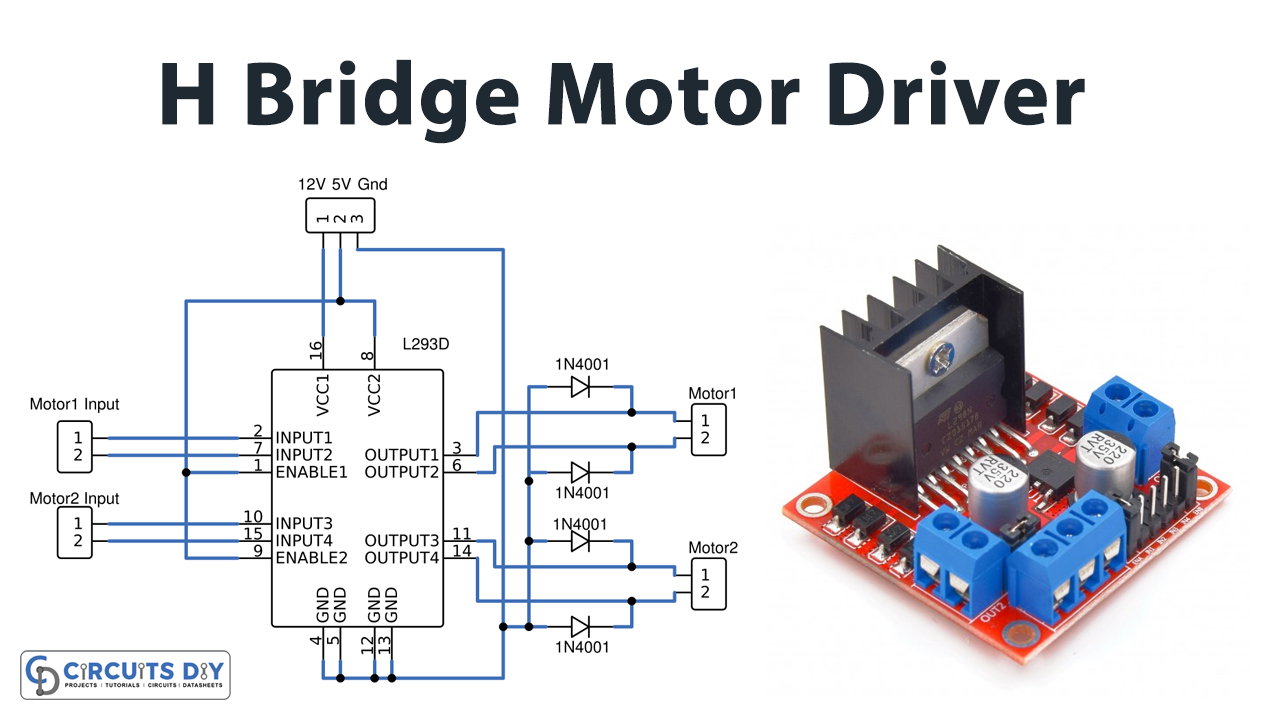
- The L293D is internally made of 4 half-H drivers, which combine to form 2 full H-bridges.
- Each H-bridge consists of 4 transistors arranged to allow reversible current flow through a motor.
- Logic inputs (IN1–IN4) determine the direction of the motor:
- HIGH-LOW → Motor rotates in one direction.
- LOW-HIGH → Motor rotates in opposite direction.
- HIGH-HIGH or LOW-LOW → Motor stops (brake).
IC Pinout Overview:
Pin	Function
1, 9	Enable 1 & 2 (PWM control)
2, 7	Input 1 & 2
3, 6	Output 1 & 2 (Motor terminals)
4, 5, 12, 13	Ground
8	Vcc2 (Motor supply voltage)
16	Vcc1 (Logic supply voltage)
10, 15	Input 3 & 4
11, 14	Output 3 & 4 (Motor terminals)
4. H-Bridge Concept
- An H-Bridge allows current to flow in either direction through a motor.
- L293D has 2 H-bridges, which is why it can drive 2 motors independently.
- Enables direction control by toggling the input pins.
Diagram Concept:
   +Vcc
    |
  [Transistor]
    |-----> Motor
  [Transistor]
    |
   GND
5. PWM (Pulse Width Modulation)
- PWM allows speed control of DC motors.
- By applying a PWM signal to the Enable pin (EN1 or EN2):
- Duty cycle 100% → Full speed
- Duty cycle 50% → Half speed
- Duty cycle 0% → Motor stops
6. Applications
- Robotics (wheeled robots, robotic arms)
- Automation projects
- Stepper motor control
- Small DC motor interfacing with microcontrollers
7. Advantages
- Simple interface for bidirectional motor control.
- Can drive motors with high current.
- Integrated protection diodes prevent damage from back EMF.
- Compact IC: saves space in circuits.
Task 17: Introduction to VR
Virtual Reality (VR) is a technology that creates a completely immersive digital environment where the user feels like they are physically present inside a virtual world. This is usually experienced using devices such as VR headsets, which block out the real world and replace it with a computer-generated environment.
In contrast, Augmented Reality (AR) does not replace the real world but instead adds digital elements on top of it. For example, AR can overlay 3D objects, text, or animations onto the real environment using a mobile phone or smart glasses.
I understood that the main difference between VR and AR lies in how they interact with the real world:
Virtual Reality (VR) creates a completely virtual environment. The user is fully immersed and cannot see the real world while using it. It is commonly used in gaming, simulations, and training.
Augmented Reality (AR) enhances the real world by adding virtual elements to it. The user can still see their surroundings along with digital overlays. It is widely used in applications like filters, navigation, and shopping experiences.

For Domain Specific Tasks click-here