
COURSEWORK
Nawaz's D-P-001 course work. Lv 1
| Nawaz Hussain | AUTHOR | ACTIVE |
Nawaz's D&P Level 0 Report
22 / 3 / 2026
Task 01 – 3D Printing
Objective
The objective of this task was to understand how a 3D printer works and to learn about STL files, slicing software, and basic printer settings.
For this task, an STL model was downloaded from the internet, opened in slicing software, and prepared for printing.
Learnings
PLA Material
PLA (Polylactic Acid) is one of the most commonly used materials in 3D printing. It is made from renewable resources such as corn starch and sugarcane. PLA is easy to print with and is widely used for beginners.
Bed Temperature
PLA can sometimes be printed without heating the print bed. However, using a heated bed improves adhesion and helps the first layer stick properly. A bed temperature of around 50–60°C works well for PLA.
Cooling
The cooling fan of the printer helps the layers solidify faster. Proper cooling improves print quality and helps maintain better detail in the printed object.
Printing Speed
Printing speed also affects the final quality of the print. A moderate speed of around 50–60 mm/s provides a good balance between print quality and printing time.
Post-Processing
Joining Parts
If a model is printed in multiple parts, they can be joined using adhesives such as super glue (cyanoacrylate) or epoxy.
Painting
3D printed objects can be painted after printing to improve their appearance or add color.
Sanding
The surface of a printed object can be smoothed using sandpaper. Sanding should be done gently using finer sandpaper to avoid damaging the plastic.
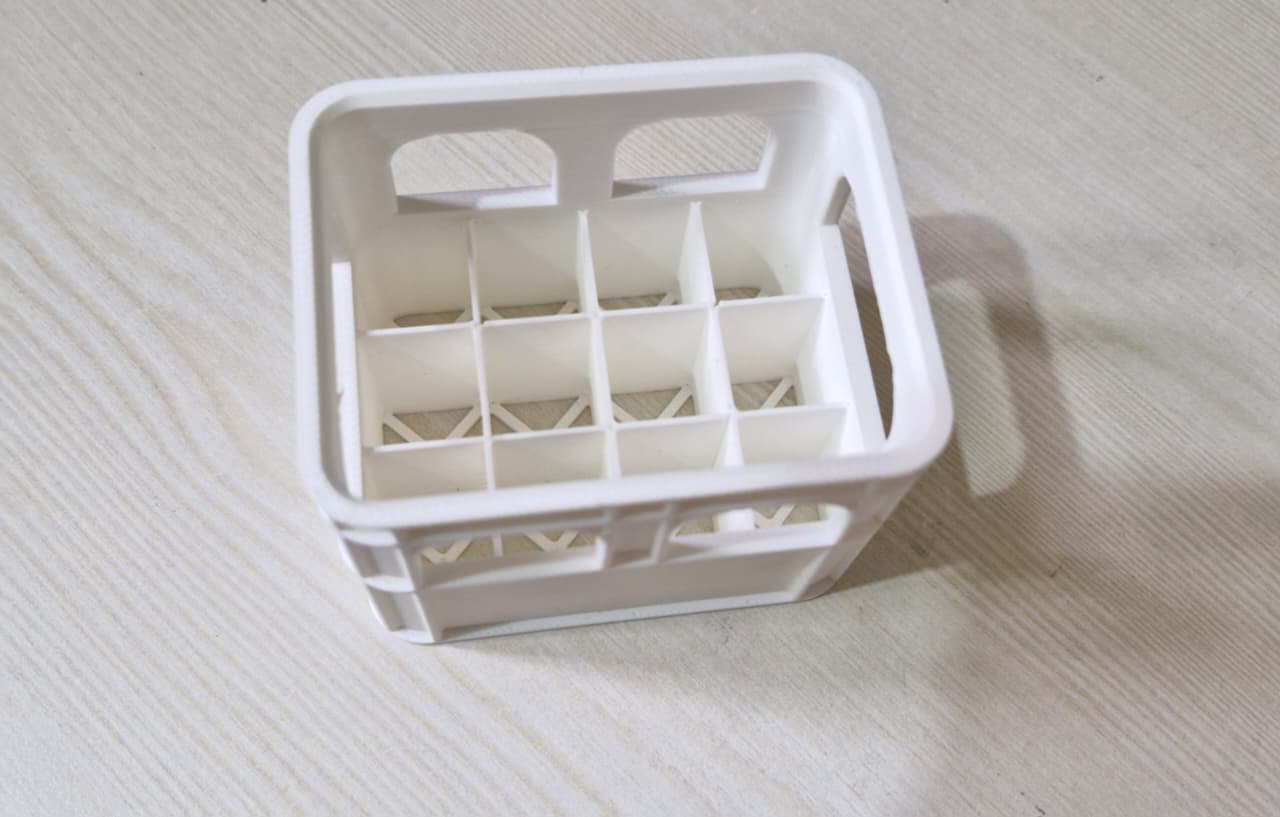
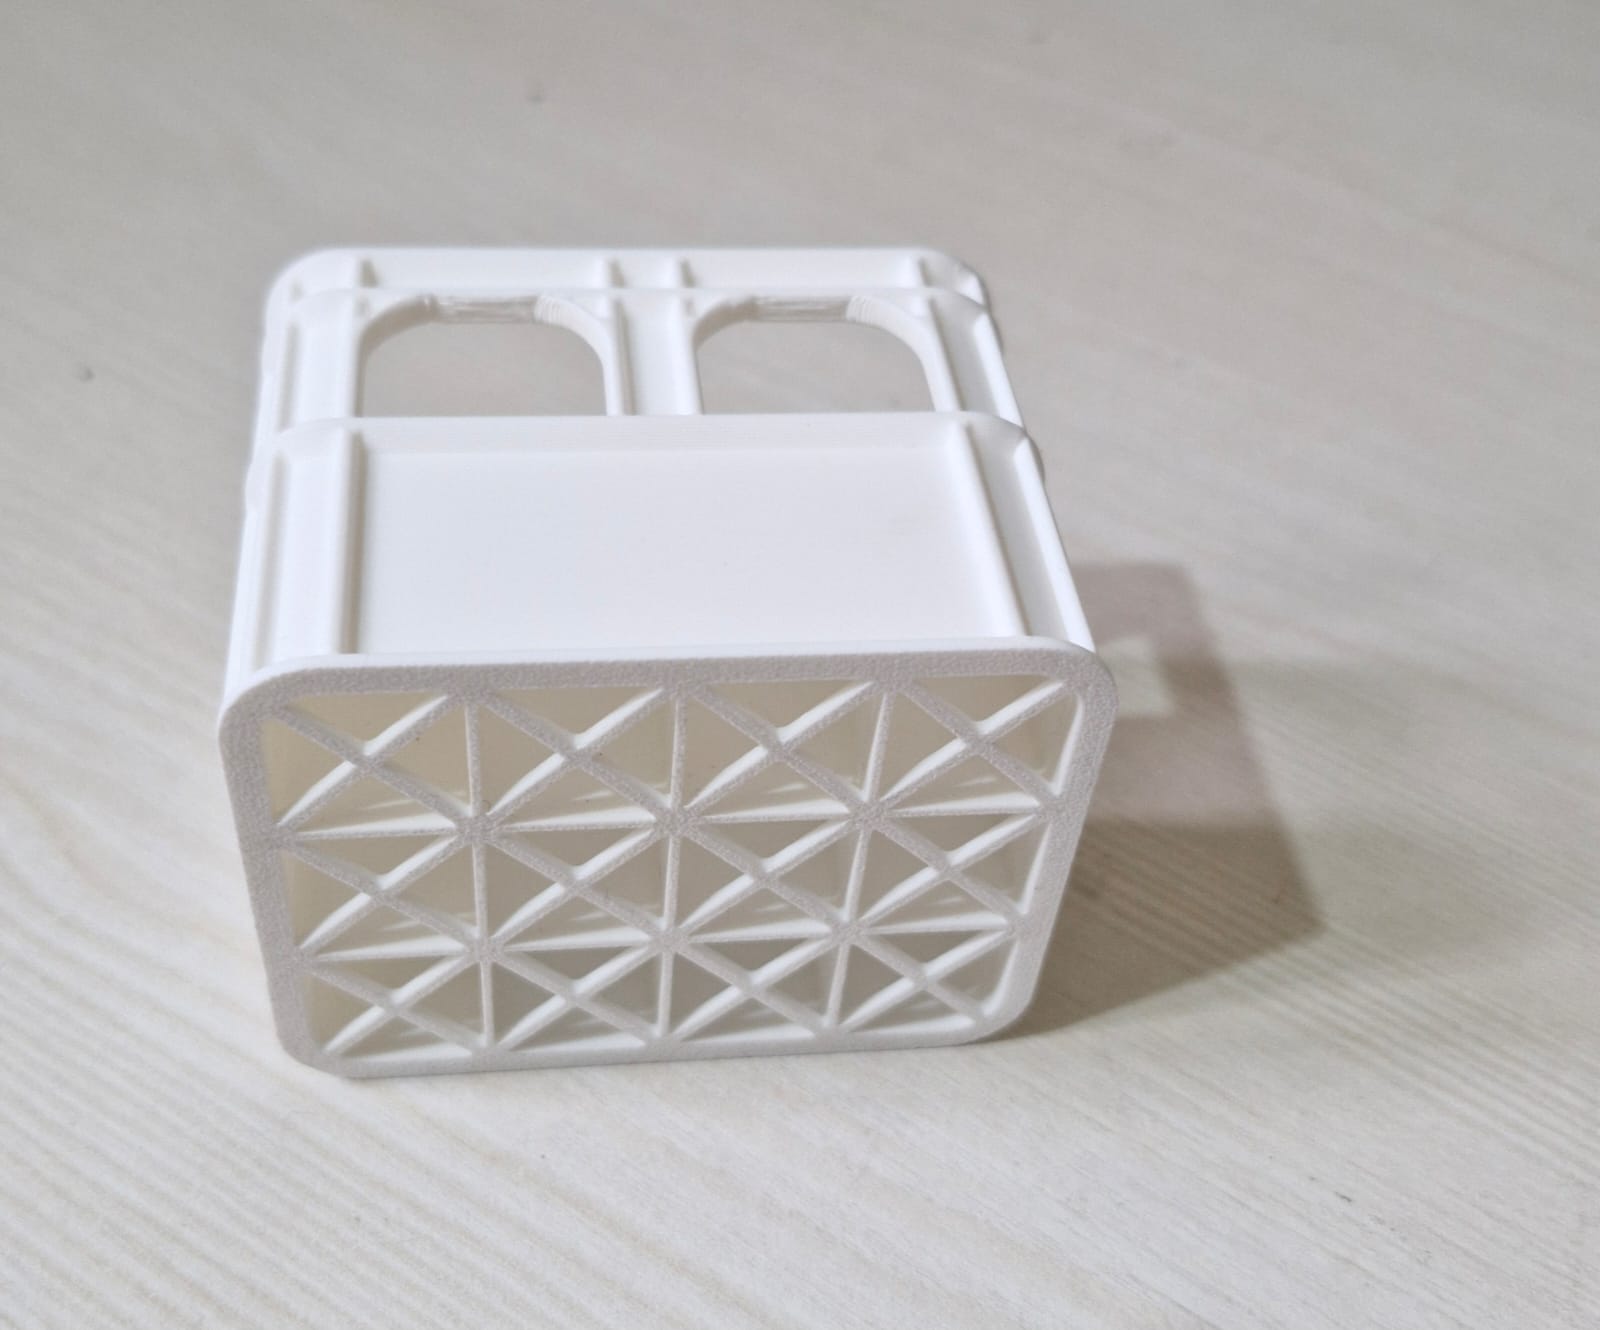
My 3D Print
Below are the images of the final 3D printed model.
Task 02 – API
Objective
The objective of this task was to understand how APIs work and how applications can fetch data from external services. A simple web interface was created that retrieves movie information using a movie API.
Learnings
Understanding APIs
An API (Application Programming Interface) allows different software applications to communicate with each other. It enables a program to request data from another service and receive a response.
API Requests and Responses
When a user searches for a movie, the application sends a request to the movie API. The API processes the request and returns information such as the movie title, poster, genre, rating, and plot.
User Interface Development
A basic movie search interface was created where users can type the name of a movie and view its details.
Practical Example
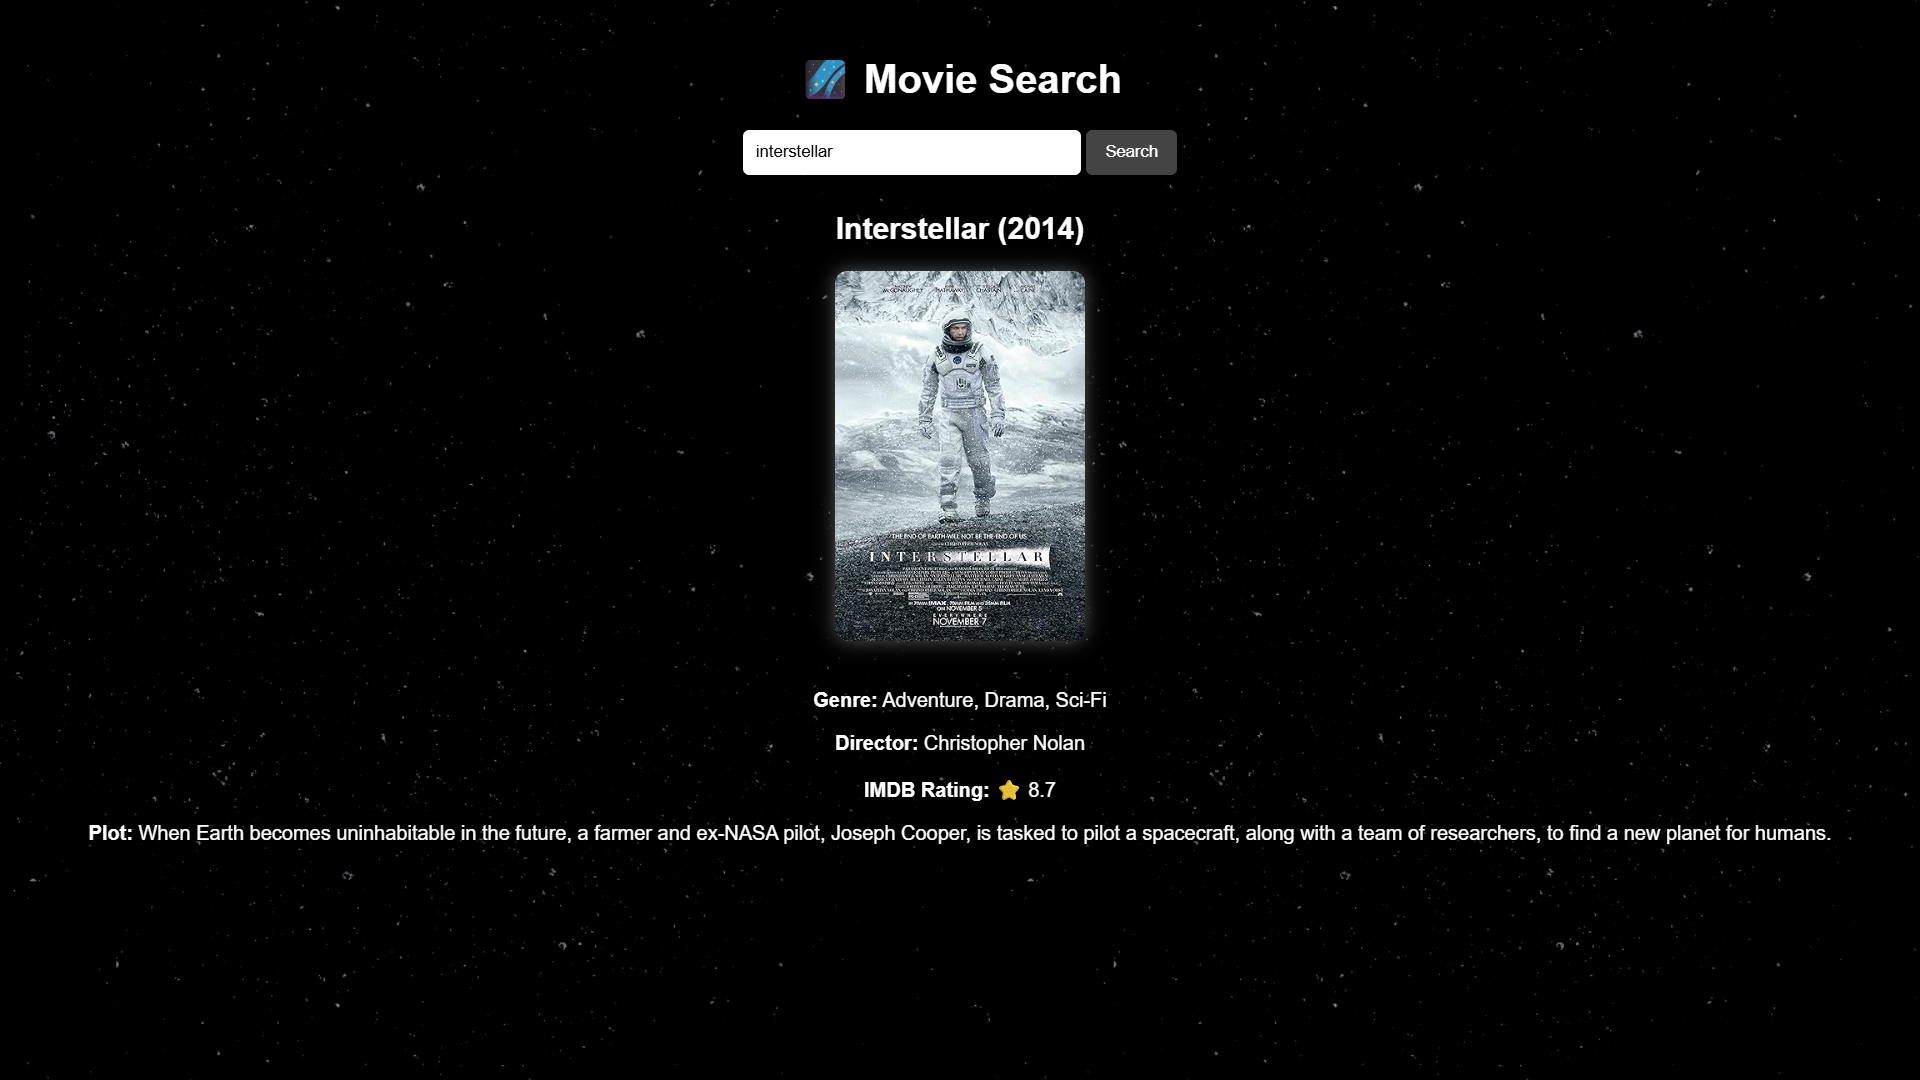
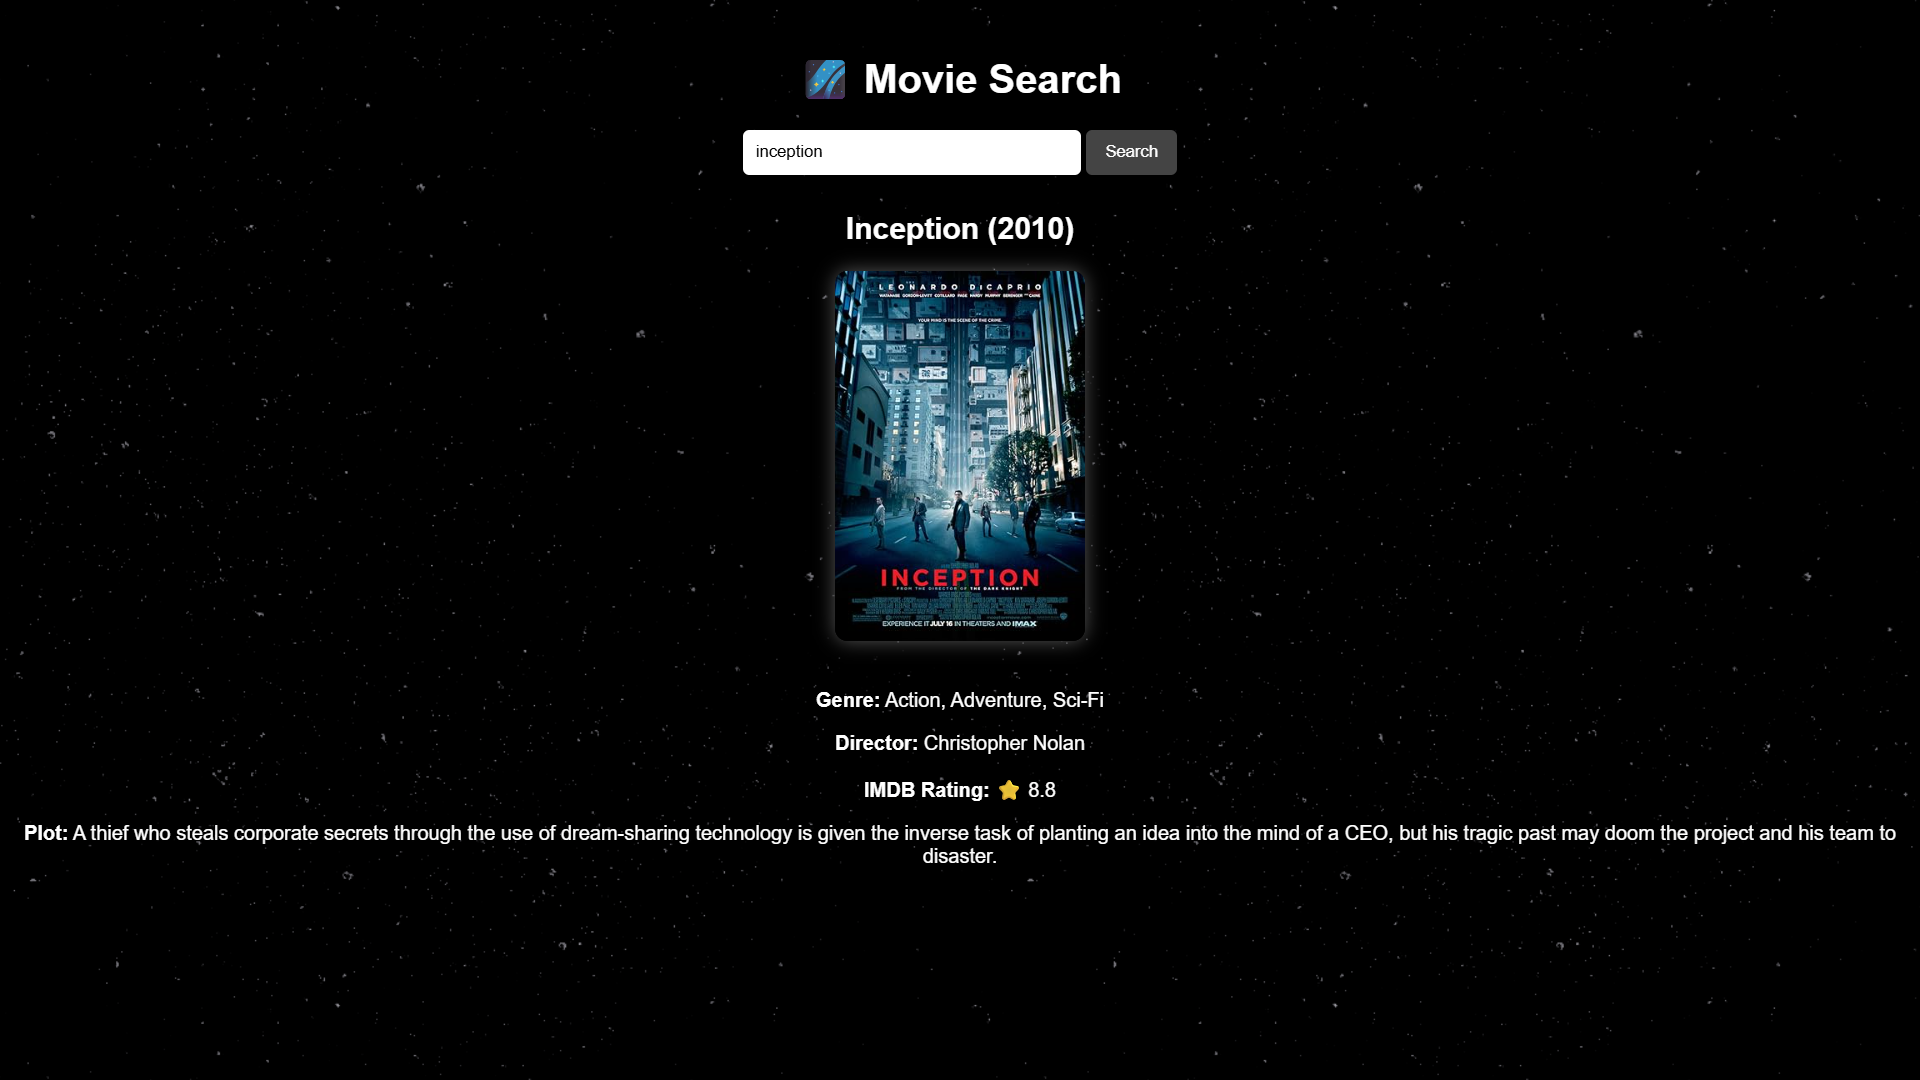
The application can fetch details for movies such as Interstellar and Inception. The API returns information including the poster, genre, director, IMDb rating, and a short description.
Practical Understanding
Through this task, I understood how a webpage can connect with an external API, send requests, receive data, and display the information dynamically.
Screenshots
Movie Search – Interstellar
Movie Search – Inception
Task 03 – Working with GitHub
Objective
The objective of this task was to understand how GitHub works and to learn the basic workflow such as repositories, forks, issues, and pull requests by exploring the provided repository.
Learnings
Understanding GitHub
GitHub is a platform used for version control and collaboration. It allows developers to store their code in repositories and work together on projects.
Repository Management
I learned how to create new repositories, manage files inside them, and delete repositories when they are no longer needed.
Forking a Repository
The provided repository was forked into my GitHub account so that I could explore and work on it independently.
Making Changes
I explored the repository structure and understood how changes can be made and later contributed back through pull requests.
Practical Understanding
Through this task, I became familiar with the GitHub interface and the basic workflow used in collaborative software development.
Task 04 – Command Line on Ubuntu
Objective
To get familiar with the Ubuntu command line and understand how files and directories can be created and managed using terminal commands.
Methodology
The Ubuntu terminal was used to practice basic commands for directory navigation, file creation, and file management. A folder named test was created and different commands were executed inside it to understand how command line operations work.
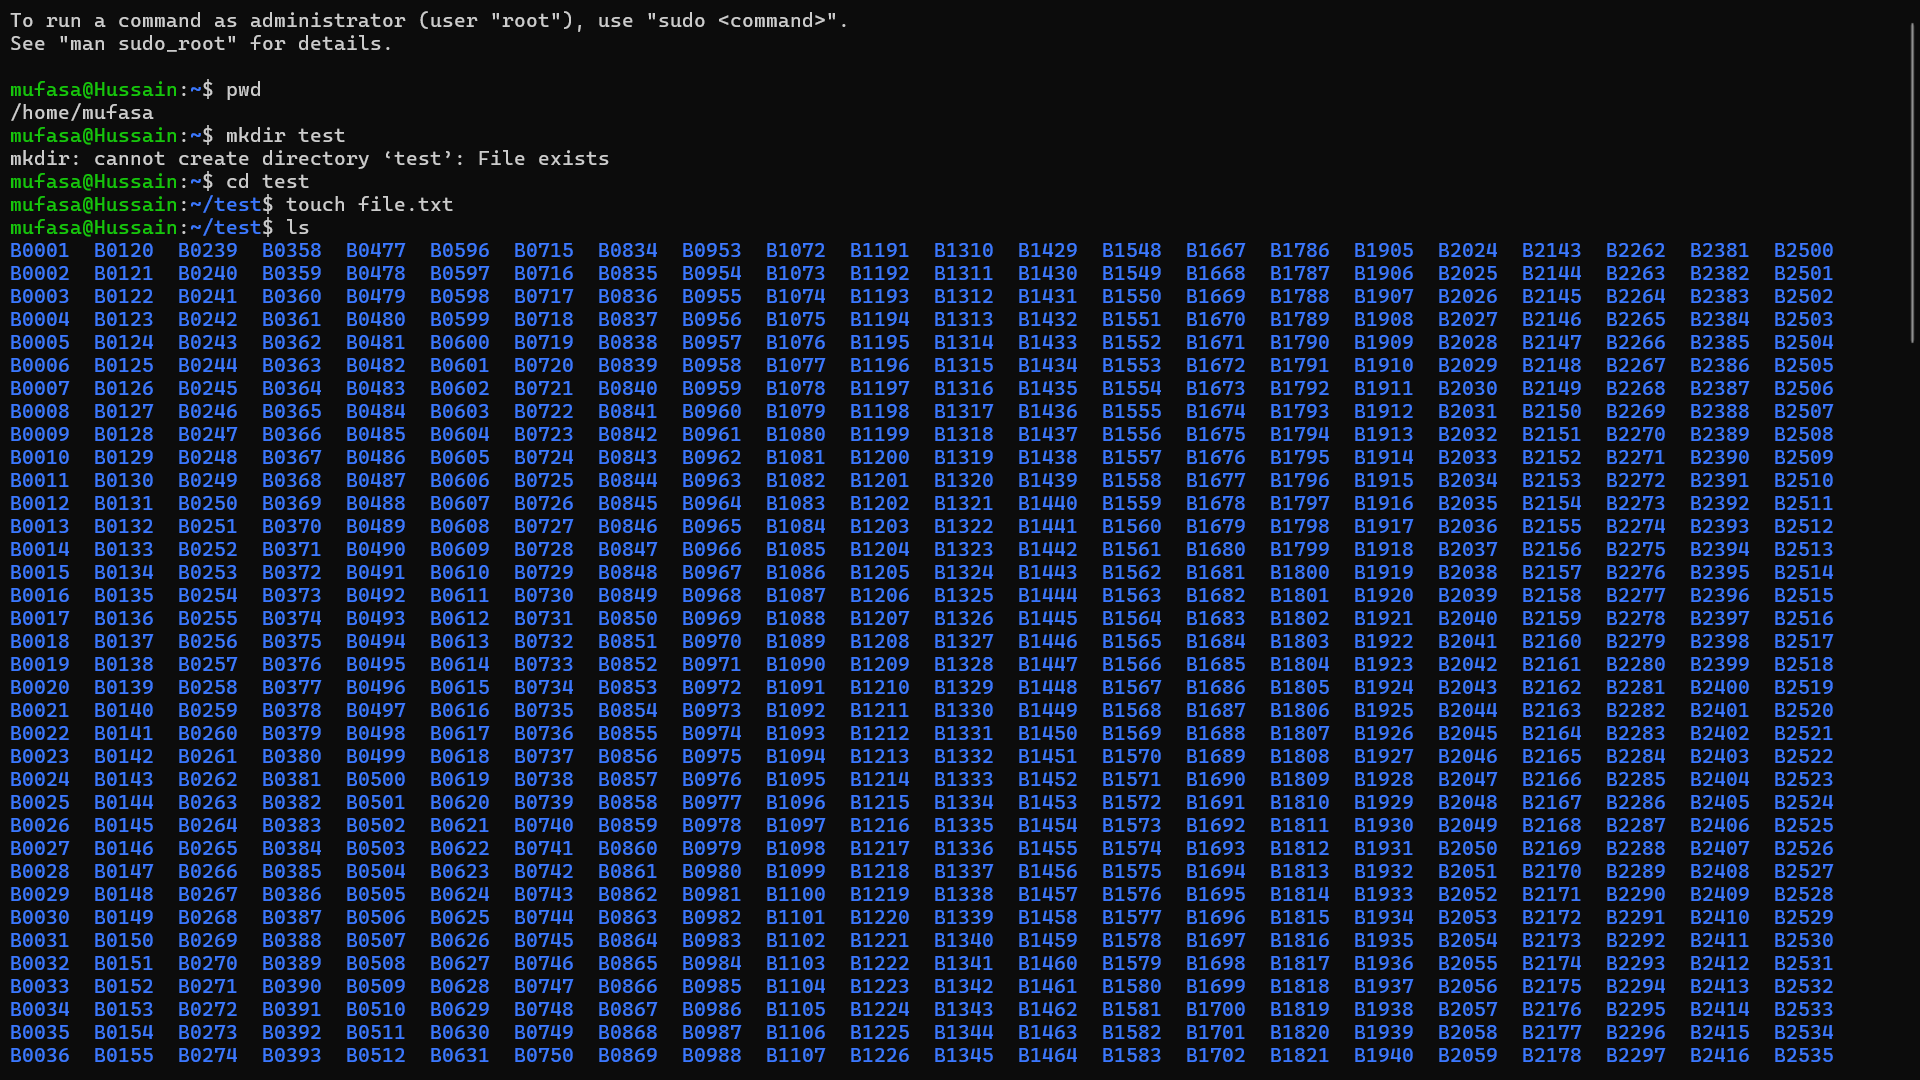
Commands Used
First, a directory named test was created and the terminal was moved into that directory.
mkdir test
cd test
pwd
Next, a new empty file was created and the contents of the directory were listed.
touch file.txt
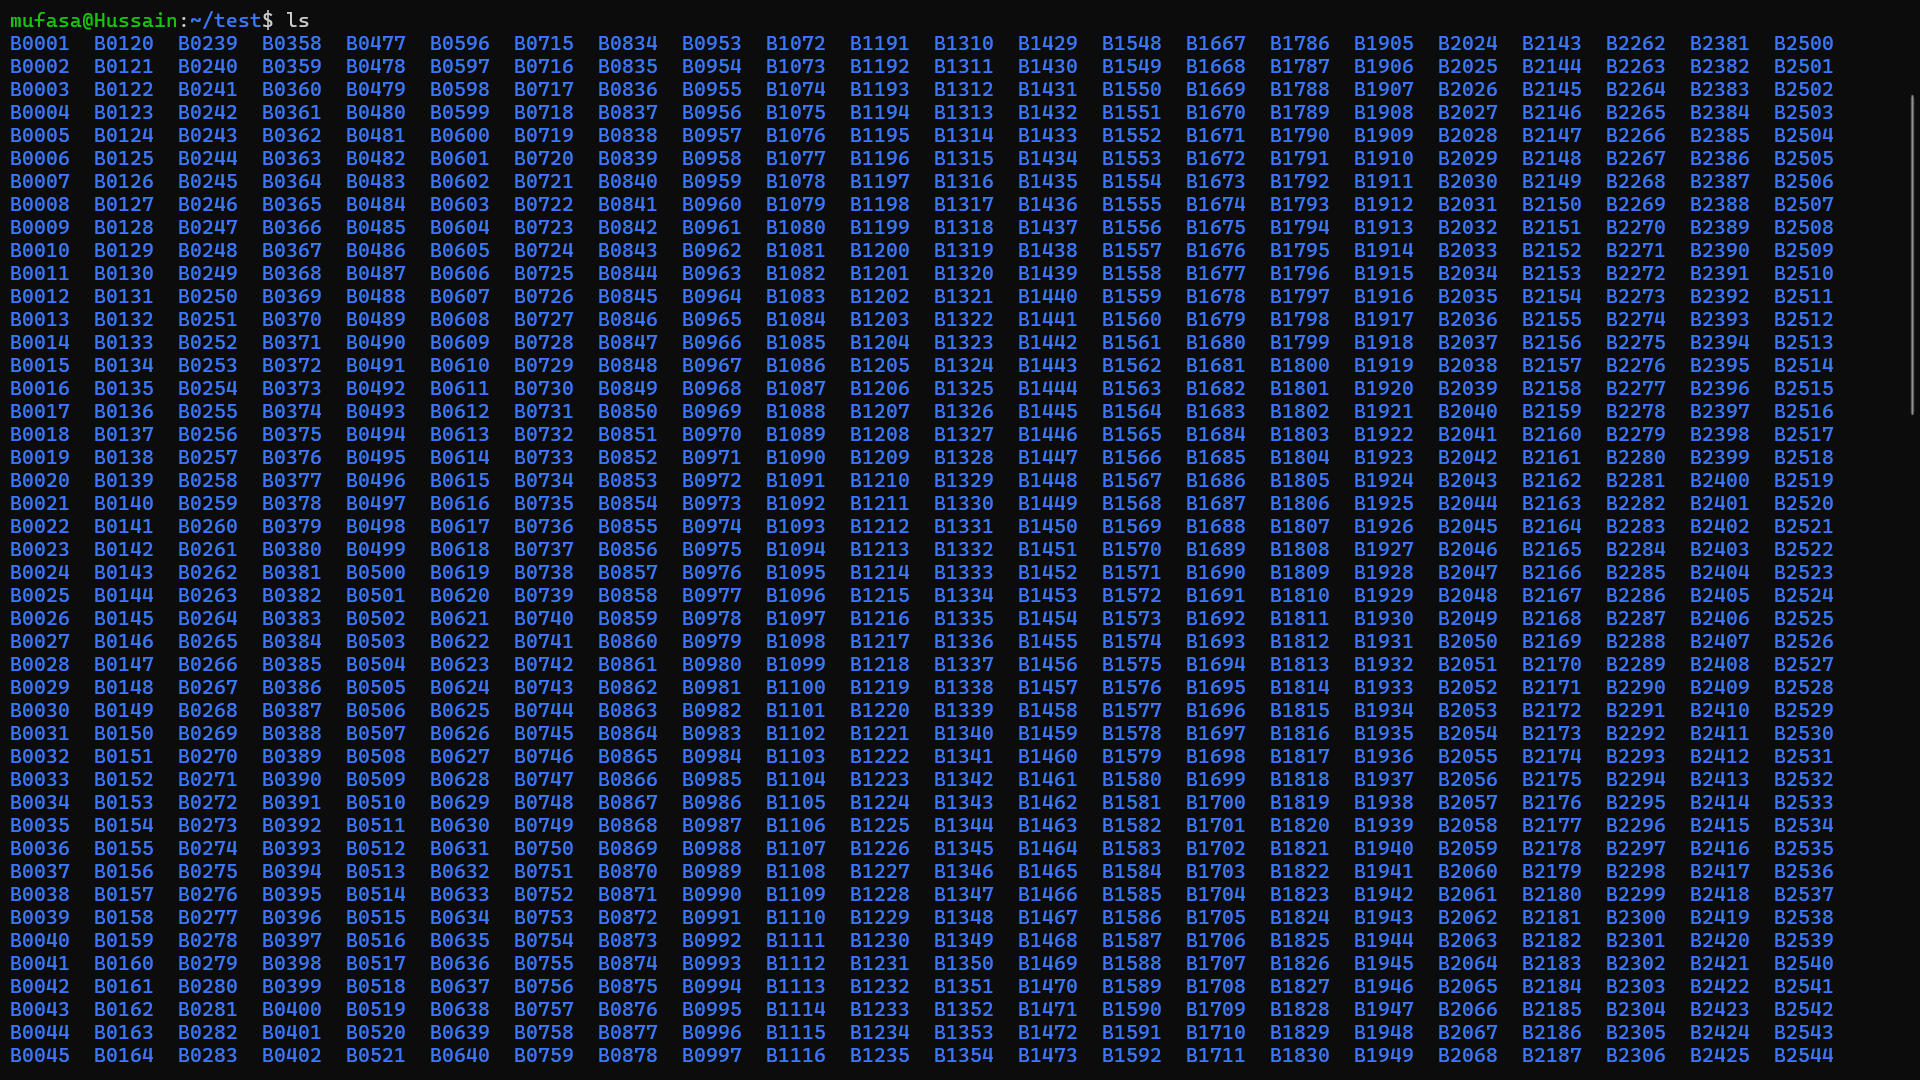
ls
Then multiple folders were generated using a sequence pattern.
mkdir B{0001..2600}
After that, text was written into two files using the echo command.
echo "this is file one" > file1.txt
echo "this is file two" > file2.txt
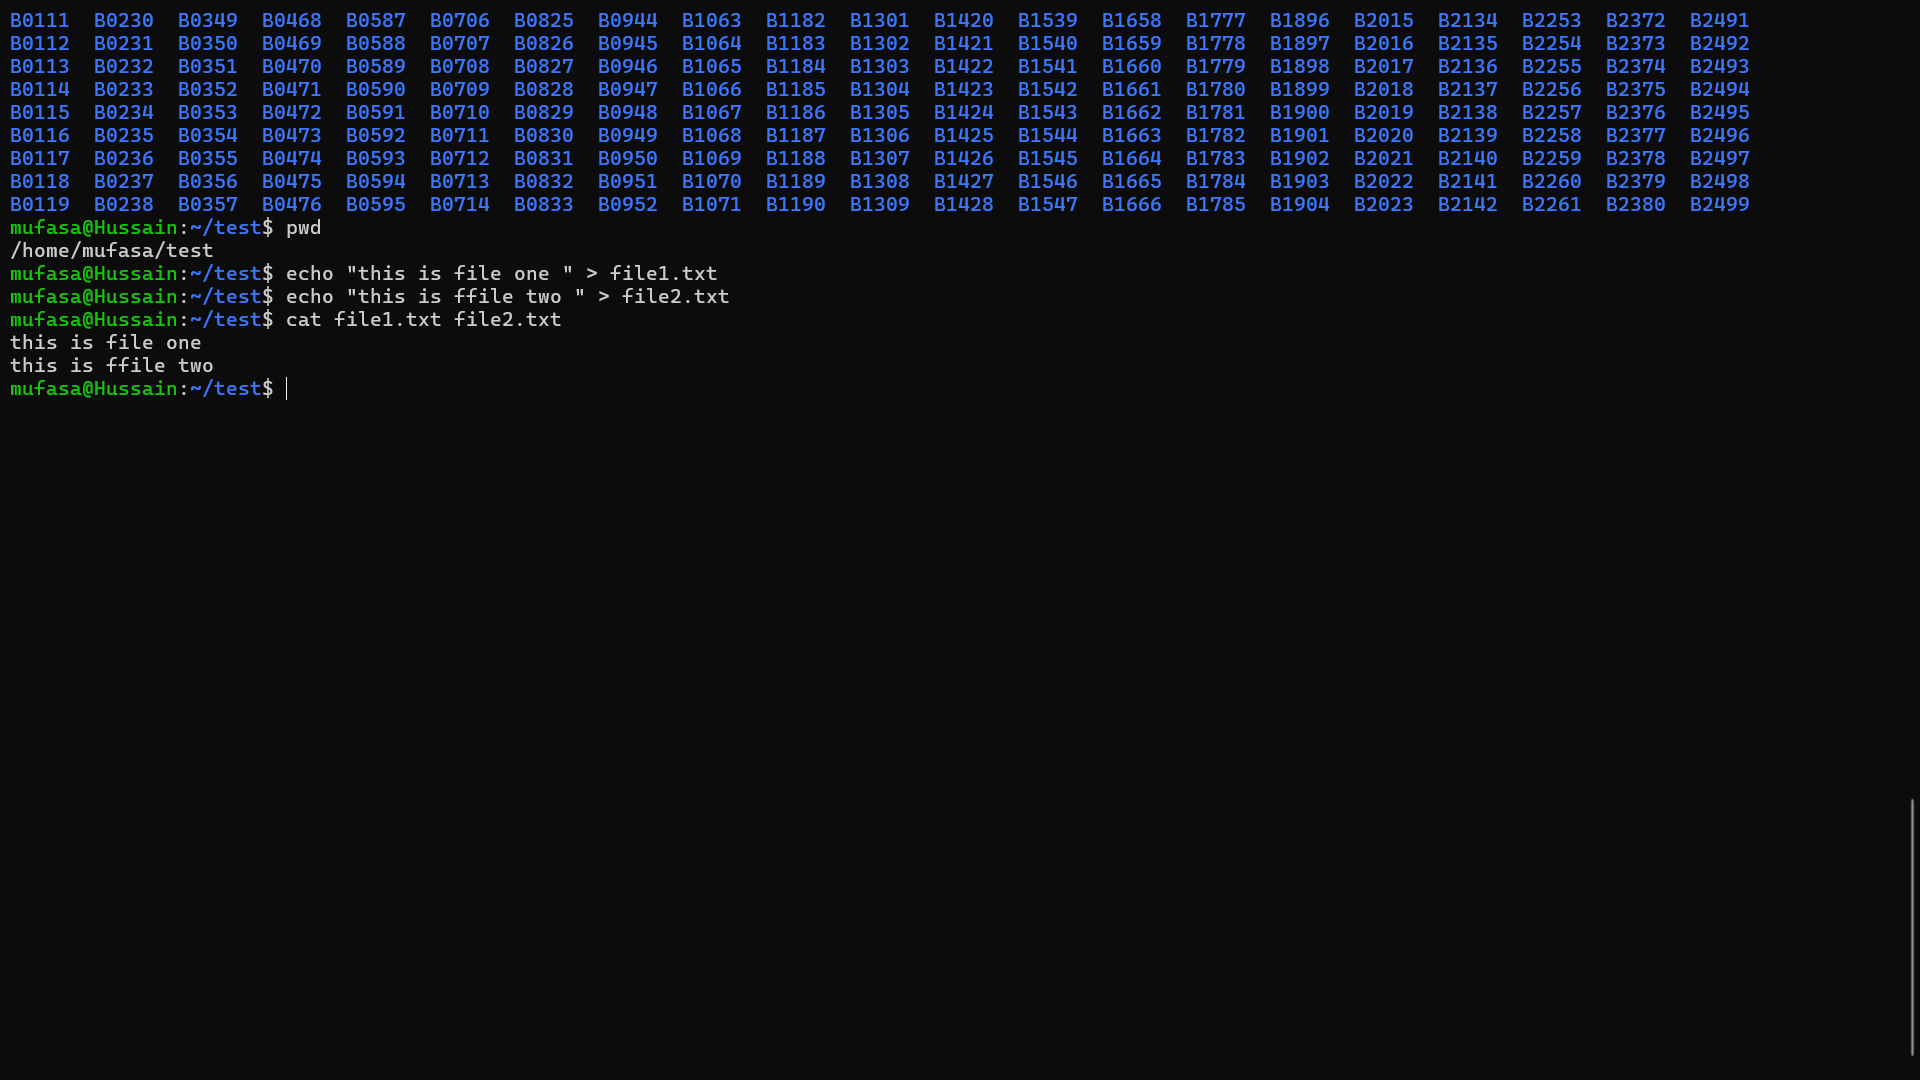
Finally, the contents of the two files were combined using the cat command.
cat file1.txt file2.txt
Output:
this is file one
this is file two
Practical Understanding
Through this task, I learned how to navigate directories, create files and folders, generate multiple directories using command patterns, and combine file contents using basic Ubuntu terminal commands.
Screenshots
Terminal commands
Folder creation
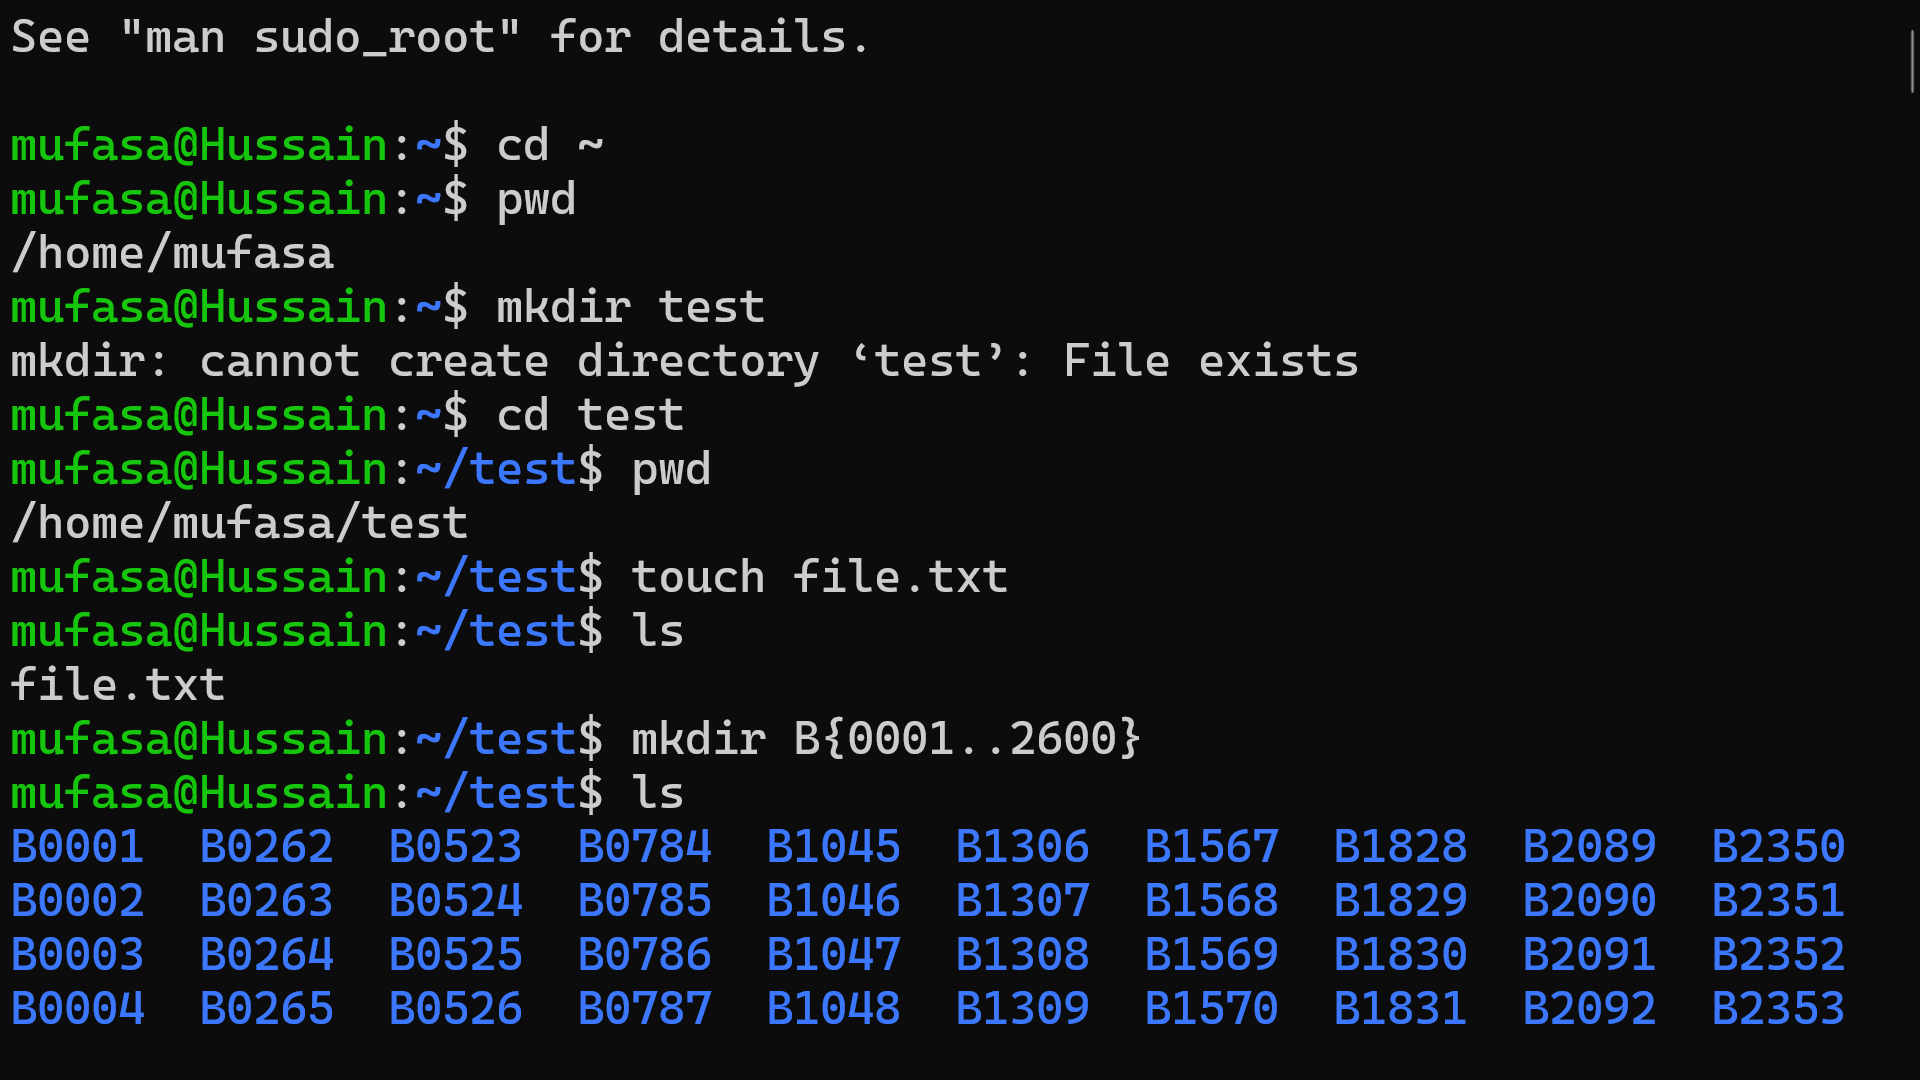
File Concatenation
Directory Listing
Task 05 – Matrix Puzzle (NumPy)
Objective
To learn basic NumPy operations and use them to decode a scrambled matrix and reveal a hidden image using Matplotlib.
Description
In this task, a scrambled matrix was downloaded and analyzed using NumPy. The matrix was reshaped and manipulated using operations such as reshaping, flipping, and transposing. After correcting the orientation of the matrix, the hidden image was revealed using Matplotlib.
Tools Used
- Python
- NumPy
- Matplotlib
Implementation
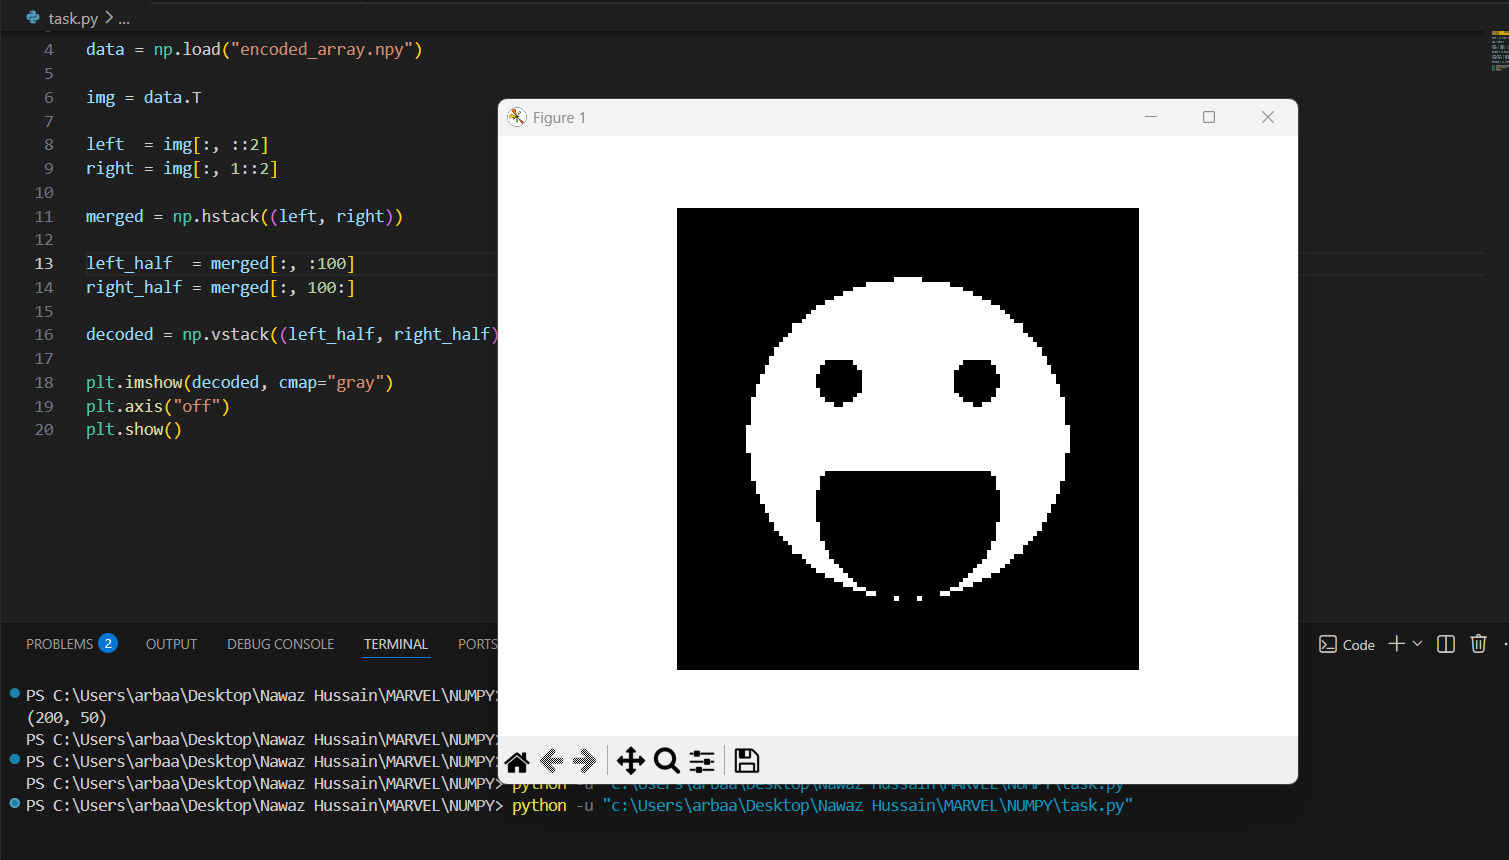
The matrix was reshaped into a square array and adjusted using NumPy operations. Finally, the image was displayed using matplotlib.pyplot.imshow().
import numpy as np
import matplotlib.pyplot as plt

data = np.load("encoded_array.npy")

img = data.T

left  = img[:, ::2]
right = img[:, 1::2]

merged = np.hstack((left, right))

left_half  = merged[:, :100]
right_half = merged[:, 100:]

decoded = np.vstack((left_half, right_half))

plt.imshow(decoded, cmap="gray")
plt.axis("off")
plt.show()
OUTPUT
Task 06 – Portfolio Webpage
Objective
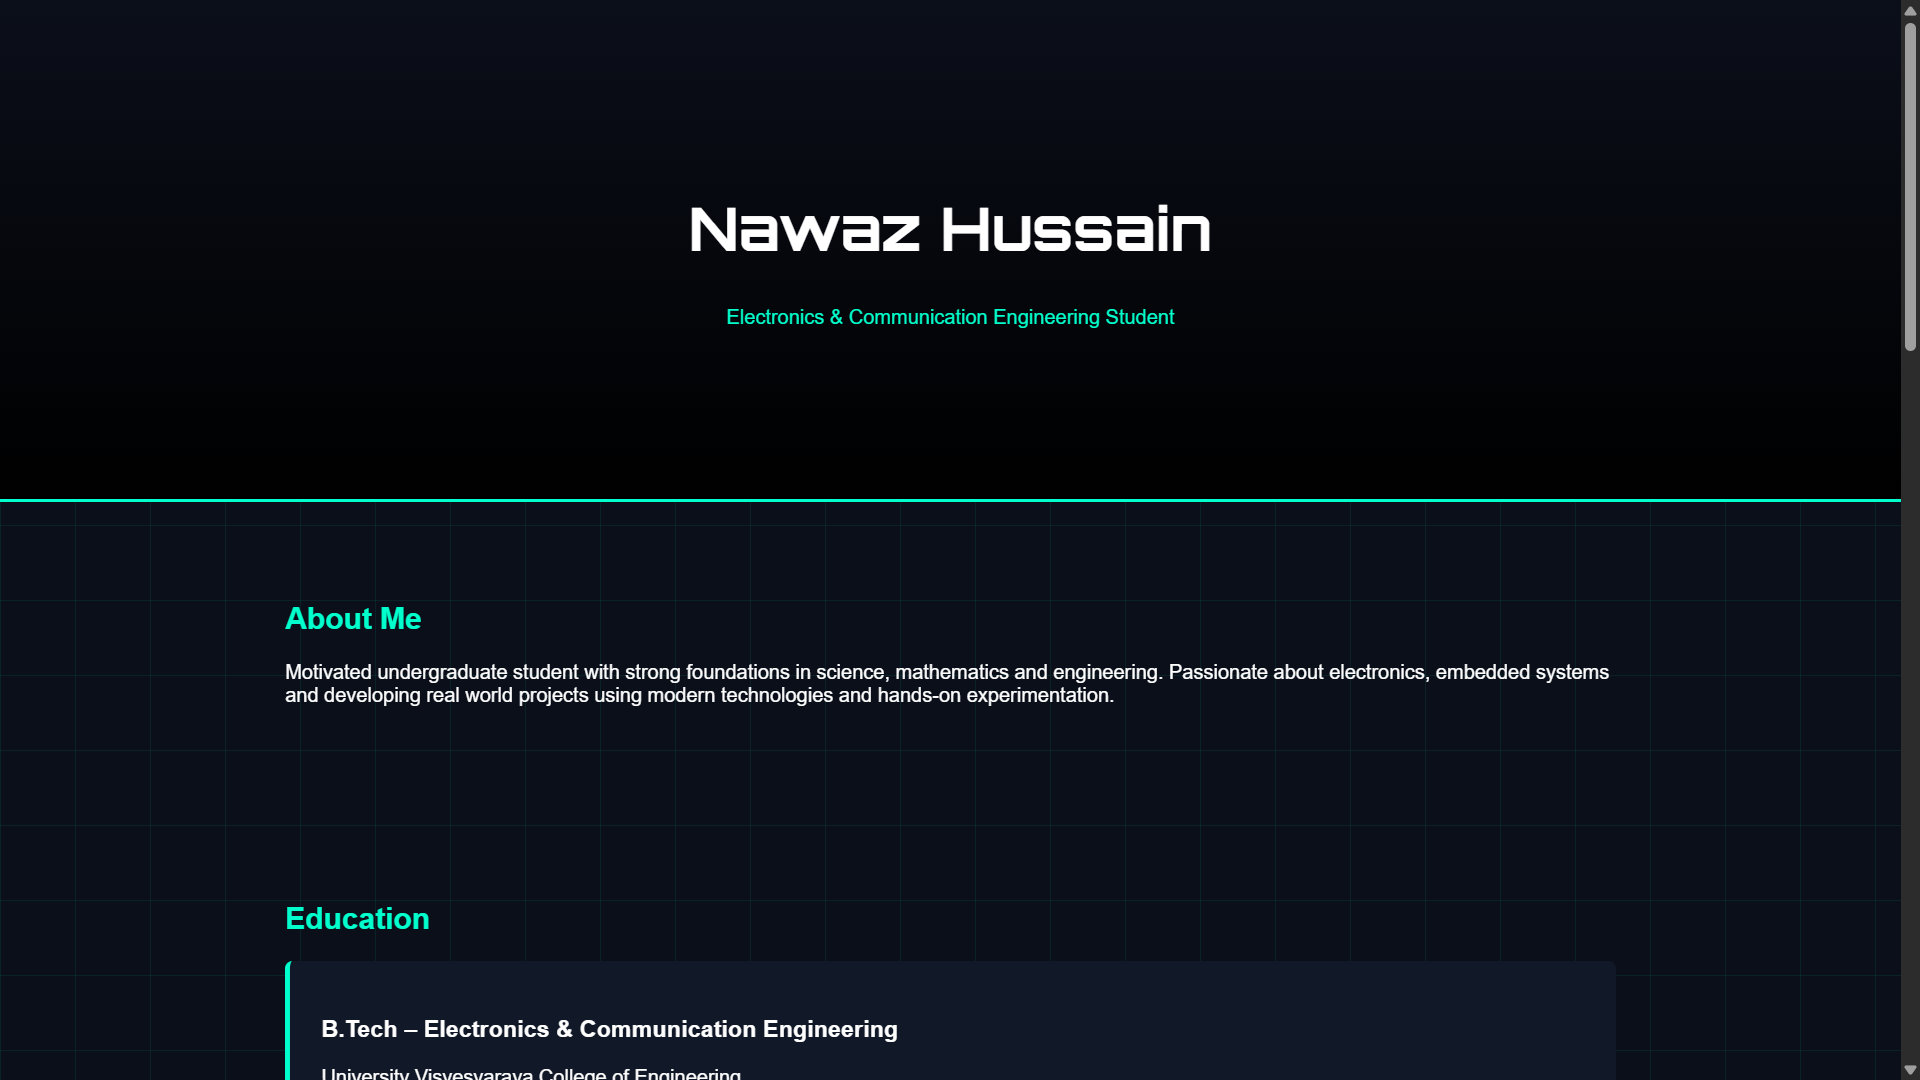
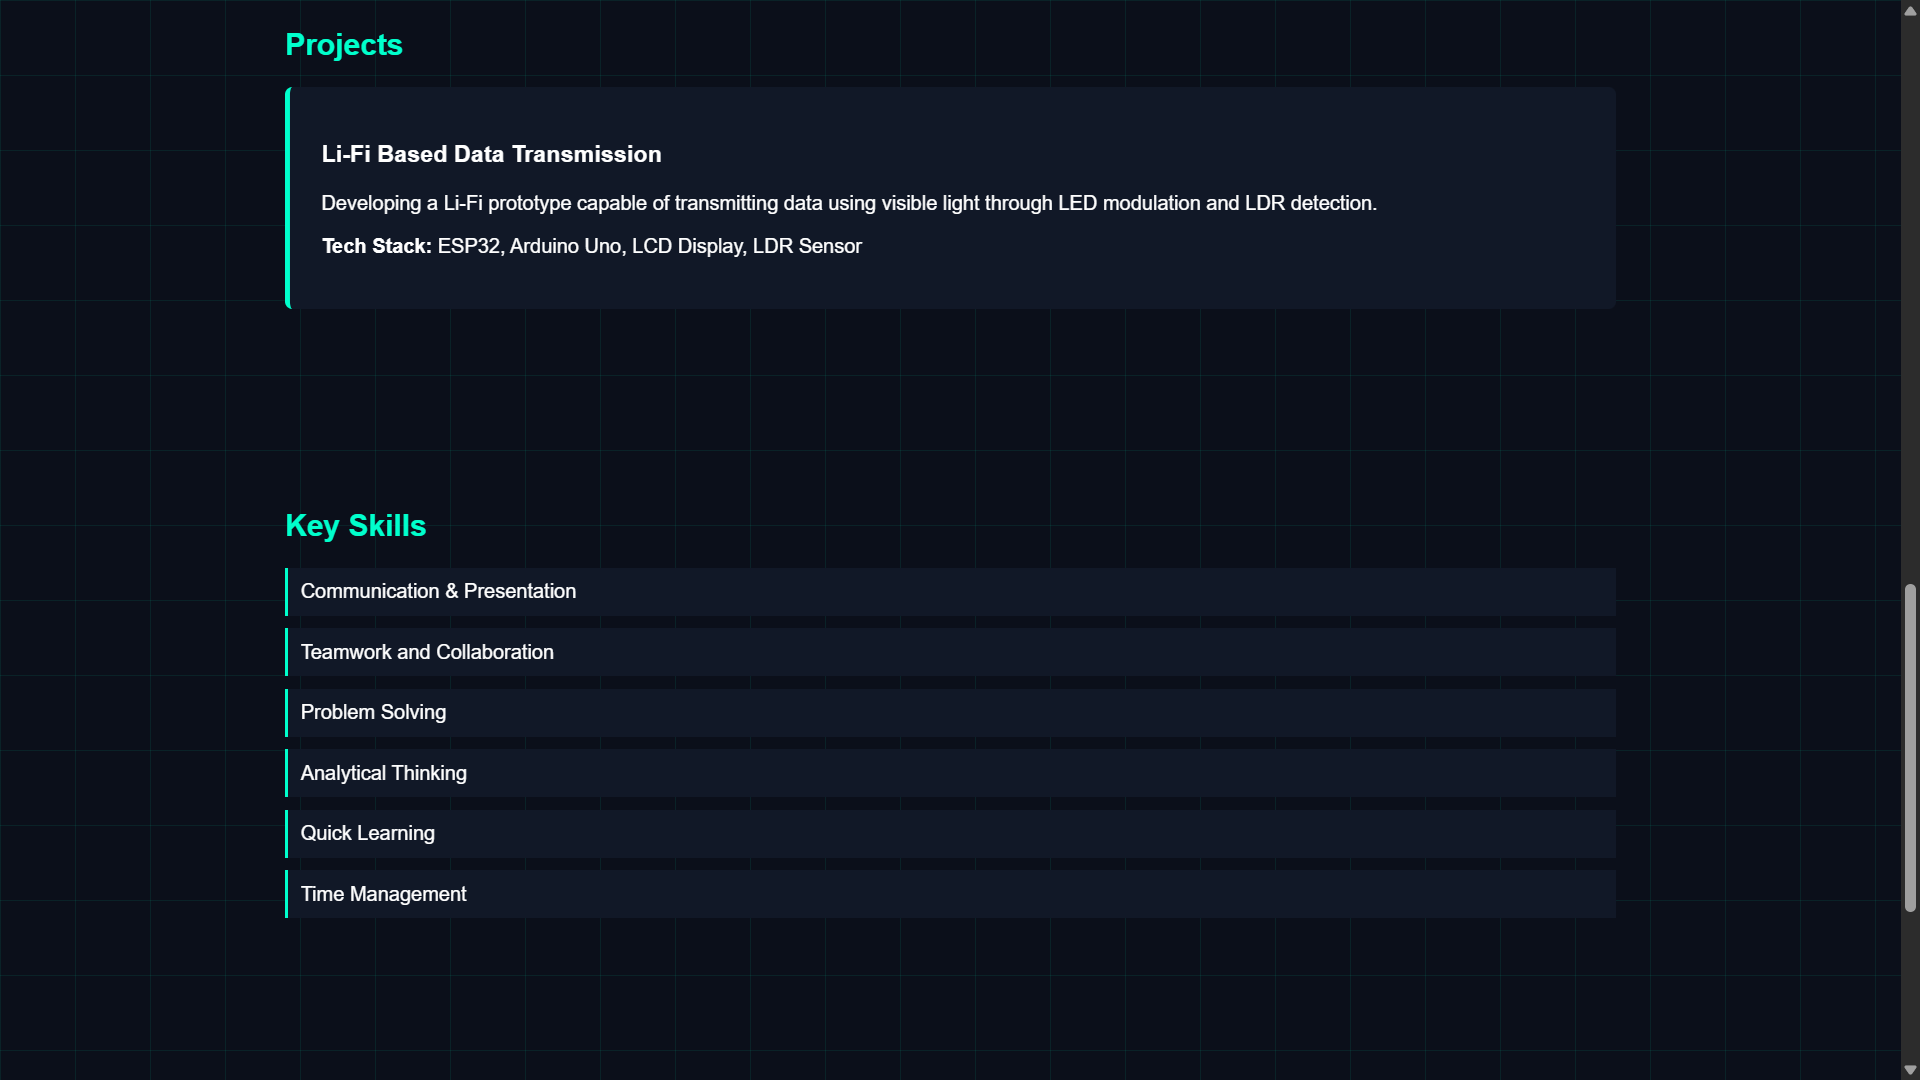
The objective of this task was to create a simple personal portfolio webpage that presents basic information such as an introduction, interests, projects, and useful links.
Description
In this task, a basic portfolio webpage was created using HTML. The page includes sections such as an introduction, projects, and links to other platforms. After creating the webpage, the project files were uploaded to a GitHub repository.
Tools Used
- HTML
- Git
- GitHub
Learnings
- Creating a simple webpage using HTML
- Structuring information clearly on a webpage
- Uploading project files to GitHub
- Understanding how a portfolio website can be used to showcase personal work
Screenshot
Task 07 – Writing Resource Article using Markdown
Objective
The objective of this task was to write a technical resource article on a chosen topic using Markdown and publish it on the MARVEL website.
Outcomes & Learnings
For this task, I wrote an article on Printed Circuit Board (PCB) Design. The article explains what a PCB is, the basic PCB design process, and some important concepts used in electronics design.
Article
Click the link below to view the article:
Task 08 – Tinkercad Ultrasonic Distance Measurement
Objective
The objective of this task was to create a Tinkercad account and build a simple circuit to estimate the distance between an ultrasonic sensor and an object using an Arduino.
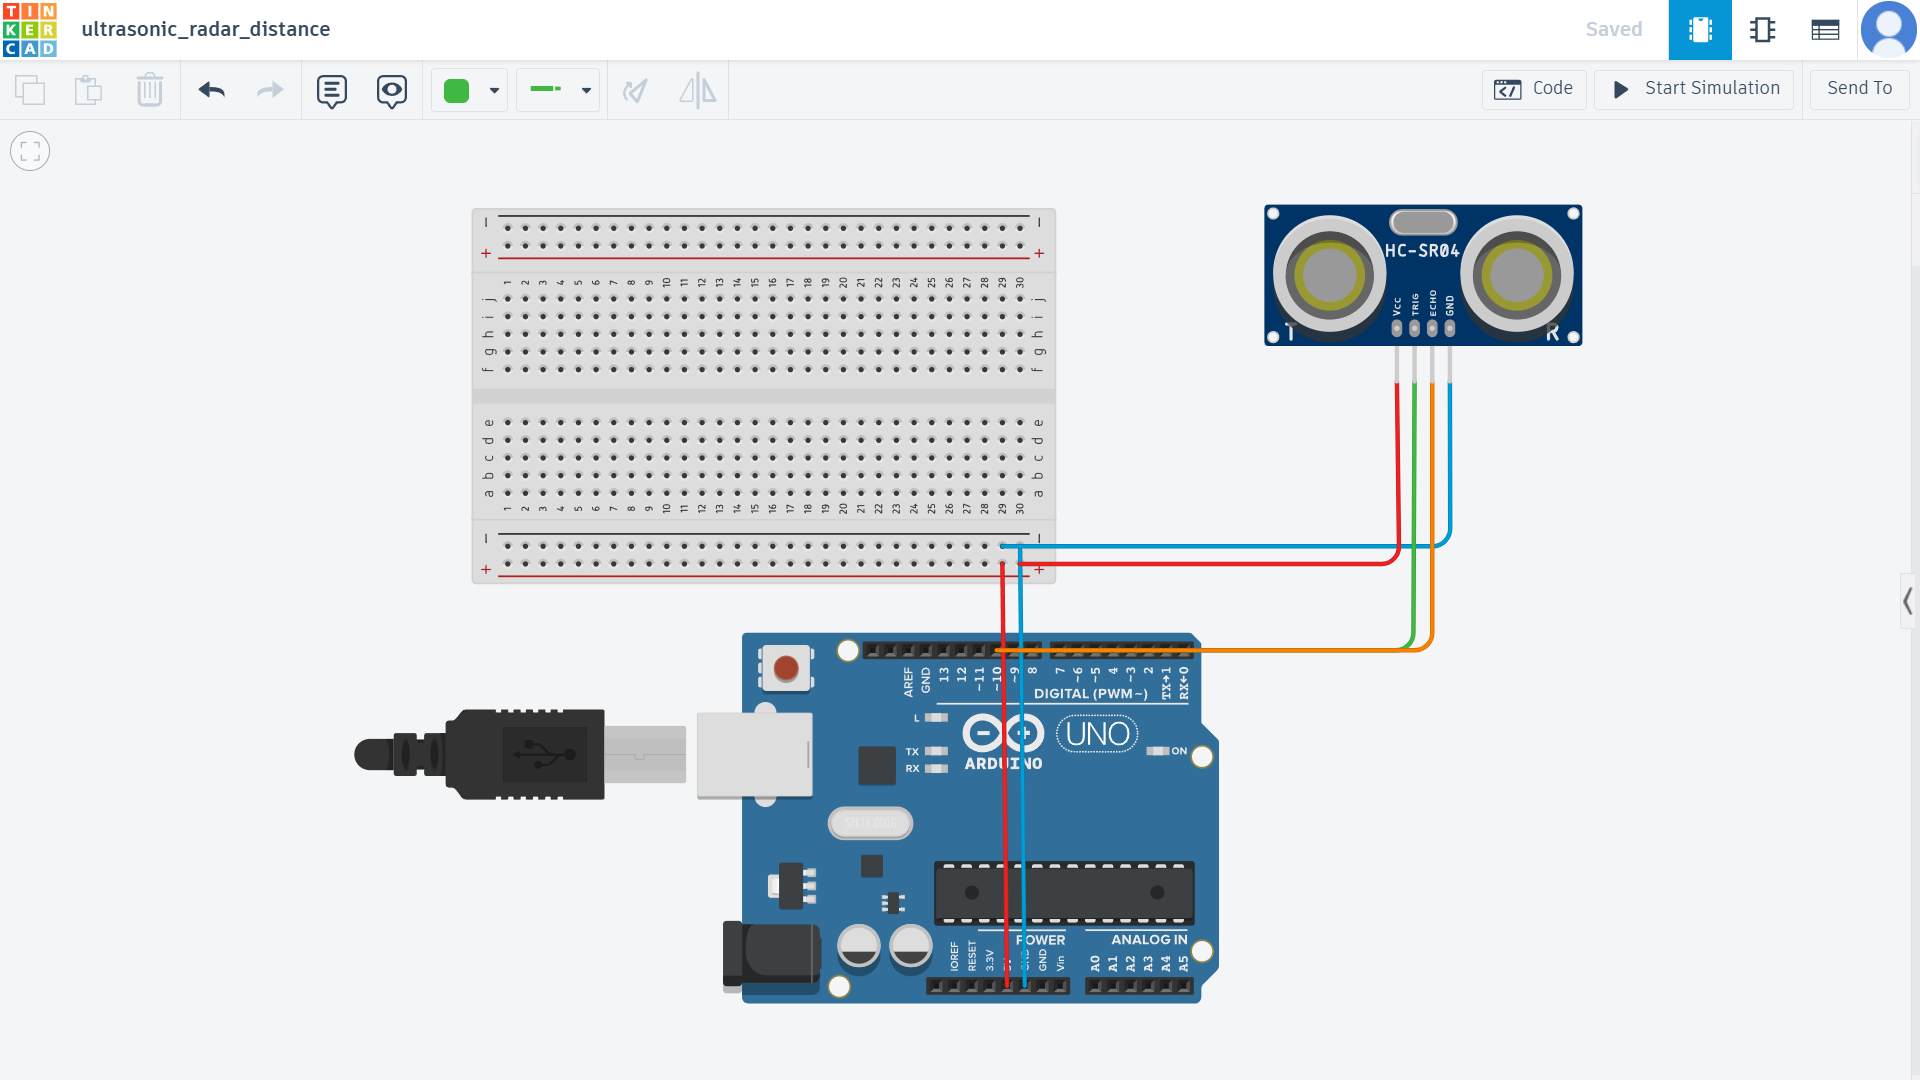
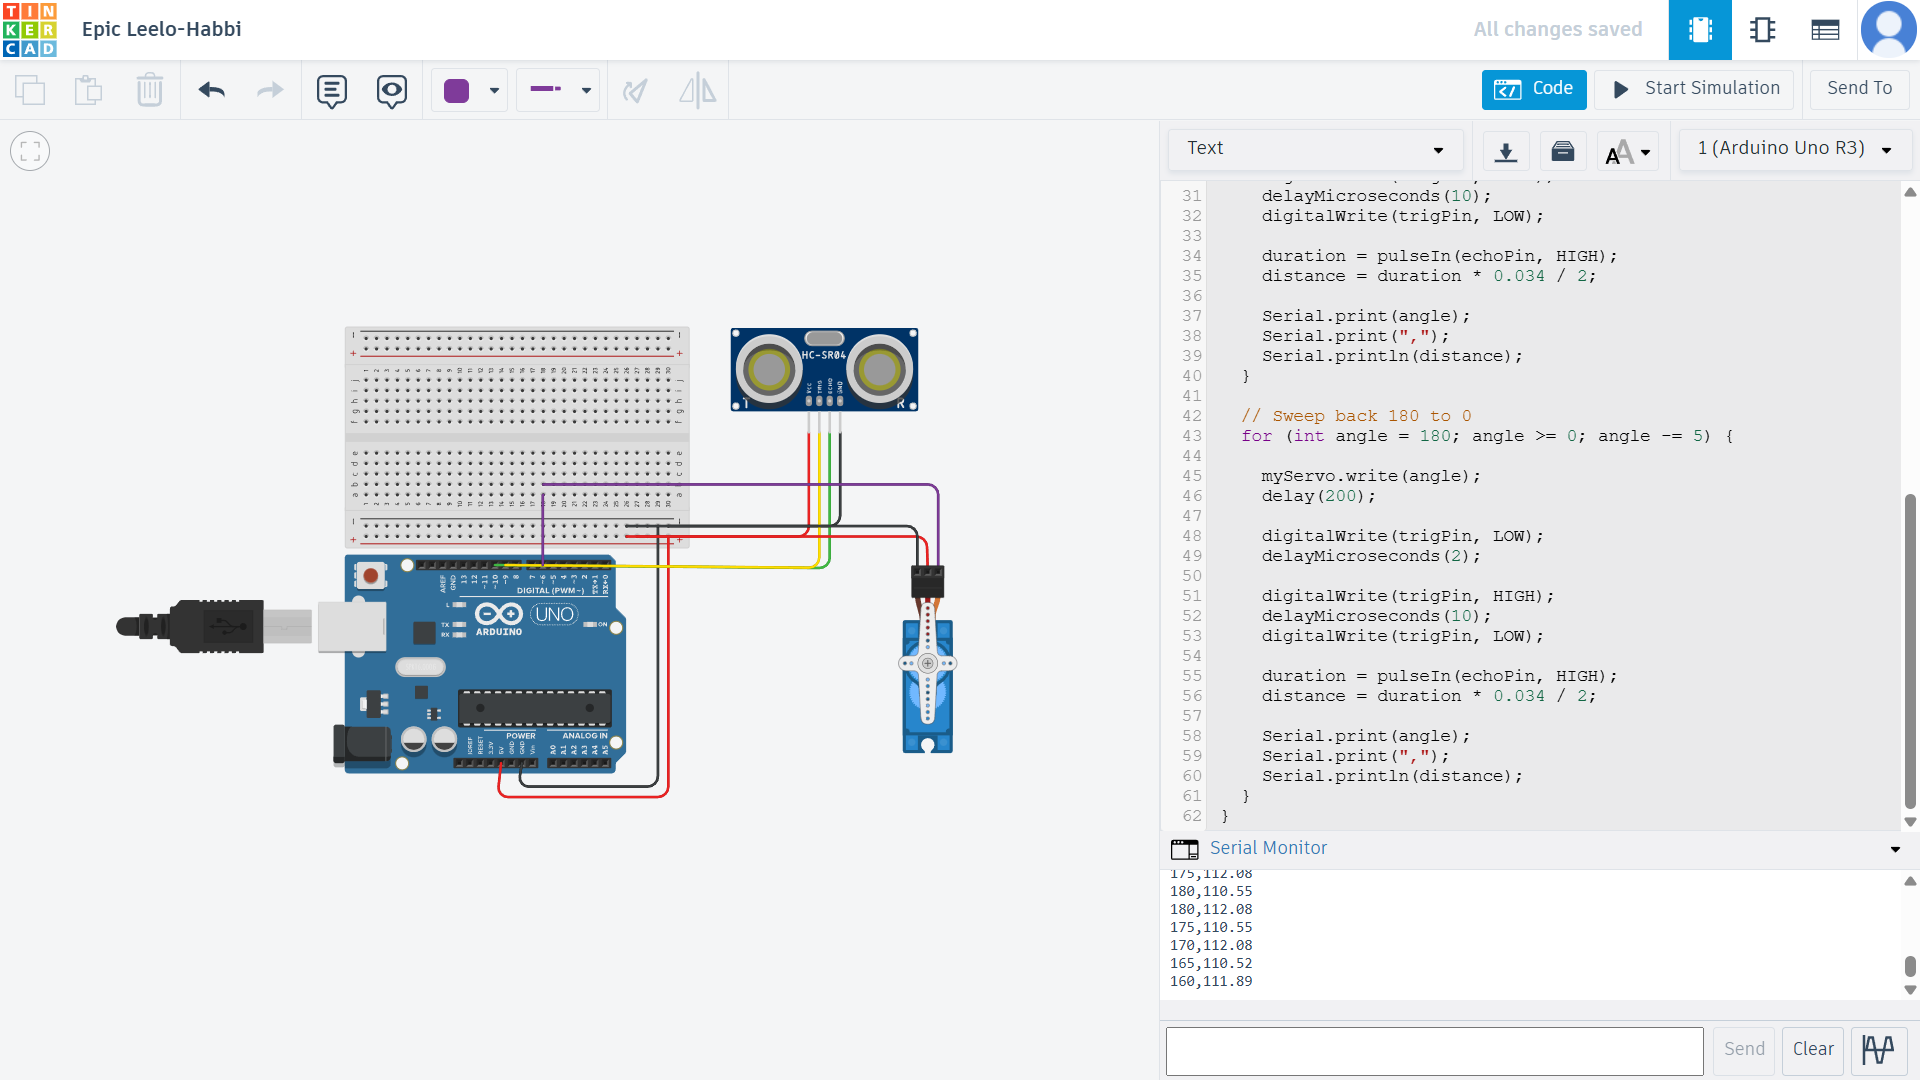
Description
In this task, an HC-SR04 ultrasonic sensor was connected to an Arduino UNO in Tinkercad. The sensor sends ultrasonic waves and measures the time taken for the echo to return after hitting an object. Using this time delay, the distance between the sensor and the object can be calculated.
A second version of the circuit was also created where a servo motor rotates along with the ultrasonic sensor to simulate a simple radar scanning system.
Components Used
- Arduino UNO
- HC-SR04 Ultrasonic Sensor
- Servo Motor
- Breadboard
- Jumper Wires
Working Principle
The Arduino sends a trigger signal to the ultrasonic sensor. The sensor emits ultrasonic waves which reflect off nearby objects. The time taken for the echo signal to return is measured and converted into distance using a simple formula in the Arduino code.
Circuit Diagrams
Ultrasonic Sensor Circuit

Ultrasonic Sensor with Servo Circuit

Simulation
Distance Measurement Simulation
Ultrasonic Radar with Servo Simulation
Learnings
- Creating circuits using Tinkercad
- Measuring distance using ultrasonic signals
- Understanding basic sensor-based distance measurement
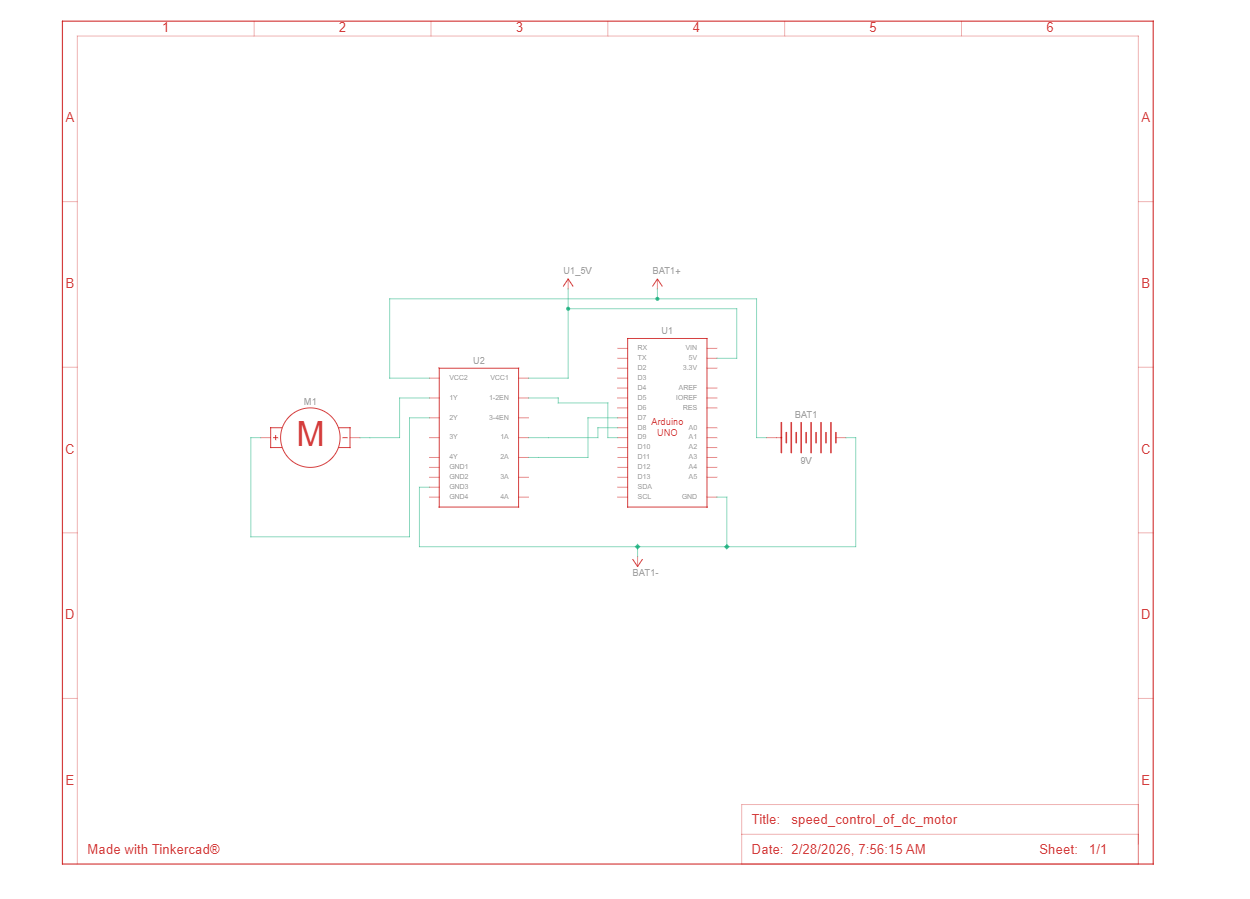
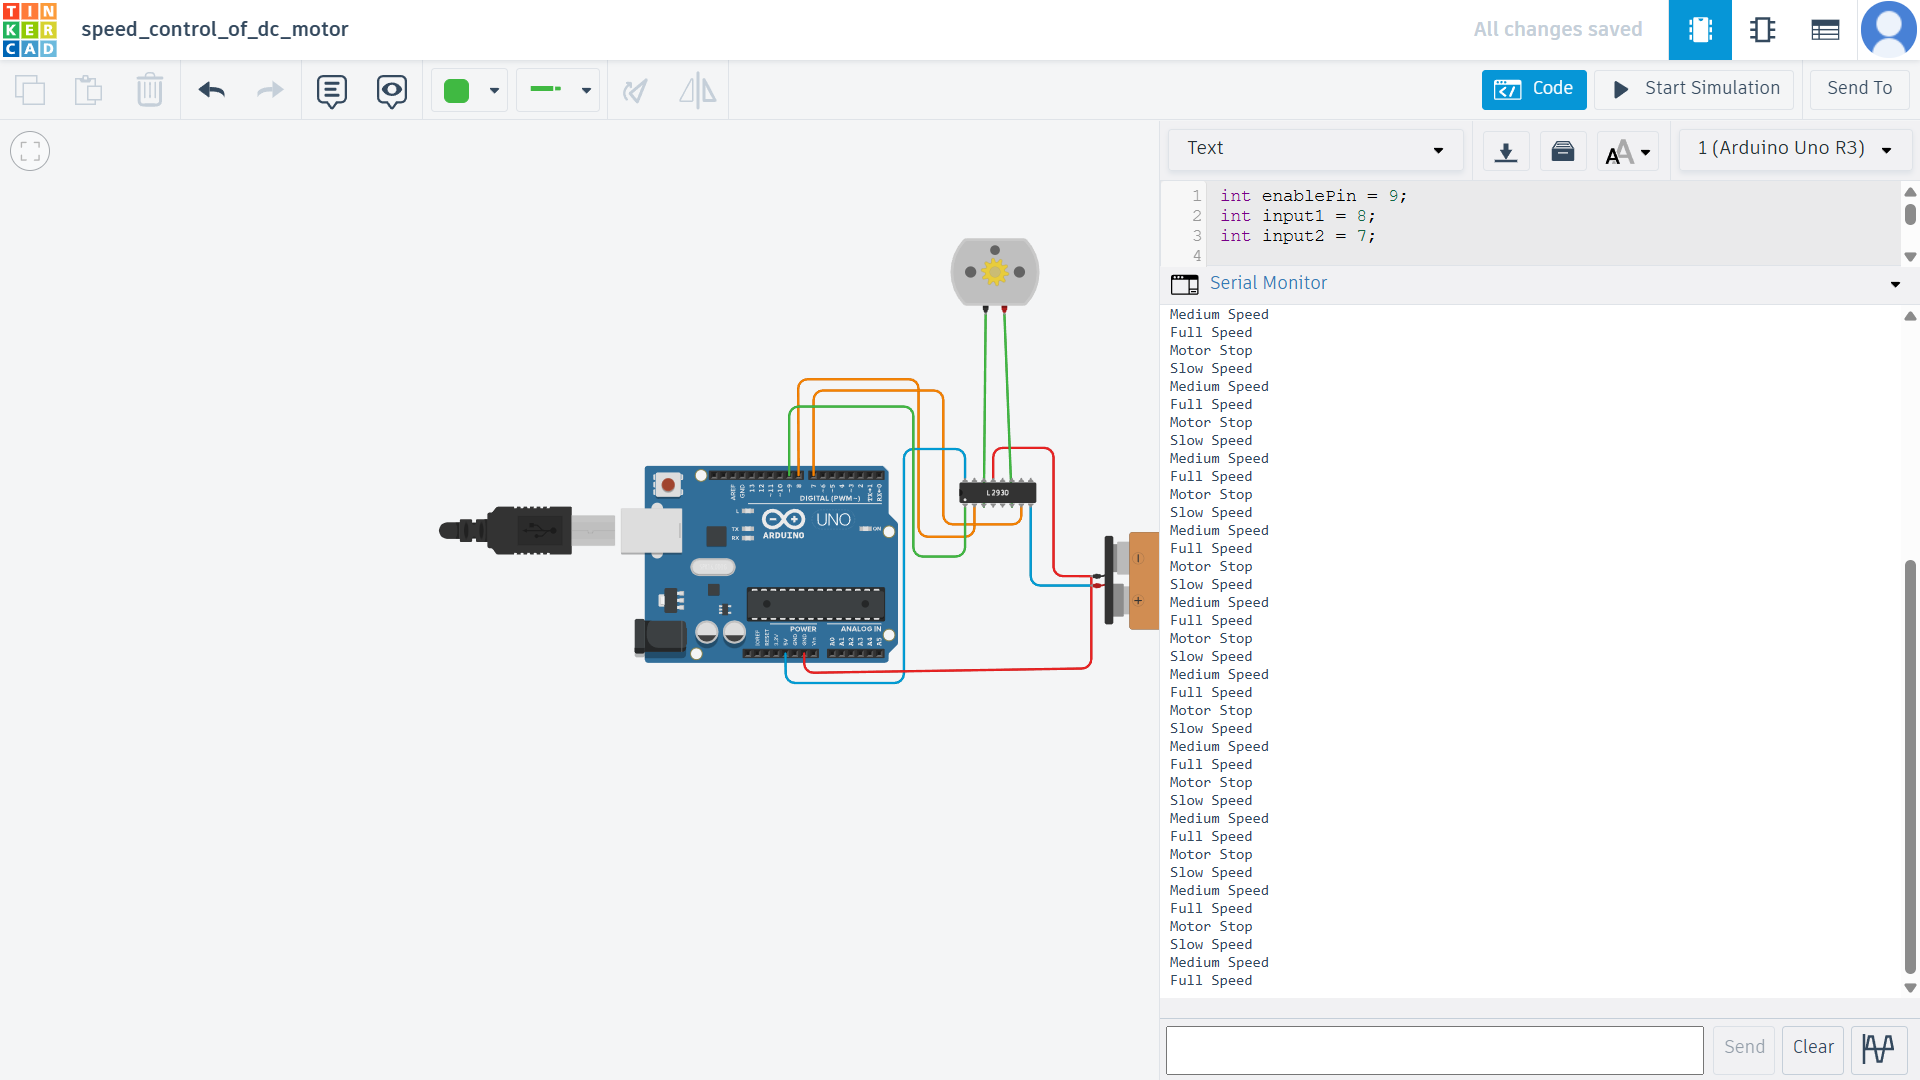
Task 09 – Speed Control of DC Motor using L298N Driver
Objective
The objective of this task was to understand how to control the speed of a DC motor using an Arduino Uno and the L298N motor driver. Using an Arduino board and the L298N H-Bridge motor driver, the speed of a 5V DC motor was controlled using PWM signals.
About the L298N Motor Driver
The L298N is a dual H-Bridge motor driver module commonly used to control DC motors and stepper motors. It allows a microcontroller such as Arduino to control motors that require higher current and voltage than the Arduino can supply directly.
The motor driver works using an H-Bridge circuit, which allows:
- Controlling the direction of rotation
- Controlling the speed of the motor using PWM
- Driving motors that require higher current
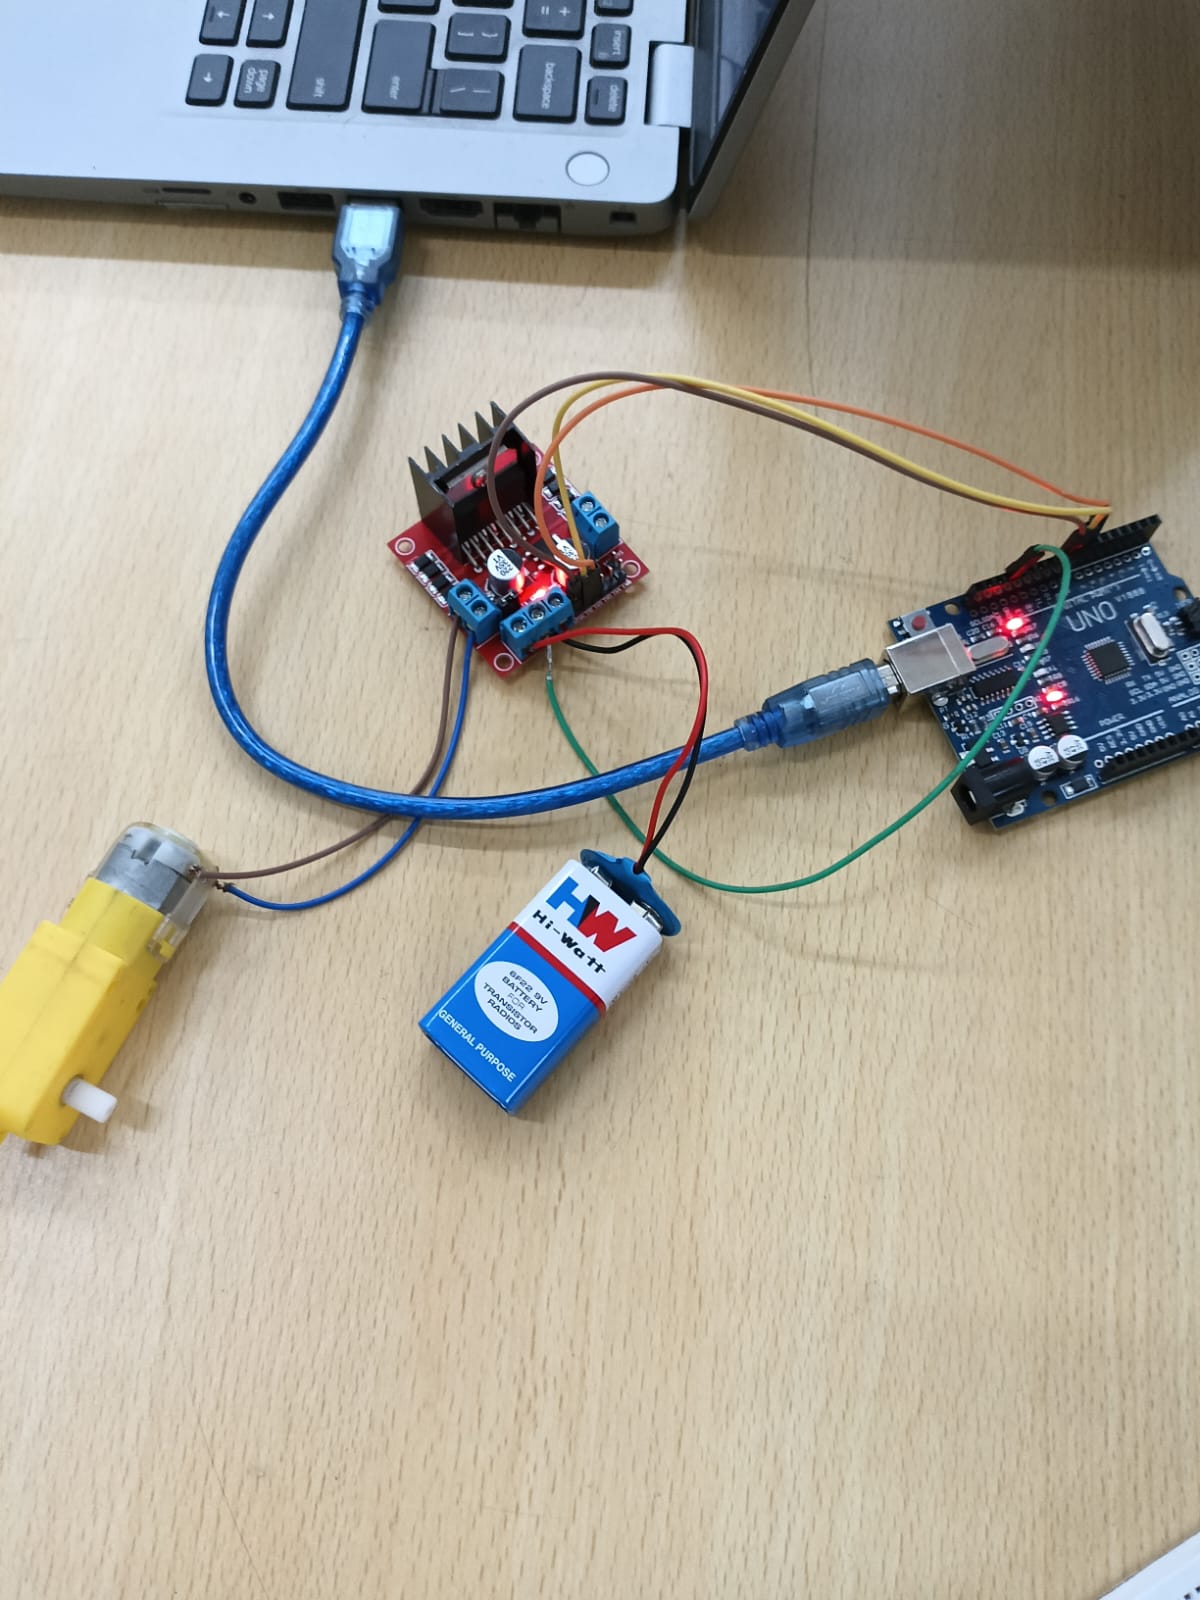
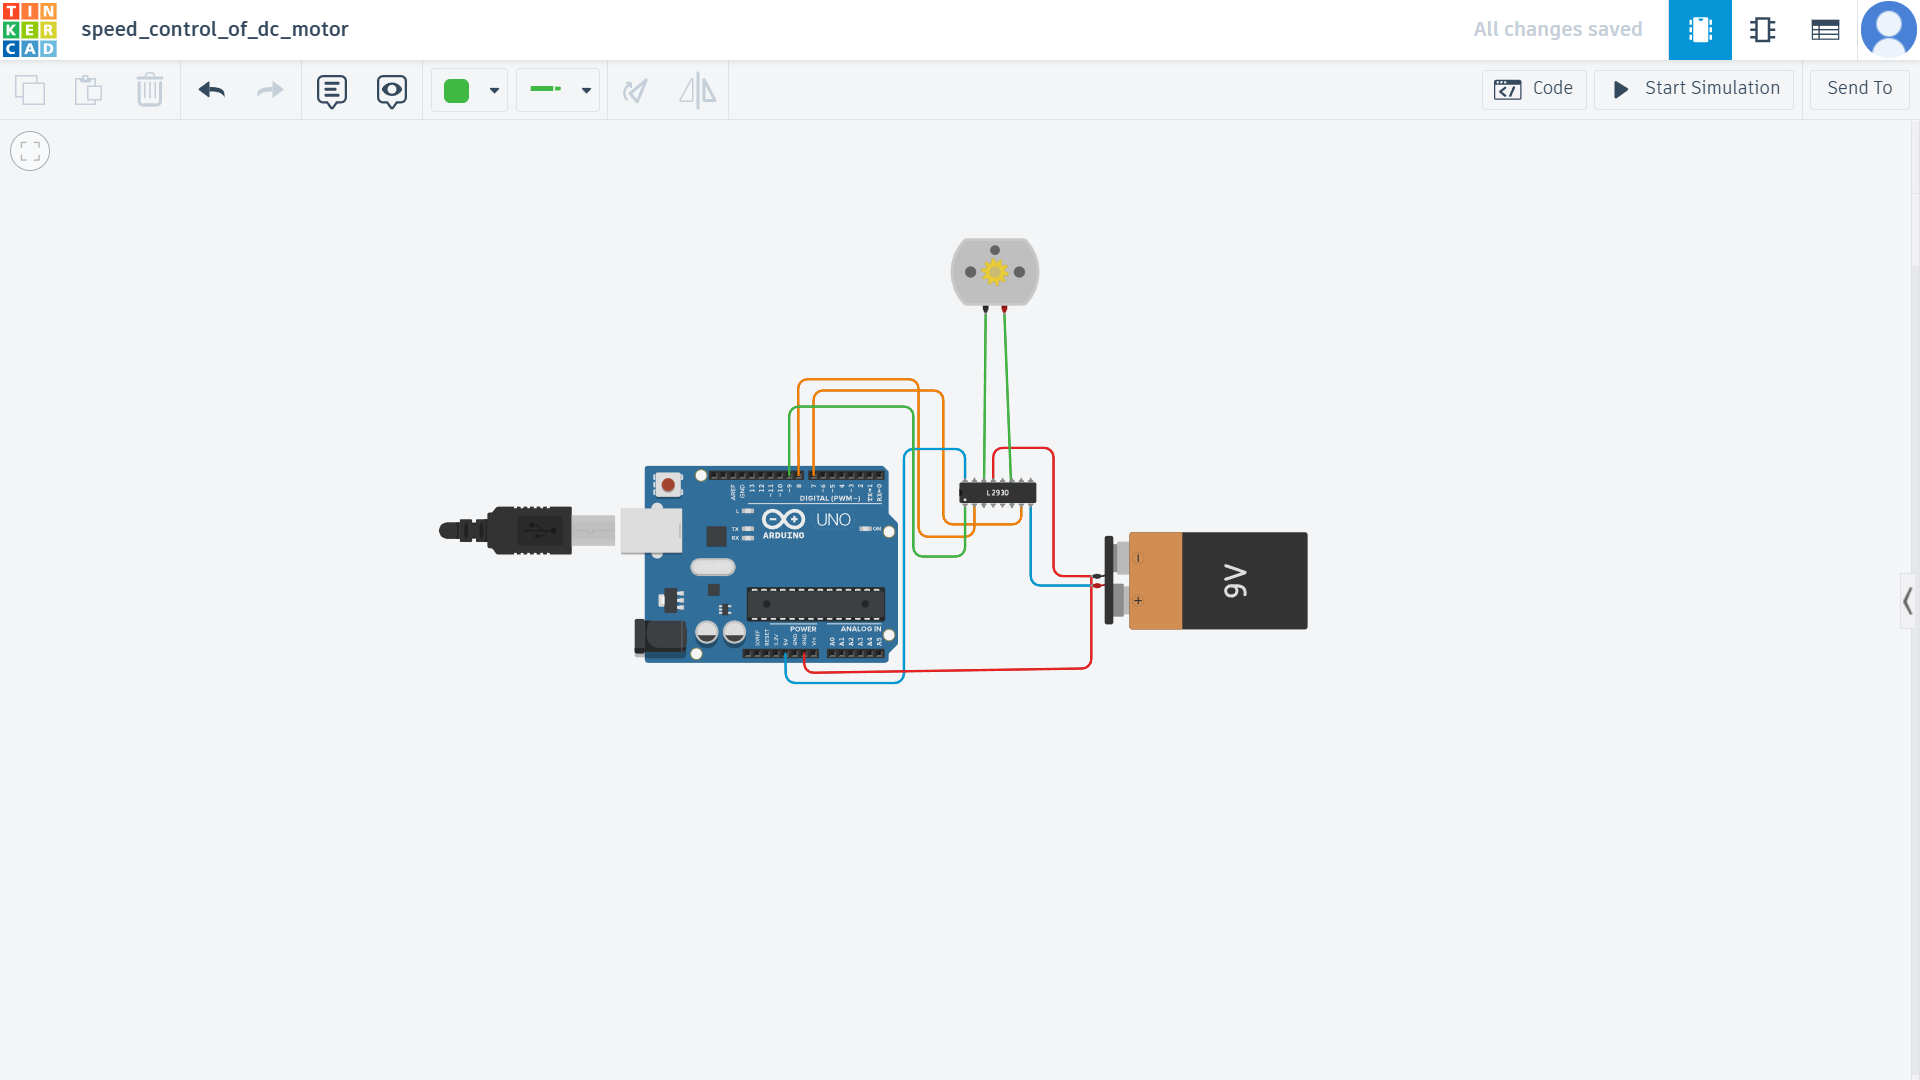
Implementation
In this task, an Arduino Uno was connected to the L298N motor driver module and a DC motor. A 9V battery was used to power the motor while the Arduino controlled the motor through digital pins. The speed of the motor was controlled by sending PWM signals to the enable pin of the motor driver.
The circuit was first simulated using Tinkercad, and then the hardware setup was tested with an actual motor driver and DC motor.
Screenshots
Demonstration Video
Practical Understanding
Through this task, I learned how motor drivers work and why they are required when controlling motors with microcontrollers. I also understood how PWM signals from Arduino can be used to change the speed of a DC motor and how an H-Bridge circuit allows both direction and speed control.
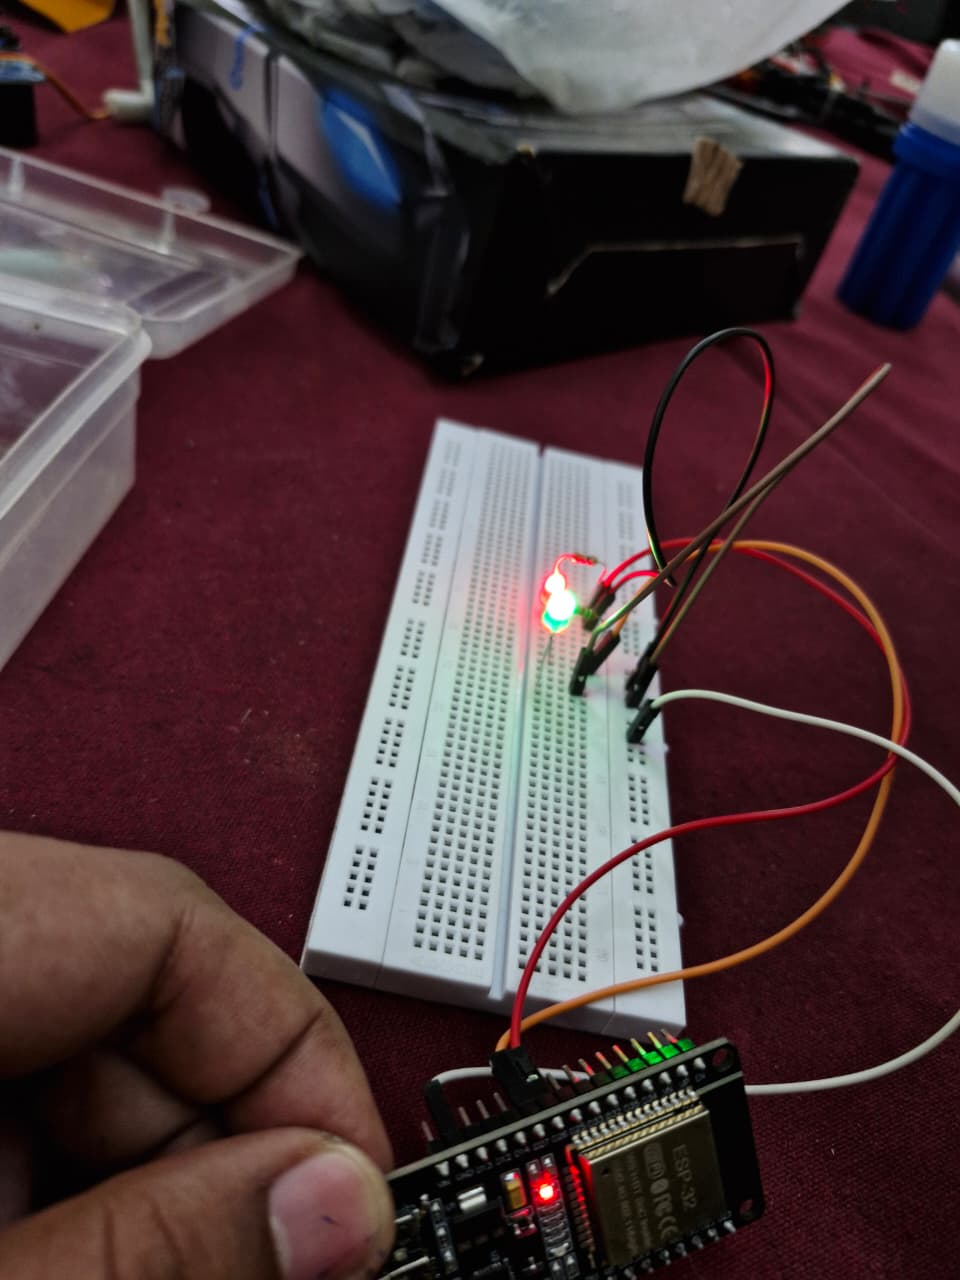
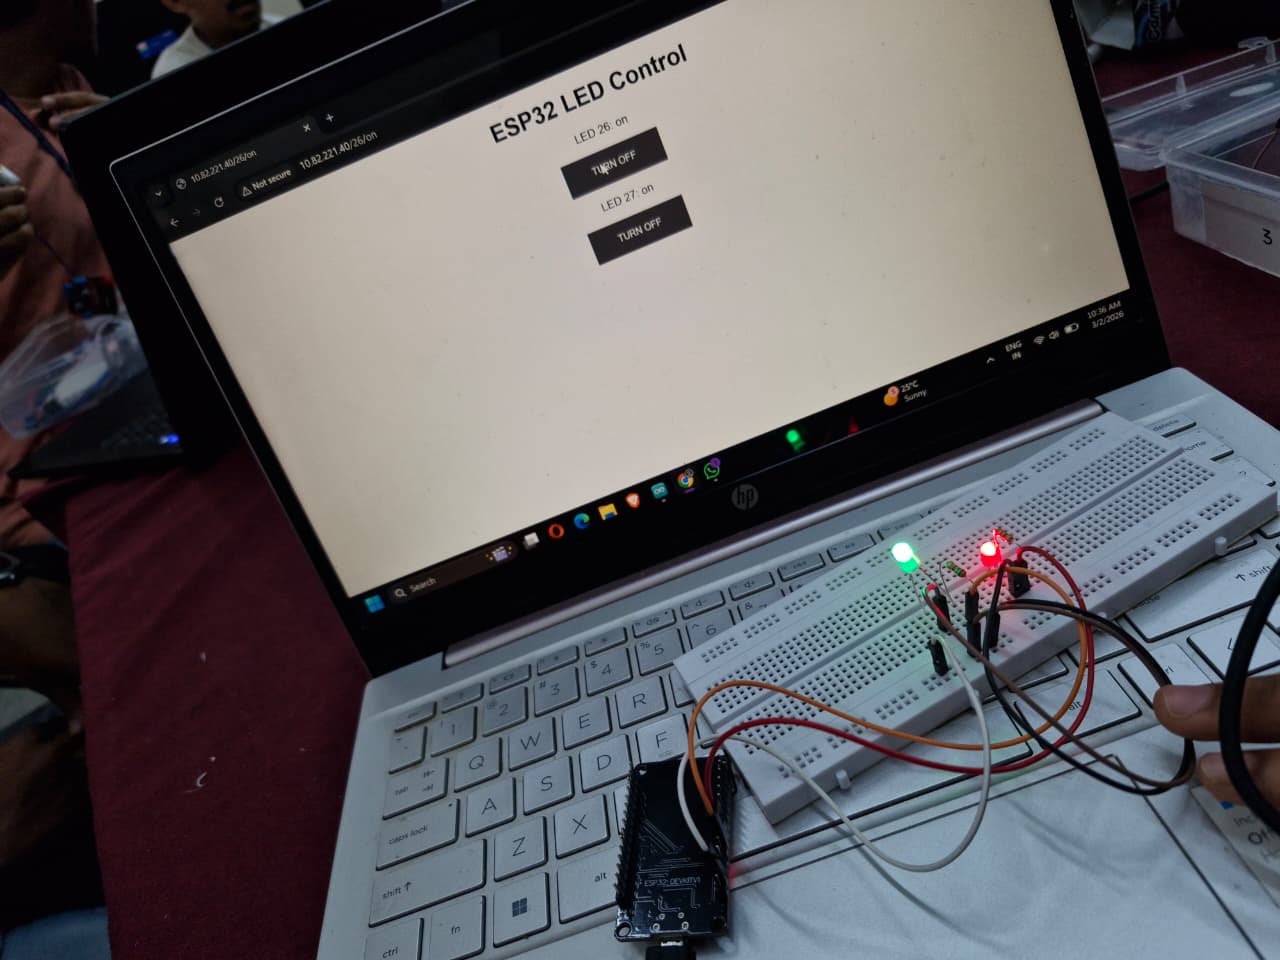
Task 10 – LED Toggle Using ESP32
Objective
The objective of this task was to learn the working of the ESP32 microcontroller and create a simple web server that can control LEDs connected to the ESP32 GPIO pins.
Implementation
In this task, an ESP32 board was used to host a small web server. The ESP32 was connected to a WiFi network and served a webpage that allowed the user to control LEDs connected to its GPIO pins.
When a button on the webpage is pressed, a request is sent to the ESP32 server, which then toggles the corresponding LED connected to the board.
This demonstrates how ESP32 can be used for basic IoT applications, where hardware devices can be controlled remotely through a web interface.
Screenshots
Demonstration Video
Full Report
Access my complete report here :
View Full Report