
COURSEWORK
Shreeya's AI-ML-001 course work. Lv 1
| Shreeya | AUTHOR | ACTIVE |
Level 0 Report - Shreeya G Bhat
18 / 3 / 2026
Task 1: 3D Printing
I spent some time looking into the basics of 3D printing. I went through the SOPs to understand how the machines actually function, specifically focusing on how the print bed needs to be leveled and the importance of safety during operation.
I looked into how 3D models (STL files) are converted into instructions for the printer. I learned about:
- The Slicing Process: How a slicer like Cura or Creality Slicer breaks a 3D model into thousands of individual layers.
- Key Settings: Why you need to dial in the bed temperature (around 60°C for PLA) and nozzle temperature (usually 200°C–210°C) to get a good first layer.
- Print Quality: How infill density and layer height affect both the strength of the object and the total print time.
I ended up picking out a 3d 6-faced die , which was further sliced by the slicing appplication
Resources Consulted
Click here to see the STL file I used
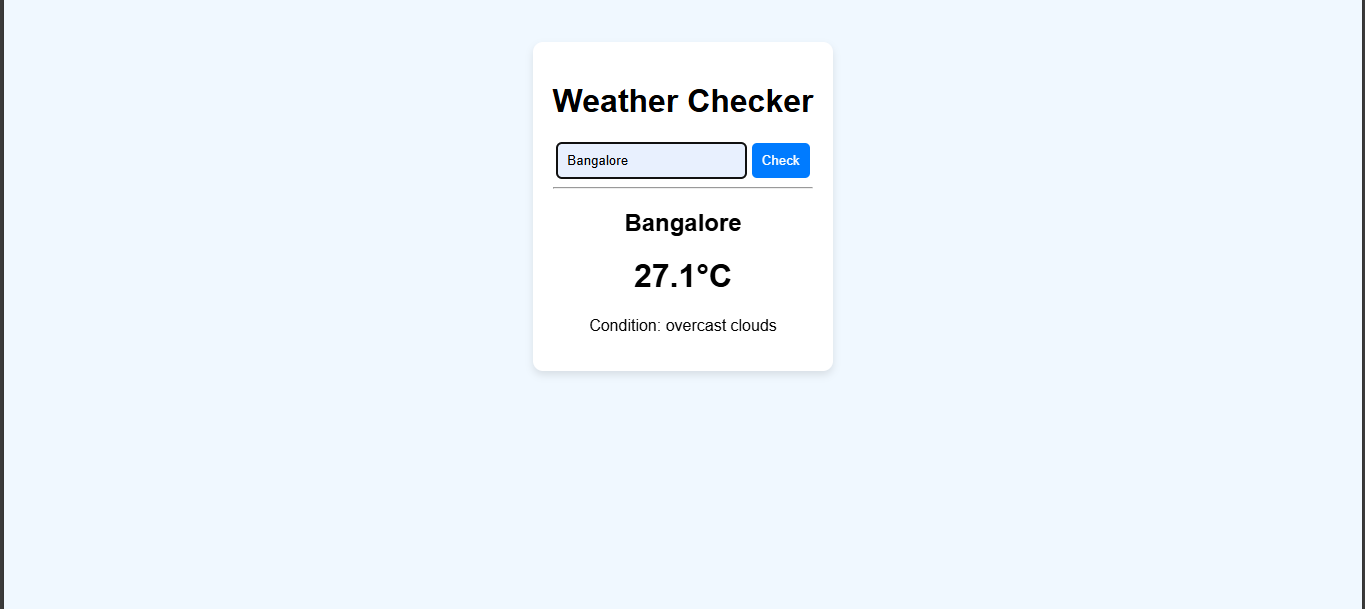
Task 2: Weather App & API Integration
I built a weather app to understand the use of APIs and see how it acts as a bridge between two applications.
Workflow
- The user enters the name of city which they desire to know the weather of.
- A GET request is sent to the OpenWeather app thro my API key.
- The app extracts my requested values ie. the weather conditions and temperature.
- The info is dynamically displayed on the user's screen.
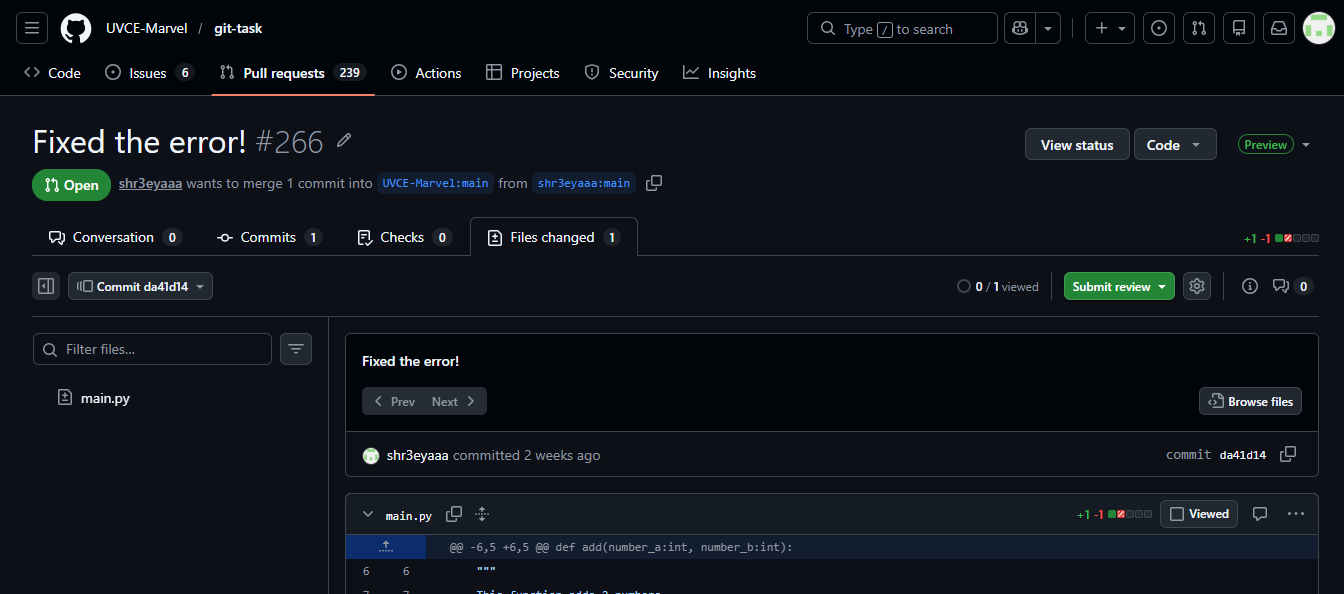
Task 3: GitHub Workflow & Contributing
I worked thro a hands-on exercise to learn the standard GitHub workflow: Forking, Branching, and Pull Requests (PRs).
How I did it?
The repository I was tasked with had a failing test (GitHub Actions). I followed these steps to fix it:
- Forking: Created a personal copy of the repository under my own GitHub account.
- Branching: Created a new branch to work on the fix without touching the original (main) code.
- The Fix: Opened
main.pyandtesting.py, identified why the test was failing, and patched the code. - Committing & Pushing: Committed my changes and pushed them to my forked repository.
- Pull Request: Opened a Pull Request back to the original repository to propose my fix.
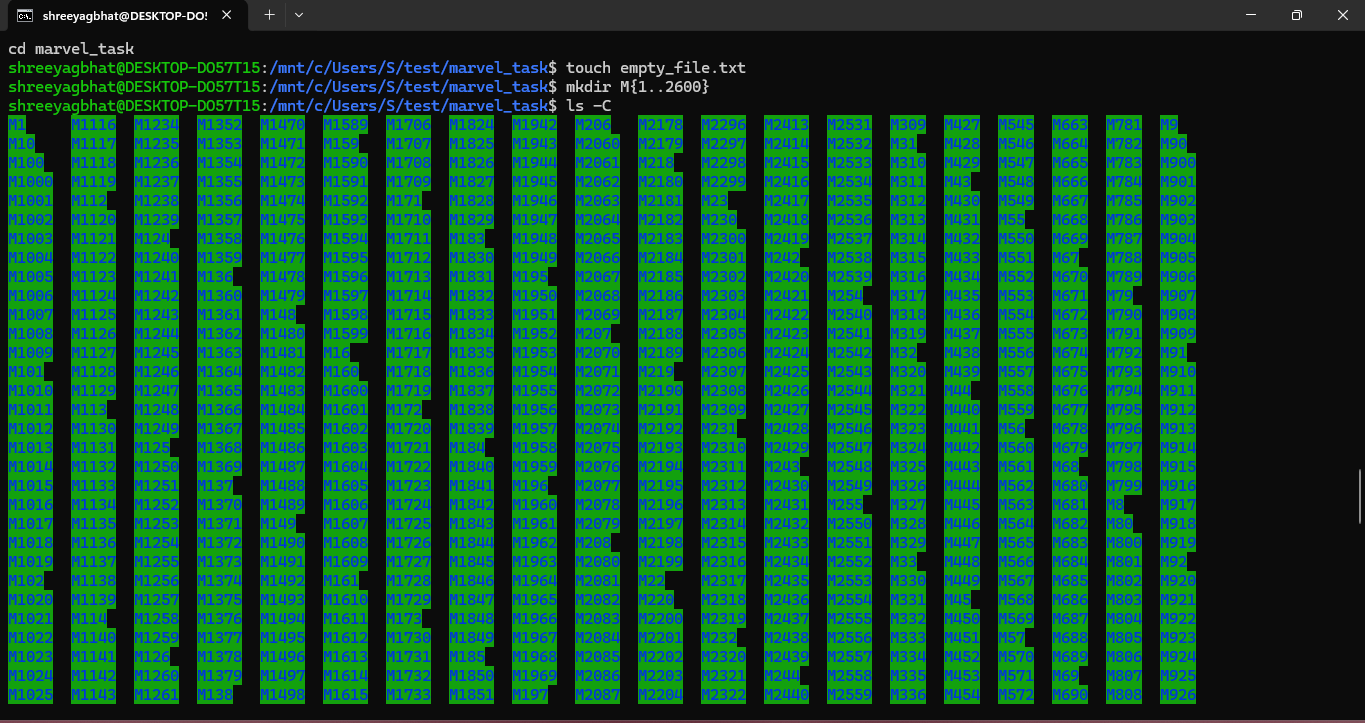
Task 4: Command Line Basics (Ubuntu)
I practiced basic Linux terminal commands to handle file systems and automate repetitive tasks.
- Create and enter the new folder
mkdir marvel_task cd marvel_task - Create the blank file
touch empty_file.txt - Create 2600 folders (The M1, M2... style)
mkdir M{1..2600} - List them (Fixing that vertical mess)
To stop it from being one long vertical line, use the -C flag. Also, stretching your terminal window wider before you type this will help it snap into more columns:
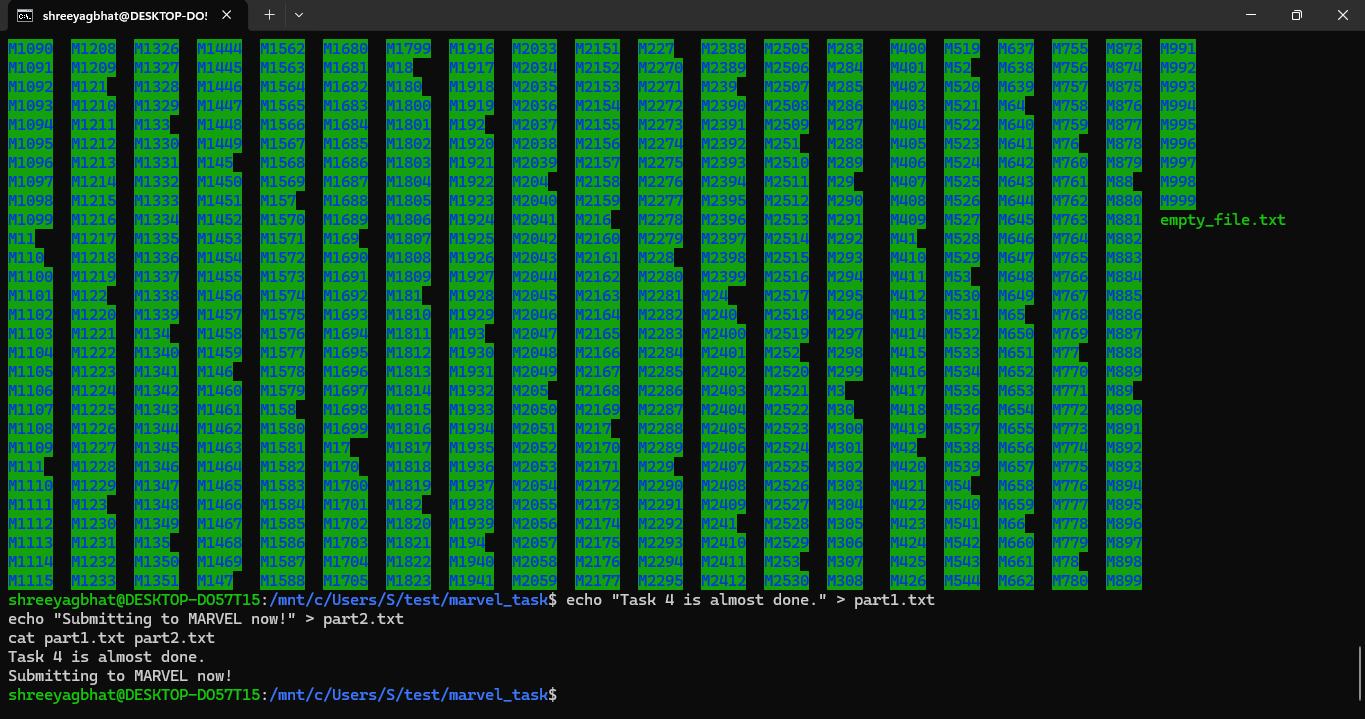
ls -C - Concatenate two random text files
echo "Task 4 is almost done." > part1.txt echo "Submitting to MARVEL now!" > part2.txt cat part1.txt part2.txt
Resources
Task 5: Linear Regression from Scratch
I implemented Linear Regression model using the California Housing dataset to understand how machine learning models optimize their predictions.
Technical Implementation
- Dataset: Used 'Median Income' as the primary feature to predict house prices.
- The "Scratch" Logic: Manually programmed the Gradient Descent loop (1000 iterations) to update weights and bias by calculating error gradients.
- Scaling: Used
StandardScalerto normalize the data, which is essential for the manual learning process to converge. - Benchmark: Compared my manual implementation against
sklearn.linear_model.LinearRegression.
Key Takeaways
- Gradients: Learned how small mathematical adjustments to weights and bias eventually lead to the line of best fit.
- Library Efficiency: While the manual code works,
Scikit-Learnis highly optimized for performance and handling large-scale datasets.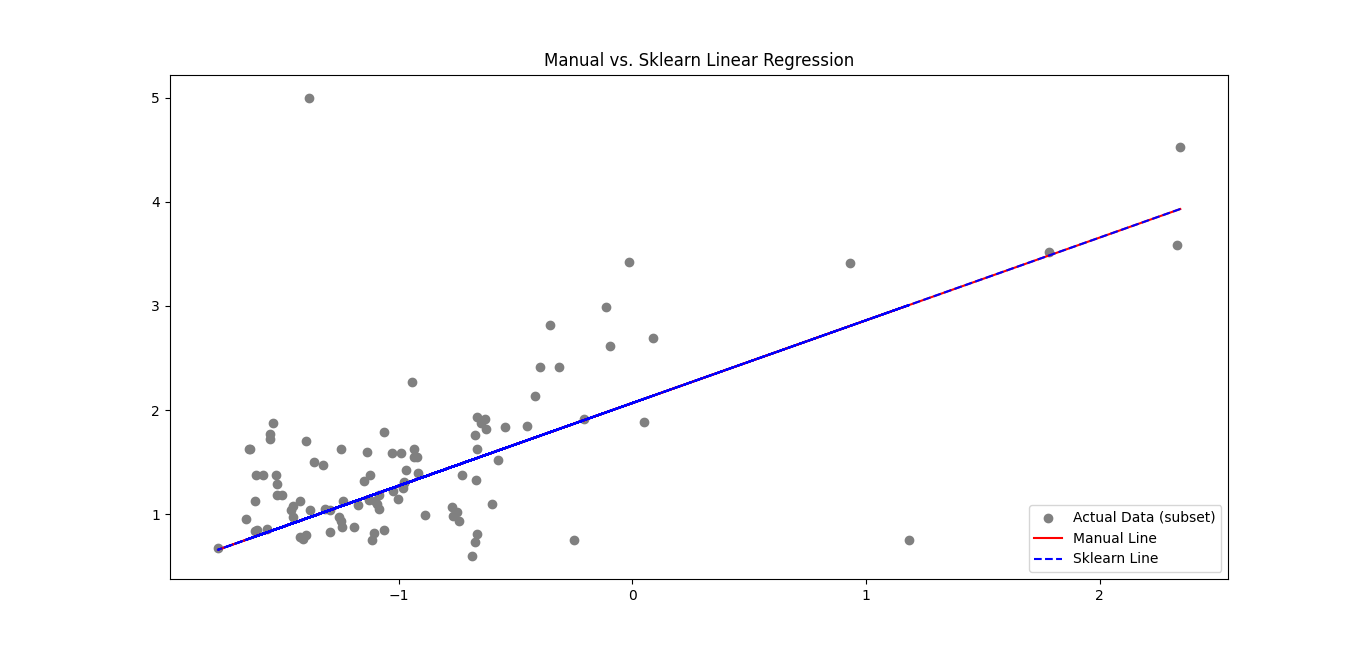 The code
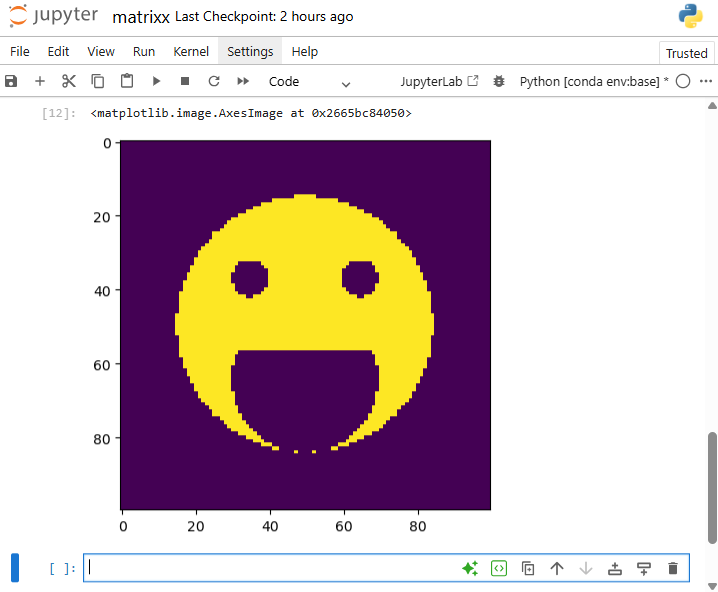
Task 6: The Matrix Puzzle (NumPy & Matplotlib)
I solved a visual data puzzle by applying NumPy matrix manipulations to a scrambled dataset, eventually revealing a hidden image using Matplotlib.
Implementation :
- Imported the scrambled matrix using NumPy to handle the raw numerical data.
- Used
arr.Tto flip the matrix along the diagonal. - Used
arr.resize(100,100)to resize the matrix and make it actually look like a square - Used
plt.imshow(arr)to reveal the image
Task 7: Personal Portfolio Webpage
I designed and deployed a responsive portfolio website to showcase my academic background, technical projects, and personal interests.
Implementation by:
- HTML5/CSS3: Used for the core structure (basically the base).
- VS Code: Primary environment for development and local testing.
- Deployment: Hosted thro GitHub Pages, ensuring the site is live and integrated.
My Live Portfolio
Task 8: Technical Resource Article (Markdown)
I authored and published a technical article on Dark Matter for the MARVEL website, using Markdown to ensure clean formatting and cross-platform consistency.
Key Outcome
Mastered Markdown syntax (headers, links, and lists)
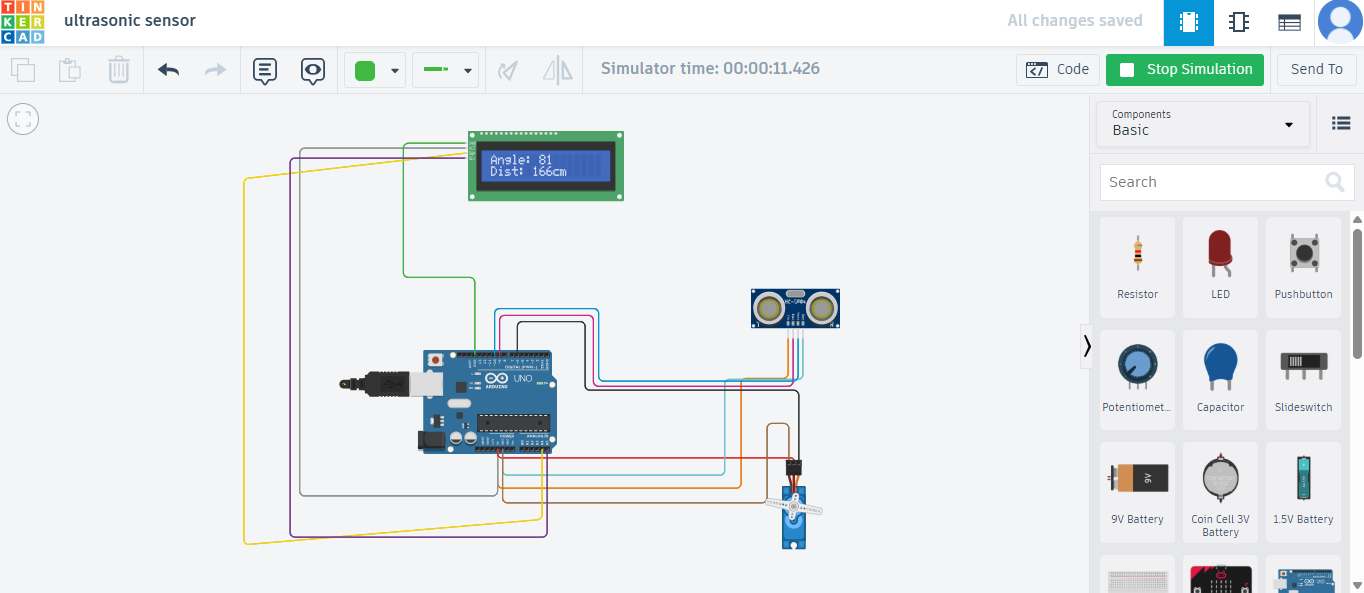
Task 9: Tinkercad
I designed and simulated a digital radar system using Tinkercad to explore the integration of ultrasonic sensors and servo motors for spatial object detection.
Technical Implementation
- Sensing: Used the HC-SR04 ultrasonic sensor to measure distance based on sound wave "time of flight."
- Scanning: Integrated a Servo motor to rotate the sensor from 0° to 180°, creating a semi-circular detection sweep.
- Monitoring: Programmed the Arduino to stream real-time angle and distance coordinates to the Serial Monitor.
Task 10: Speed Control of DC Motor
I implemented a speed control system for a 5V motor using an L298N H-Bridge motor driver and an Arduino Uno.
Technical Implementation
- Motor Driving: Used the L298N driver to handle the high current requirements of the motor, which the Arduino pins cannot provide directly.
- Speed Regulation: Applied Pulse Width Modulation (PWM) via the
analogWrite()function to vary the average voltage supplied to the motor, effectively controlling its RPM. - H-Bridge Logic: Configured the input pins (IN1, IN2) to set the direction of rotation and the Enable pin (ENA) to regulate speed.
Workflow
- Hardware Assembly: Wired the physical 5V BO motor to the L298N and powered it using an external battery source to prevent drawing excessive current from the Arduino.
- Testing: Recorded the motor transitions from low speed to high speed and verified direction control.

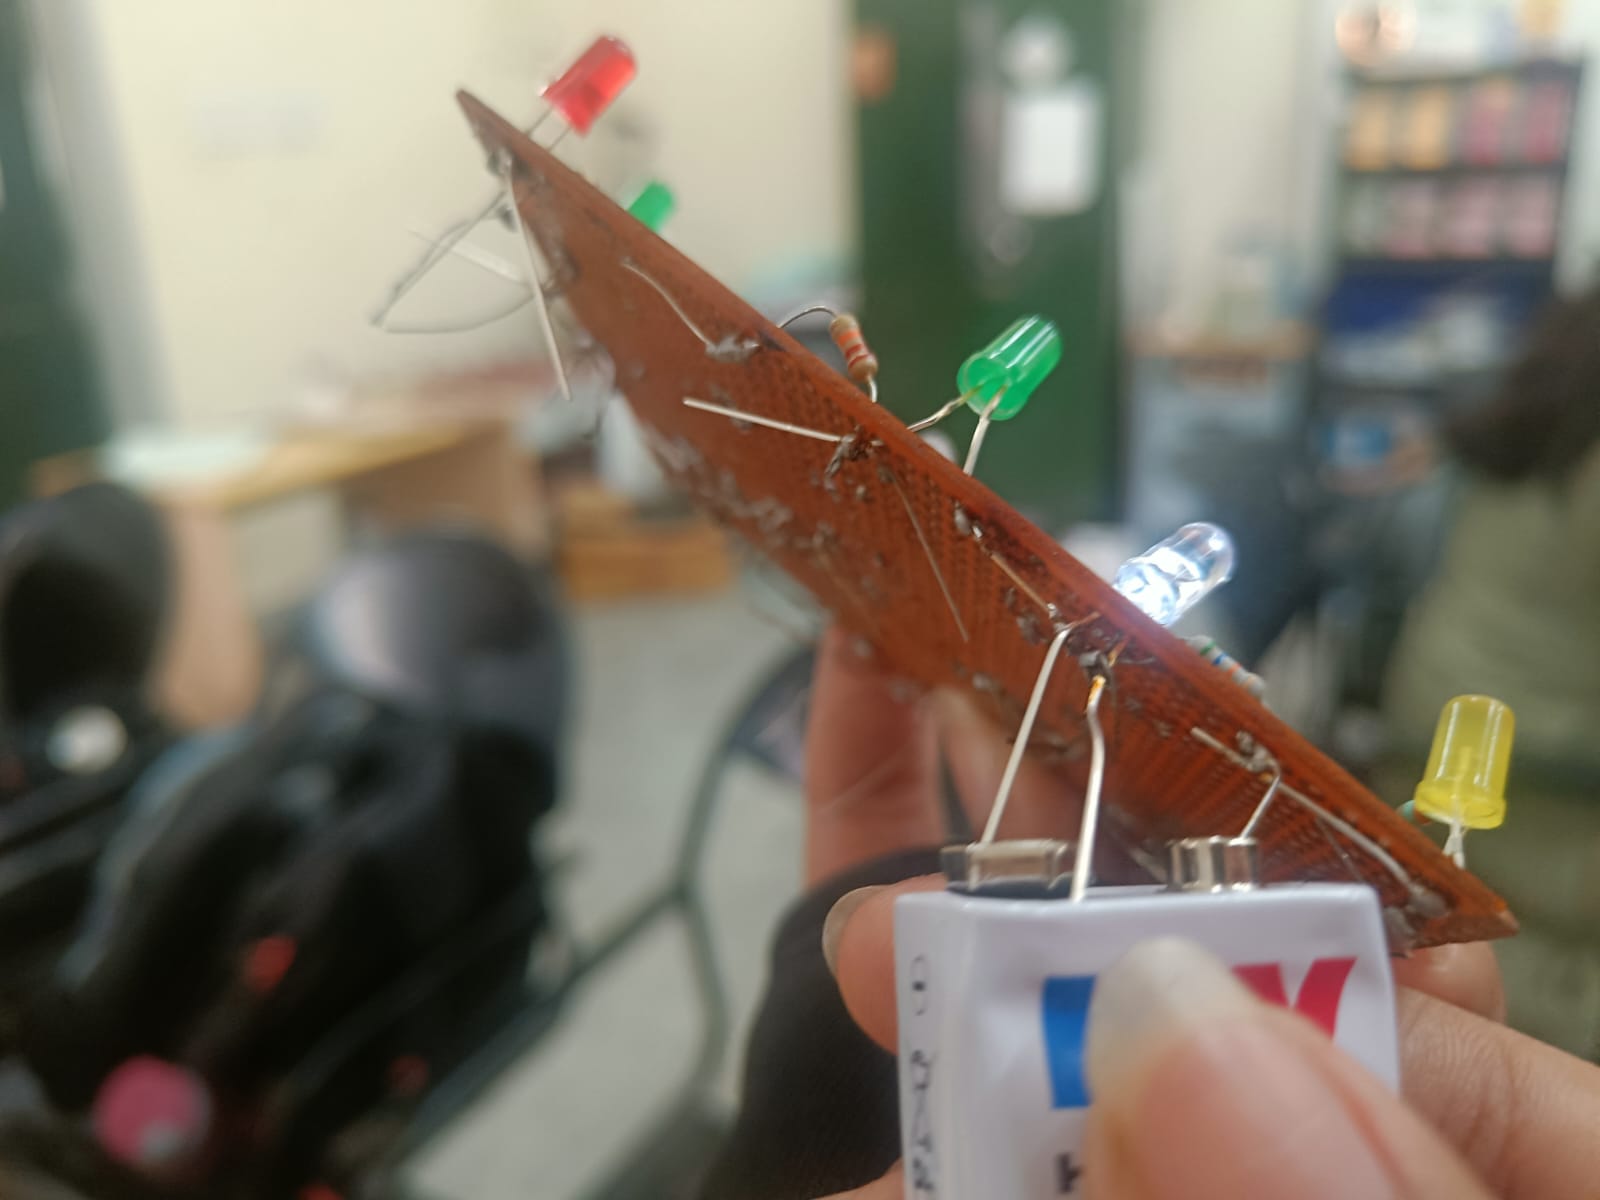
Task 12: Soldering
I learned the fundamentals of soldering, focusing on equipment safety and technique while assembling a basic LED circuit on a perf board.
Soldering Toolkit
- Soldering Iron: Used to heat the component leads and the copper pad on the perf board.
- Solder (Lead-free): The filler metal used to create a permanent mechanical and electrical bond.
- Flux: Applied to prevent oxidation and help the solder flow smoothly onto the joints.
- Soldering Wick & Pump: Utilized for desoldering and correcting excess solder or "bridges."
- Stand & Brass Sponge: Essential for safely resting the iron and cleaning the tip between joints.
Implementation: LED Circuit
Under the supervision of a lab coordinator, I soldered a simple LED and resistor circuit:
- Preparation: Cleaned the iron tip and tinned it for better heat transfer.
- Placement: Mounted components through the perf board and bent leads slightly to secure them.
- The Joint: Heated the pad and the lead simultaneously for 2-3 seconds before applying solder to create a "volcano" shaped joint.
- Finishing: Clipped excess leads using a wire cutter once the joints cooled.
Task 14: K-Map
Here's the logic of the burglar alarm:
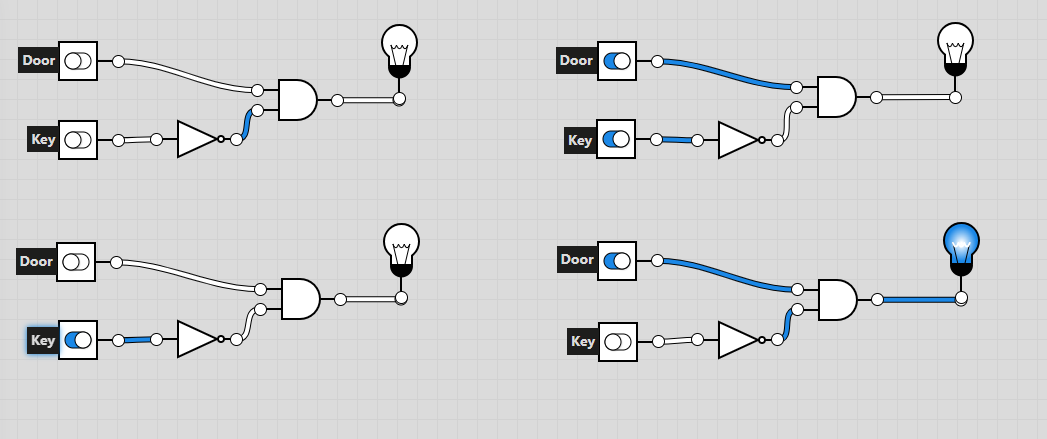
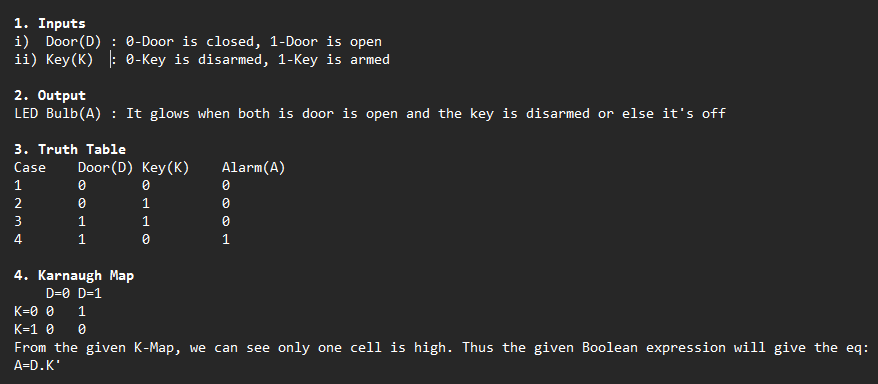 Here's the Circuit:
Task 16: Datasheet Report — MQ135 Gas Sensor
I studied the MQ135 datasheet to understand its operational parameters, calibration requirements, and the mathematical principles behind its gas sensing capabilities.
Technical Specifications
- Sensor Type: SnO2 semiconductor (conductivity increases with gas concentration).
- Target Gases: Ammonia (NH3), Nitrogen oxides (NOx), Alcohol, Benzene, Smoke, and CO2.
- Operating Voltage: 5V.
- Output: Analog (AO) for ppm concentration; Digital (DO) for threshold alerts.
The Math
- Freundlich Adsorption: The sensor follows the formula $x/m = K P^{1/n}$, modeling how gas molecules adsorb onto the sensor surface.
Click here for the link to my report
Task 17: Virtual Reality
I went through a couple YouTube videos and useful resources to learn the basics of AR and VR. Link to the rep
Task 18: SadServers – Command Line Murders
I tackled the Command Line Murders challenge on SadServers, utilizing Linux system administration tools to investigate logs, process trees, and file activity to identify the perpetrator (after multiple tries) while learning and using multiple commands.
Troubleshooting Toolkit
- Using the
cdcommand to change between the clmystery, mystery and other directories. - Using
lsto list the content of the directories. - Using
catto see the content of the file - Using
grepto parse through the contents of the file. - Using
head -n (no.) file_nameto access a couple of lines from the beginning of the file
The Investigation Flow
- Initially analysed the instructions in the clmystery directory.
- Accessed various files and directories in
mystery. - Got a clue which turned out to be false.
- Analysed again to find the real culprit and identified him to make the server HAPPYY :)

Task 20: Notebook Ninja (Jupyter Foundations)
I completed the Jupyter Notebook challenges that focused on Markdown structuring, cell-type management, and data visualization using libraries in python.
Completed Challenges:
- Markdown Skills: Implemented headers, bulleted lists, adding images and formatted text for documentation.
- Coding Executed Python calculations and generated plots using
Matplotlib.
Documentation:
Task 21: Machine Learning – Intro & Data Preparation
I studied the foundations of Machine Learning and made an article based on the two YouTube videos I watched, which explained data formulation for ML as well.
Click here for link to my article
Thank YOU