
COURSEWORK
Lakshitha's D-P-001 course work. Lv 2
| Lakshitha Vijay | AUTHOR | ACTIVE |
LEVEL 0 REPORT (Generic Tasks)
13 / 9 / 2025
LEVEL 0 REPORT (Generic Tasks)
TASK 1: 3D Printing
Objective: To understand the working of a 3D printer and use it to print a 3D object.
I started with understanding the working of the 3D printer present in our lab. I first understood the type of the 3D printer that we use (ie. Fused Deposition Modeling or FDM 3D printer). I then read about the core principle (ie. Additive Manufacturing), the key components (like frame, print bed / build plate, extruder assembly, hotend, heating block, nozzle, heat break & heat sink and filament spool), and the step - by - step working process (digital design / blue print, slicing, printing, completion and post processing). Next, I learnt in some detail about what an STL file is and also about slicing an STL file. I then went through the SOPs regarding 3D printer (pre-print, during print, and post-print). Finally I learnt about the meaning, importance and standards for various printer settings like infill density, bed temperature, etc.
I downloaded the STL file from the internet. I installed Ultimaker Cura. I'm yet to print my model.
TASK 2: API
Objective: To build a web app that uses API.
Description of my project: I obtained an API key from NASA’s official API portal. I created a web app using HTML, CSS and JavaScript that displays the "Astronomy Picture of the Day" (APOD). The app also allows users to view APOD for any past date. Apart from this, there are features that allows users to search for astronomy related pictures captured by NASA (eg: Nebula, Aurora,Saturn rings, etc.). We can also ask for a random astronomy pic. All pictures and descriptions are fetched directly from NASA’s API and displayed in the app.

Link to the video demonstration
Link to the GitHub repository of my code.
Outcome: Through this task, I learnt about API and basics of creating web apps. I learnt how to integrate external data into a web application.
TASK 3: Working with Github
Objective: To get familiarised with GitHub integrated workflows (GitHub actions), Issues, and pull requests.
For this task, I first created my GitHub account. I then learnt the basics through copilot on GitHub. Further, I learnt about forking, I learnt to create my own copy of a project, to clone a fork to my computer, to create a branch to work on, to make and push changes and to make a pull request. I used the knowledge gained to complete my task.
In order to complete the given task, I forked the given repository. Then I cloned the fork to my computer. I fixed the error in the main branch of the repository so that it doesn't fail tests and then I opened a pull request proposing to fix the issue.


Outcome: I learnt the basics of GitHub.
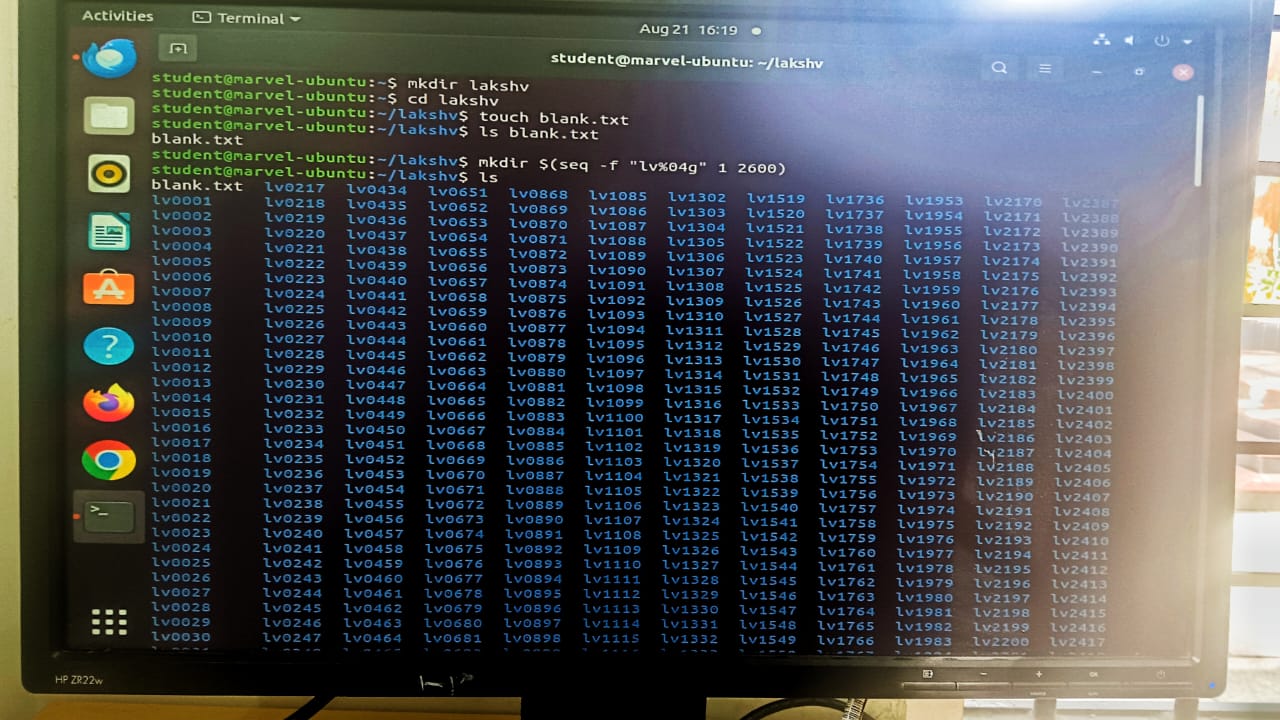
TASK 4: Get familiar with the command line on ubuntu and do the subtasks
Objective: To get familiar with the command line on ubuntu.
I first created a new folder, then I changed directory into that folder, next I created a blank file without using any text editor, then I listed the files in that folder, then I created 2600 folders within this folder, I listed the contents of that folder. I then created a text file named test and entered random text into it. I also entered random text into blank.txt which was already created. I then concatenated the two text files and displayed them on the terminal.
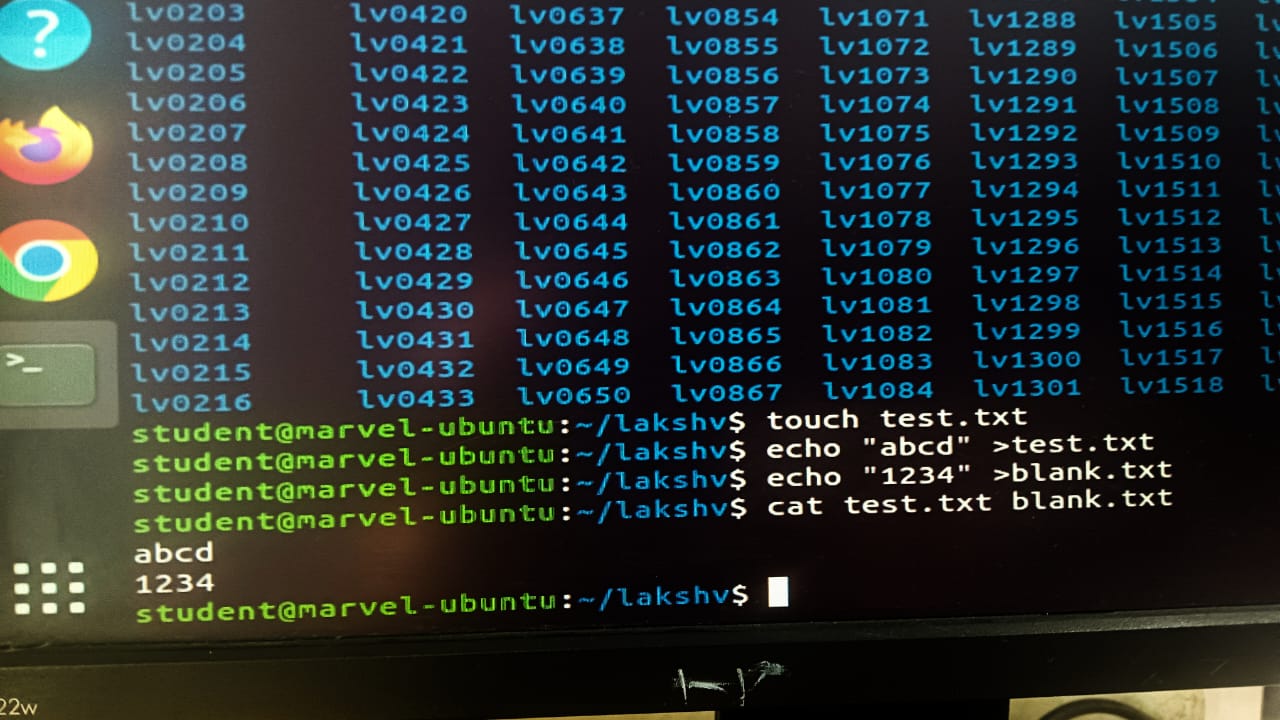
Outcome: I learnt few basic ubuntu command lines.
Task 5 : Build Your Own Brain -Linear Regression from Scratch
Objective: To get a glimpse of machine learning by implementing linear regression from scratch, and compare its performance with the scikit-learn implementation, using the California Housing dataset to evaluate the model on real-world data.
I sarted with understanding linear regression and gradient descent in a bit of detail. I then implemented linear regression manually (without using ML libraries for training). I applied gradient descent to minimize error. I compared my custom model’s performance against sklearn.linear_model.LinearRegression.I analyzed results by: Graph showing line of best fit and the datapoints, performance metrics: MSE, MAE, R² for both custom and scikit-learn models and a brief comparison between two models.

Link to code (Jupyter Notebook)
Outcomes: Through this task, I learnt the concepts of Linear regression and Gradient descent which talks about obtaining the "best fit line". I learnt the importance of scaling which makes all features similar in size, so that the model learns faster and better. I learnt about few standard metrics used to evaluate regression models. I realised that inbuilt ML libraries reduce difficulty as well as increase speed and accuracy.
Task 6 : The Matrix Puzzle
Objective: Decode the given scrambled matrix into a hidden image using NumPy operations, Matplotlib and visualization techniques.
I first imported the necessary libraries. Then using NumPy operations I found the size of the matrix and reshaped it into a square matrix. I viewed the image using Matplotlib. I then realised that there is a need to reorrient the image, which i did in order to reveal the final image.

Link to code (Jupyter Notebook)
I've also included a more generalised but a little complicated code in the above repository.
Outcomes: I learnt the basics of NumPy and Matplotlib through this task.
TASK 7: Create a Portfolio Webpage
Objective: To create a responsive website that showcases my portfolio and push it to the git repository.
I used HTML and CSS to create my portfolio website.

Link to GitHub repository
Outcomes: I learnt how to create a responsive web page and push it to the git repository.
TASK 8: Writing Resource Article using Markdown
Objective: To write a technical resource article using Markdown.
I have written a resource article on "Exoplanet Detection Techniques".
Here's the link to my Resource Article.
Outcomes: Through this task, I learned to use markdown to add formatting elements (headings, bulleted lists, URLs) to plain text. I realised that markdown is one of the most effective tools that can be used for writing reports, articles, etc.
TASK 9: Tinkercad
Objective: To get familiar with Tinkercad.
I created my tinkercad account and explored the application for a while. Then I performed the given task where i had to simulate a simple circuit using an ultrasonic sensor to estimate the distance between an obstacle and the sensor and display the results on the serial monitor. So, I basically created a radar system utilising an ultrasonic sensor and servo motor to detect objects within a certain range. The ultrasonic sensor emits sound waves and measures the time taken for them to bounce back, while the servo motor rotates the sensor to cover a wider area, providing a simple yet effective detection mechanism.

Here's the link to simulation video
Outcomes: Through this task, I was introduced to tinkercad. I also got insights about working of ultrasonic sensor and servo motor.
TASK 10: Speed Control of DC Motor
Objective: To control the speed of a DC motor using an L298N motor driver, Arduino board and Potentiometer.
I started with reading the reference article to understand about the L298N motor driver. I understood that the speed of the DC motor is controlled through PWM(Pulse Width Modulation) and the direction of rotation of the motor is controlled through a H-Bridge. I also understood about the various pins and the screw terminal blocks on the motor driver.
I connected the circuit as shown in the figure below, uploaded the code and controlled the speed of the motor through the potentiometer.


Link to demonstration video
Outcomes: Through this task I learnt to control the speed of a 5V BO motor using an Arduino UNO and H-Bridge L298N motor driver.
TASK 11: LED Toggle Using ESP32
Objective: To learn the working of an ESP32 and create a standalone web server with an ESP32 that controls the LED connected with ESP32 GPIOs.
I rigged up the circuit as shown in the figure. I then used the arduino IDE to code and upload the program to the ESP32. I got an IP adress, which I typed in my mobile's browser, to access the web server. I could control the two LEDs from my mobile through WiFi as shown in the video below.


Link to video demonstration
Outcomes: I learnt how to interface ESP32 with GPIOs and control devices through a web server. I also gained hands-on experience in programming and wireless communication using ESP32.
TASK 12: Soldering Prerequisites
Objective: To perform basic soldering on a perf board.
I first learnt about the soldering equipment present in our lab, the solder, the soldering iron, soldering wick, flux, etc. I then soldered an LED on a perf board as shown in the figure below.
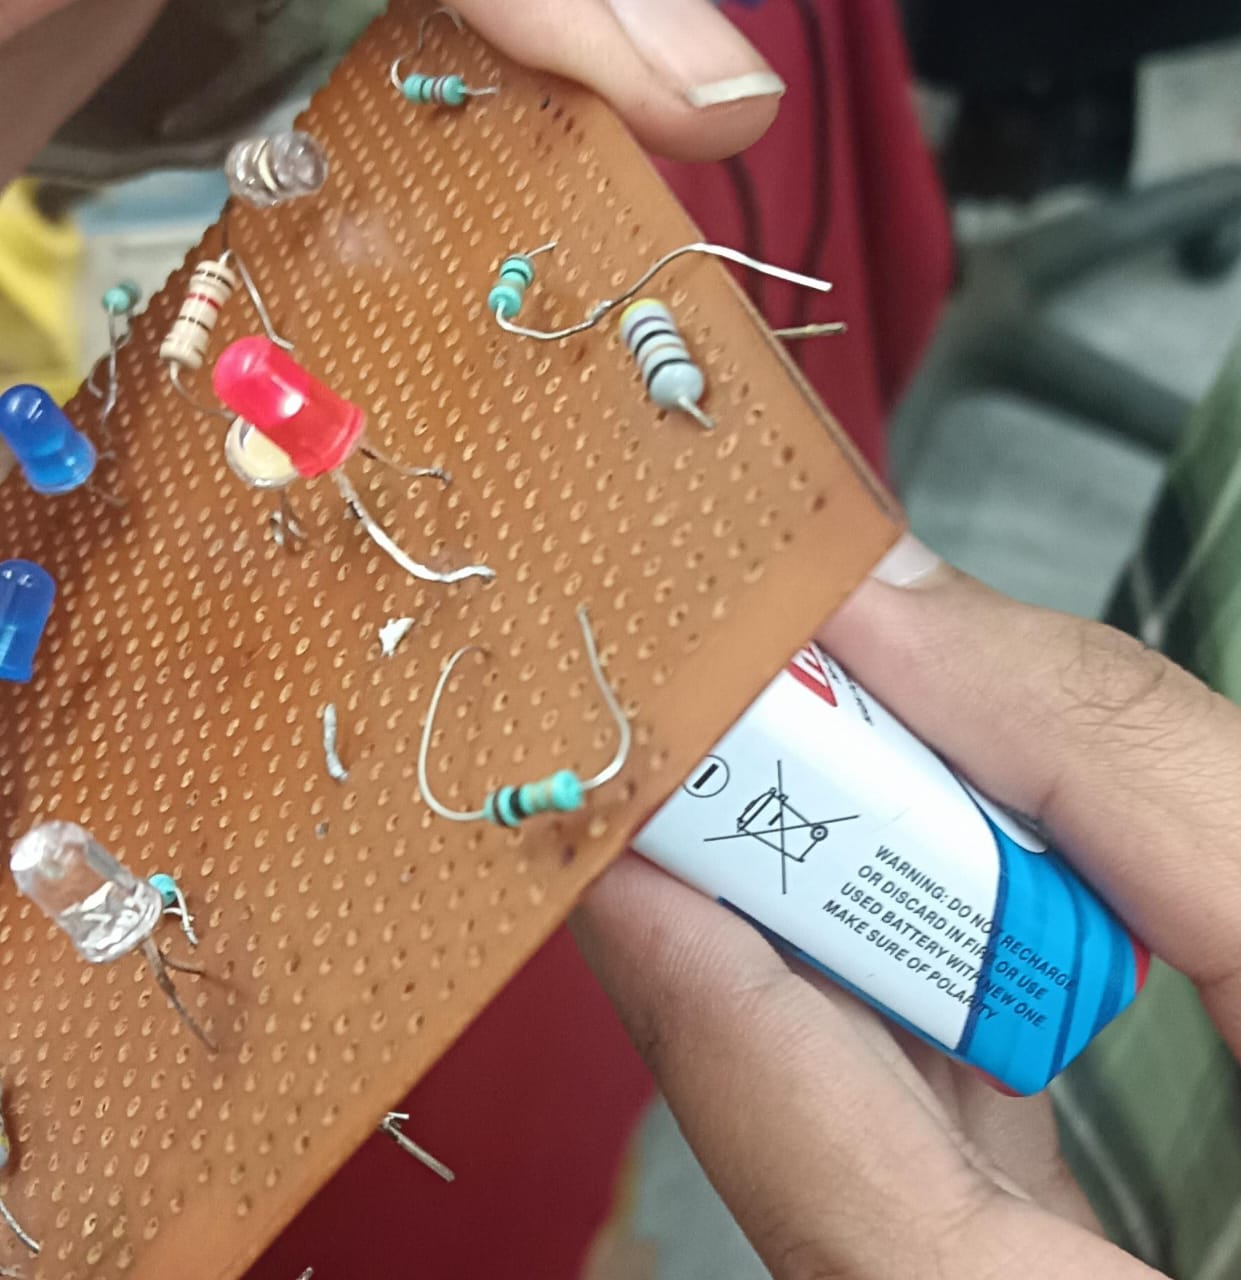
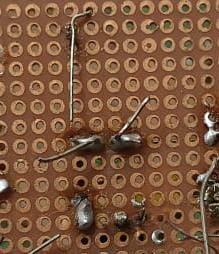
Outcomes: I got hands-on experience in using the soldering equipments and learnt to perform a basic solder.
TASK 13: 555 astable Multivibrator
Objective: To design a 555 astable multivibrator with duty cycle 60%.
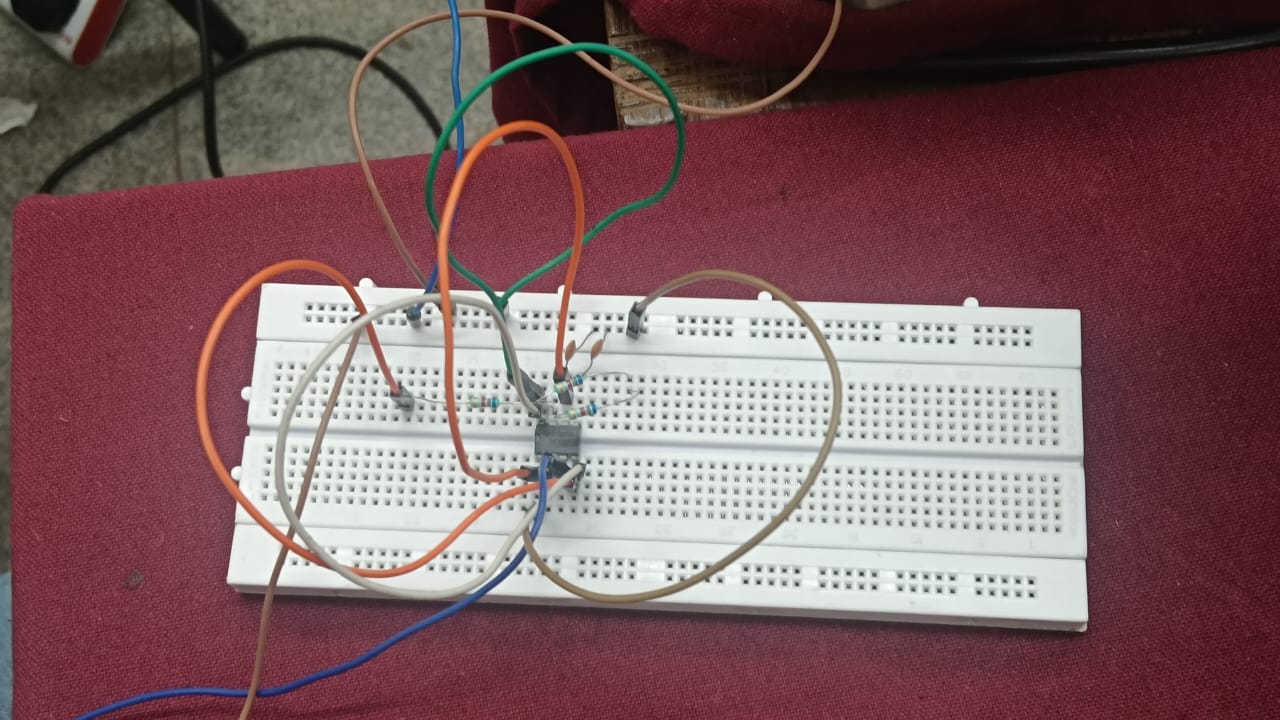
I started with understanding the 555 IC, and also the concept of duty cycle. I then rigged up the circuit on a bread board and by using the probes, I observed the output of my circuit on the DSO(Digital Storage Oscilloscope) as shown below. I achieved the required 60% duty cycle. I then learned in more detail about the 555 IC, I learned the internal working in the astable mode and understood how the square wave is produced and also how the resistor values determine the duty cycle.


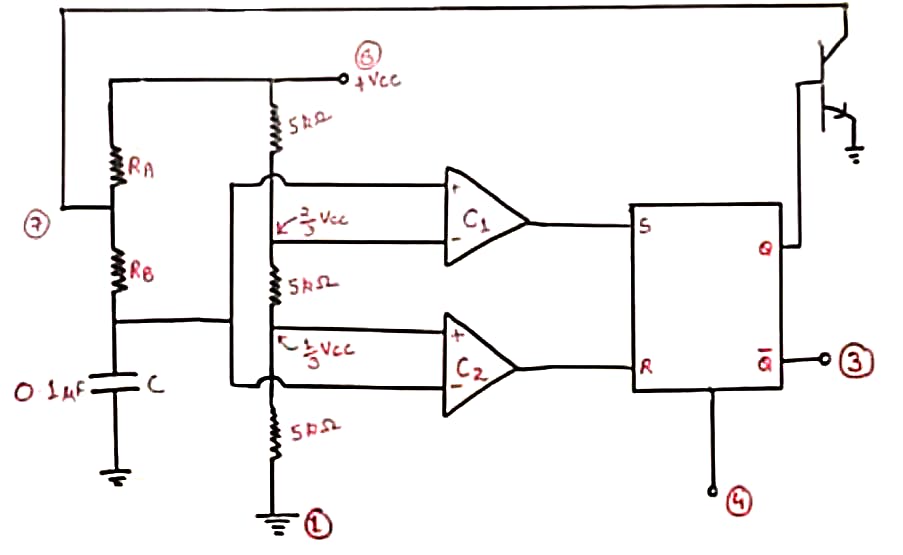


Outcomes: I learned how to design and implement a 555 timer in astable mode to achieve a 60% duty cycle. I also gained hands-on experience in observing and verifying the output waveform using a Digital Storage Oscilloscope (DSO).
TASK 14: Karnaugh Maps and Deriving the logic circuit
Objective: To determine the karnaugh map and make a burglar alarm using simple logic circuits for 4 cases, based on door lock/open and key pressed/not pressed.
I've denoted the door lock/open and key pressed/not pressed as follows:
Door: Lock = 0, Open = 1 Key: not pressed = 0, pressed = 1
The burglar alarm is supposed to ring(LED is supposed to glow) only when the door is open without the key being pressed. So the truth table is as shown below:

To derive the logic circuit corresponding to the above truth table, I've used Karnaugh Map:


I also simulated the above logic circuit in tinkercad in 2 ways:
Simulation 1:

Link to simulation 1 video
reference image for 1st simulation:
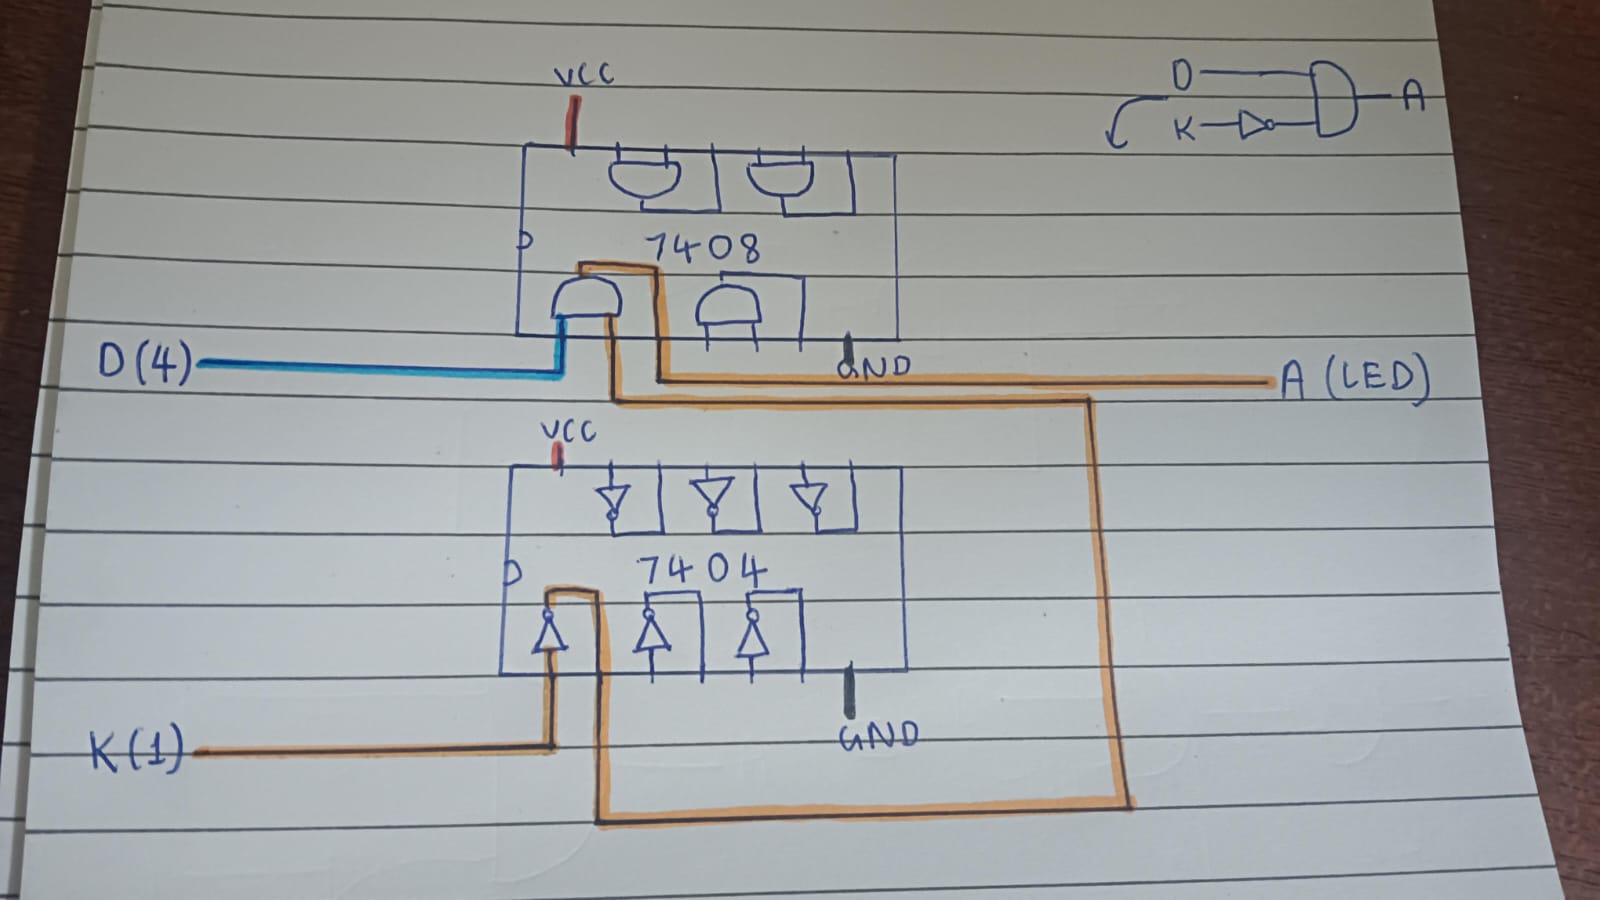
Simulation 2:

Link to simulation 2 video
reference image for 2nd simulation:
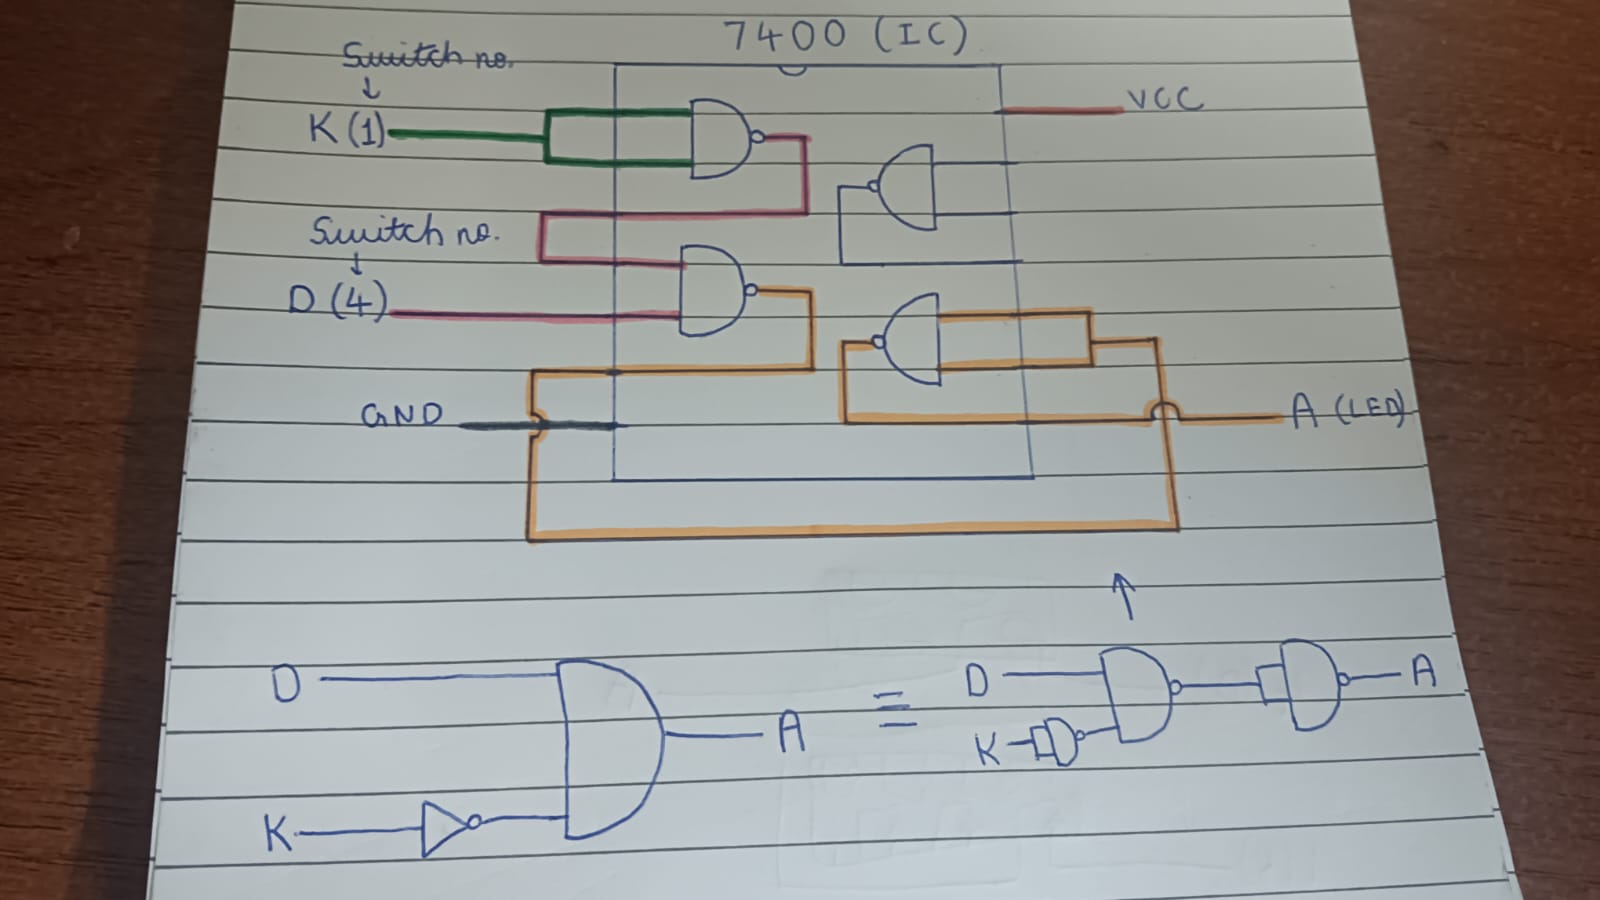
Outcomes: I learnt to use Karnaugh map and also to represent a real world problem in the form of a logic circuit which is realised through a logic equation which is in turn simplified using a K-map from the required truth table. I also learnt about ICs like 7400, 7404 and 7408.
TASK 15: Active Participation
TASK 16: Datasheets report writing
Objective: To study the datasheet of L293D motor driver and write a report on it.
I first downloaded the datasheet from the internet. I studied it and added information like description, applications, features, pin configuration and functions, etc. I then added on information about PWM and H-bridge.
 Link to my complete report
Outcomes: I learnt about L293D motor driver and also gained experience in writing reports and studying datasheets.
“Please click here to continue to the next section of the report.”