
COURSEWORK
Dhruv's IOT-001 course work. Lv 1
| Dhruv | AUTHOR | ACTIVE |
17 / 4 / 2024
The basics:
As an open learner I was guided by the coordinators Abhilash, Bhavid and student Bhuvan to help finish these tasks. They were always ready to help a huge thanks to them!!!! :)
ESP 32
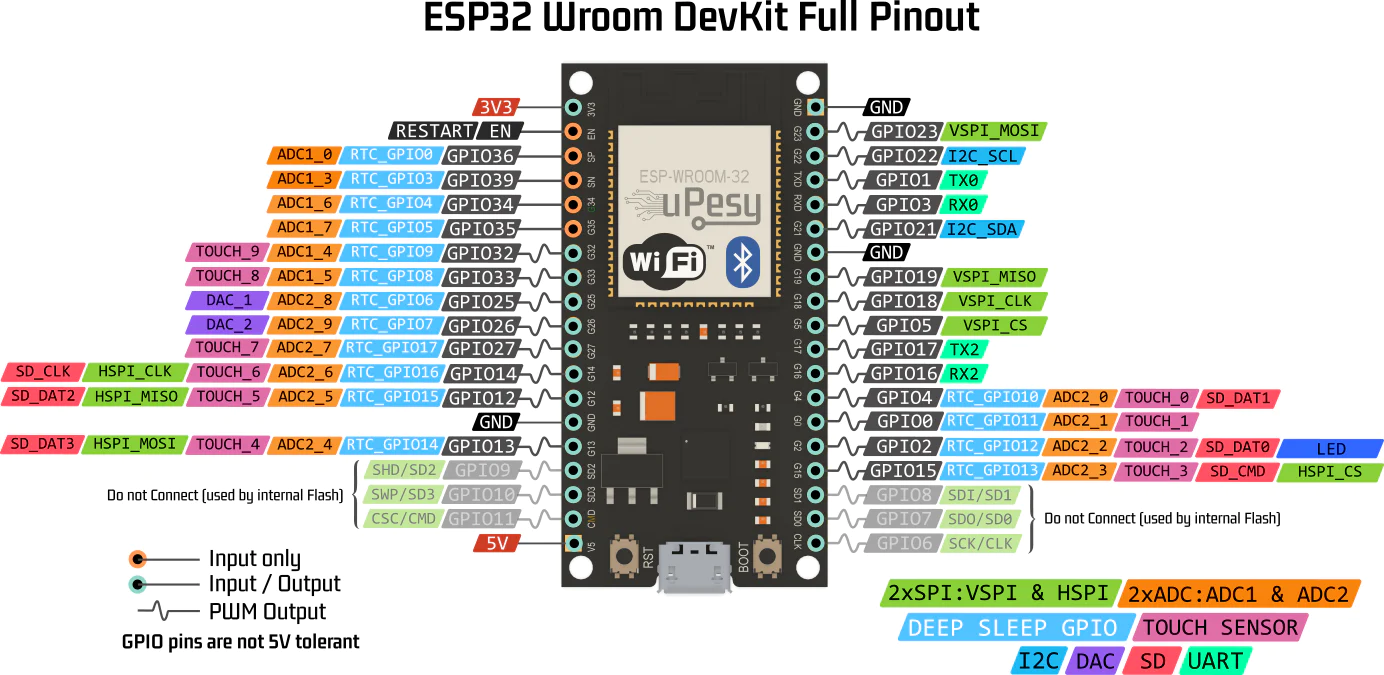
This is the ESP 32 with all the pins, this was super new and confusing to me at start.
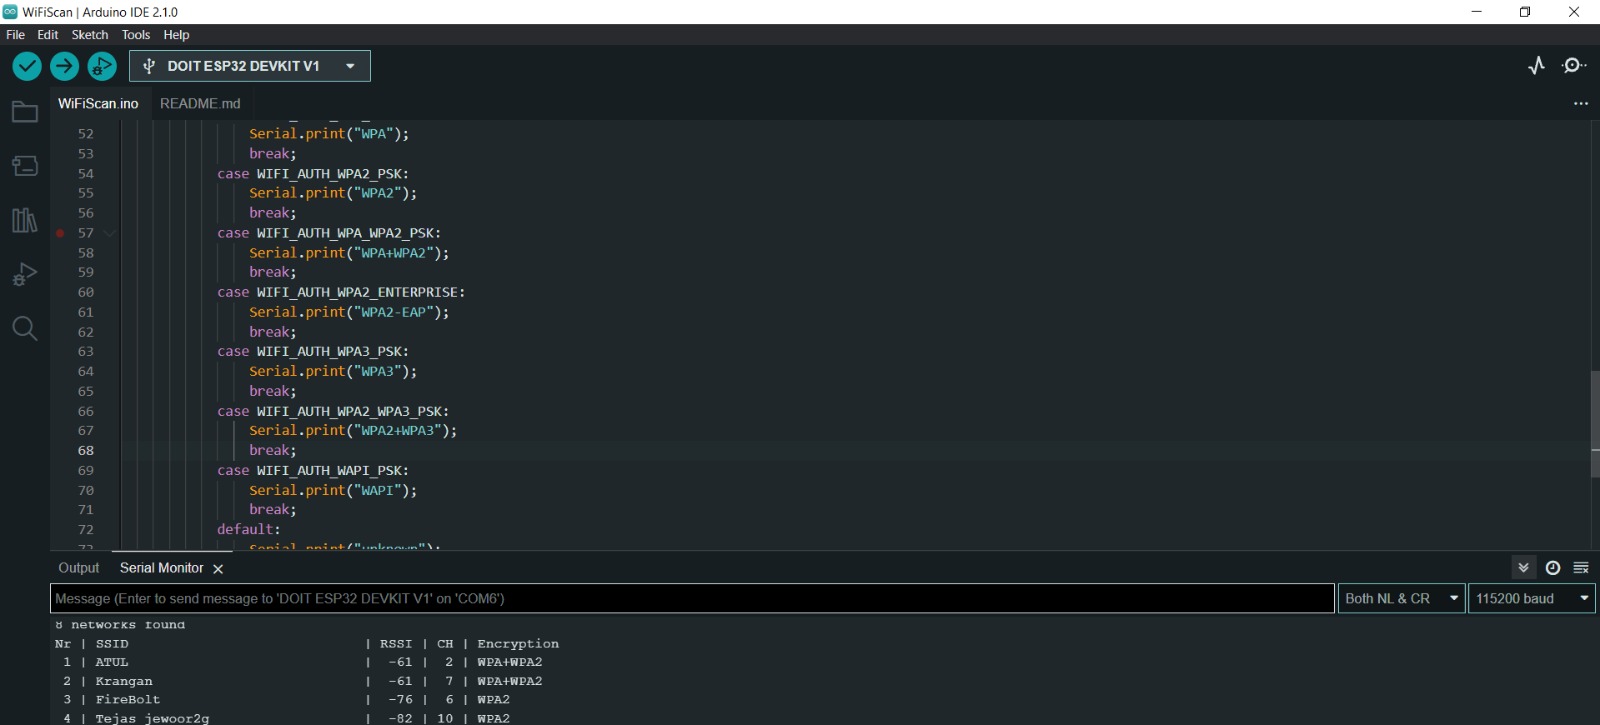
Learnt how to set wifi on esp32
Task 1 : Simon Says
What is Simon says game?
Simon says is a classic memory game where players should replicate a random sequence of colours provided by the device.
Task 2 : Basics of MQTT protocol
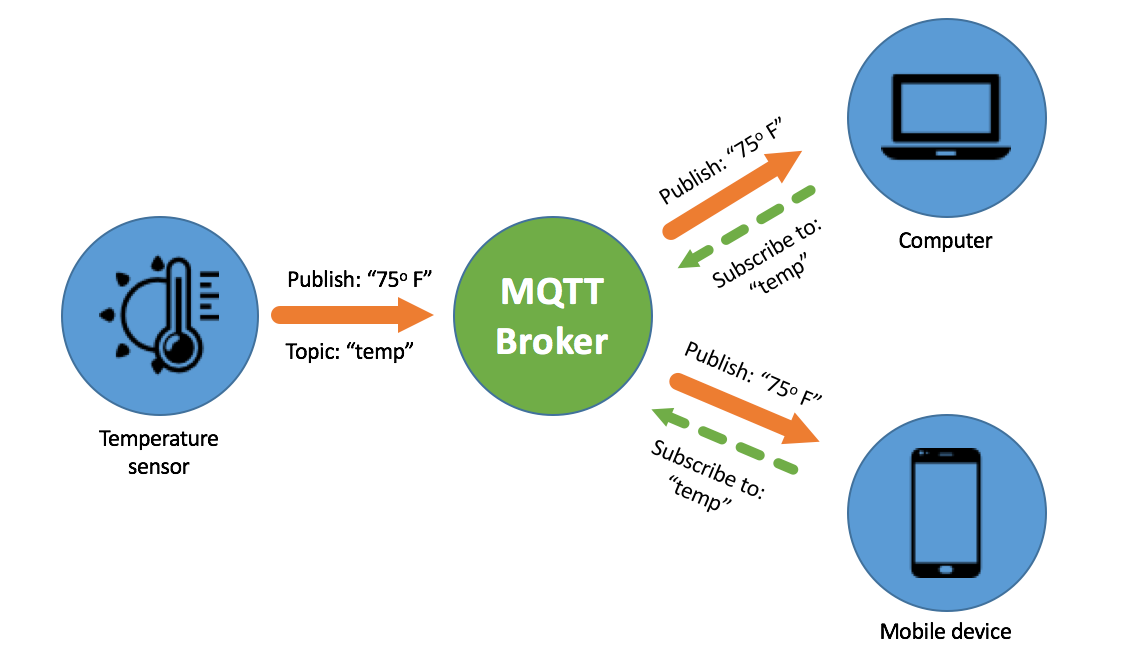
MQTT
Learning about MQTT, it stands for message queuing telemetry transport. Its used for IoT as it designed to reduce network bandwidth and resources. The broker publishes the messages to the devices that have subscribed. The broker also filters the message and is the central hub.
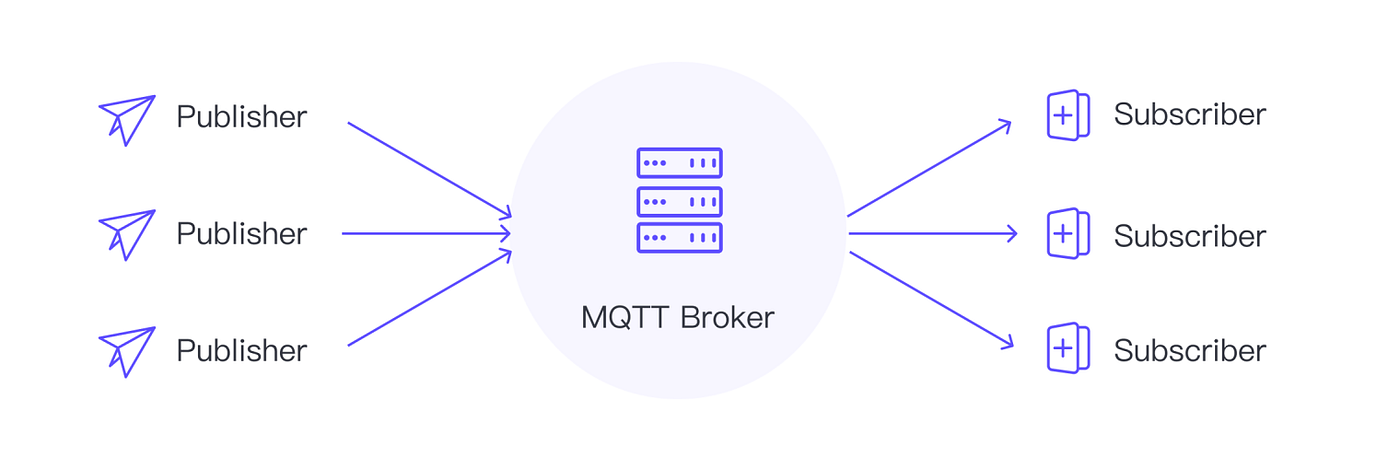
As we can see the publisher is publishing data and this is published continously but the subscriber requests the data as per the need!
This saves us the computational power to always be using the data and can vary per applications.
Task 3 : Basics of Creating a website.
The task was to create a webpage which toggles background colour based on clicking a button. It uses basic HTML, CSS and Javascript.
Learnt basics of java script to make a function and refreshed CSS and html!
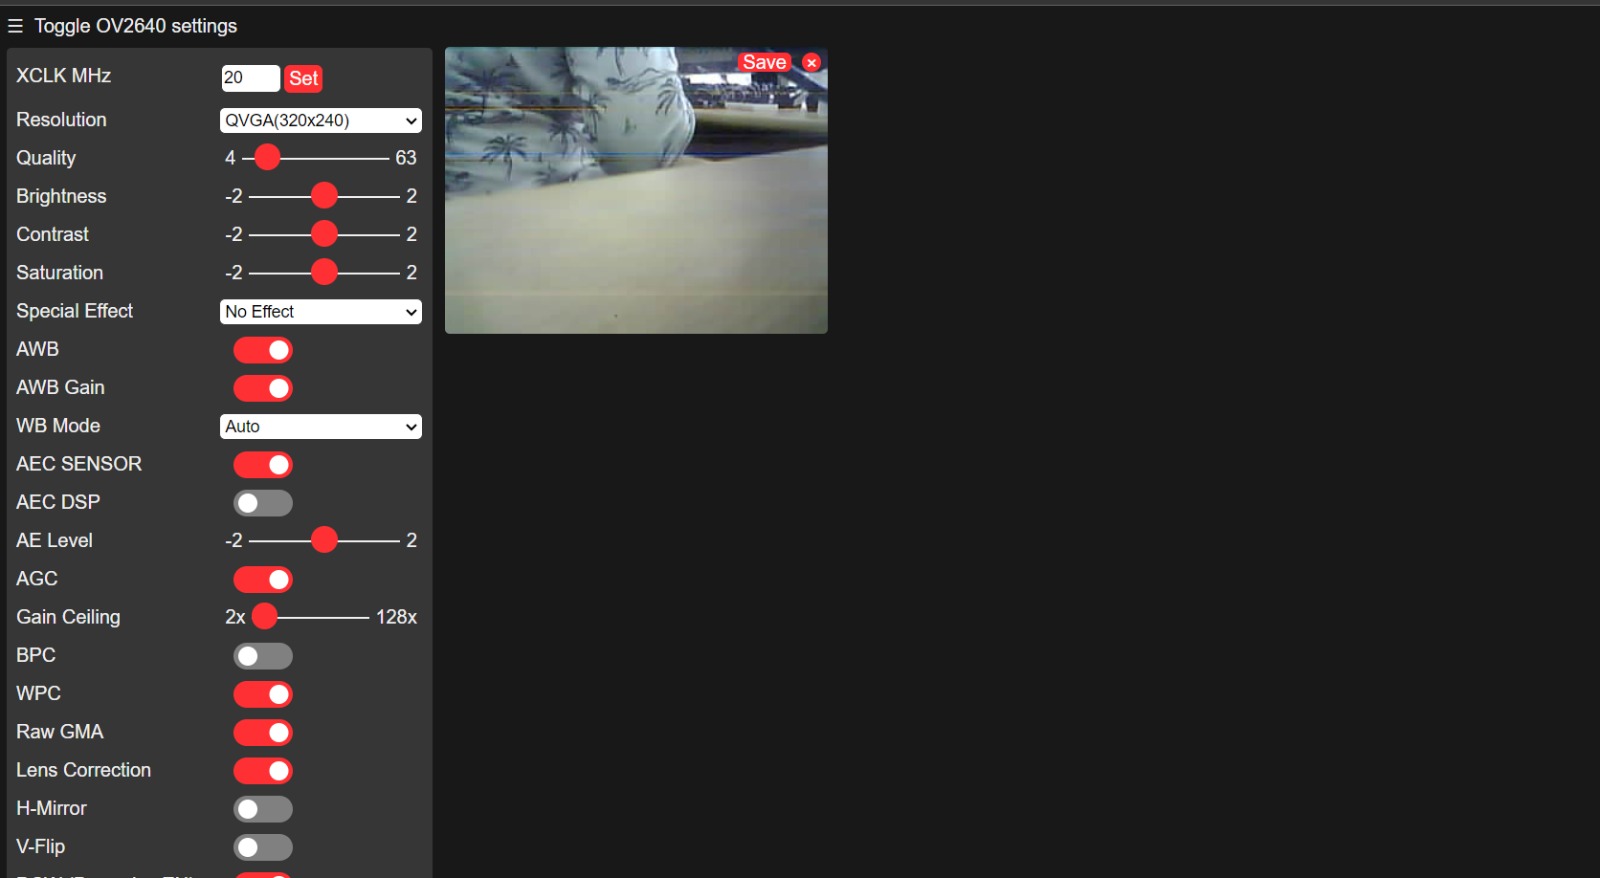
Task 4 - ESP32 Cam
The ESP32-CAM is a popular development board based on the ESP32 chip, which integrates both Wi-Fi and Bluetooth connectivity along with a camera module.

ESP32 CAM has no onboard data connection port so we had to use FTDI programmer to upload code.
First executed a flashing light to check if the camera was working.
Then later at lab actually used the camera to record photos and videos
sadly video is bad on youtube so please go to the link
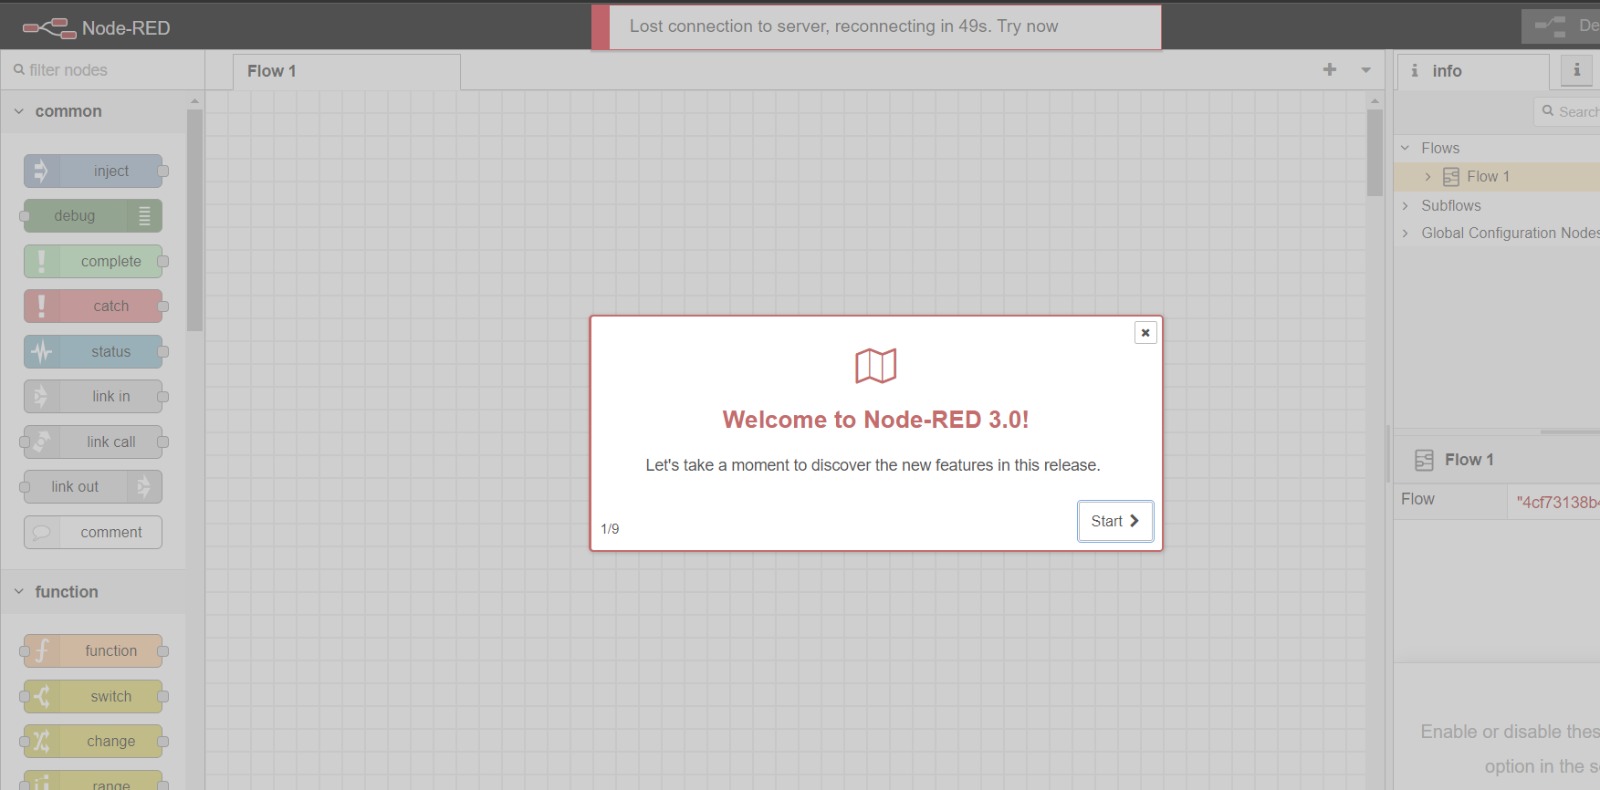
Task 5 - Node Red
I wasnt really able to complete the task as it didnt work for me
but, I did try it!
This is installing node red
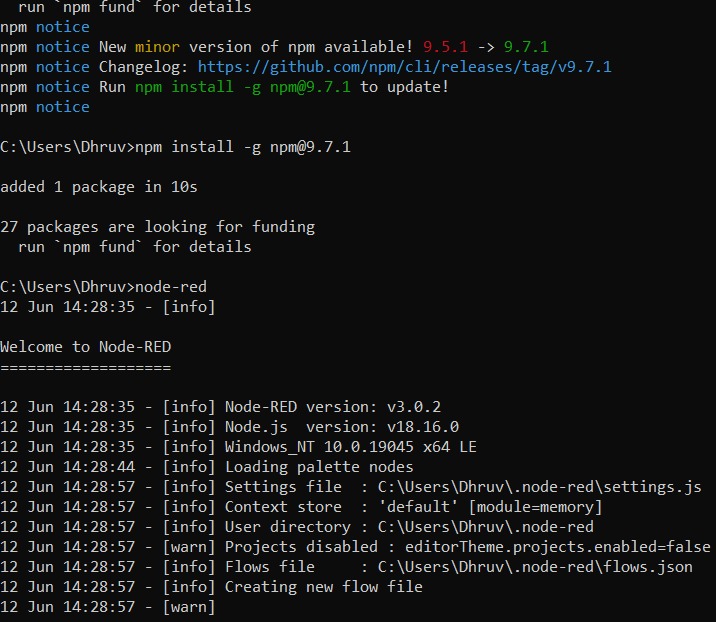
After installing, I did try to do it but it didnt work for me.
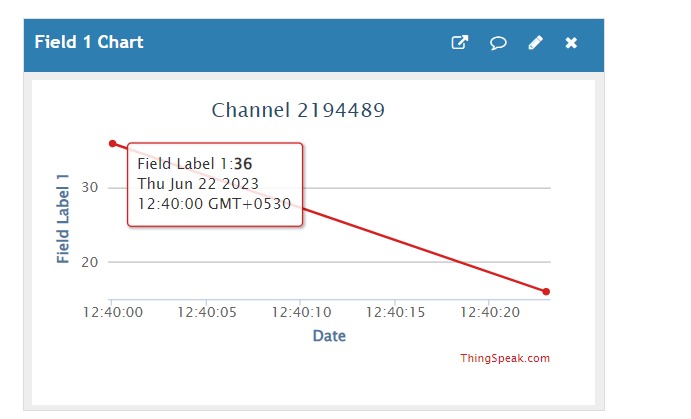
Task 6 - Sending data to ThingSpeak + Task 9 Soil Moisture
ThingSpeak is a Ruby-based open-source software that enables users to interact with internet-connected devices like ESP32. It simplifies the process of accessing, retrieving, and logging data by offering APIs for both devices and social networking platforms.
I always wanted to make a smart plant, so thought of using thingspeak with a soil moisture sensor.
I did inform the coordinator if this was okay, as the main goal is to send the data to thingspeak
This is one of the most useful task in the IOT domain as it can be used to send data and using the data we can do ML models and actually predict!!
Also connected it to IFTTT, to make it send me an email when the event occured.
I had to replace and buy 2 different types of mositure sensors as usually the moisture sensors are broken :(

This is the mail it sent when the event occured!

This is the plot in matplotlib using the data
Task 7 - Communication using I2C protocol
The I2C (Inter-Integrated Circuit) protocol is a synchronous, multi-master, multi-slave, packet-switched serial communication protocol used for connecting multiple integrated circuits on a circuit board. It facilitates communication between various digital devices, such as microcontrollers, sensors, and peripheral ICs.
The task was establish connection between ESP32 and Arduino board, send message between them using I2C protocol and display the message on the serial monitor.
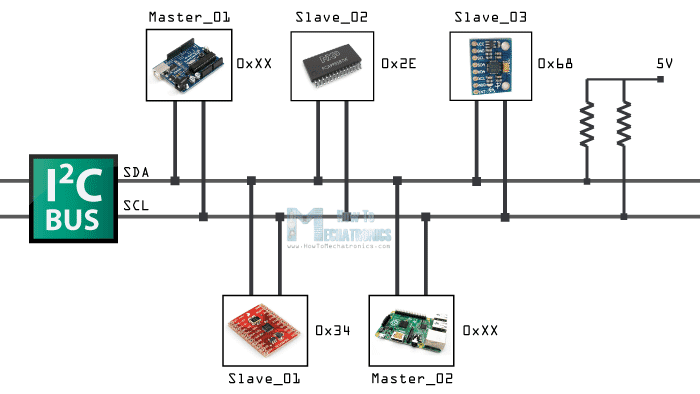
Why use pull up resistors?
This avoids a case where one device is driving a bus line HIGH while another drives it LOW, which would create a short. However, it means I2C relies on pull-up resistors in order to pull the bus HIGH when in the idle state.
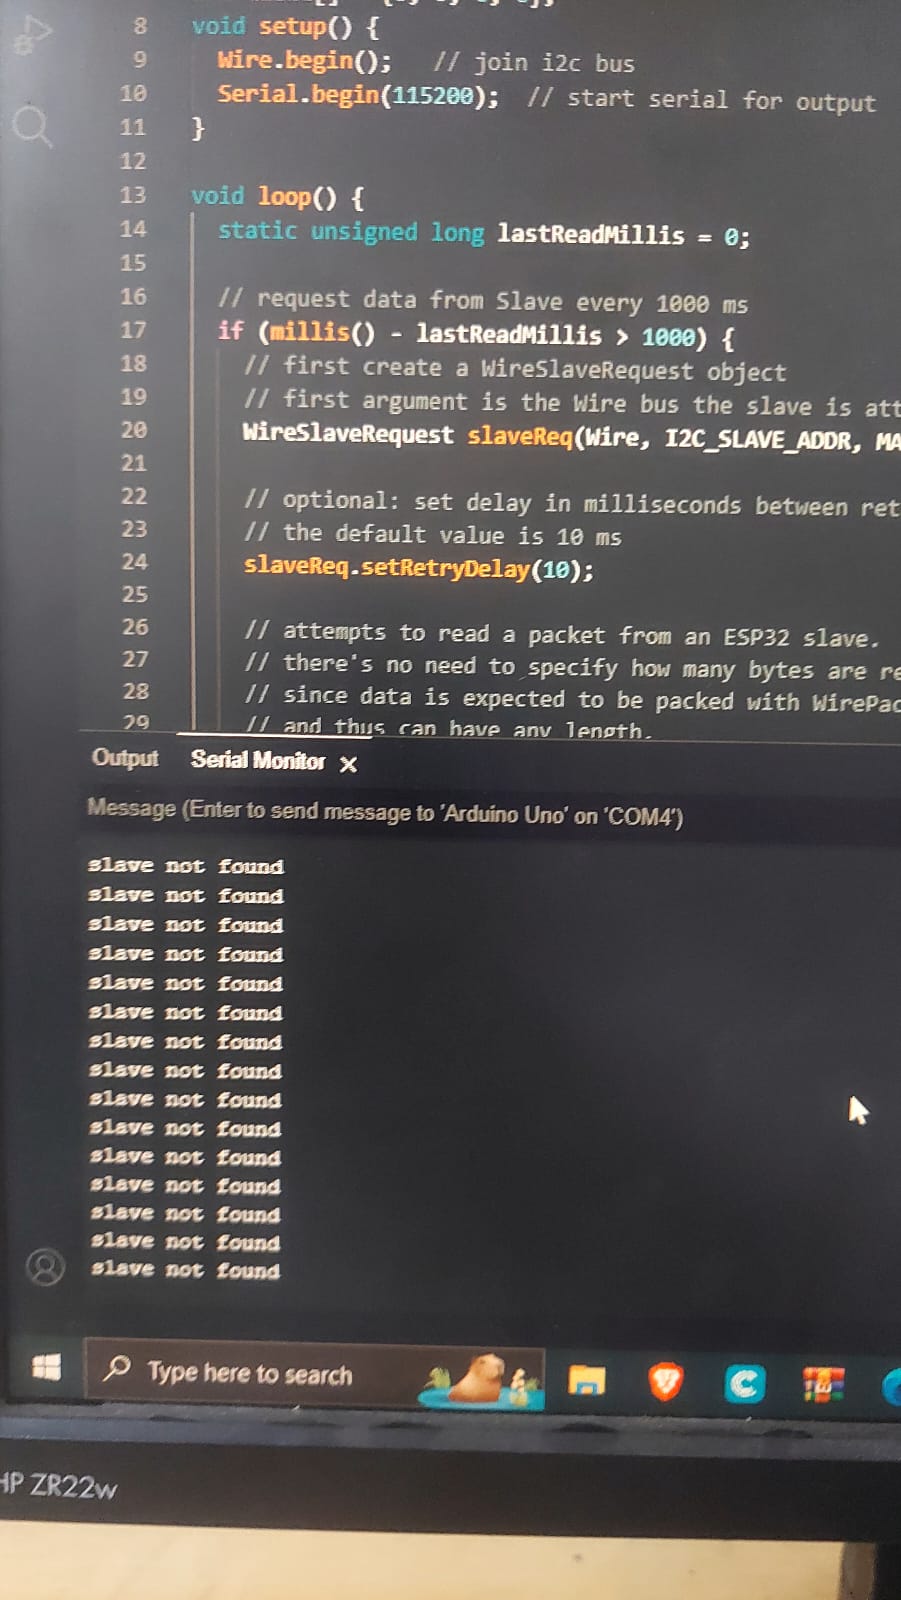
Problem encountered
I belive this task is impossible as the digital high of ESP 32 and Arduino are different. I did try this task, tried debugging and cross checking also.
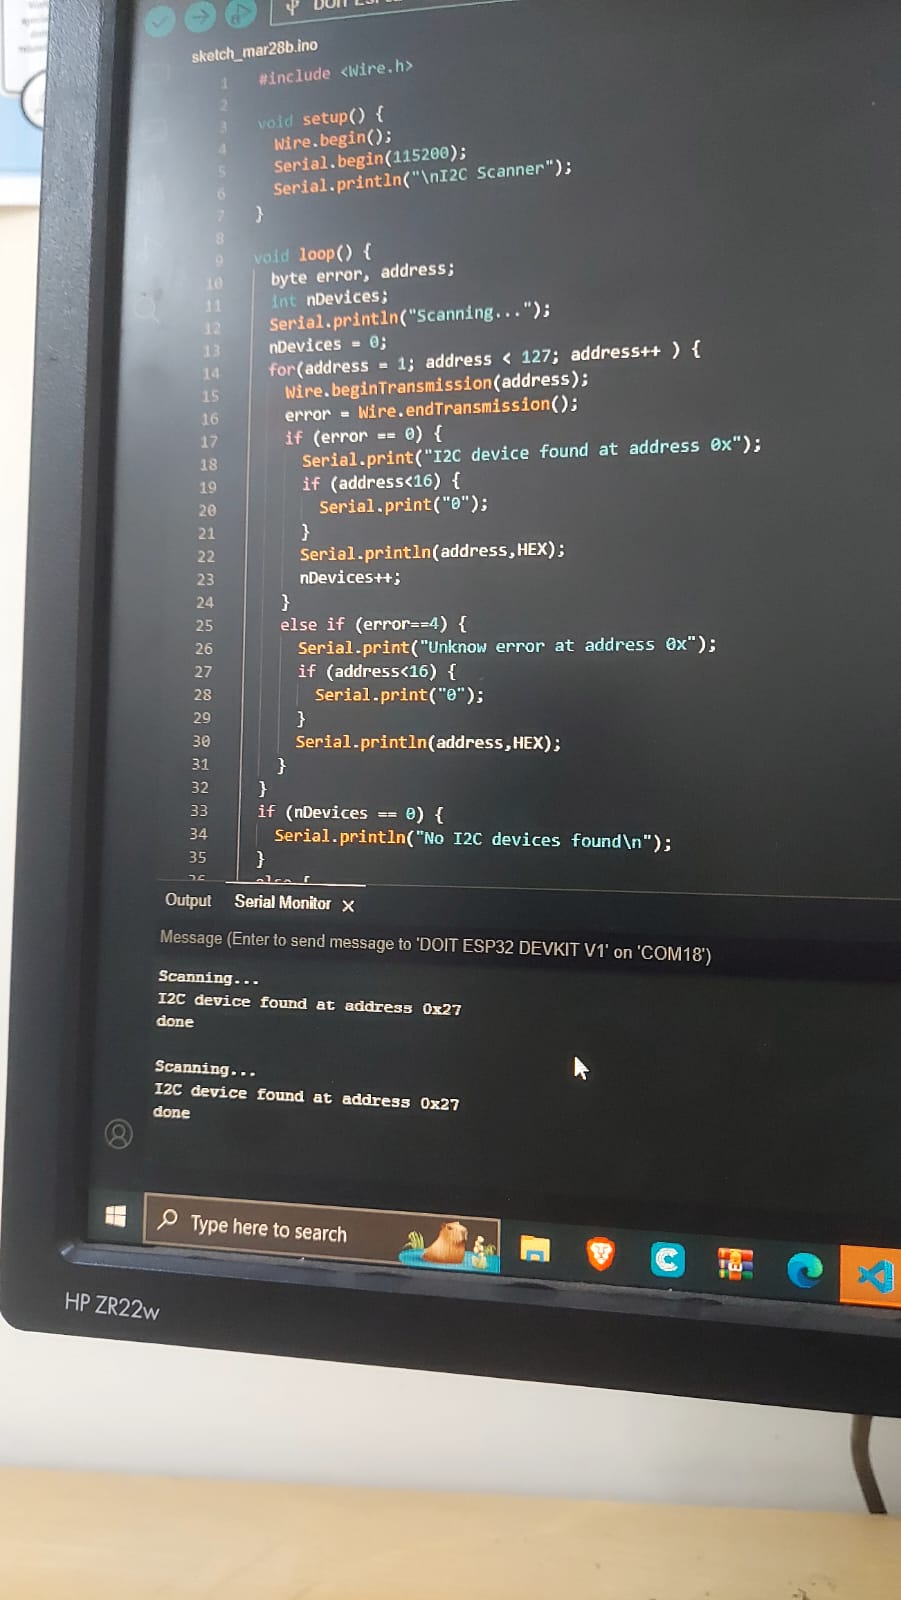 This is scanner if any i2c was discovered in any ports. Sadly there was no port being shown when I put the esp32.
So to Cross check arduino part working, I connected the LCD which uses i2c also.
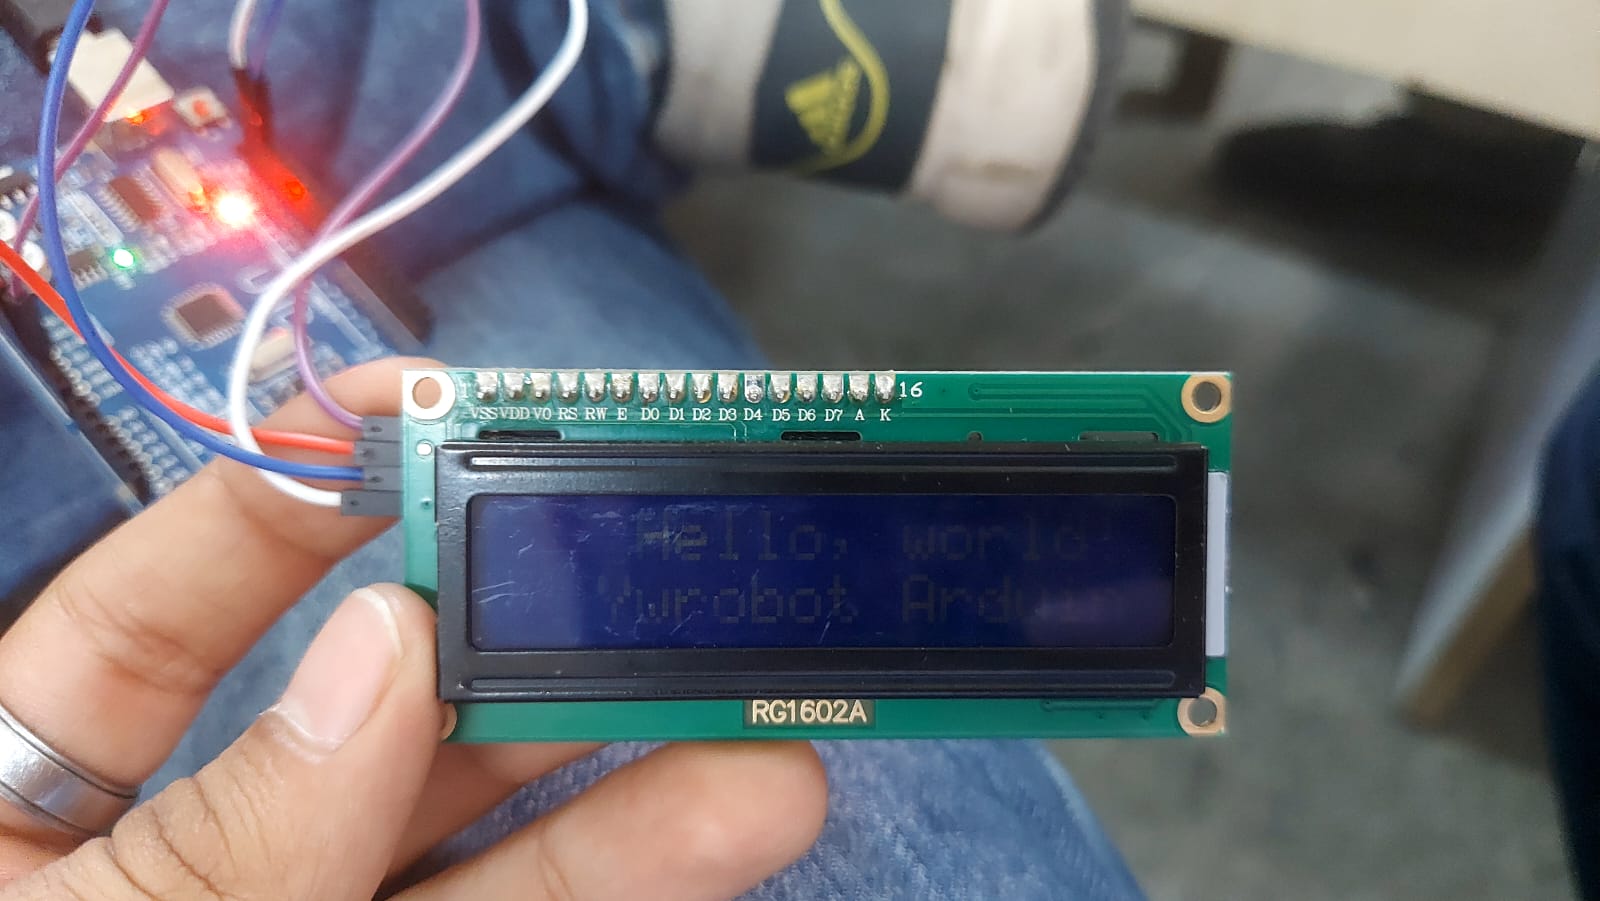 It worked and so did the scanner.
I even tried using pull up resistors.
Task 8 - Flashing Morse Code
We were tasked to create More Code flasher using ESP32.
Made functions in IDE and also learnt basics of morse.
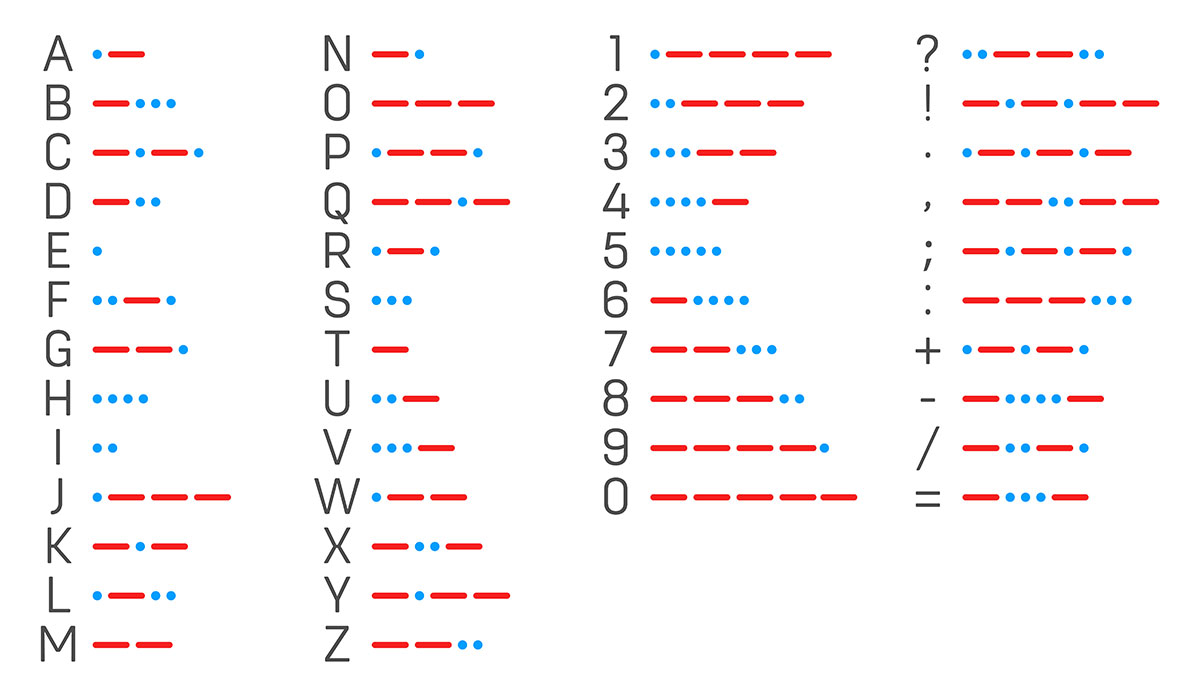
Instead of using a buzzer. Used a flash light to distinguish dots and dash.
This is the morse code being flashed
Task 8 done with Task 6
Task 9 - Soil Moisture Sensor
We were tasked to display the soil moisture level in the serial monitor using a capacitive soil moisture sensor and an ESP32. It alerts the user if soil moisture level is below a particular level.
Capacitive soil moisture sensor works by checking the charge storing capacity of the soil which in turn indicates the amount of moisture present in the soil.
Task 10 - Read and Display Vitals
The last task consisted of using i2c, but with Oled display and max30100 sensor. The SDA and SCL pins were connected as told in the resource and after many tries it did work out. There are 2 popular sensors out in the market and one of them is known not to work. After researching and trouble shooting I found out my sensors were broken. I used my friends sensor and finished the task.
This is the circuit:

The circuit I made using breadboard and esp32!
.jpeg?raw=true)
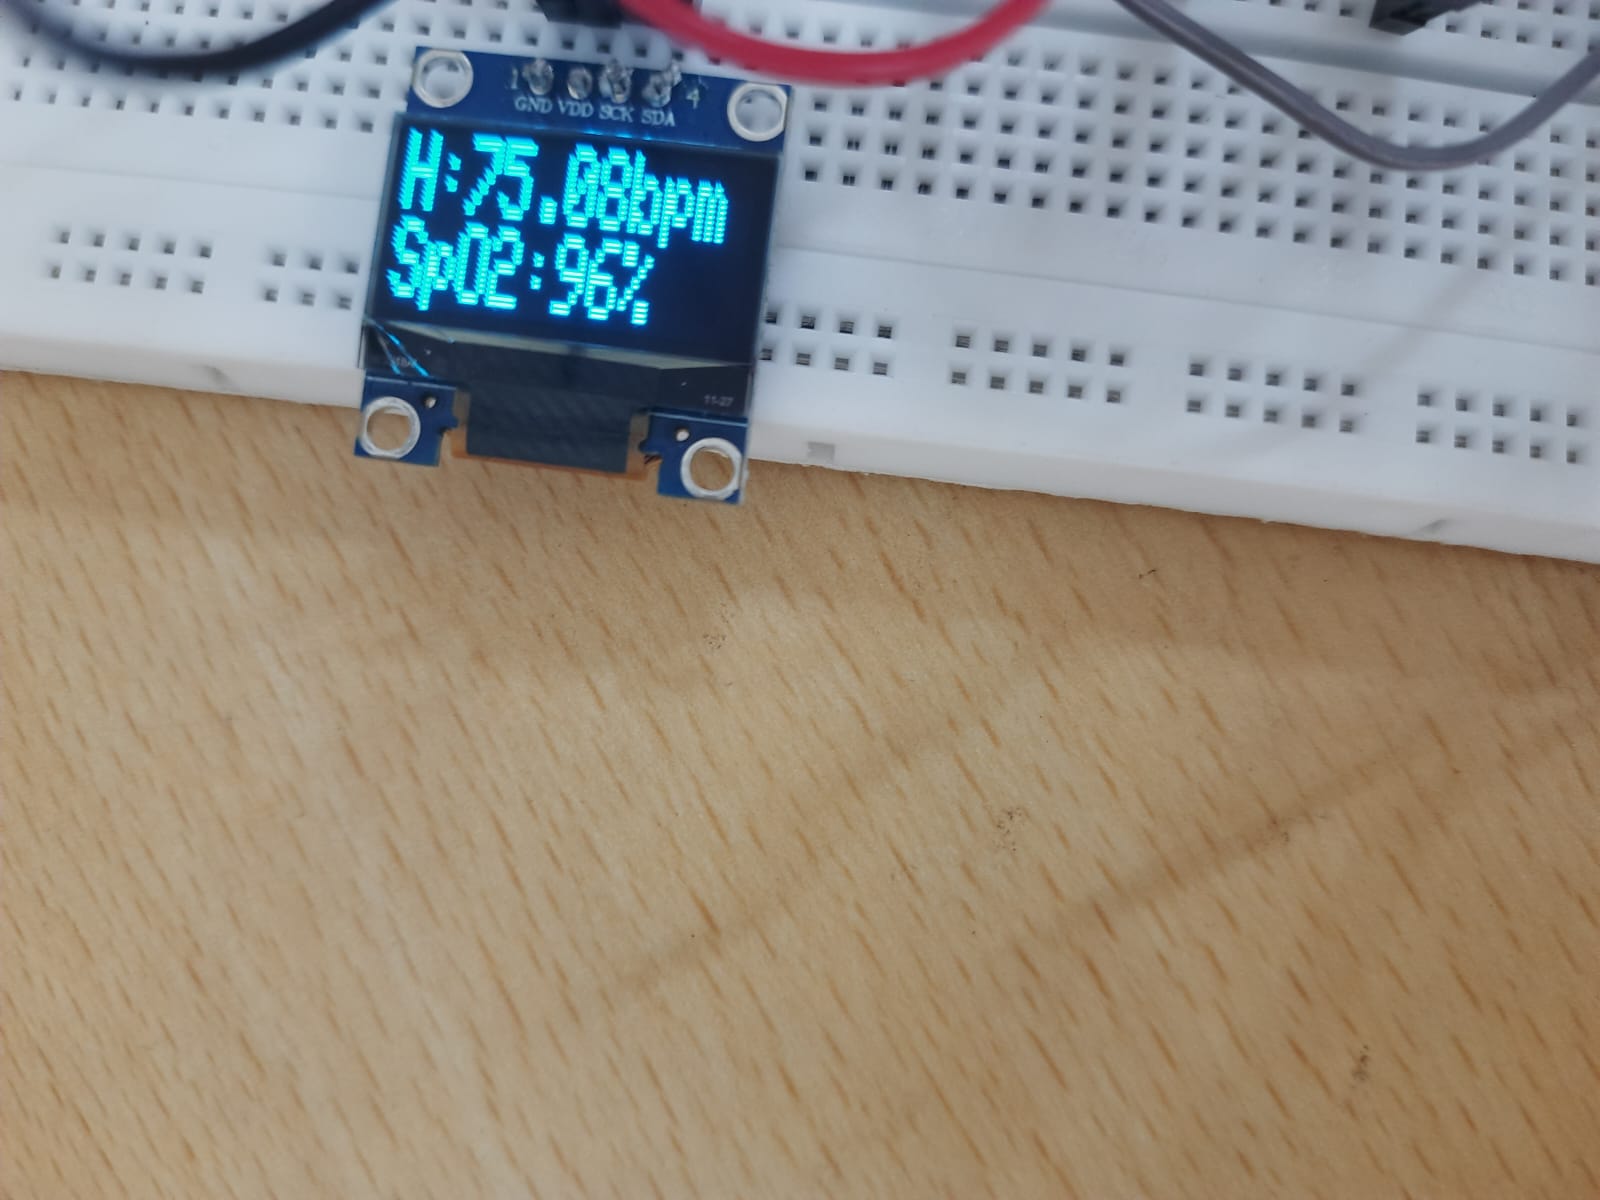 The final Output!
Thank you for reading!
Dhruv Mahajan