COURSEWORK
Krithik's D-P-001 course work. Lv 1
| Krithik Reddy | AUTHOR | ACTIVE |
24 / 9 / 2025
TASK 1: 3D Printing
A 3D Printer creates physical object from a digital design by building them layer by layer using materials like plastic, resin, or metal. There are different types of 3D printers:
- Fused Deposition Modelling (FDM)
- Stereolithography (SLA)
- Selective Laser Sintering (SLS)
The 3d Printer used at MARVEL is an FDM type 3d printer. In this type it takes in the filament and then melts and extrudes the thermoplastic filament layer by layer. Once a layer is printed it cools down and another layer is built on it and the process continues till the entire object is printed.
Key takeaways from this task were:
1. Understood the different types of 3D printer.
2. Learnt the different part of the 3D printer.
3. Understood the working of the 3D printer
4. Learnt the process to print a 3D object using a 3D printer.
To Print a 3D object using a 3D printer, first we must download the STL file of the model, then use any slicer software to slice the model and lastly get gcode file that was uploaded by the software to get the print.
TASK 2: API
API stands for Application Programming Interface. API is the messenger that takes your request and sends it to the system and then delivers the response back to you. As we can see most of the websites work on this principle, the best examples are weather applications and travel booking websites.
I built an API that would track weather data around the world. The data here will be updated dynamically. So using the open weather API website I was able to gather all the weather data and I built a website using JavaScript that gathered the data from the open weather API website any time we entered the name of a city.

TASK 3: Working with Github
Github is an online repository, it is a place where we can store our code online in the cloud. It is extremely useful as we can easily access the code from Github whenever required and we can easily share the code with anybody.
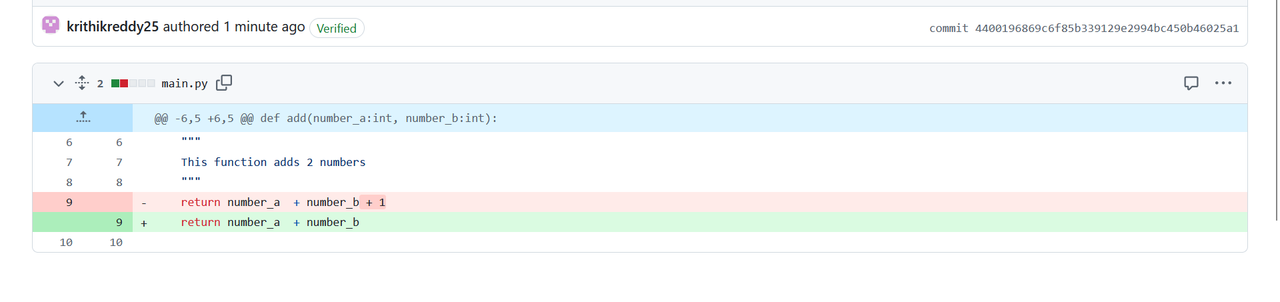 As I was working on this task I had learnt many new terminologies. I had to first fork the file, after that I had resolve the error present in the code located in the repository and I finally sent a Pull request to commit the changes to the source code.
TASK 4: Command line on Ubuntu
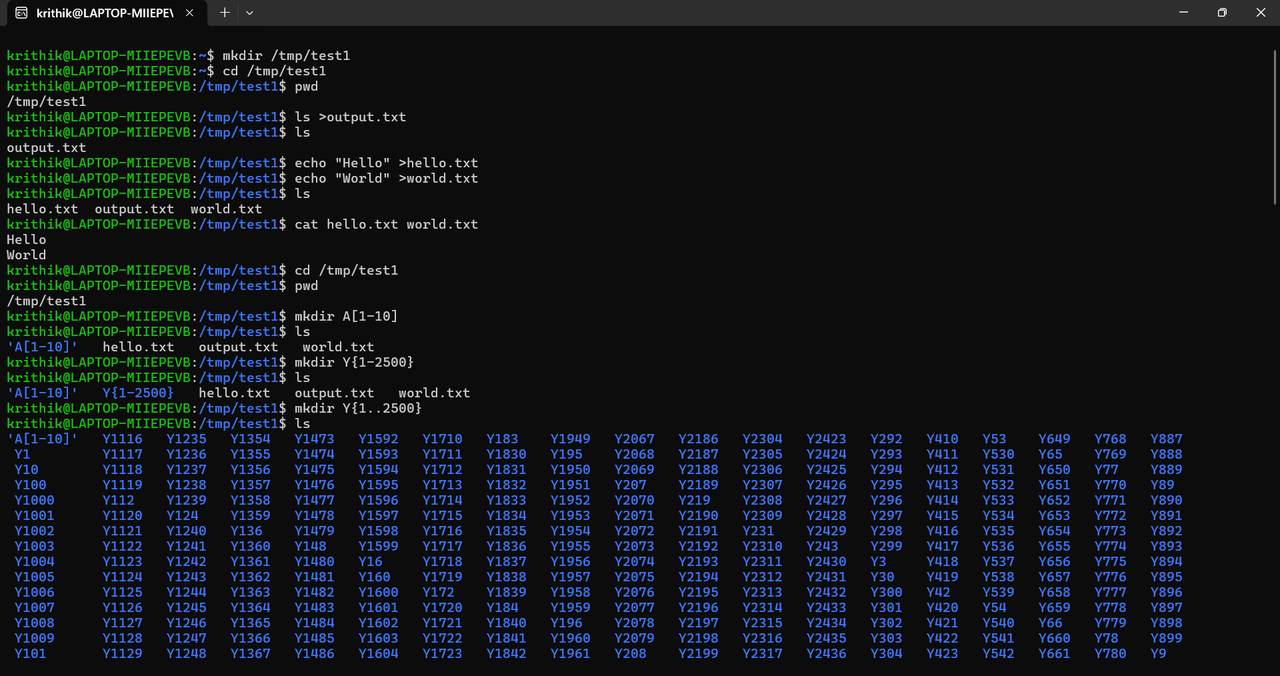
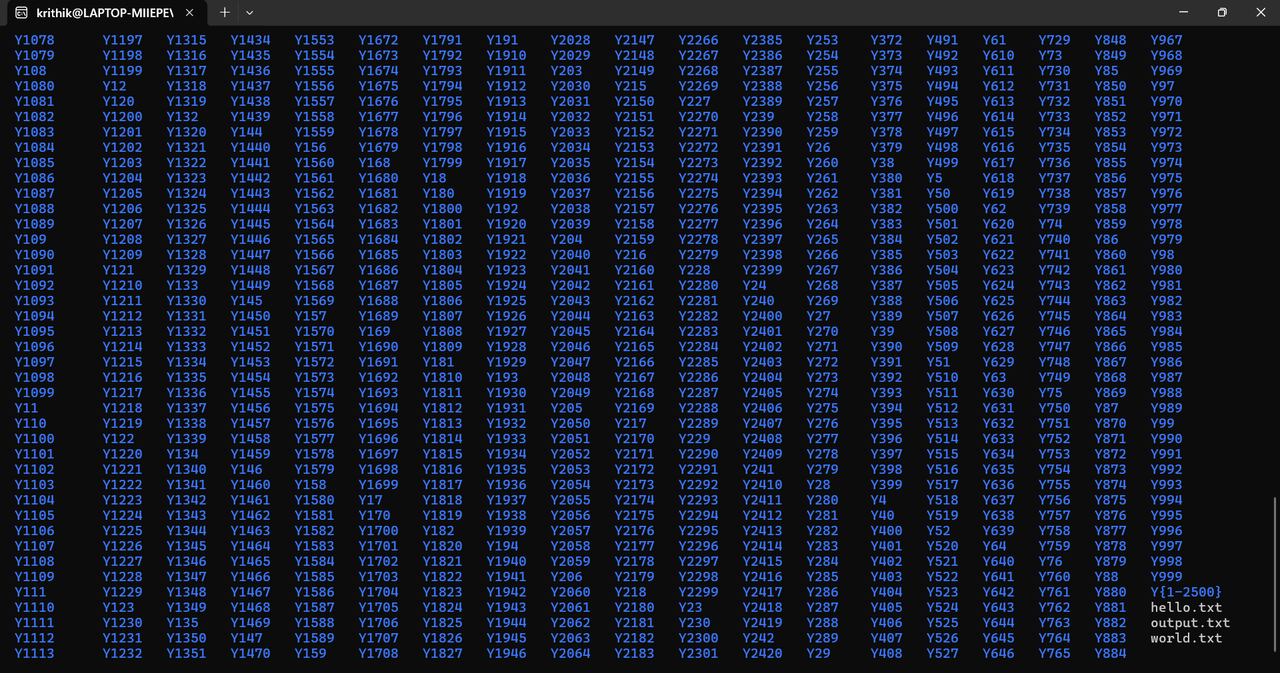
Ubuntu is a free open source operating system that is based on Linux operating system. The command line in Ubuntu, also known as the terminal or command prompt, is a text-based interface used to interact with the operating system. In this task I was able to learn the basics required to move around file and enter content inside a file and perform operations like concatenation, etc.
Few of the Basic Commands learnt:
pwd - print working directory
cd - change directories
ls - list the contents
mv - rename or move the file
echo - just prints its arguments back out again
mkdir - Make directory
TASK 5: Portfolio Website
I created a Portfolio website in which I have added all my personal information, including all my education, internships I had received, technical skills i posses and all the project that I have worked upon so far.


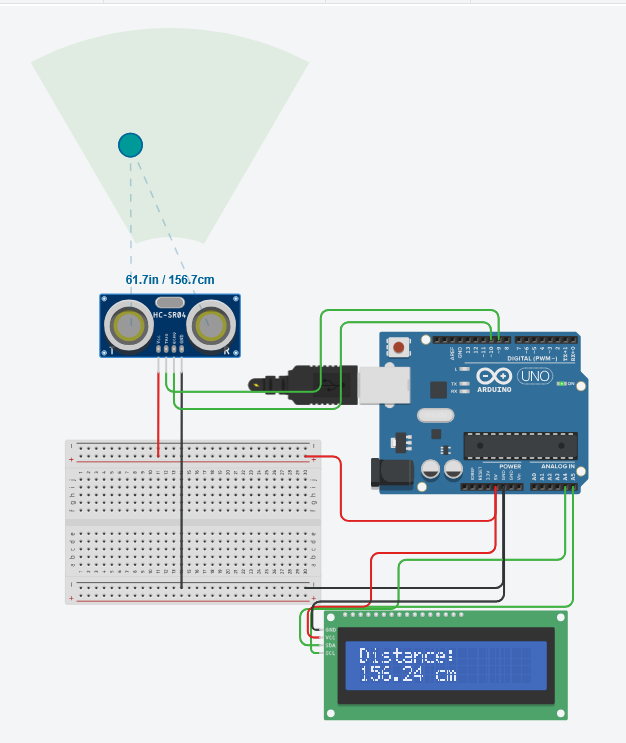
TASK 6: Tinkercad
Tinkercad is an online platform that enable electronic simulations along with other services. Any electronic circuit can be designed and simulated on this platform.
Using an Ultrasonic sensor, Arduino board and LCD display. I designed a circuit that would measure the distance of the object in front of the Ultrasonic sensor. I coded the logic and uploaded it into the Arduino, the output is displayed on the LCD Display. So whenever the Ultrasonic sensor senses an object in front of it, it sends a signal to the Arduino that converts it into a readable value and is outputted onto the LCD display.
TASK 7: Speed Control of DC Motor
The speed control of DC motor is done using Arduino and an H bridge L298N motor driver. H bridge is connected to the PWM signal of the Arduino, the speed of the dc motor can be changed by varying the pulse width modulation signals from the arduino. The program is written and uploaded onto the arduino. So by changing the PWM in the program the speed of the DC motor can be controlled.
The H bridge is an unique circuit having 4 pins, the motor will be connected in such a way that when the H bridge is not enabled the current flows in a one direction and the motor rotates. When the H bridge is enabled the current starts flowing in the opposite direction and the motor starts rotating in the opposite direction.
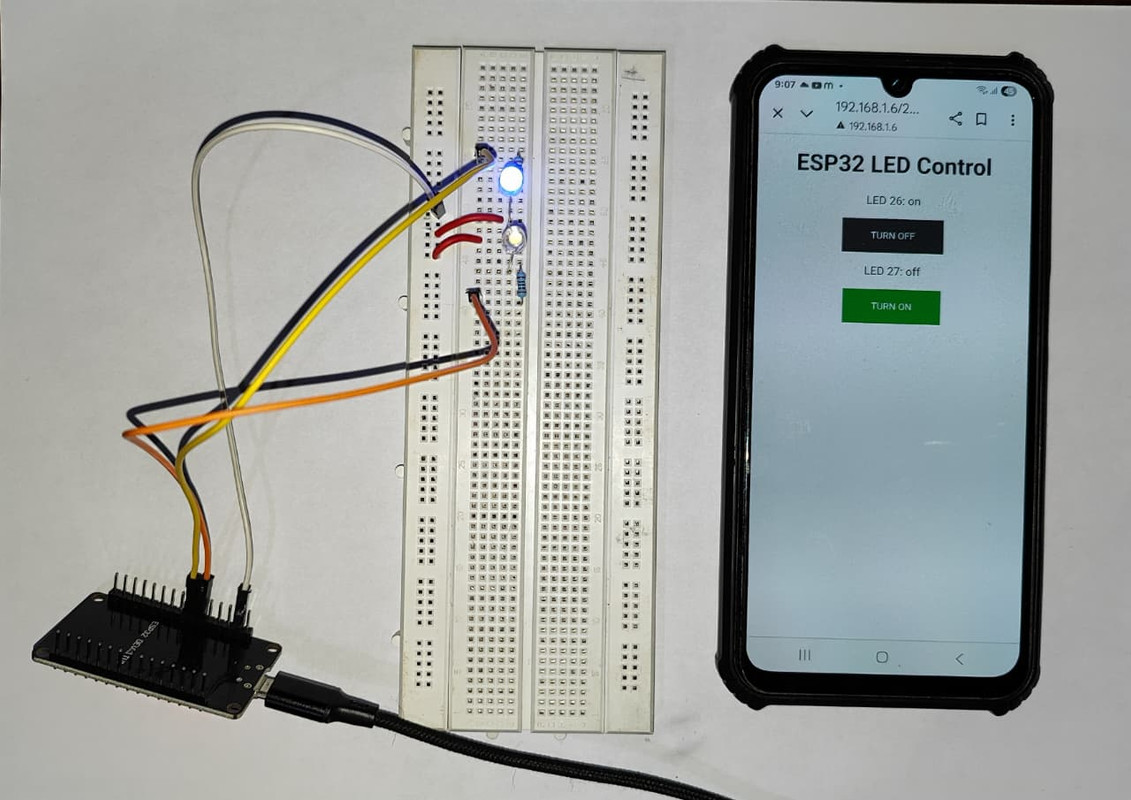
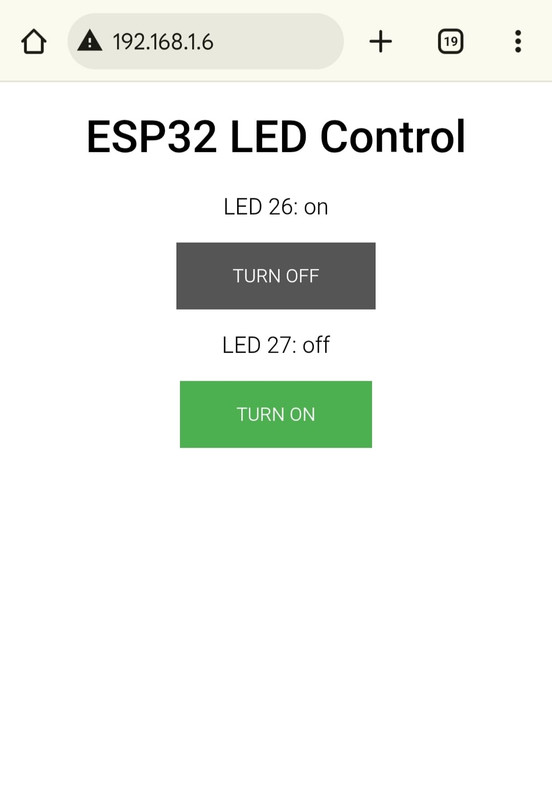
TASK 8: LED Toggle using ESP32
The ESP32 microcontroller comes with GPIO pins that can be used for many different functions.
For this project, I set up the circuit on a breadboard using an ESP32 Wroom, LEDs, 330Ω resistors, and jumper wires. I then uploaded a web server program through the Arduino IDE. The code includes the WiFi library, network credentials, variables to track LED states (ON/OFF), and GPIO pin assignments. In the setup, the ESP32 connects to the WiFi network, and in the loop, the code handles the client’s HTTP requests and serves a web page with HTML and CSS.
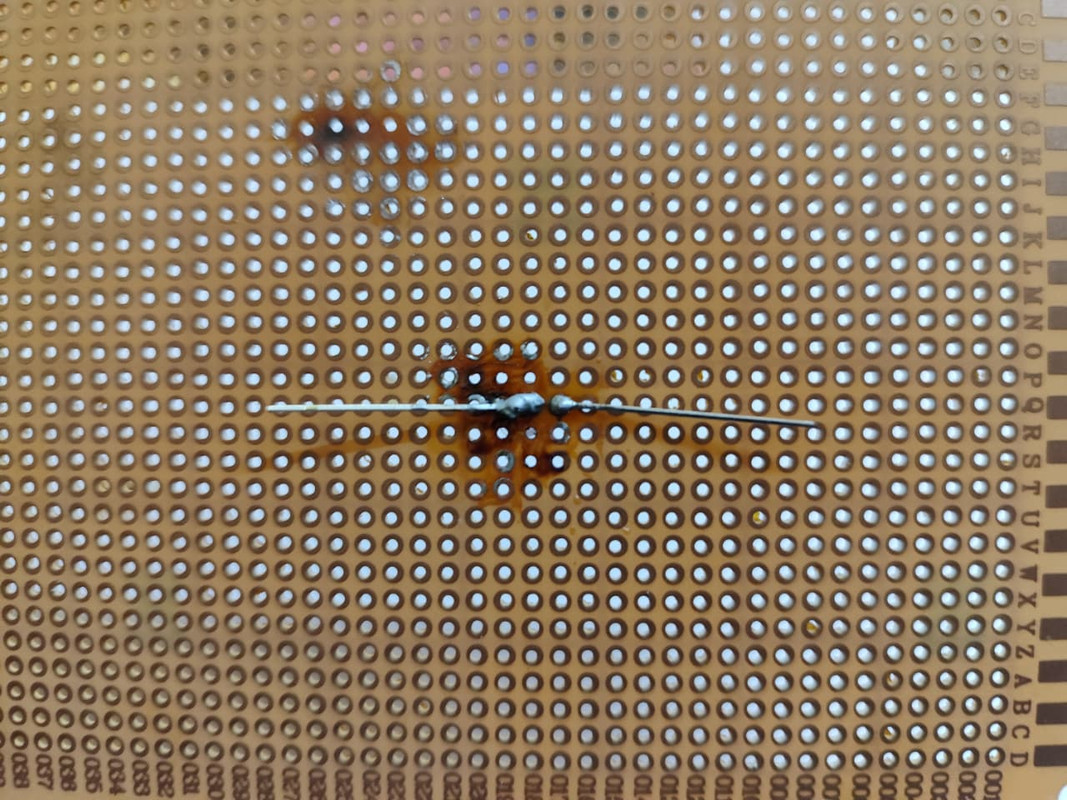
TASK 9: Soldering
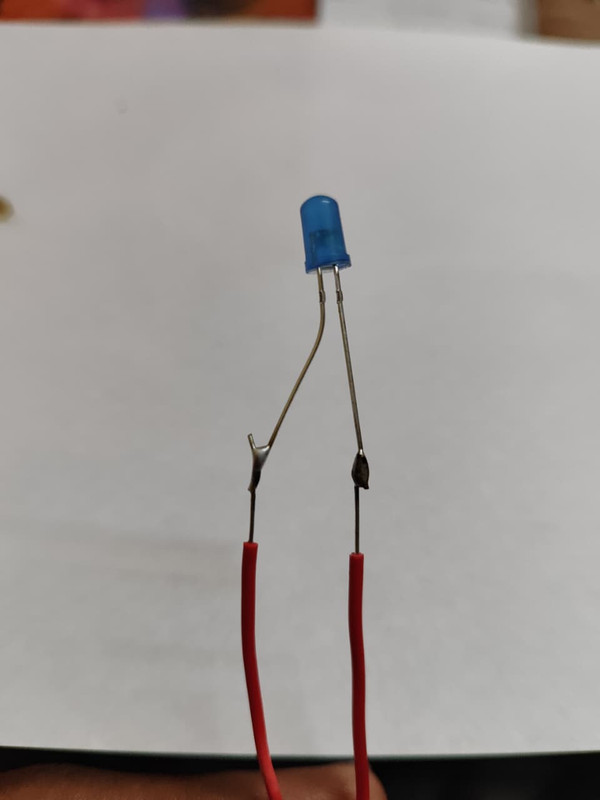
Soldering is the process of joining two or more electronic parts together by melting solder around the connection. Solder is a metal alloy and when it cools it creates a strong electrical bond between the parts. Even though soldering can create a permanent connection, it can also be reversed using a de-soldering tool.
In this task i have soldered an LED onto a perfboard. A **perfboard** is a board with a grid of holes, often with copper pads, used for building electronic circuits. Components are inserted into the holes and soldered to make permanent connections. Therefore multiple components can be placed on the perfboard and soldered to fix them permanently.
TASK 10: 555 Timer
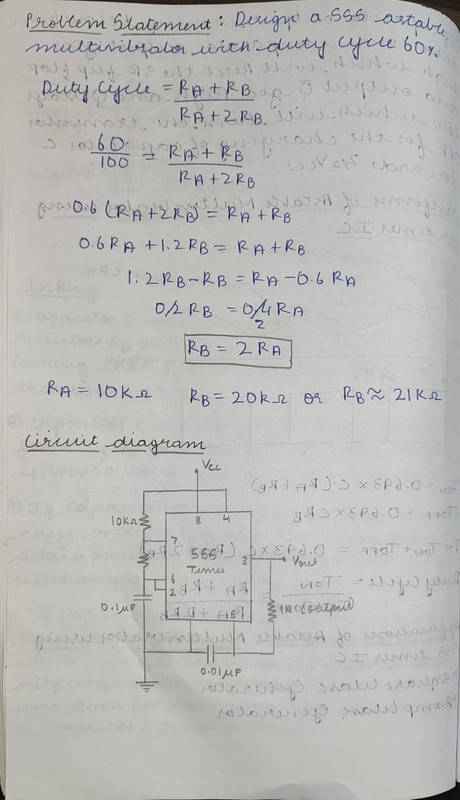
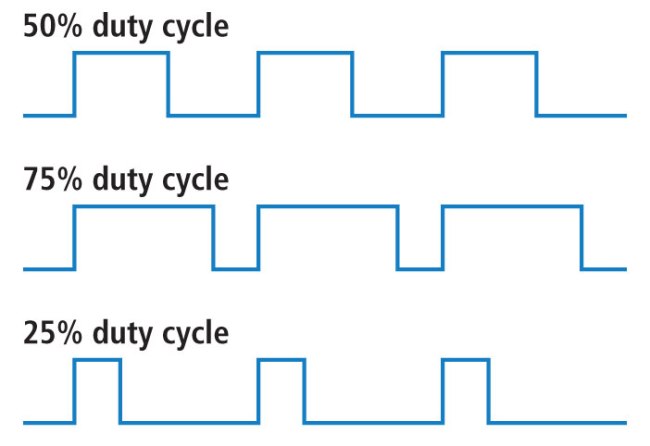
555 Timer can be used to build an astable multivibrator. An astable multivibrator has no stable state and both the states are quasi stable state. It can be used as a square wave generator or as a ramp generator.
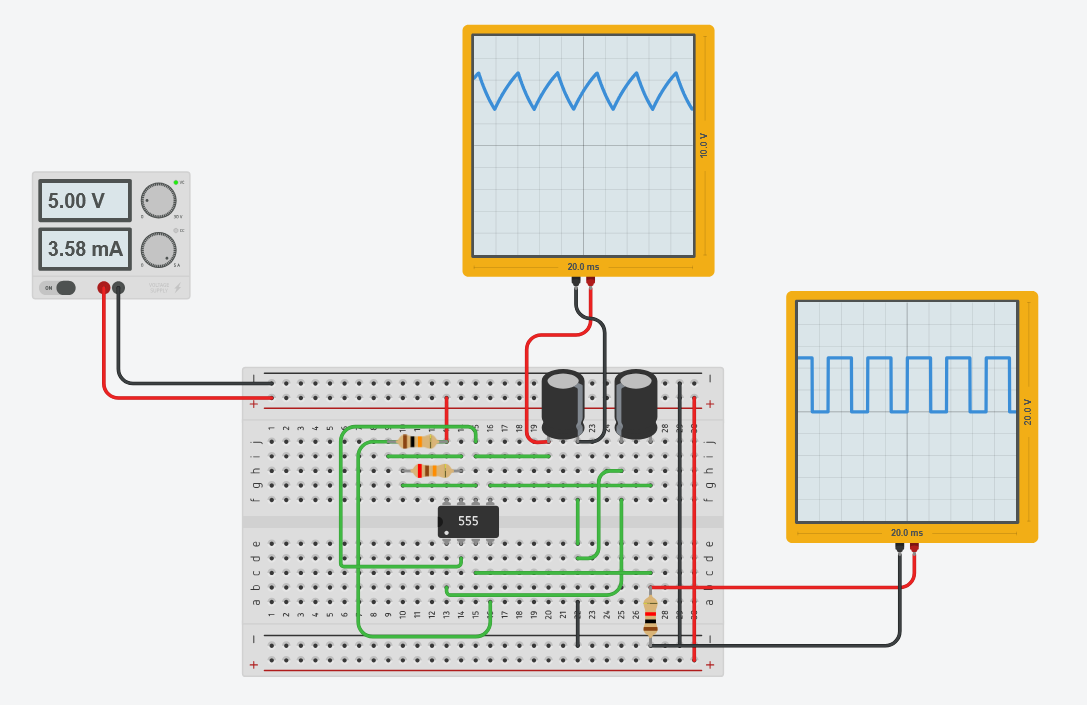
First the capacitor starts charging through resistors Ra and Rb, during this the output is high. Then the capacitor starts discharging through Rb, during this the output is low. Therefore we get a square wave as the output. The duty cycle of the square wave can be varied by varying the resistors Ra and Rb.

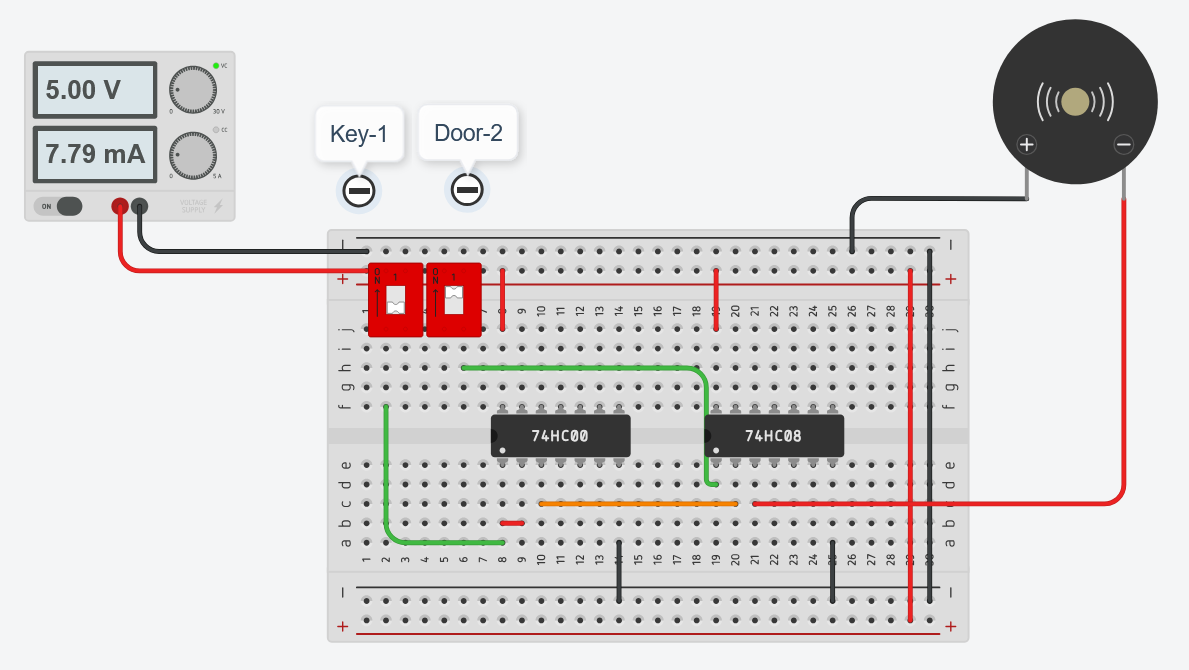
TASK 11: K-Maps
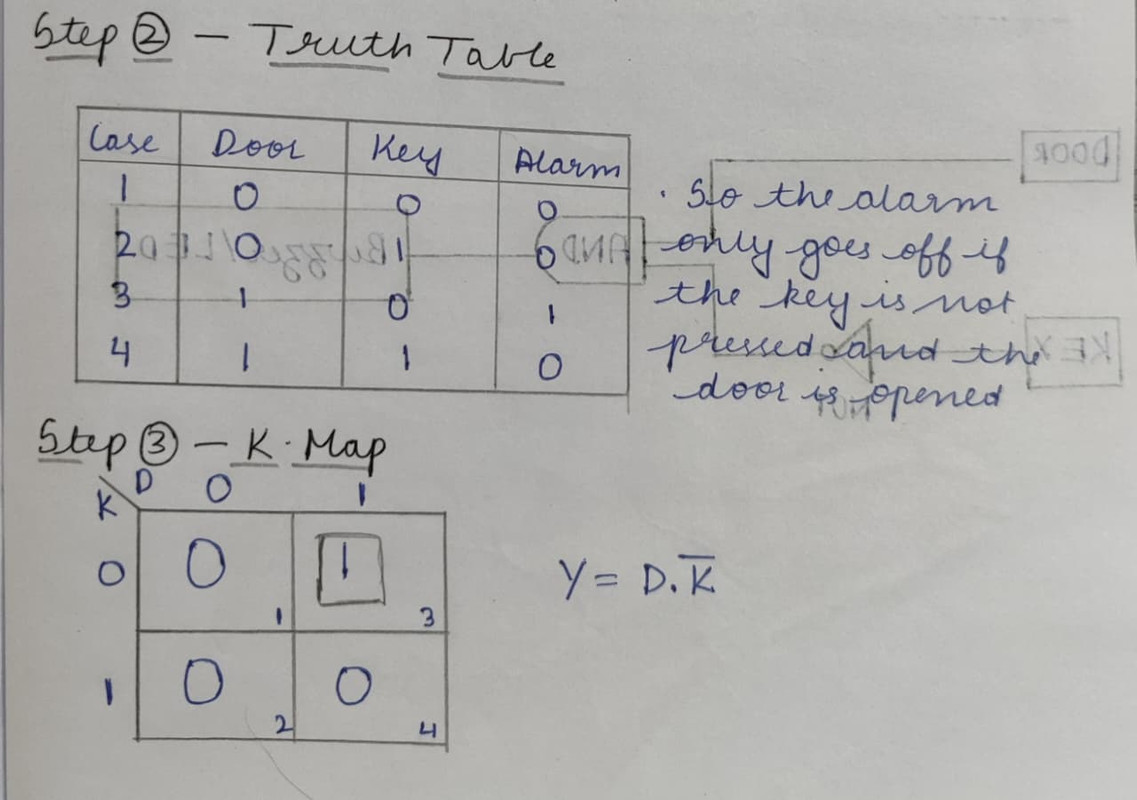
A Karnaugh map (K-map) is a graphical method for simplifying Boolean expressions in digital logic design. For this task i solved the logic to make a burglar alarm circuit.
To solve the task I represented each output of the burglar system in the K-map. And i reduced the size of the logic circuit by grouping the like terms in the K-map. In the end I successfully reduced the size of the logic circuit with the help of the K-map and set up the burglar system of Tinkercad.
TASK 12: Active Participation
I had actively participated in Silic-O-Hack in Imptetus 25.0 conducted by IEEE UVCE. Silic-O-Hack is an electronics based competition where multiple rounds were involved to solve electronic circuit problems and more.
TASK 13: Datasheets Reporting
For this task I studied the Datasheet of L293D Motor driver. L293D is a dual H-bridge motor driver integrated circuit (IC). L293D is used to control DC motors, it can control the speed as well as the direction of the motor.
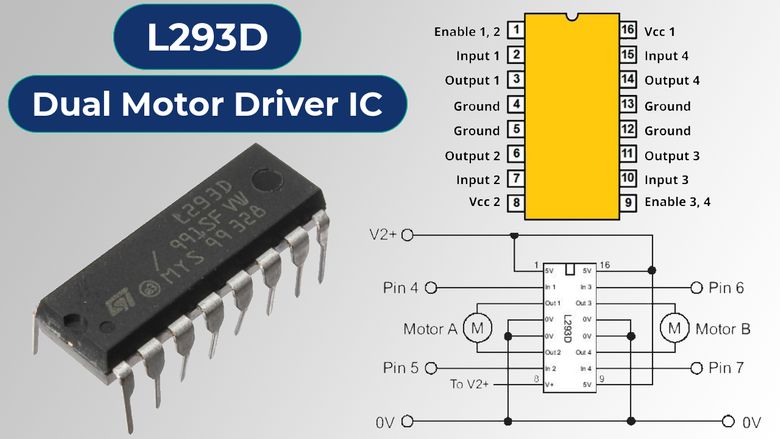
Key features
- It contains two inbuilt H-bridge driver circuits
- The motor operations of two motors can be controlled by input logic at pins 2 & 7 and 10 & 15.
- Input logic 00 or 11 will stop the corresponding motor
- Logic 01 and 10 will rotate it in clockwise and anti-clockwise direction respectively.
- Enable pins 1 and 9 must be set high for motor to start operating.
- They are designed to drive inductive loads such as relays, solenoids, dc and bipolar stepping motors, as well as their high-current, high-voltage loads in positive supply applications.
Specifications
Wide supply-voltage range: 4.5 V to 36 V
Separate Input-Logic supply
Internal ESD (Electrostatic Discharge) protection
Thermal shutdown
Output Current 600 mA per channel
Peak Output current 1.2 A Per channel
Output clamp diodes for inductive loads
Transient Suppression
L293D uses Pulse Width Modulation technique to control the speed of DC motors by varying the average voltage supplied to them. The speed of the motor is controlled by using pins en 1 and en 2. Instead of simply setting the enable pins to high or low. A PWM is applied to this pin.
TASK 14: Markdown
Markdown is a lightweight markup language that allows you to format plain text using simple, easy-to-read symbols. In this task I learnt how to write my report using Markdown and along with that I learnt Some basic syntax in Markdown.

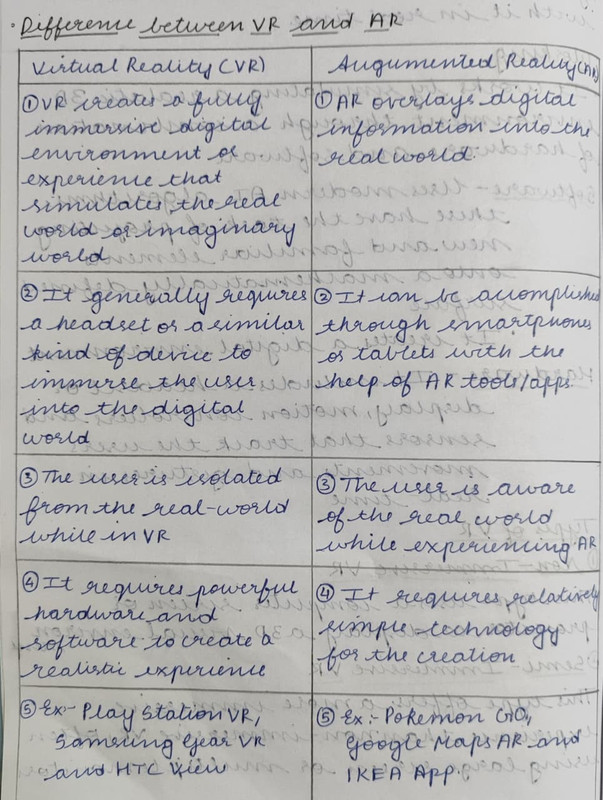
TASK 15: Virtual Reality
Virtual Reality allows users to immerse themselves in an environment and interact with it in real time. In this task I learnt about Virtual reality and Augmented Reality. I learnt about the different types of VR. Along with all this I learnt the key differences between VR and AR. I also learnt and understood the various applications of both VR and AR in real life. Few of the best applications for VR is playstation VR, Samsung gear VR. The applications for AR is Pokemon GO, IKEA app, etc.