
COURSEWORK
Jessia's AI-ML-001 course work. Lv 1
| Jessia Susan John | AUTHOR | ACTIVE |
LEVEL 0 TASKS
21 / 3 / 2026
TASK 1: 3D Printing
- I learnt about a FDM 3d printer.
- Next i selected my STL file from www.printables.com.
- STL file - It is the common method to share and print 3d objects.
- Next I moved to slicing my file. -
- Slicing in 3D printing is the software process of converting a digital 3D object or model (Eg. STL file) into horizontal 2D layers and also it defines the printing parameters like speed, temperature of bed and filament, infill, and supports etc.
- Some settings that i had to keep a note of:
- Bed tempertatue- 60 degree celsius
- Infill density- 15 %
- Nozzle temperature- 200 degree celsius
- I used Bambu Studio as my slicing software.
4 Slicing generated a G-code file that tells the printer how to go about printing the object.
TASK 2: API
What is an API?
API stands for Application Programming Interface. It is a set of rules and protocols that allows different software applications to communicate with each other. or simply it acts as an mediator that delivers your request to a server and then sends the response back to you.
Need for APIs? They allow different platforms to work together, such as showing a Google Map inside a food delivery app and provides security.
Movie Information Hub
- To implement this, I developed a web application that fetches real-time movie data.
- To get the movie data , I integrated the TMDB (The Movie Database) API.
- By registering for a unique API key, I was able to send requests to their servers based on user input.
- When a user searches for a film, code fetches data from the API displays the response.
Video of my website
Movie API
TASK 3: Working with Github
Objective:
To learn and apply some basic GitHub features like forking a repository, initiating pull request (PR), committing the code, using GitHub Actions to test.
- I began by forking the main branch of the given repository. By this I was able to make my own copy of the repository where I could make necessary changes.
- Found the error and fixed it.
- Then after making the necessary changes I committed (saved) the changes.
- I initiated a pull request (PR) to merge changes from my forked repository to the main git-task branch.


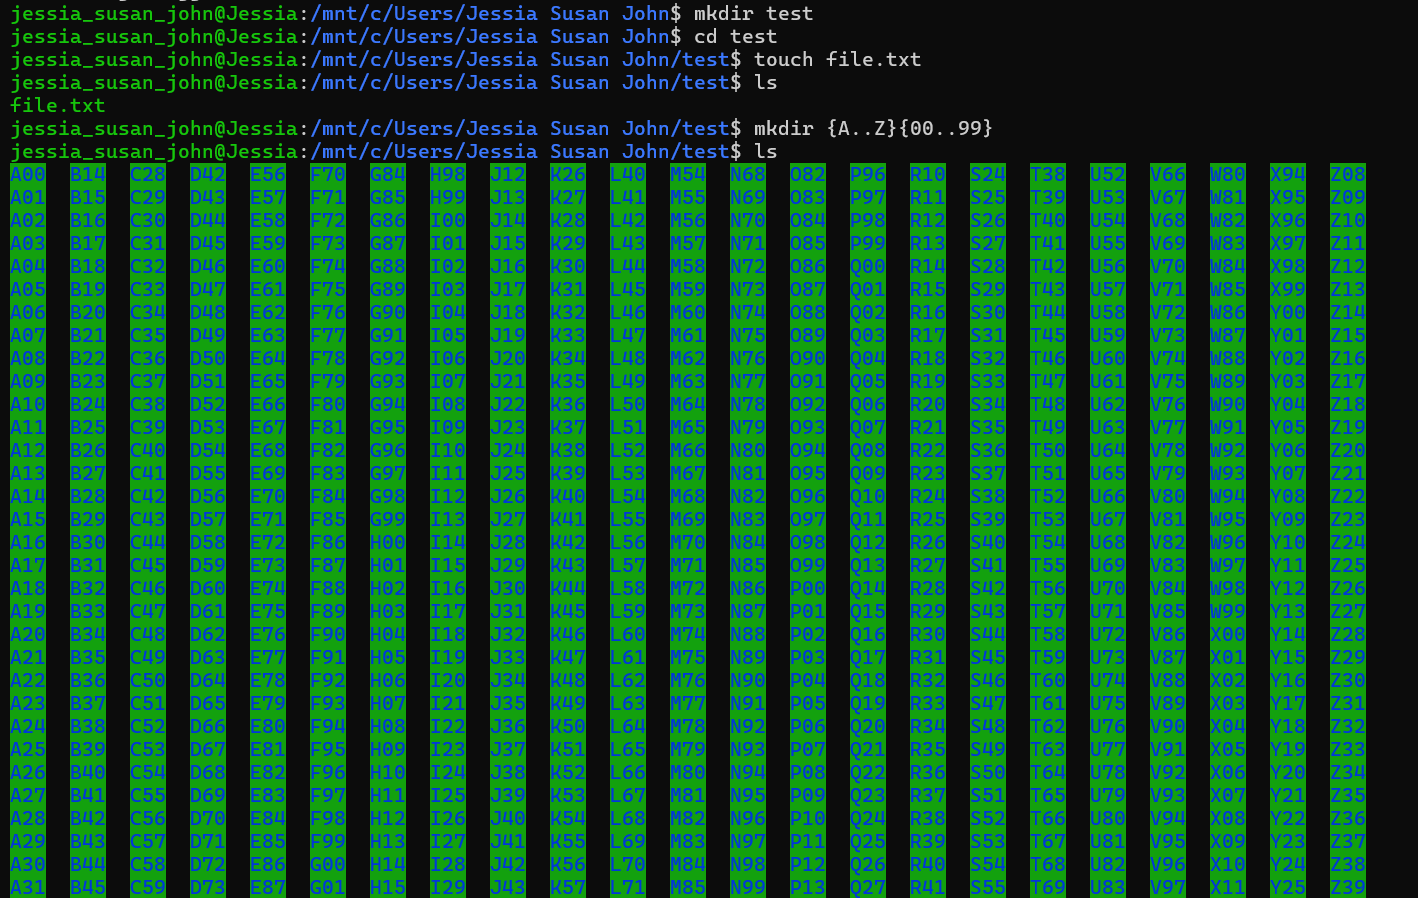
TASK 4: Get familiar with the command line on ubuntu
- Ubuntu is a Linux-based operating system which is user-friendly and accessible.
- Through this tasks i was able to familirize myself with commands like : mkdir, cd, touch, ls, echo, cat.
- I began by creating a folder named "test" using mkdir(make directory).
- Changed my directory into the test folder using cd(change directory).
- Created a blank file without text editor, using touch command.
- Used ls to list files in the folder ( it displays the blank folder created above )
- To create 2,600 folders : mkdir {A..Z}{00..99}. This command tells to create a folder for every letter from A-Z paired with every number from 00-99
- Used echo (with >) to display the texts into two files .
- Used cat command to join the two files and display the two simultaneously.

TASK 5: Build your own brain
The objective of this task was to predict California House Prices using gradient descent optimization algorithm and finally comparing it with the industry standard Scikit-Learn library.
- I began by loading the dataset in my program.
- To know what exactly the data set consists I used info, isnull and describe functions of and using StandardScalar function the data is standardized.
- The data is split into training and testing data sets. The training set is the original data on which the patterns need to be learnt and testing set is the data given to the model to check its accuracy.
- Gradient descent was used as the optimization algorithm to minimize the MSE, by calculating the partial derivatives and in each iteration updating the values of weight and bias.
- Next to verify if my model was working correctly, I calculated three key metrics for both my model and the sci-kit learn model: MAE (Mean Absolute Error), MSE (Mean Squared Error), R^2
- After running the same data through the sci-kit library, the results were similar and also used
matplotliblibrary to help view the compasion graphically.
TASK 6: The Matrix Puzzle — Decode with NumPy & Reveal the Image
To decode a hidden image from a scrambled array of numbers, using NumPy to manipulate the data and Matplotlib to visualize the data.
- Used np.load() to load the given data into my notebook.
Manupulating the data
- .size - This function helped in finding the size of the array.
- .shape - I used this function to find the shape (order of the matrix)
- When I first visualized the data it was not upright. To fix this I used transpose function .T which rotated the image.
Visualising the data
- imshow()
- The main function used here to convert the text into images.
- I used this to visualise the given data and hence make necessary changes.

TASK 7:
Portfolio page I built this simple portfolio page using the React framework along with HTML and CSS


TASK 8: Writing a resource article in markdown
The objective of this task was to learn and use markdown language which is a lightweight markup language that can be used to add formatting elements to plaintext text documents. It can be used for almost anything like making websites documents etc.
Through this task I learnt about some commands or tags used to format markdown files like # Heading 1, **Bold Text**,*Italic Text*,- List Item``[Text](URL)(for hyperlinks), , Using backticks to add code into our file ````
Link to the article I have written: AI hallucinations
TASK 9: Tinkercad
The aim of this task to design and simulate an automated radar system capable of detecting objects within a certain field of view.
- I started by learning how to build and simulate electronic circuits, Arduino circuits using tinkercad. Creating the circuit Using tinkercad I built a simulation of the radar system using the components: Arduino Uno, Ultrasonic sensors, servo motor, LCD display, resistors(220ohm).
- Added the code to the ardunio.
- The logic was for the servo motor to sweep-180 degree and triggering the ultrasonic sensor at each point.
- Calculating distance based on the time taken for the sound wave to return.
- Printing the distance and current angle to the serial monitor and the LCD Display. Link to my simulation
Task 10: Speed control of DC Motor
The main aim of this task was to controlling the speed of a 5V BO motor using a Arduino Uno and H-Bridge L298N motor driver.
Working
- Here I made use of the Pulse Width Modulation (PWM) technique to control speed of motor. Since a digital pin can only be HIGH (5V) or LOW (0V), through the PWM the power on and off can be pulsed very quickly. This is done by adjusting the Duty Cycle (the ratio of 'on' time to 'off' time), thus the average voltage sent to the motor is changed.
- In this task I made use of the H-Bridge L298N motor driver .
- I began by understanding the techniques to control the speed of motor. designed a simulation in Tinkercad before physical assembly.
- I made the circuit by wiring the Potentiometer to input pin and connected L298N to the digital enabled pin of the arduino.
- I programmed the Arduino to read the analog voltage from the potentiometer and uploaded o the no code.
- On rotating the potentiometer and I could observe motor speed changing.

Task 11: LED toggle using ESP32
-
ESP32 can host a custom HTML interface accessible via a local IP address, which allowed to toggle the LEDs wirelessly from a smartphone or PC.
-
I created the web server in the Arduino ide.
-
Using the given resource I built the physical circuit for toggling.
-
Uploaded the code into the ESP32 microcontroller.
-
Connected to a common WiFi, obtained the IP address and accessed the web server and using this web server I was able to toggle on and off two LEDs.

Attaching a video of my task
LED toggle using ESP32
TASK 12: Soldering prerequisites
- Soldering is a technique to join two metals by a metal alloy called solder alloy, to create electrical and mechanical connections. I learnt about the solder in our Lab, the main parts and precautions to be taken.
- Soldering Iron - Main heat source.
- Solder: A metal alloy that creates a permanent electrical and mechanical connection between parts.
- Wet sponge - For cleaning the soldering tip.
- Flux- is used to clean the metal surface and removing oxidation .
For this task, taking the necessary precautions, I was able to solder a resistor on the perf board.

TASK 13: Building an astable circuit using 555 timer IC
The 555 timer IC
- A 555 timer is an integrated circuit (IC) used to generate precise time delays or oscillations. For this task the 555 timer was connected in its astable mode.
- Duty cycle is the ratio of time circuit is ON compared to the time it is OFF.
- Here we required to achieve 60% duty cycle.
- The formula of duty cycle is Duty cycle = R_1 + R_2/R_1 + 2R_2.
- I selected R_1 = 22.2ohm and R_2 = 44.4ohm to achieve a duty cycle of 60%.
- Designed the astable circuit using the components on a breadboard.
- Connected the power supply. Used probes of DSO to connect to output pin 3 of the IC and recorded duty cycle of about 60.3% which was very close to the required value.


TASK 14: Karnaugh Maps and Deriving the logic circuit
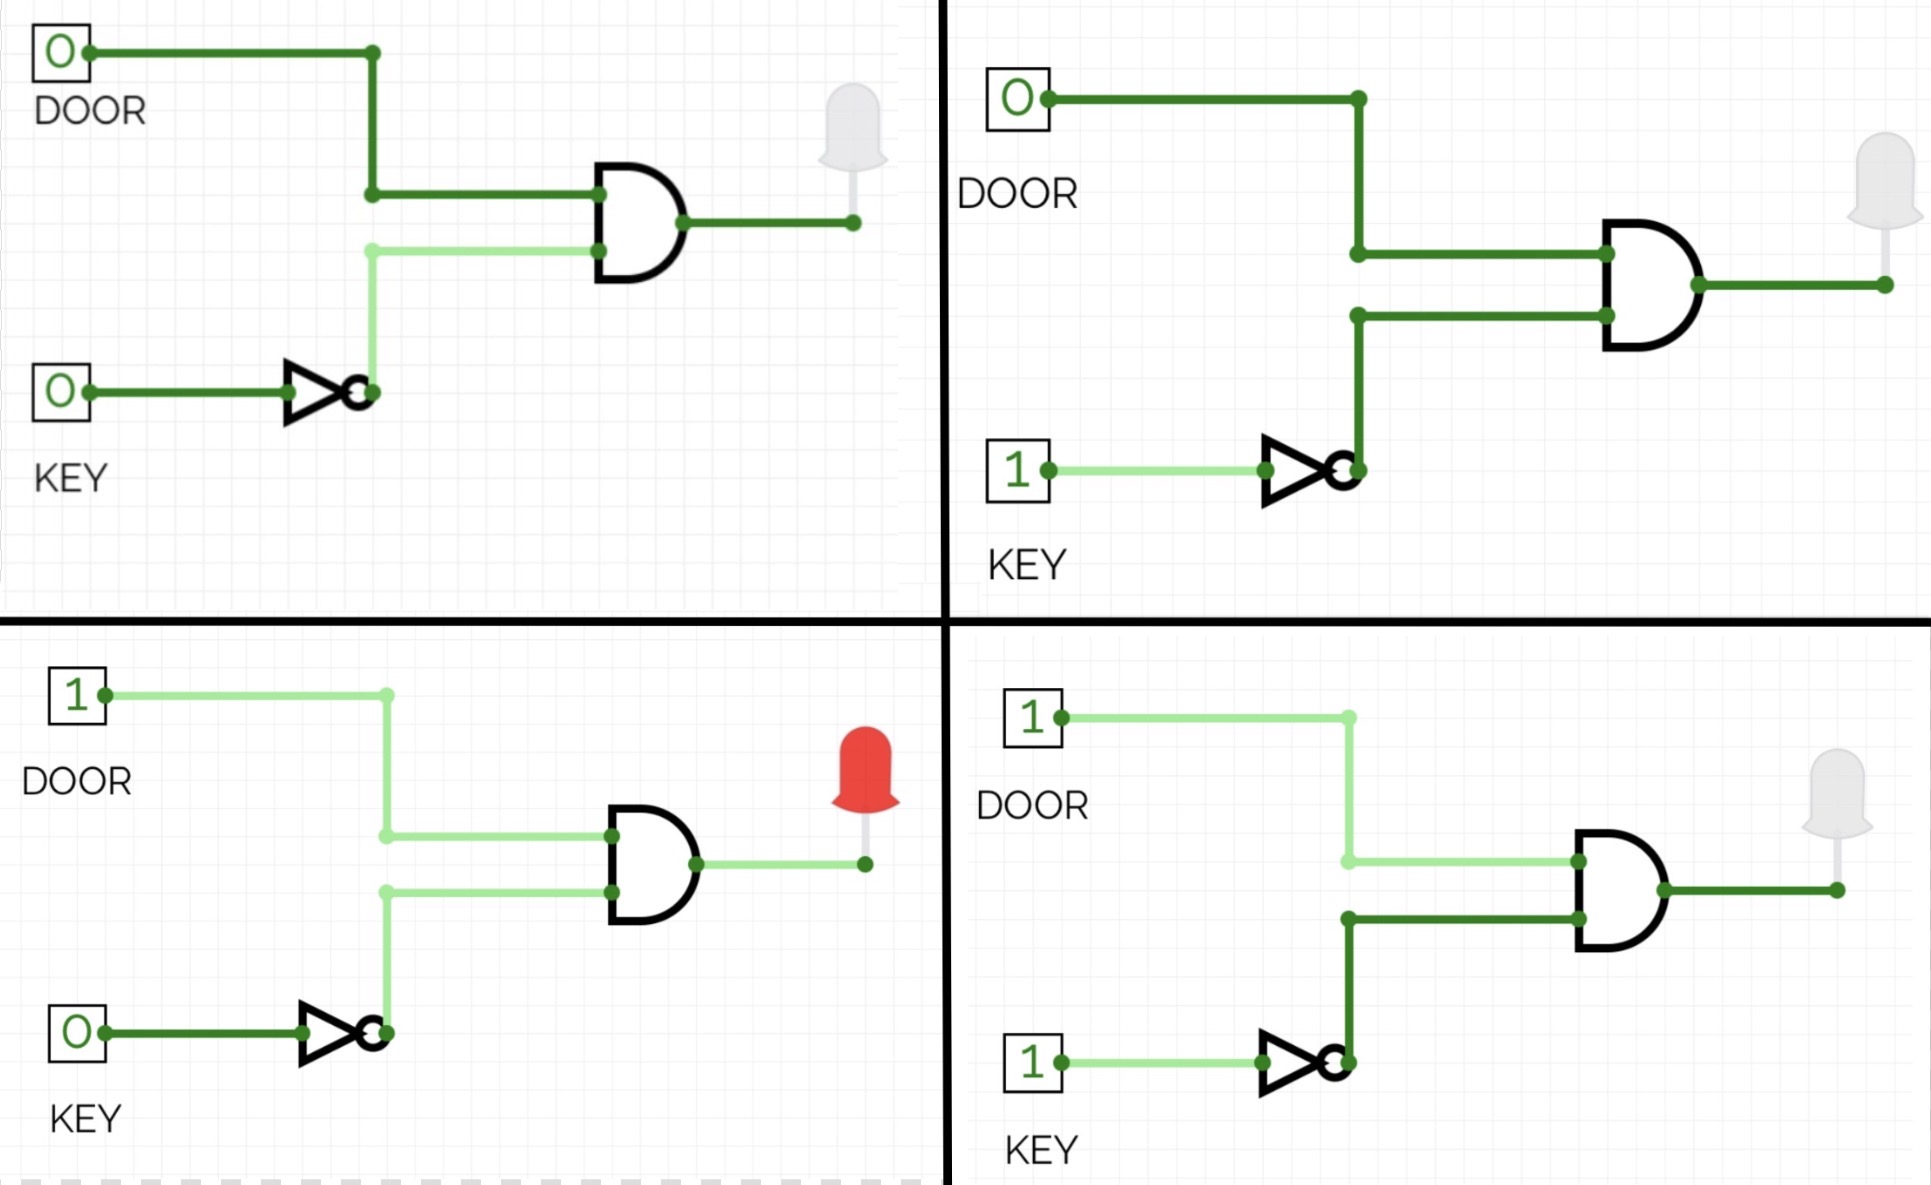
The objective of this task was to define conditions under which a burglar alarm should ring.
- I began by considereing the inputs :- Door and Key and the four cases : Door - open/closed. Key-pressed/not pressed
- The Output - Alarm : 0 = Does not ring, Alarm 1 = Ringing
The alarm goes off only when the key is not pressed and door is open.

- I created a truth table which consists of the four cases.
- Using K-map I was able to derive the simple logic expression in this circuit.
I simulated these four cases in CircuitVerse .
TASK 15,16,17
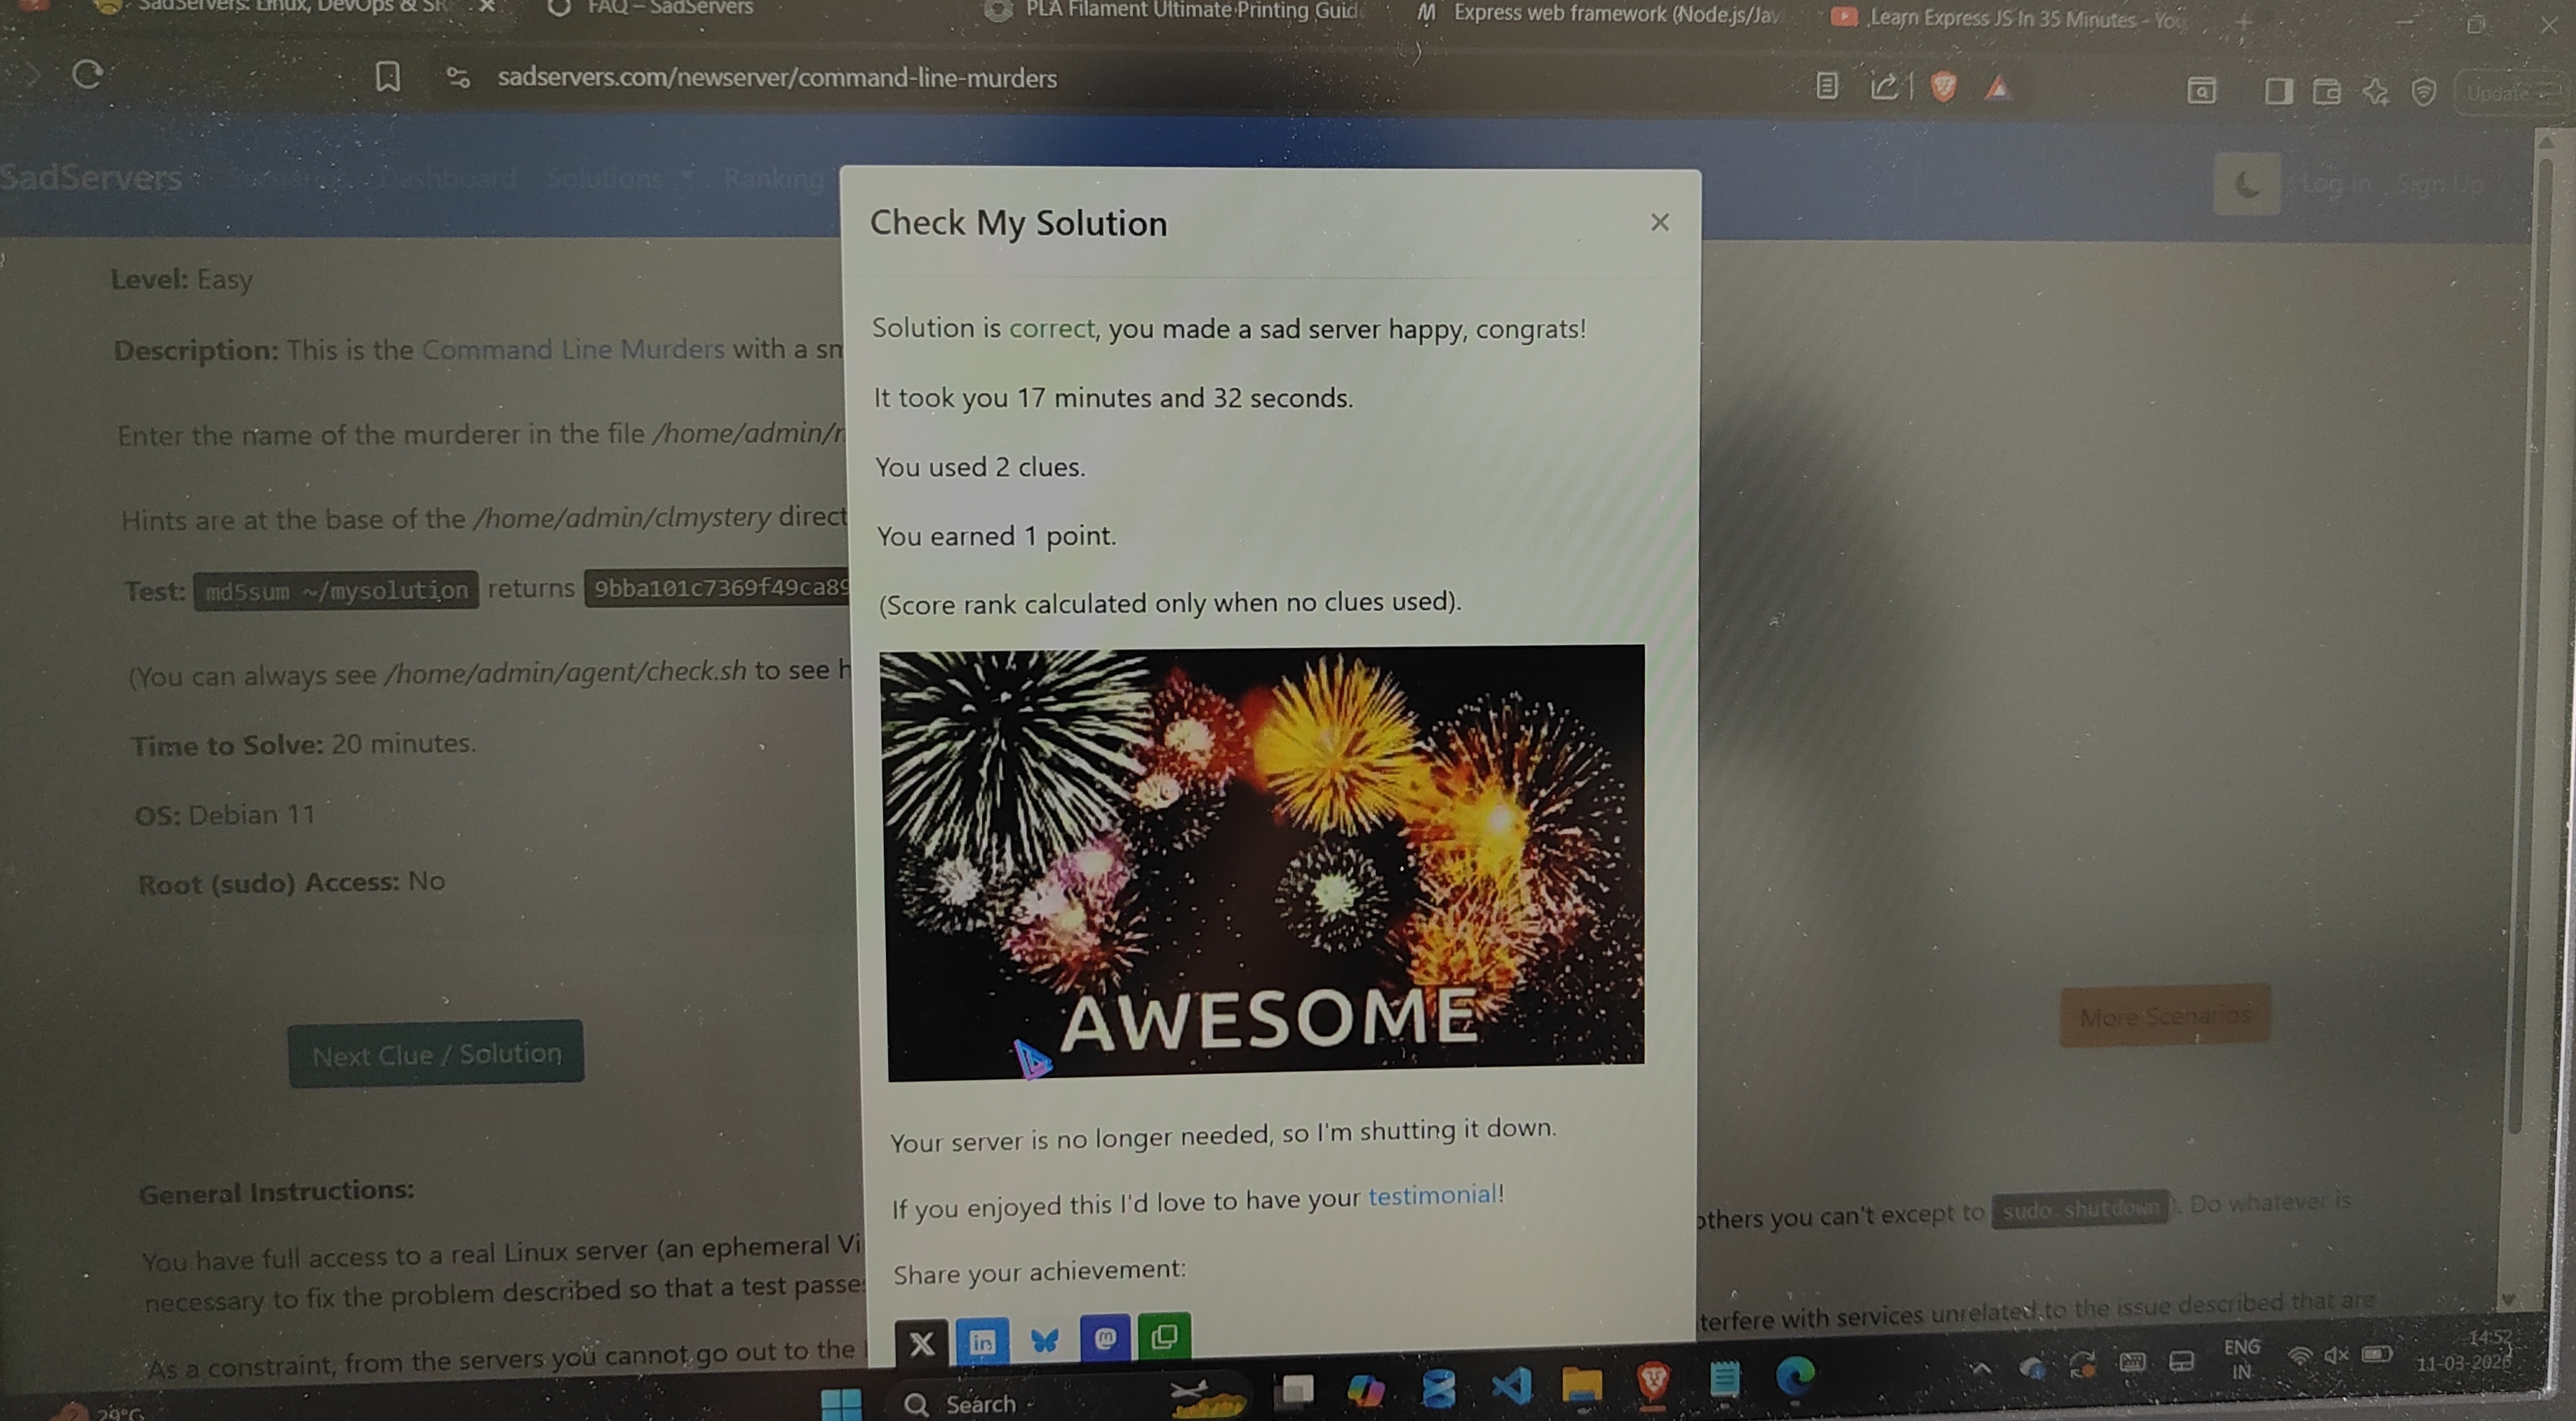
TASK 18: Sad servers - "Like LeetCode for Linux"
- Sad Server is often called "leet code for Linux " where a broken server (sad server) is made happy using the command line which enables us to diagnose and resolve the issue
- For the completion of this task I used some basic, important Linux commands like: cd, tail, head, grep, |(pipeline)
- After going through the instruction file, I found the clues, navigated through the other folders and files and eventually found the killer!
Task 19: Make a Web app
- The objective of this task was to make a web app where we can view and access digital resources and also manage user. It was to be done using Express js.
 Image of my resource web app
Link to view video of the application Resource-app
TASK 20 : Notebook Ninja – Getting Started with Jupyter
- Through this task I created my Jupyter notebook, a tool using which I can write code as well as text in the markdown format.
- I was able to write and execute python program, organize my text and
also visualize data by plotting graphs using matplotlib.
TASK 21: Watch & Reflect – Intro to Machine Learning
The objective of this task was to understand the basic concepts of Machine Learning and to learn about data preparation.
Link to my article:
Introduction to Machine Learning