
COURSEWORK
Suha's EV-RE-001 course work. Lv 1
| Suha Tasmiya | AUTHOR | ACTIVE |
Marvel Level-1 Tasks Report
22 / 4 / 2023
#COMMON TASKS REPORT
Task 1: 3D Printing
In this task we had to learn the working of a 3D printer and print a model. I chose to print a small model of a T-Rex.
Things I learnt:
- About STL files.
>* The process to change the size, density, speed of printing, temperature, etc.
>* About G-code and the method to print a model.
This was a very interesting and fun task. I learnt how a 3D printer works, the softwares required and the process that goes into it.

Task 2: API
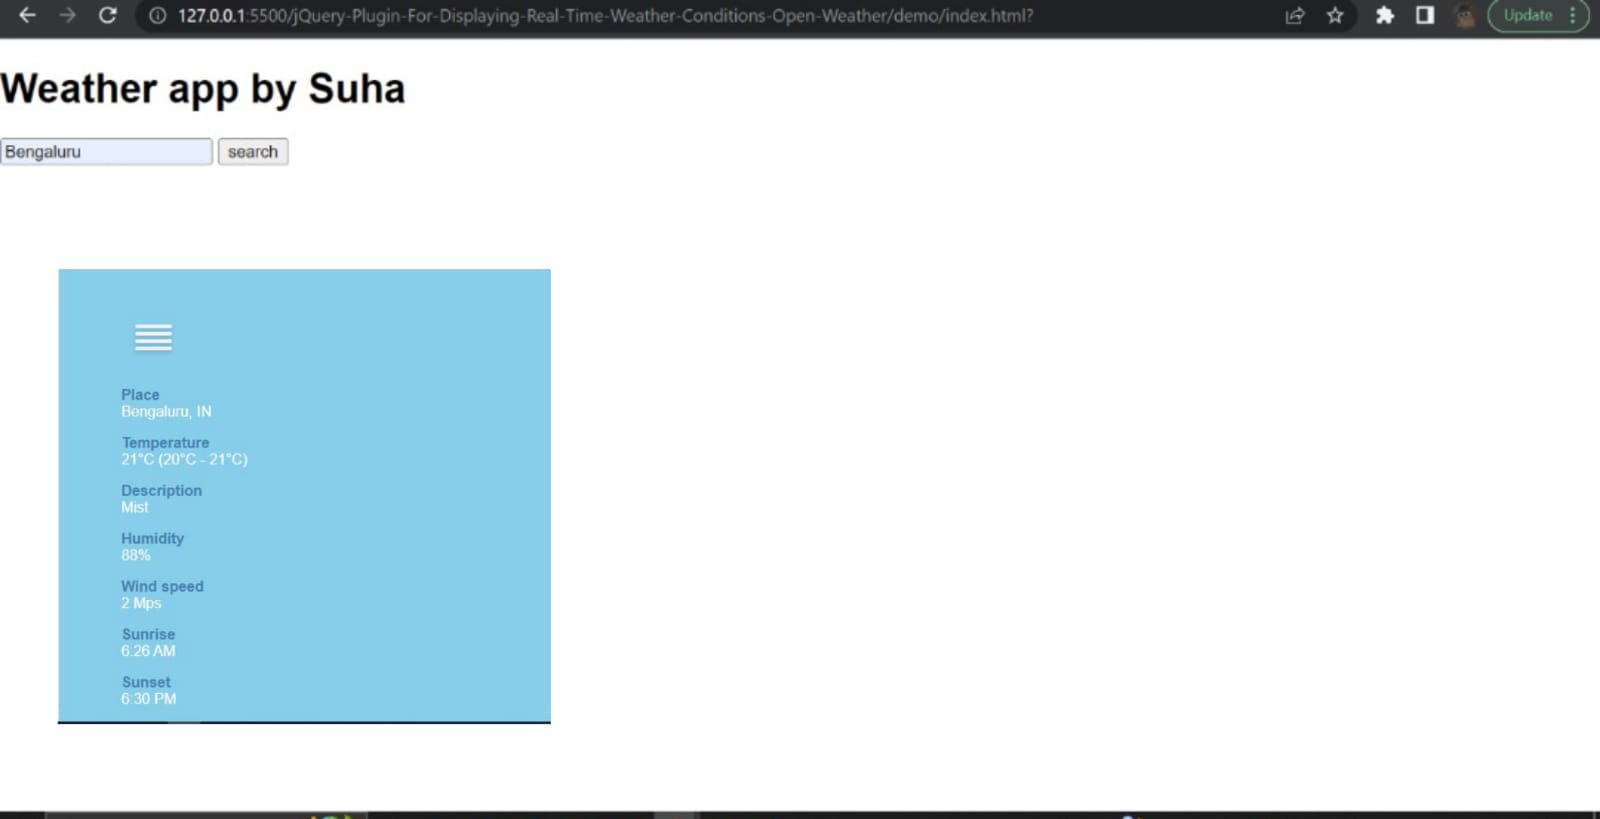
In this task we had to familiarize ourselves with the working of an API*(Application Programming Interface)*. I chose to make a weather API.
Things I learnt:
- What an API is and its applications.
* Its importance and how it can help developers create better user experiences that are more engaging, intuitive, and efficient.
This was an informative task and it helped me increase my knowledge in a new field.

Task 3: Tinkercad
In this task we had to work on a circuit and simulate one such that the distance of the sensor would be displayed on the lcd screen.
Things I learnt:
- I wasn't familiar with tinkercad at all, so this task helped me learn a new skill.
*I learnt about different components of the circuit.
I found this task a little hard as i wasn't getting the desired output for quite some time, but once i did it was quite simple.
It also helped me in tech roadies task 2.

Task 4: Active Participation
Certificates
I participated in tech-roadies and many events during impetus. I qualified for round 2 in one event.
mechronins
Tech-Roadies
MOOC Course:
I started CS50 course in February. It is a 8 week long course and a self-paced course. I am planning to finish it within July.
 I also started CS50P(Introduction to
Programming with Python) in April as I wanted to learn python.
I also started CS50P(Introduction to
Programming with Python) in April as I wanted to learn python.

Task 5: Soldering
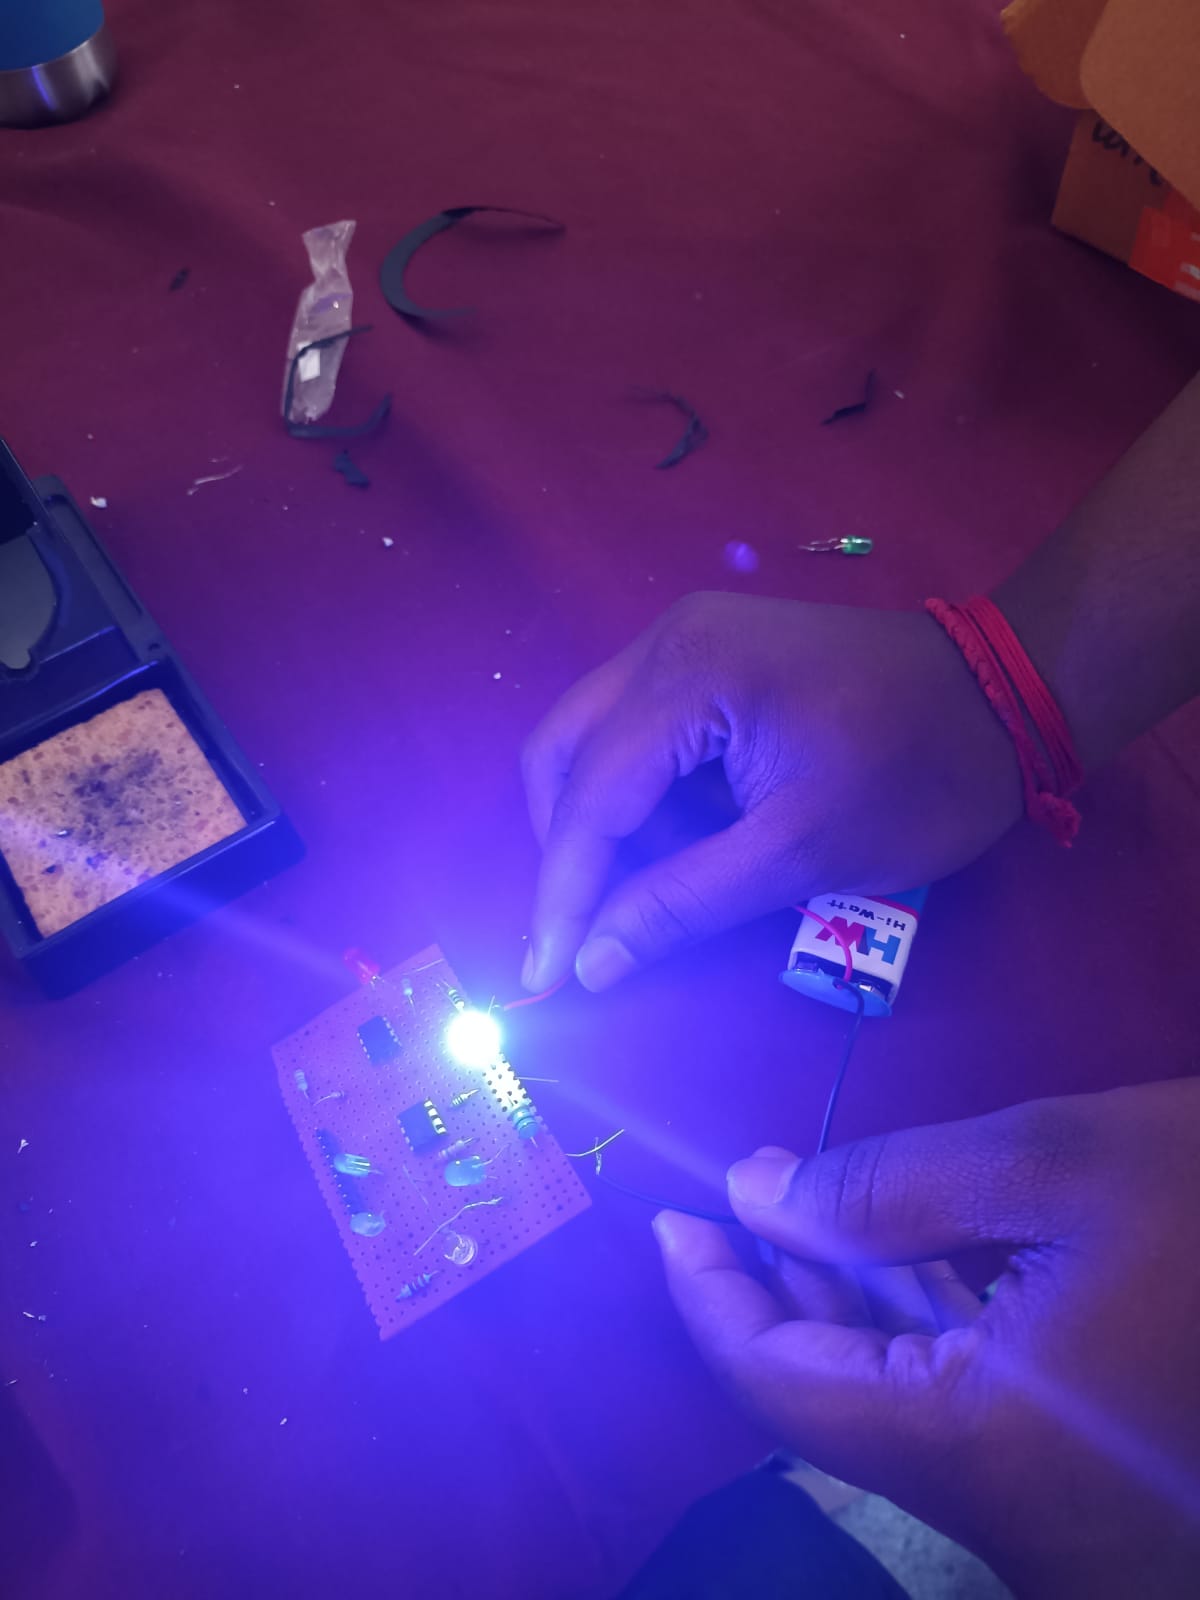
We had to perform basic soldering for this task on a perf board. I went through a few videos on how to do it. One of the coordinators, Abhilash, explained and performed it following which we did it too.
Things i learnt:
- How to perform soldering
* The equipments used for soldering and their uses.
* The applications of soldering.
* The use of flux and how oxidation can be prevented.
This was a very simple task and was the first hardware task that i worked on in marvel. I performed soldering on a led light with a resistor and checked the circuit with the help of a battery.


Task 6: Portfolio page
This task required us to create a portfolio page about us. This was a very simple task.
I had worked on a very similar page during a GDSC event. I decided to make a few changes to the existing website.
Things i learnt:
- Skills in html and css


Task 7: Working with Pandas and Matplotlib
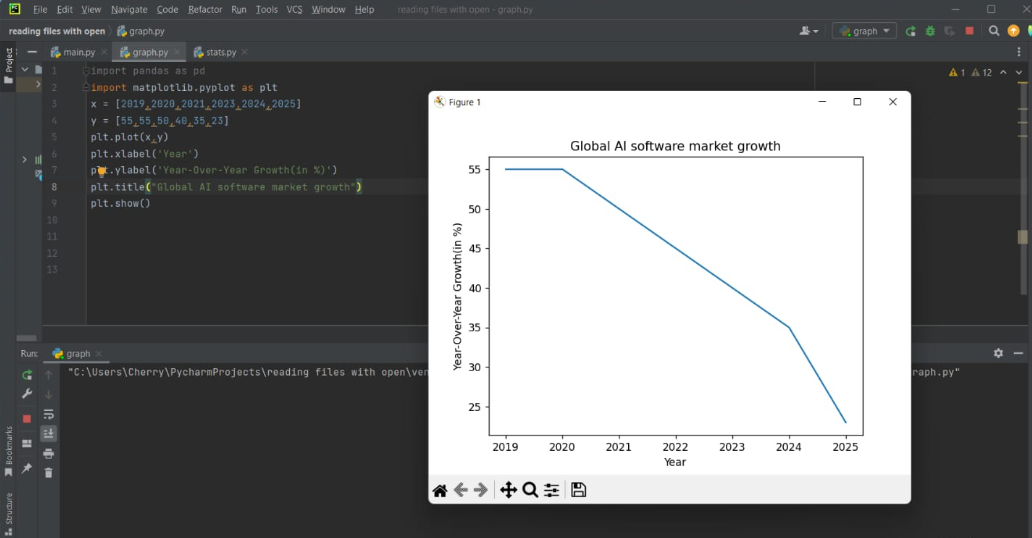
In this task we had to plot a a line graph, bar graph, and a scatter plot using pandas and matplotlib. This looked very intimidating in the beginning and i decided to skip it, but later I decided to give it a shot. It wasn't that hard once i watched a couple of tutorials and followed them.
Things I learnt:
*Working with pandas and matplotlib.
* Plotting Line graphs, bar graphs and scatter plots.
*How python can be used for different purposes
Line Graph
 Bar Graph
 Scatter Plot

Task 8: V2G Technology
This was one of the easier tasks which required us to write an article about any technical topic. Since I'm in the domain EV & RE, i decided to choose a topic related to it. I did some research and found the topic V2G Technology interesting.
Things I learnt:
*V2G Technology and its applications.
How it might prove to be a very useful and necessary technology in the future.
The advantages of this technology.

Task 9: Karnaugh Maps and Deriving the logic circuit
In this task we had to determine the
karnaugh map and make a burglar alarm using simple logic circuits. Since i didn't know much about this topic, i watched many videos and read a few articles about it.
Things I learnt:
- About K Maps and that they are pictorial method that are utilised to minimise various Boolean expressions without using the Boolean algebra theorems along with the equation manipulations.
- ses of Karnaught maps in electronics.
*I learnt the method of solving 3 variable K Maps.
To create a burglar alarm using simple logic circuits, we have to define the different cases based on door lock/open and key pressed/not pressed. Here are the four cases:
- Door locked, key not pressed
- Door locked, key pressed
- Door unlocked, key not pressed
- Door unlocked, key pressed
To simplify the logic, we can use a Karnaugh map for each of the four cases. Here are the Karnaugh maps:

To create the burglar alarm, we can use a combination of logic gates such as AND, OR, and NOT gates. Here's one possible implementation using AND and NOT gates:

To implement this, we can use two AND gates and a NOT gate as follows:
 This was something very new to me, and I had a slightly hard time understanding this.
LEVEL-1 REPORT
Task 1 - LTspice and KiCad
Task 2 - Speed control of DC motor
Introduction
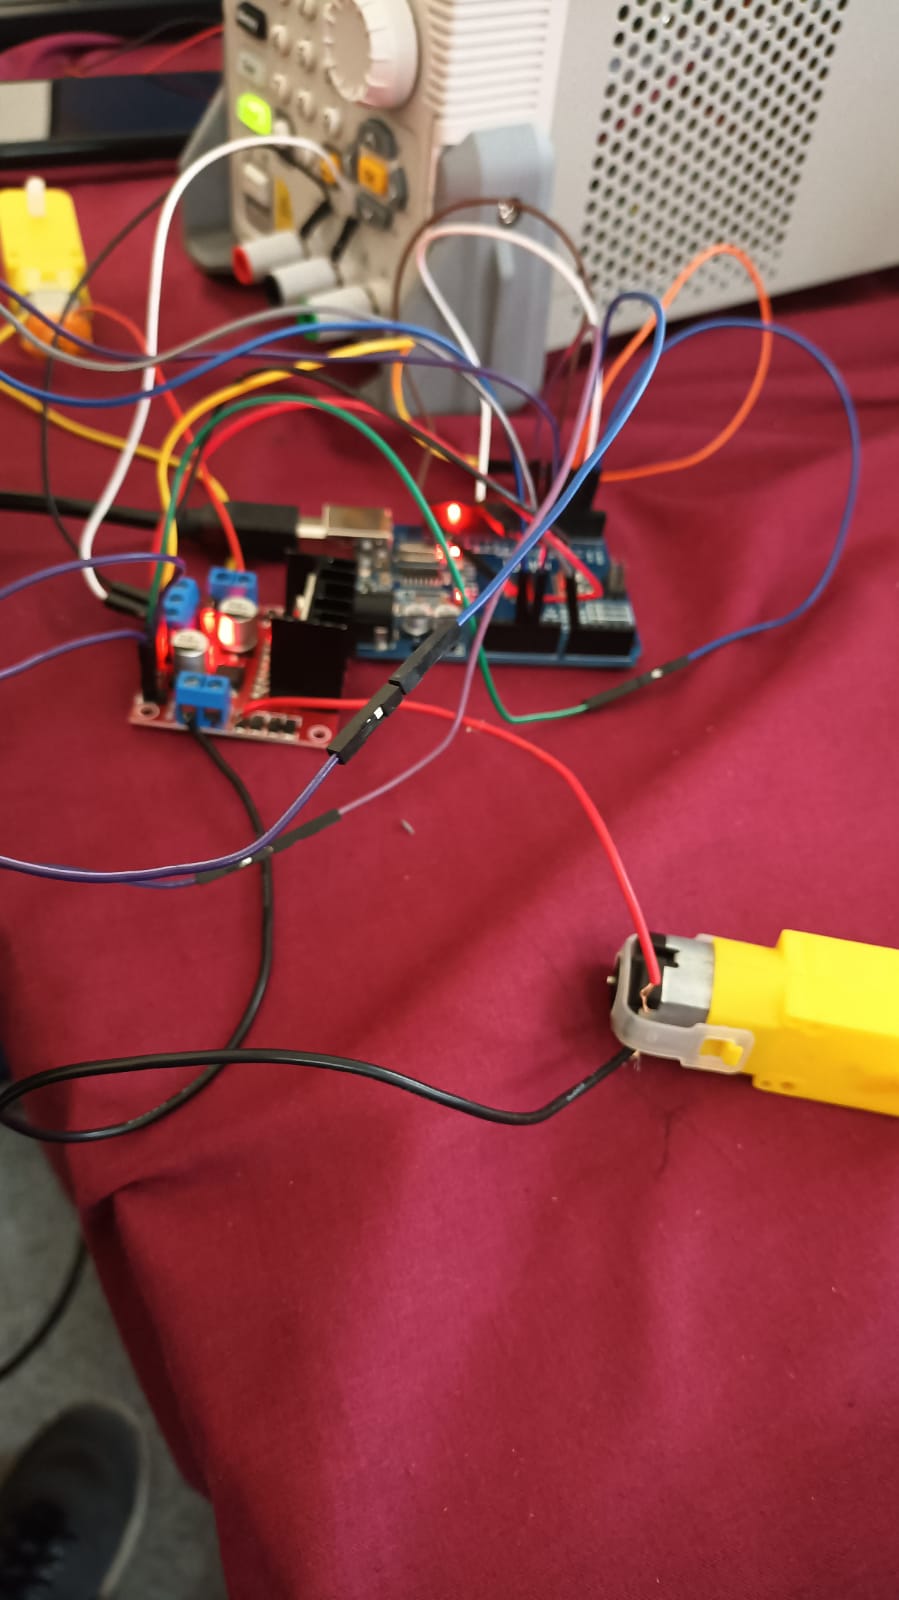
The objective of this project was to learn about the dual H-Bridge L293D motor driver and explore how to control the speed of a DC motor using an Arduino. The project involved using a potentiometer to adjust the motor speed and understanding the working principles of the motor driver.

Key Learnings
- Understanding the working principles of motor drivers and their connection with microcontrollers.
- Implementing speed control using pulse-width modulation (PWM) to regulate motor speed.
- Interfacing external components like potentiometers with Arduino for input control.
- Enhancing motor control by incorporating additional features like direction control or closed-loop control.
Conclusion
Overall, this project expanded my knowledge of motor drivers, PWM control, and their application in regulating the speed of DC motors. It demonstrated the practicality of Arduino-based speed control and laid the foundation for future motor control projects.
Task 3 - Direction Control of a Motor
Introduction
The objective of this project was to explore the control of a DC motor's speed and direction using a dual H-Bridge L293D motor driver with an Arduino. The project aimed to understand the components involved and the necessary steps to achieve speed and direction control.
Key Learnings
- Understanding Motor Control
- Practical Application of Motor Drivers
Conclusion
This project provided valuable insights into controlling the speed and direction of a DC motor using the dual H-Bridge L293D motor driver with an Arduino. The practical implementation showcased the ability to manipulate the motor's behavior through proper connections and programming. Understanding these concepts opens up possibilities for various applications requiring accurate motor control, such as robotics, automation, and more.
Task 4 and 5 - Point Turn of a Vehicle and Ultrasonic Sensor
Introduction
In this project, we aimed to create a small vehicle equipped with point-on navigation capabilities. The objective was to design a vehicle that could move in any direction, much like the movement of a chess piece known as a \point." This project challenged us to build a versatile and agile vehicle that could perform precise movements on a flat surface.
Materials Used
- Small Vehicle Platform: We utilized a small, four-wheeled vehicle platform as the foundation for our project.
- Arduino Microcontroller: An Arduino microcontroller served as the brain of our vehicle, enabling us to program and control its movements.
- Motor Drivers: Motor drivers were employed to control the four wheels of the vehicle, allowing for precise movement.
- Power Supply: To provide power to the motors and the Arduino, we used a suitable power supply source.
Vehicle Design and Control
The vehicle was designed with four independently controlled wheels, similar to a chess piece's movements. By manipulating the motor drivers through the Arduino, we programmed the vehicle to move forward, backward, left, and right with great precision. This capability allowed us to navigate the vehicle accurately on a flat surface, mimicking the point-like movements of a chess piece.
Introduction
In the second task, we enhanced our vehicle by integrating ultrasonic sensors. The objective was to equip the vehicle with obstacle detection and avoidance capabilities. When an obstacle was detected in front of the vehicle, it would automatically change its course to avoid a collision.
Ultrasonic Sensor Implementation
- Ultrasonic Sensors: We incorporated ultrasonic sensors at the front of the vehicle to measure distances.
- Programming Logic: Using Arduino programming, we implemented logic that continuously measured the distance to the nearest obstacle. When the sensor detected an obstacle within a predefined range, the vehicle's control logic triggered a change in direction.
- Obstacle Avoidance: Upon detection of an obstacle, the vehicle would initiate a turn, allowing it to navigate around the obstacle while maintaining its point-like navigation characteristics.
Conclusion
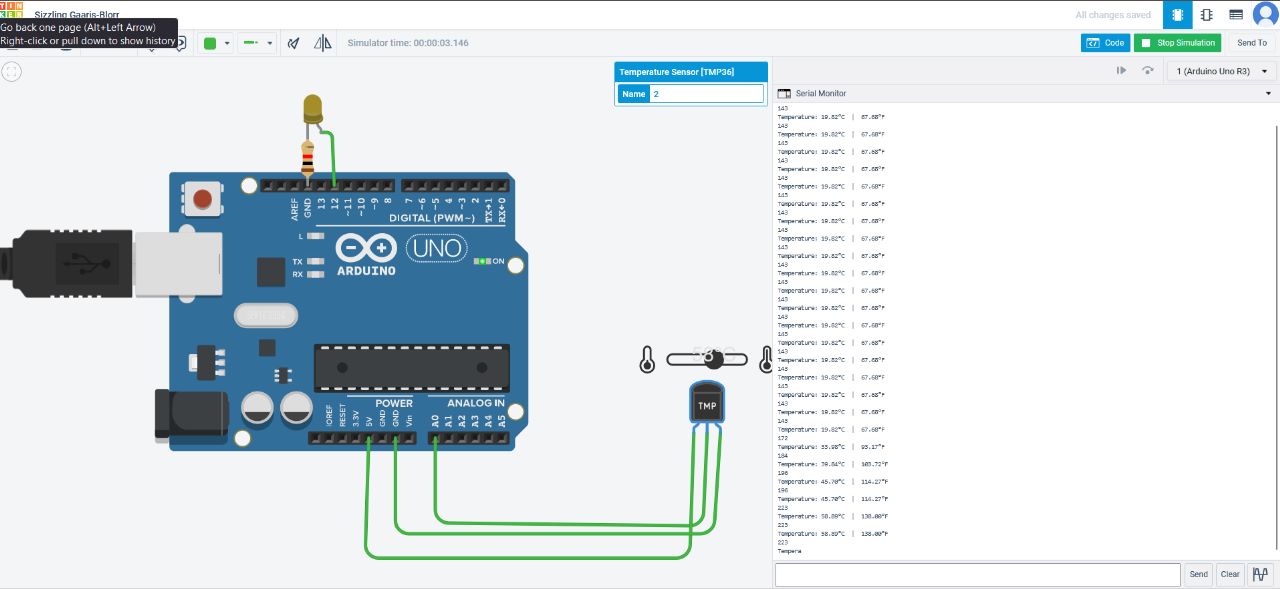
Task 6 - Temperature Detection
Introduction
In this project, we utilized Arduino and the LM35 temperature sensor to accurately detect and monitor temperature variations. The LM35 sensor is a precision analog device that provides an analog voltage output proportional to the temperature it measures.
Methodology
1.Hardware Setup
2.Programming
3. Calibration
4.Data Display
Results
Throughout our testing, the Arduino and LM35 sensor consistently provided temperature measurements. The readings obtained were reliable and responsive to changes in the surrounding environment in the beginning, but when the soldering tip was brought near, the readings weren't reliable.

Key Learnings:
- Understanding the hardware connections and circuit diagram for the LM35 sensor and Arduino.
- Programming the Arduino to read analog voltage and convert it to temperature using the LM35 sensor.
- Calibration techniques to ensure accurate temperature measurements.
Conclusion
Using the Arduino and LM35 sensor, a temperature detection system was successfully implemented. This project demonstrates the effectiveness of the LM35 sensor in measuring temperature accurately. The combination of Arduino's versatility and the LM35 sensor's precision makes it an excellent choice for various temperature monitoring applications.
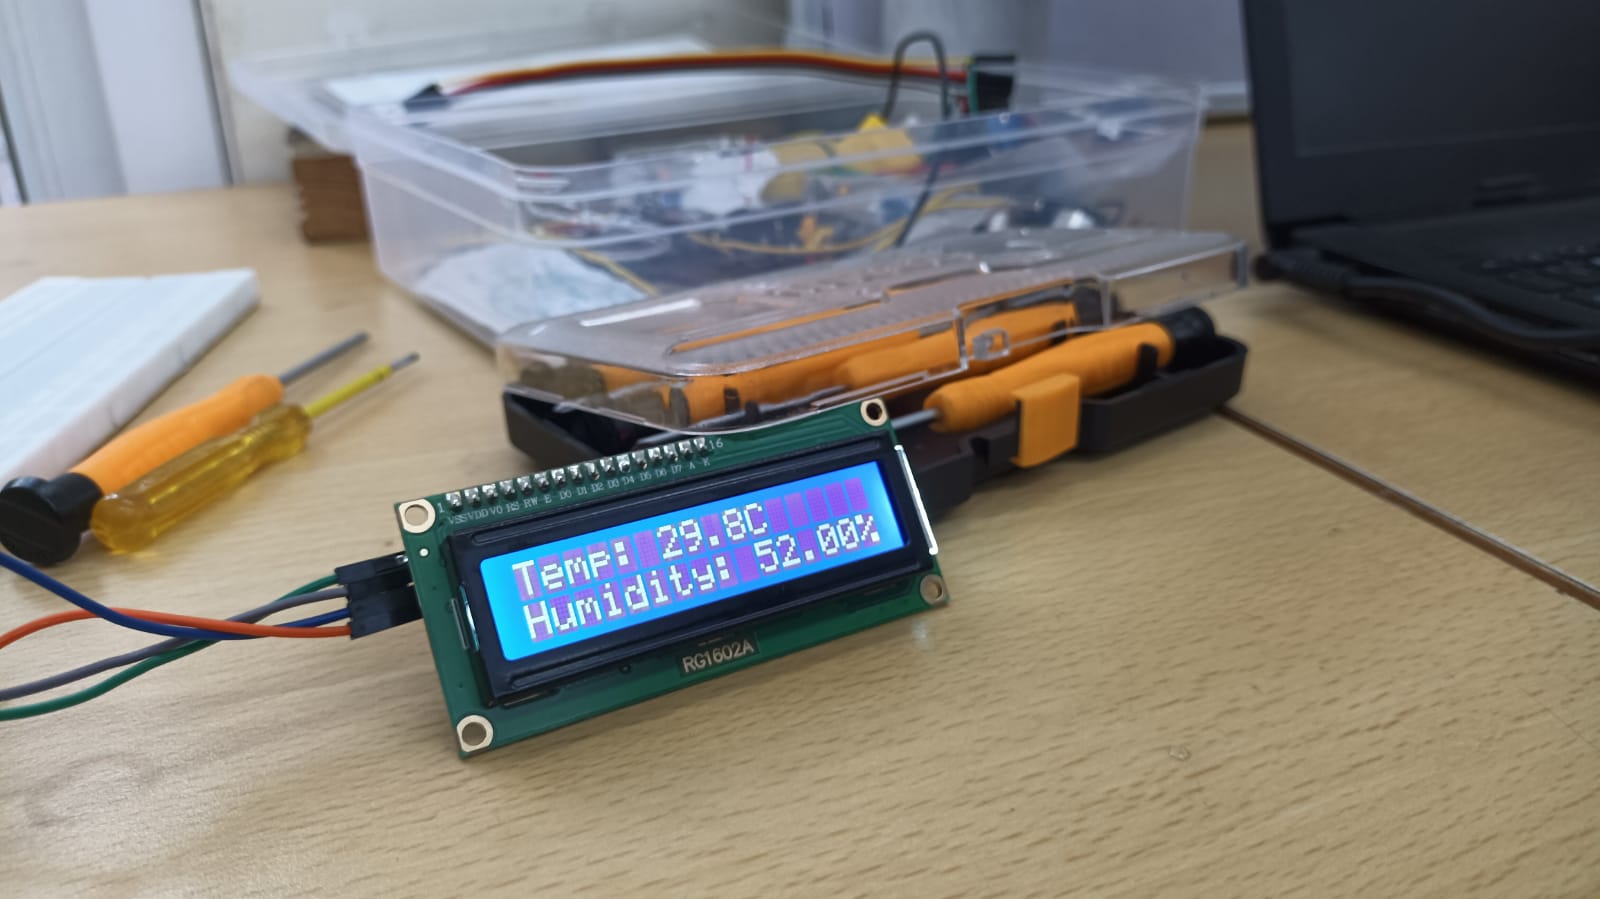
Task 7 - Temperature and Humidity Detection
Introduction
The DHT11 sensor is a basic, low-cost digital temperature and humidity sensor widely used in various applications.
Hardware Setup
- Connect the DHT11 sensor to an Arduino board using the following pins:
- VCC - Connect to 5V pin on Arduino
- GND - Connect to GND pin on Arduino
- OUT - Connect to a digital pin on Arduino (e.g., pin 2)

Key Learnings:
- Sensor Integration: I gained hands-on experience in connecting and integrating the DHT11 sensor with an Arduino board.
- Library Usage: I learned how to utilize external libraries in Arduino IDE, specifically the DHT library.
- Display Output: I acquired knowledge on how to use the LiquidCrystal_I2C library to initialize and control an LCD display. This enabled me to showcase the temperature and humidity readings in a user-friendly format.