BLOG · 20/3/2024
Level 2 "REPORT"

Task 1:
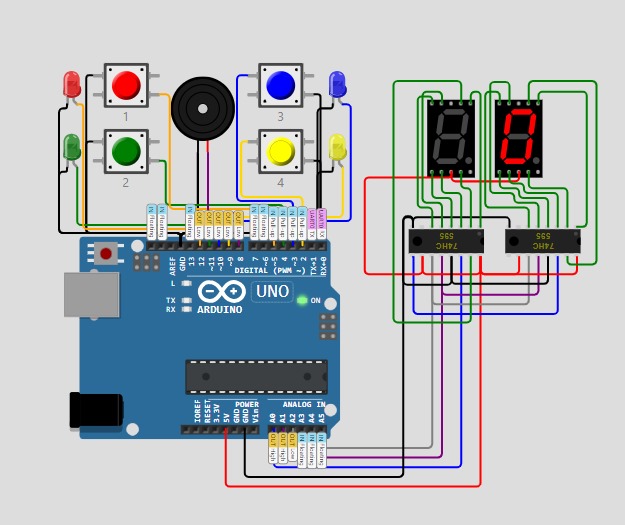
Simon Says.
The main goal for us was to create a fun game using ESP32 microcontroller ,push buttons and LEDs. We had the task to blink the LED randomly, asking the user to push the corresponding buttons. If the user had failed, then we were told to give a clear indication and restart the game.
It was one of the most wonderful task that we could just start off with level 2.
below are some of the pictures from the task that I performed .
Arduino uno was replaced by Esp32 microcontroller , While performing the experiment , I commented all those lines in the code that included Buzzer and 7 segment display as i did not include them while performing the same .

Task 2:
Basics of MQTT protocol and other communication protocols.
MQTT:
MQTT stands for Message Queuing Telemetry Transport. It is an extremely simple and lightweight messaging protocol (subscribe and publish) designed for limited devices and networks with high latency, low bandwidth or unreliable networks.
MQTT plays a very vital role in Machines to Machines , and Iot domain as the very own platform is concerned about Battery performance and bandwidth of the devices .
The MQTT broker is the center of every Publish / Subscribe protocol.
The broker is responsible for receiving all messages, filtering the messages, determining who subscribed to each message and sending the message to those subscribed clients.
MQTT brokers used in the industry are, the HiveMQ MQTT Broker and EMQX. Cloud providers such as Microsoft and Amazon also provide their own MQTT brokers with Azure IoT Hub and AWS IoT Core.

Task 3: Basics of creating a website
The main task that we had was to, Create a webpage with a button that when pressed toggles the color of the webpage.
Through this task , I was able to create a webpage using HTML, CSS and Js.
I have hosted my webpage in GITHUB , Below link directs you to the same !
.png?raw=true)
https://chandu9632038969.github.io/Marvel.pf
Task 4 - ESP32 Cam
Our main task was to Set up a CCTV camera system that streams/records video footages .
The components that I used while performing task include ESP32-CAM \nFTDI programmer
Female-to-female jumper wires.
Since ,The ESP32-CAM doesn’t come with a USB connector ,We use an FTDI programmer to upload code through the U0R and U0T pins (serial pins).
I have understood how things worked while recording a video in esp32 cam,
Since I faced some issues in getting the desired output, I haven't uploaded the images, So pardon me for that !!
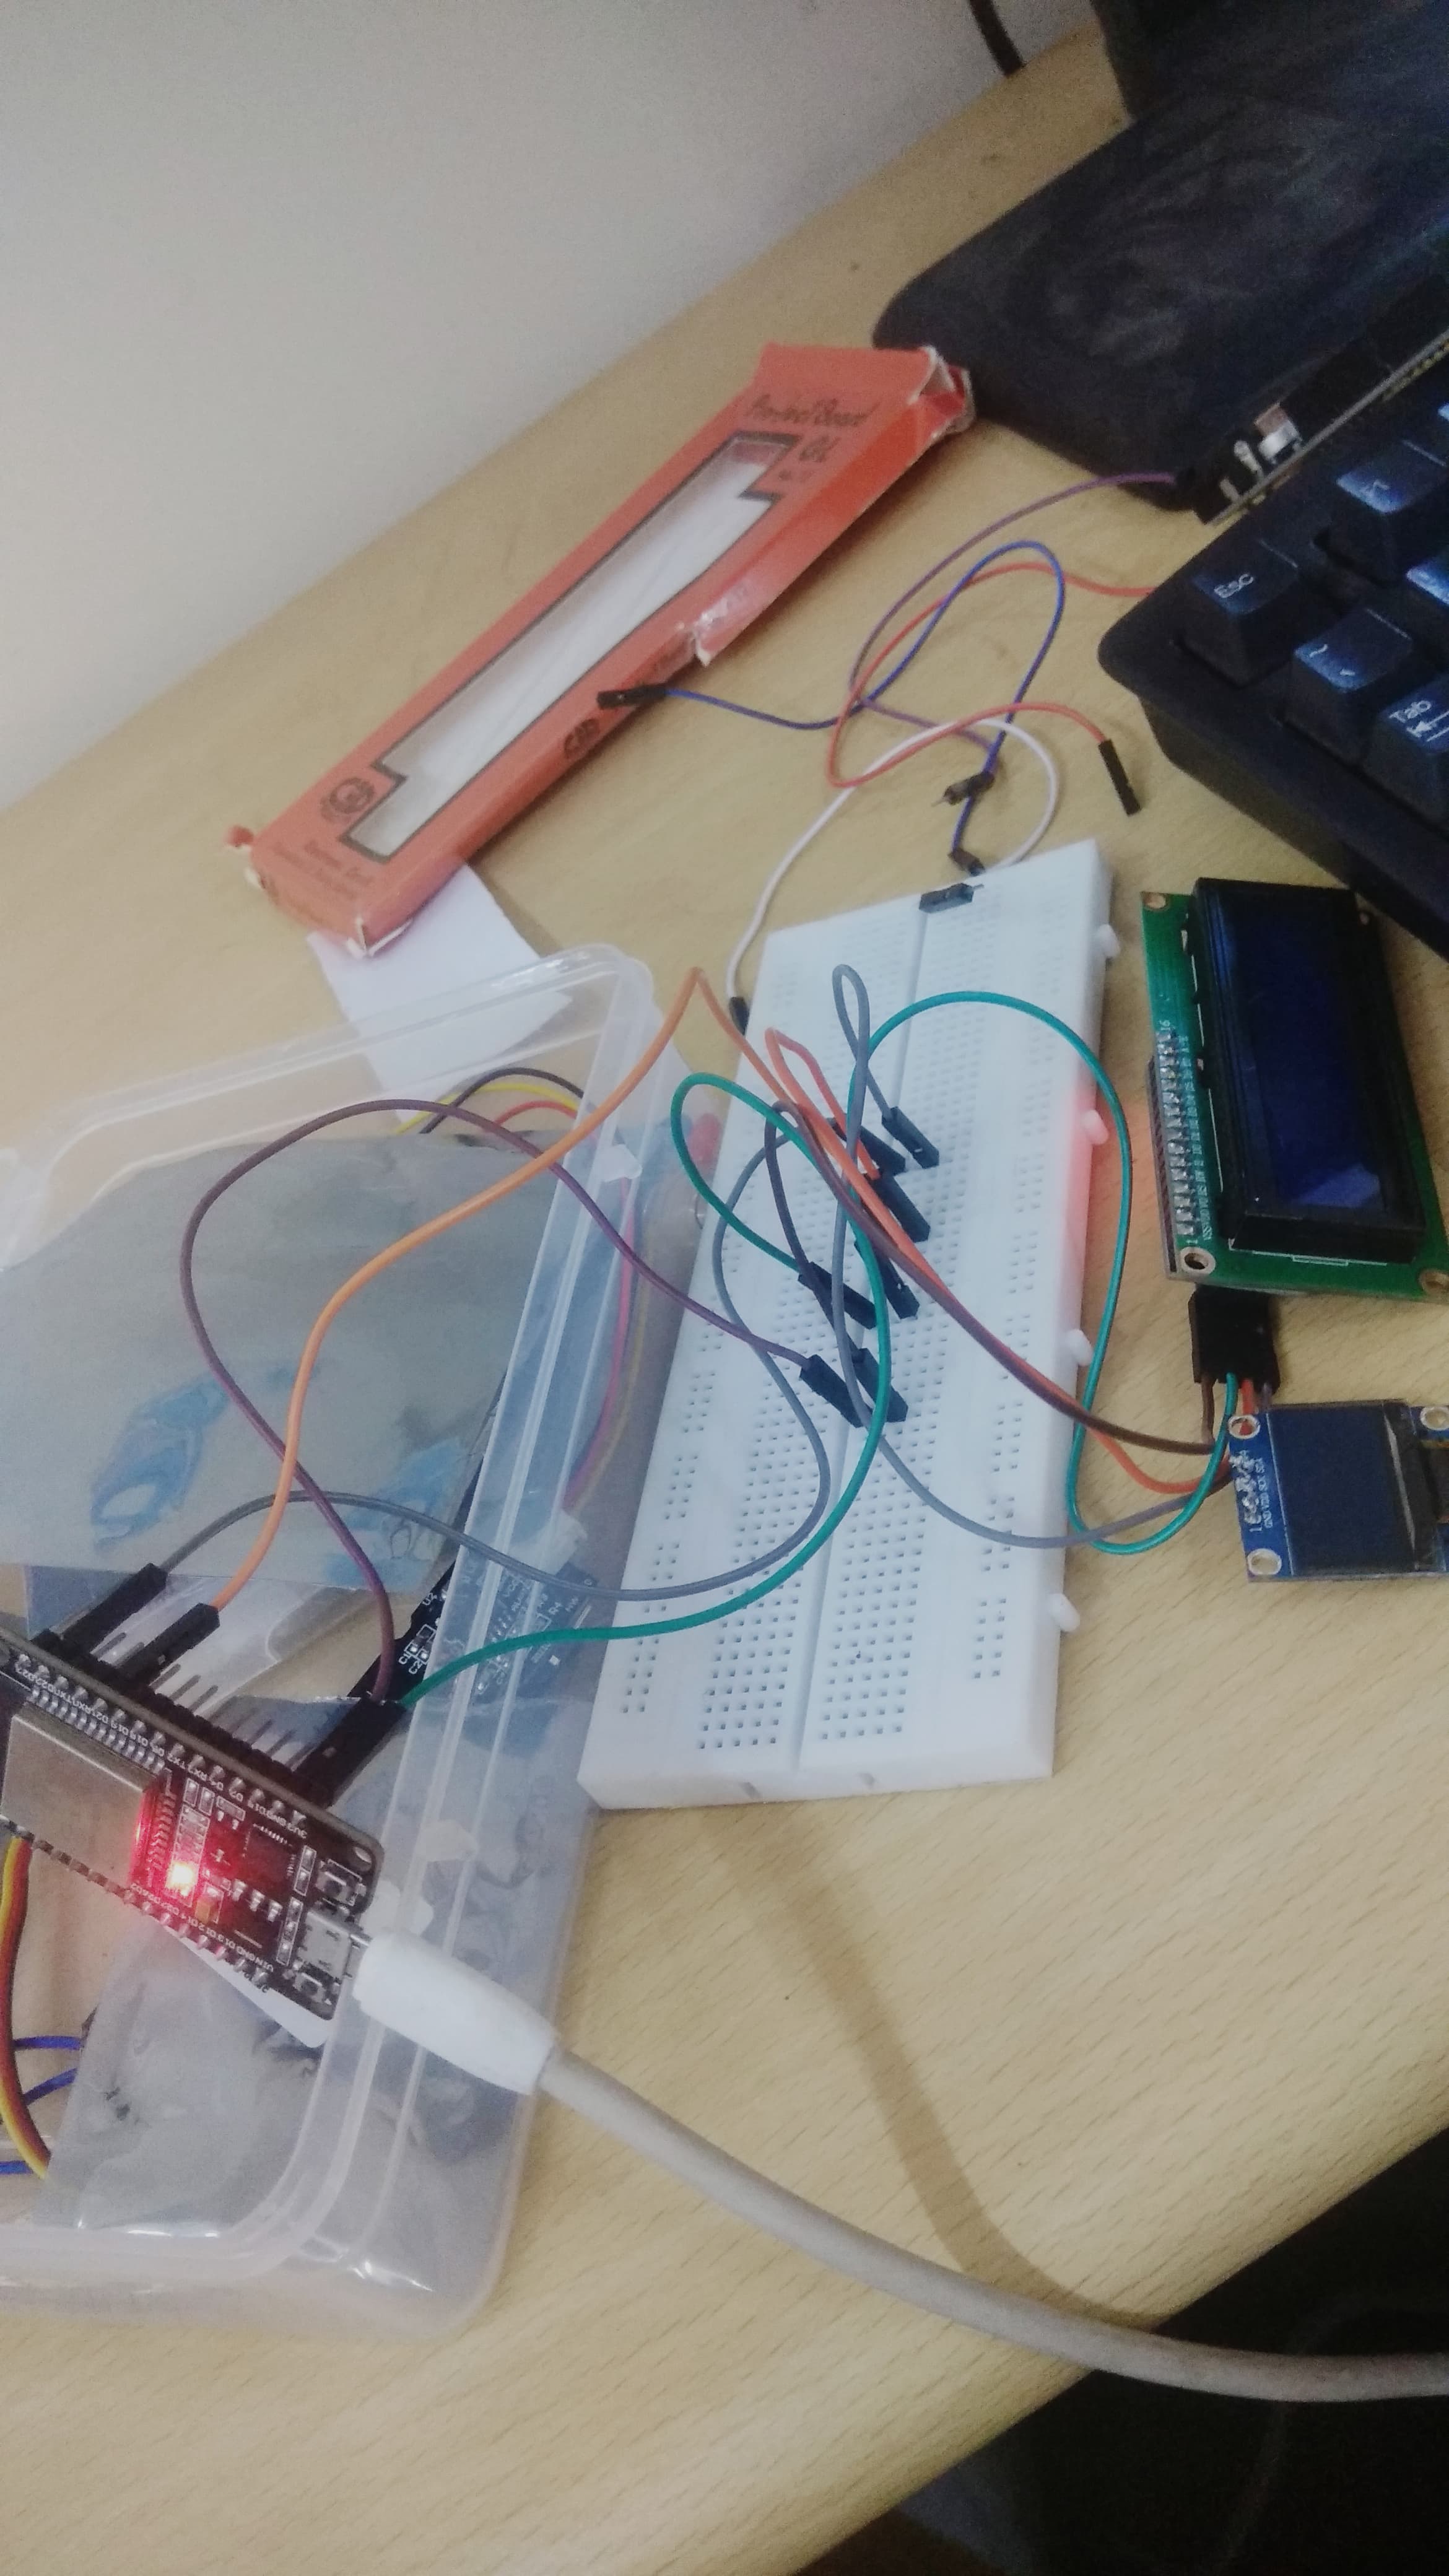
Task 7 - Communication using I2C protocol.
our main aim was to Send data from Esp32 to Arduino through I2C protocol and display a message on the lcd screen by typing the message using the webserver hosted on the esp32.
I2C stands for the inter-integrated controller. This is a serial communication protocol that can connect low-speed devices. It is a master-slave communication in which we can connect and control multiple slaves from a single master. In this, each slave device has a specific address.
some of its advantages include:
1.It supports flexible data transmission rates.
2.It supports long-distance communication than SPI.
3.Each device on the bus is controlled separately.
below are some of the pictures of the same!

Task 8 - Flashing Morse Code.
After Completion of this Task , I was able to Set up an ESP32 to flash morse code using an led making use of the message sent by the webserver hosted on the esp32.
By using the serial monitor in the Arduino IDE, we will be able to type a message on your computer, and the Arduino will translate it into tones in Morse code.
The same method could be used to convey the message through an LED, since both devices can be rapidly turned on and off.
Below are some of the pictures of the task I performed.

https://youtube.com/shorts/vpSP0QKSw6w?feature=share
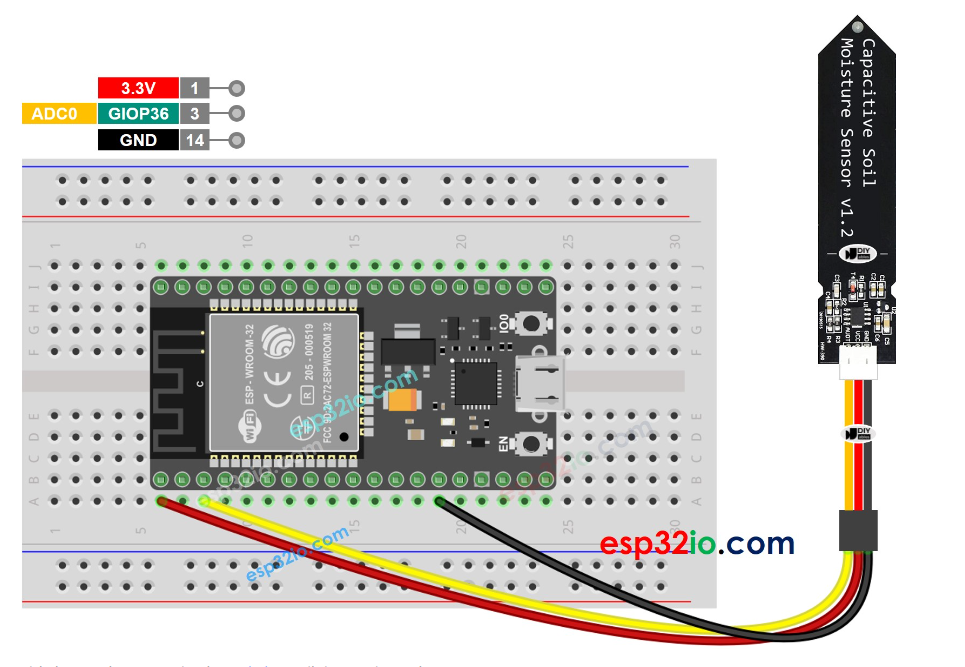
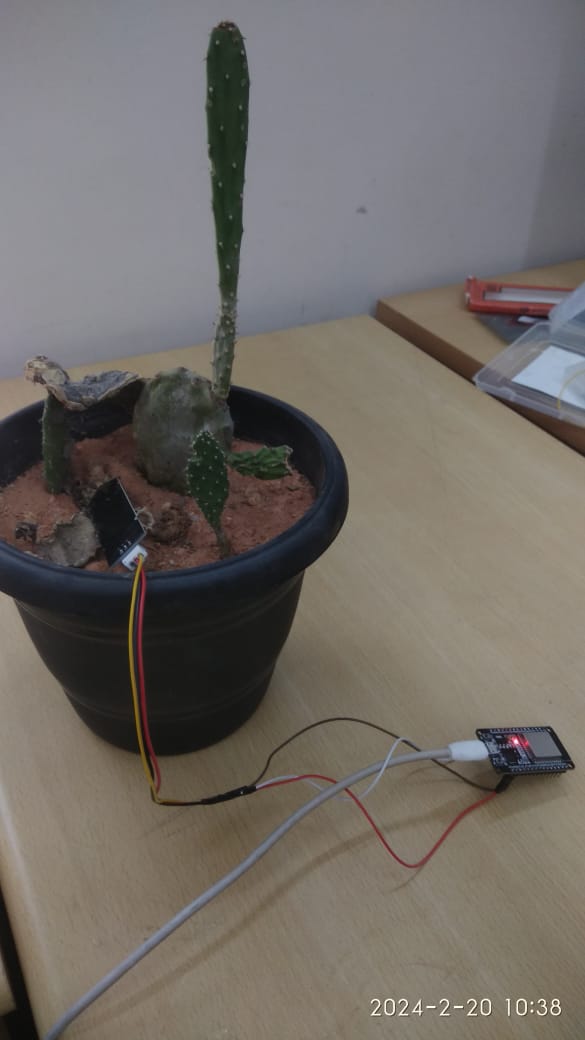
Task 9 - Soil Moisture Sensor.
After performing this Task , I was able to Measure the moisture level of the soil in the pot using the capacitive soil moisture sensor and display the moisture level on the serial monitor .
The components that I used while performing the task include , Esp32, USB Cable , jumper wires , Capacitive Soil Moisture Sensor, Breadboard etc.
Below are some of the pictures of soil Moisture task that I performed .

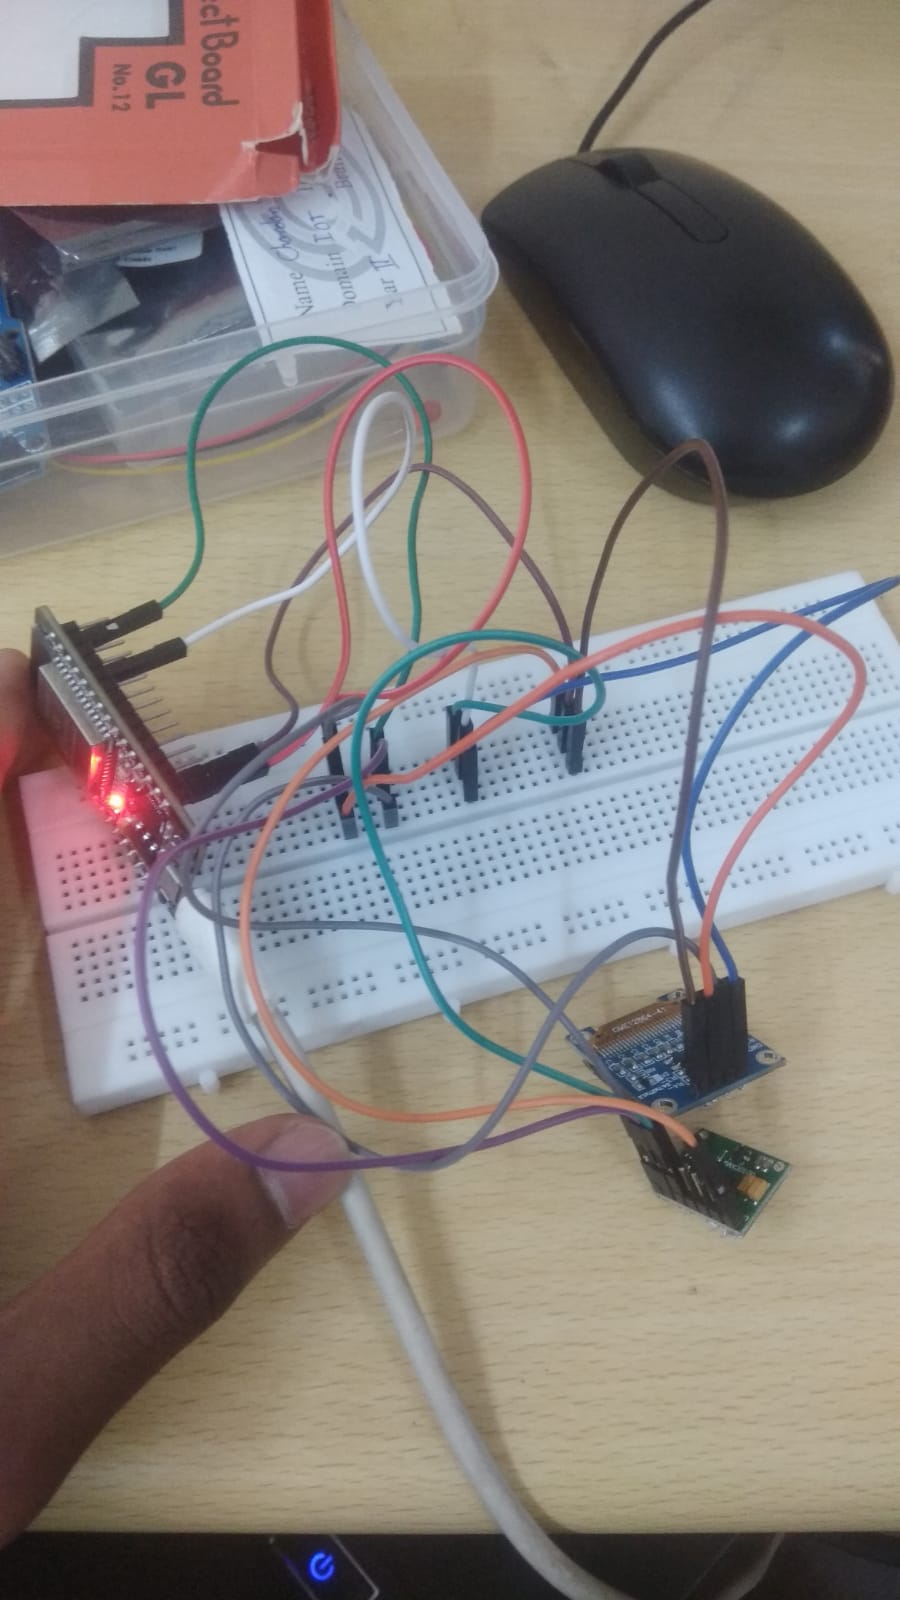
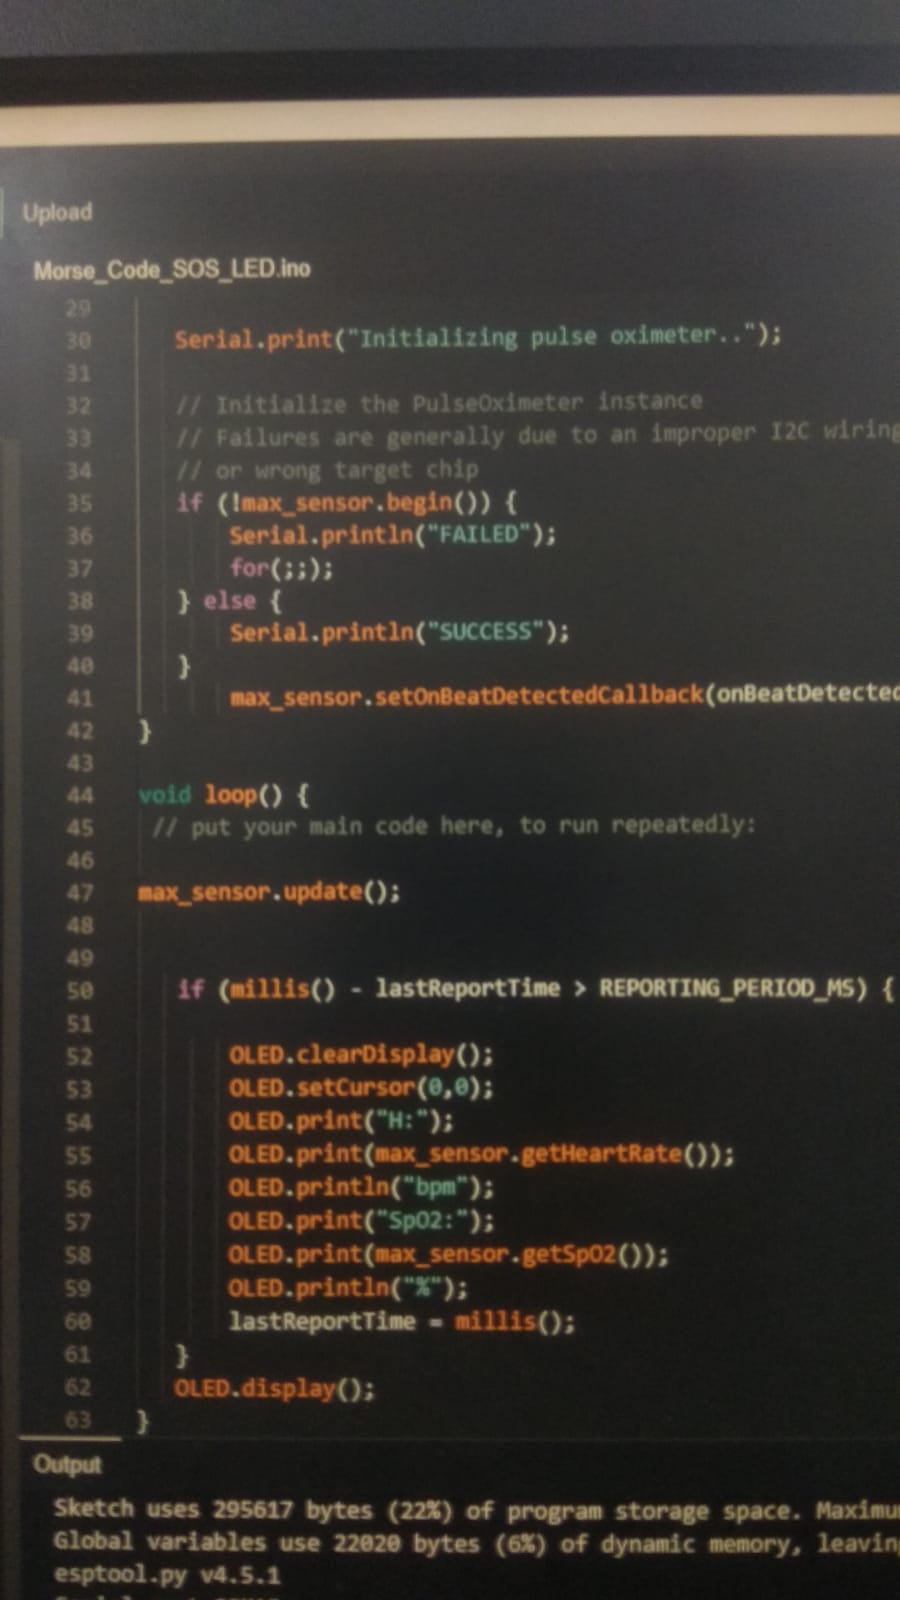
Task 10 - Read and Display Vitals
The main task of ours was to ,
Measure heart rate and blood oxygen levels using MAX30100 sensor and display the results on an Android Application using MIT App Inventor.
The components that I used to perform the above task were
1.ESP3
2.MAX30100 pulse oximeter module
3.OLED SSD1306 display
4.BreadBoard.
5.jumper wires.
6.Working of Max30100:
It sends a red light and an infrared light through your fingertip, then it measure the reflected lights with its integrated ADC and does some processing on the signals. The more oxygen the blood contains, the more infrared it absorbs and also more oxygen in the blood would let pass more red light through it. Similarly, When heart pumps blood, module would sense the increment of oxygen caused by pumped blood.