BLOG · 13/4/2023
COMMON TASK REPORT-2
this post is consists of report of common task from 6 to 9

TASK-6
LED TOGGLE
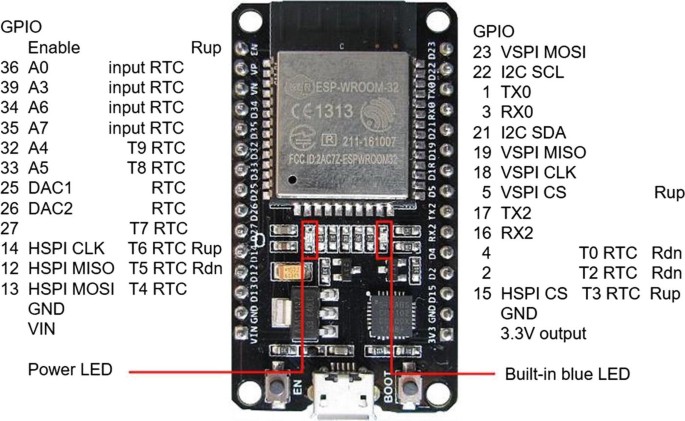
The task is to make a standalone web server with an ESP32 to control the LEDs connected with ESP32 GPIOs.
MATERIALS REQUIRED
- Breadboard
- Two LED lights
- Two Resistors
- Jumper wires
- ESP32 Microcontroller
ESP32 MICROCONTROLLER
ESP32 is a low-cost, low-power microcontroller with integrated Wi-Fi and Bluetooth. It is the successor to the ESP8266 with much wider functionality.
Common Applications:
- Smart industrial devices
- Programmable Logic Controllers (PLCs)
- Smart medical and wearable health monitors
- Smart energy devices
- HVAC and thermostats

CIRCUIT WORKING
Once the circuit is properly connected and code is uploaded to the microcontroller, connect it to Wi-Fi using SSID and password. An IP address is assigned and opening that IP in a browser opens a control page with ON and OFF buttons.
ARDUINO CODE (ESP32 Web Server)
#include

// Replace with your network credentials
const char* ssid = "your_SSID";
const char* password = "your_PASSWORD";

WiFiServer server(80);

String header;
String output26State = "off";
String output27State = "off";

const int output26 = 26;
const int output27 = 27;

unsigned long currentTime = millis();
unsigned long previousTime = 0;
const long timeoutTime = 2000;

void setup() {
  Serial.begin(115200);
  pinMode(output26, OUTPUT);
  pinMode(output27, OUTPUT);
  digitalWrite(output26, LOW);
  digitalWrite(output27, LOW);

  Serial.println("Connecting to WiFi...");
  WiFi.begin(ssid, password);
  while (WiFi.status() != WL_CONNECTED) {
    delay(500);
    Serial.print(".");
  }

  Serial.println("");
  Serial.println("WiFi connected.");
  Serial.println("IP address: ");
  Serial.println(WiFi.localIP());
  server.begin();
}

void loop(){
  WiFiClient client = server.available();
  if (client) {
    currentTime = millis();
    previousTime = currentTime;
    Serial.println("New Client.");
    String currentLine = "";
    while (client.connected() && currentTime - previousTime <= timeoutTime) {
      currentTime = millis();
      if (client.available()) {
        char c = client.read();
        Serial.write(c);
        header += c;
        if (c == '\n') {
          if (currentLine.length() == 0) {
            client.println("HTTP/1.1 200 OK");
            client.println("Content-type:text/html");
            client.println("Connection: close");
            client.println();

            if (header.indexOf("GET /26/on") >= 0) {
              Serial.println("GPIO 26 on");
              output26State = "on";
              digitalWrite(output26, HIGH);
            } else if (header.indexOf("GET /26/off") >= 0) {
              Serial.println("GPIO 26 off");
              output26State = "off";
              digitalWrite(output26, LOW);
            } else if (header.indexOf("GET /27/on") >= 0) {
              Serial.println("GPIO 27 on");
              output27State = "on";
              digitalWrite(output27, HIGH);
            } else if (header.indexOf("GET /27/off") >= 0) {
              Serial.println("GPIO 27 off");
              output27State = "off";
              digitalWrite(output27, LOW);
            }

            client.println("");
            client.println("");
            client.println("ESP32 Web Server");
            client.println("ESP32 Web Server");

            client.println("GPIO 26 - State " + output26State + "");
            client.println((output26State=="off") ?
              "ON" :
              "OFF");

            client.println("GPIO 27 - State " + output27State + "");
            client.println((output27State=="off") ?
              "ON" :
              "OFF");

            client.println("");
            client.println();
            break;
          } else {
            currentLine = "";
          }
        } else if (c != '\r') {
          currentLine += c;
        }
      }
    }
    header = "";
    client.stop();
    Serial.println("Client disconnected.");
  }
}
WEB SERVER PAGE

CIRCUIT DIAGRAM

TASK-7
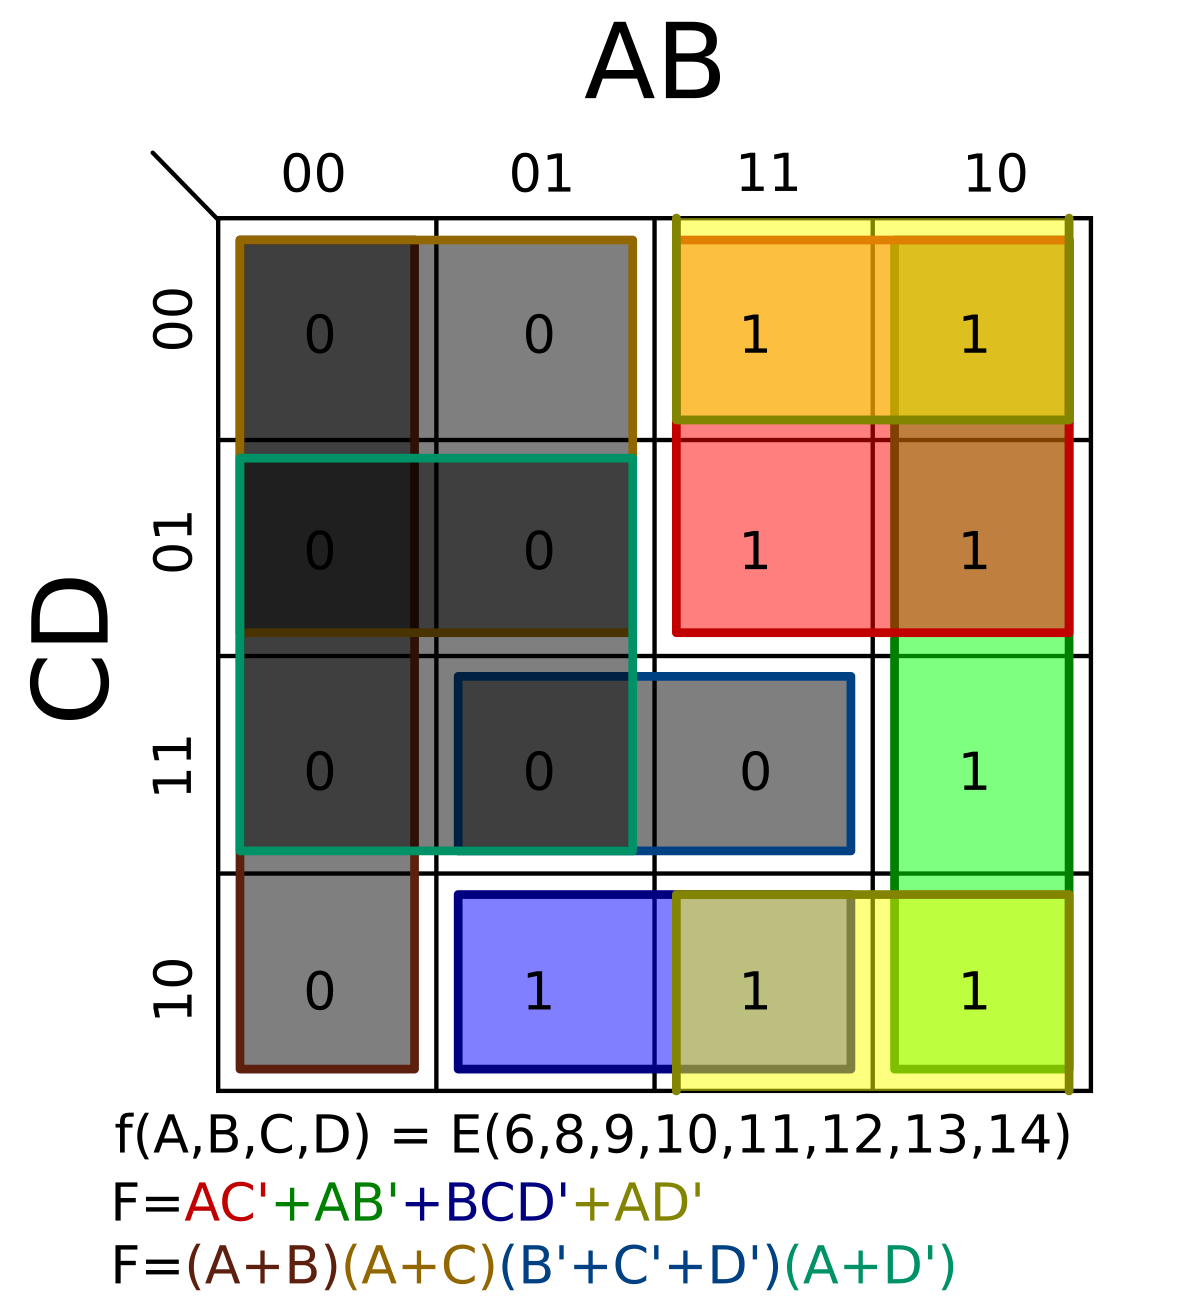
KARNAUGH MAPS AND LOGIC CIRCUIT
A Karnaugh map (K-map) is a visual tool used to simplify Boolean expressions and digital logic functions.

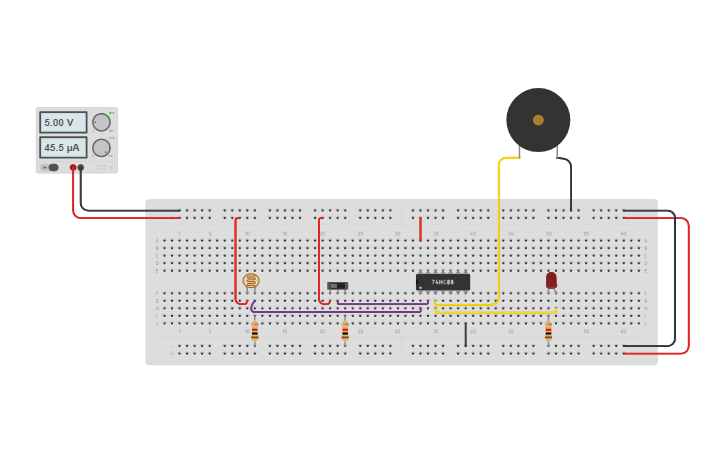
Burglar Alarm System using AND Gate
In this task, we implement a burglar alarm system using:
- Light Dependent Resistor (LDR)
- AND gate IC (74HC08)
- LED and Buzzer
When light falls on the LDR, the circuit triggers both LED and buzzer through the AND gate logic.
COMPONENTS USED
- Breadboard
- LDR
- Resistors
- AND Gate IC (74HC08)
- LED
- Buzzer
CIRCUIT

TASK-8
UBUNTU TASKS
Objective
- Create a folder named
test - CD into that folder
- Create a blank file without a text editor
- List files in the folder
- Create 2600 folders named A$1, A$2…
- Concatenate two text files and display on terminal
Basic Commands
pwd→ Print current directory pathmkdir test→ Create a folder named testcd test→ Enter into foldertouch file1.txt→ Create a blank filels→ List contentsnano text1.txt→ Open editor to writecat text1.txt text2.txt→ Concatenate and display
Create 2600 Folders
for i in {1..2600}
do
  mkdir "A$i"
done
Concatenate Two Files
touch text1.txt text2.txt
nano text1.txt     # Add: HELLO MYSELF ANJAL K NAIR
nano text2.txt     # Add: I AM A MARVEL BATCH STUDENT

cat text1.txt text2.txt