BLOG · 20/7/2024
NEHA HK IOT,LEVEL 1
GENERIC TASKS
 | OP |
GENERIC TASKS
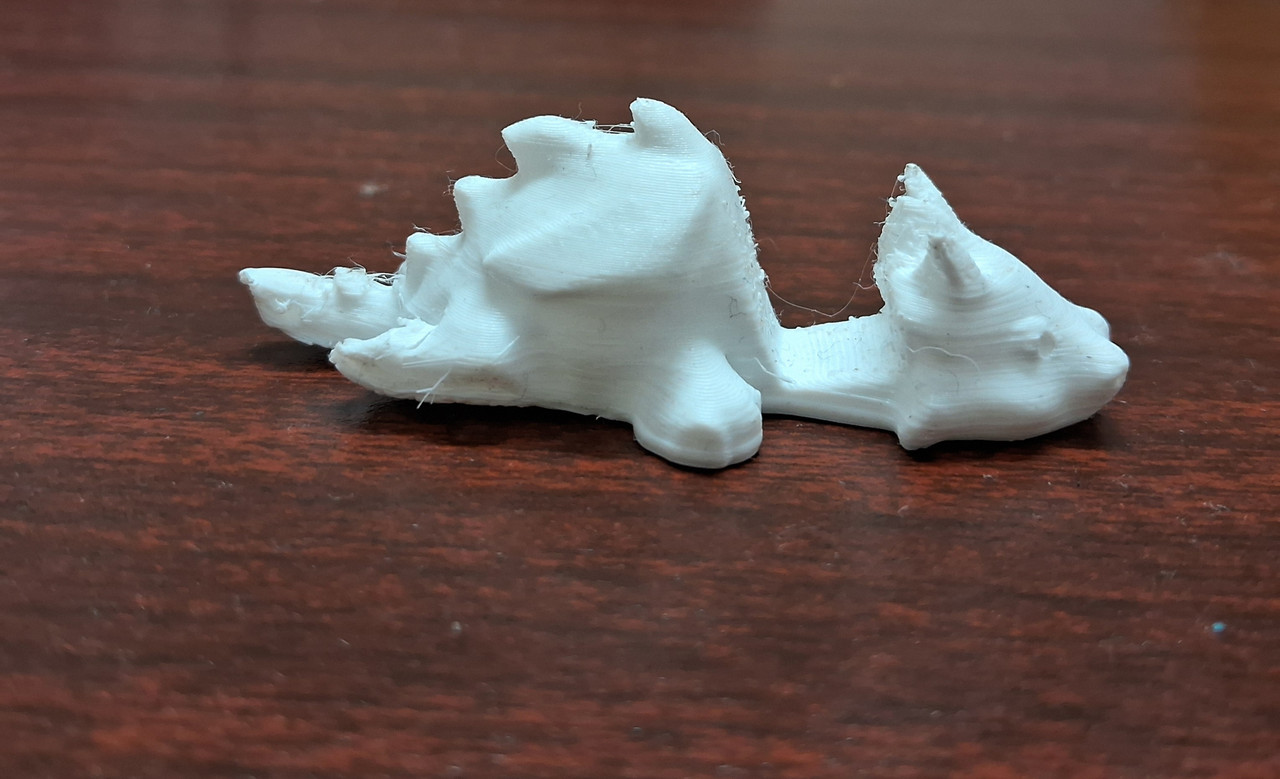
TASK 1. 3D PRINTING
The aim was to make a 3d model using 3D printing, you need a digital 3D model of your object, which you can create using software like Blender or download from sites like Thingiverse. Use slicing software (e.g., Creality Slicer) to prepare the model. This software converts the model into layers and generates G-code instructions for the printer.
The next important step is to configure printing parameters such as layer height, infill density (for solidity), print speed, temperature(.Extruder Temperature (200 C FOR PLA),Bed temperature (50-60 C)), and supports in the slicing software.
Transfer the sliced G-code file to your printer via USB, SD card, or network connection. Start printing and monitor initially. After printing, remove the object from the build plate and finish as needed (e.g., removing supports).
TASK 2. API
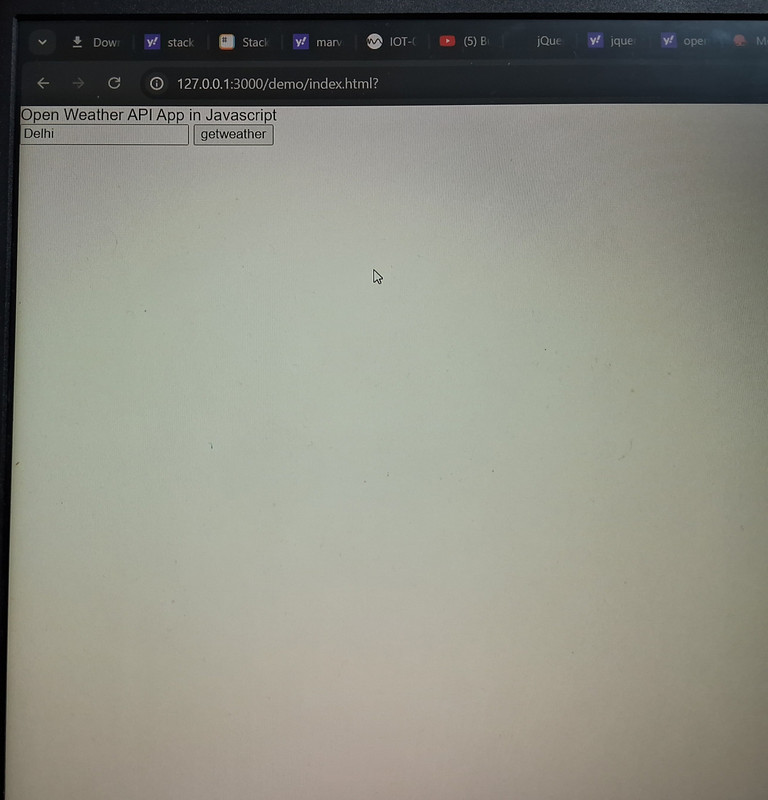
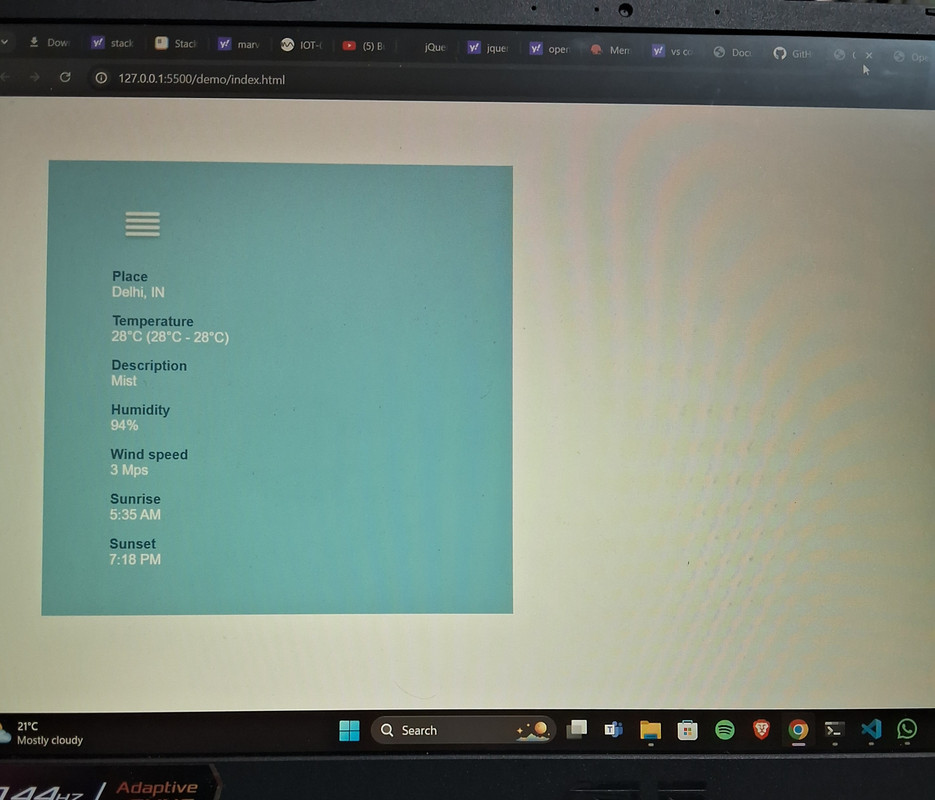
To create a Weather API integration project, start by selecting a Weather API provider like OpenWeatherMap or Weatherstack. Set up a basic folder structure on your computer with files such as index.html, script.js, and optionally style.css for styling. In your index.html, create elements for user interaction and data display. Write JavaScript in script.js to make API requests using fetch() and update the HTML with weather information fetched from the API. Customize the API endpoint and parameters according to your chosen provider’s documentation. Finally, test the app by opening index.html in a web browser and clicking a button to display current weather data. This project helps in understanding API integration and enhances skills in web development by providing real-time weather updates through a user-friendly interface.
the main issue i faced during execution of this task was not being able to run the code live, i used vs code for the execution of the program ,i asummed the error was due to some mistake in the code but i later discovered the error was with the needed extentions and not the code
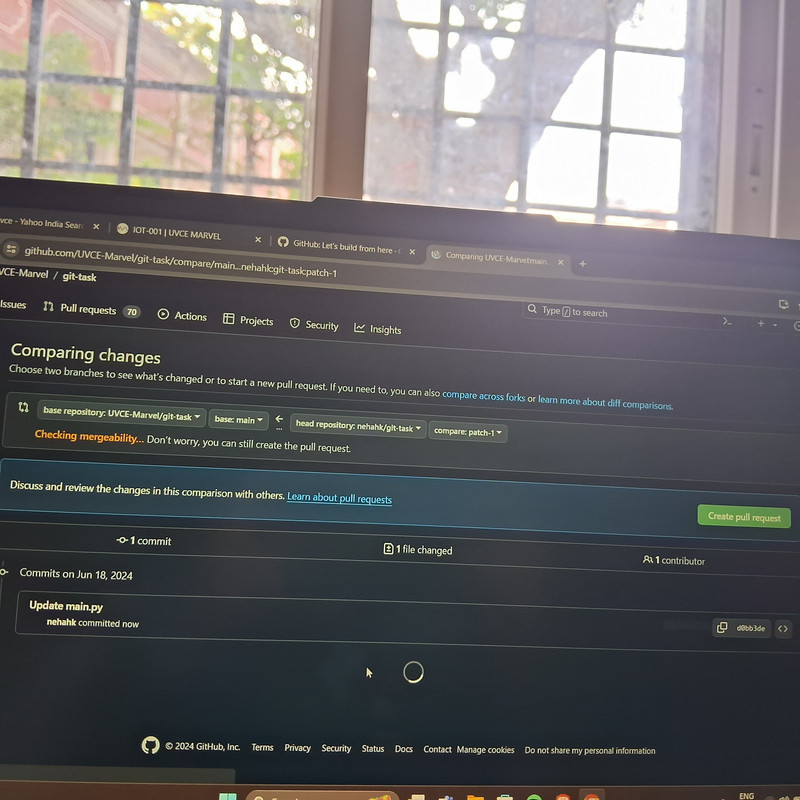
TASK 3. WORKING WITH GITHUB
The task involved fixing a Python function in a Git repository hosted on GitHub. The function, add, had an error where it incorrectly added 1 to the sum of two numbers. The fix required removing the + 1 to ensure correct addition. This task also highlighted the use of GitHub's integrated workflows, including GitHub Actions for automation, and managing issues and pull requests for collaboration and code review. GitHub serves as a robust platform for version control, project management, and continuous integration, facilitating efficient development and collaboration among developers.
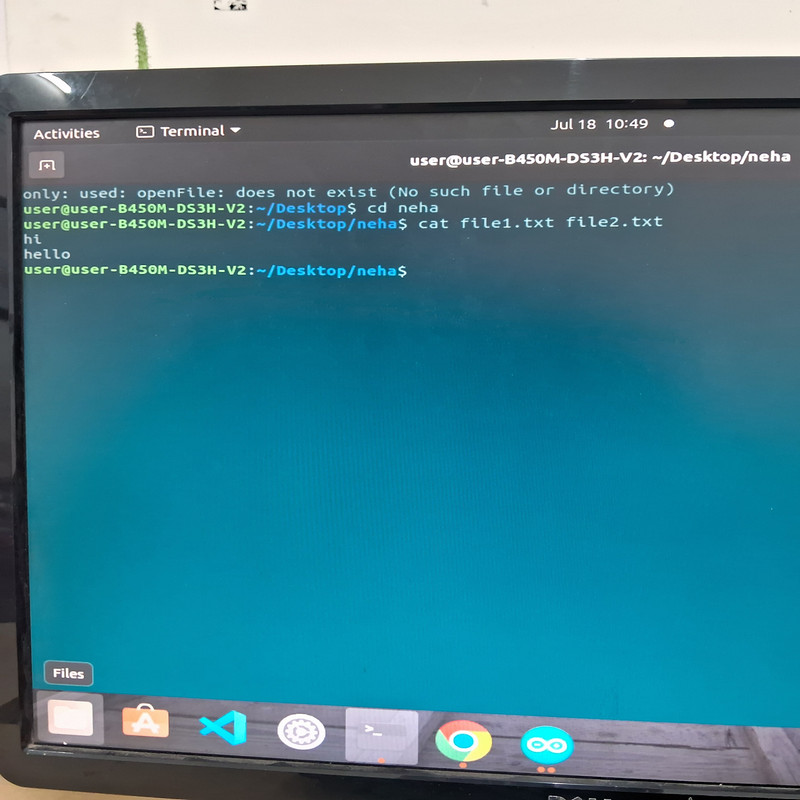
TASK 4. GET FAMILIAR WITH THE COMMAND LINE ON UBUNTU
In Ubuntu, a widely-used Linux distribution known for its stability and extensive software support, the task involves mastering essential command-line operations.
In Ubuntu's command line, you're creating a folder named test.cd and adding an empty file named blank_file.txt inside it. After confirming the file's existence with a list command, you proceed to generate 2600 folders (M0 to M2599) within test.cd. Following this, you create two text files (file1.txt and file2.txt) containing random text. Finally, you concatenate the text from file1.txt and file2.txt to display their combined content in the terminal. These steps illustrate basic file and directory management using Ubuntu's command line interface.
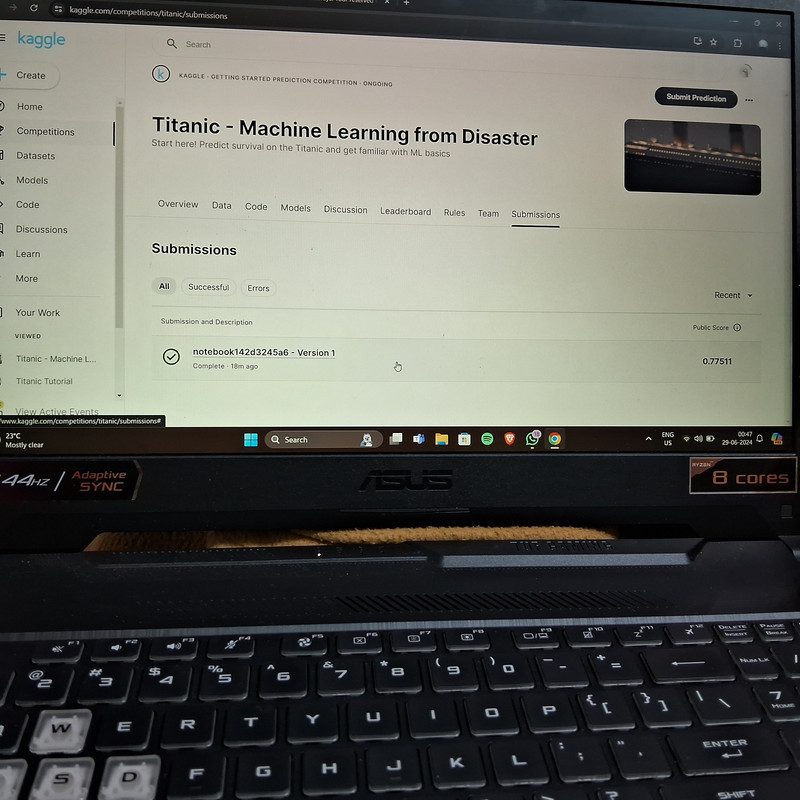
TASK 5.KAGGLE CONTEST
The Kaggle Titanic ML competition tasks participants with building predictive models to determine which passengers were more likely to survive the historic sinking of the Titanic.The Kaggle Titanic ML competition presents a challenge rooted in history: predicting survival outcomes from the tragic sinking of the RMS Titanic in 1912. With over 1500 lives lost due to insufficient lifeboats, the competition asks participants to leverage machine learning to identify patterns in passenger data—like age, gender, and socio-economic class—that could predict survival likelihood. Our aim was to construct predictive models to uncover insights into which groups of passengers were more likely to survive this infamous maritime disaster.
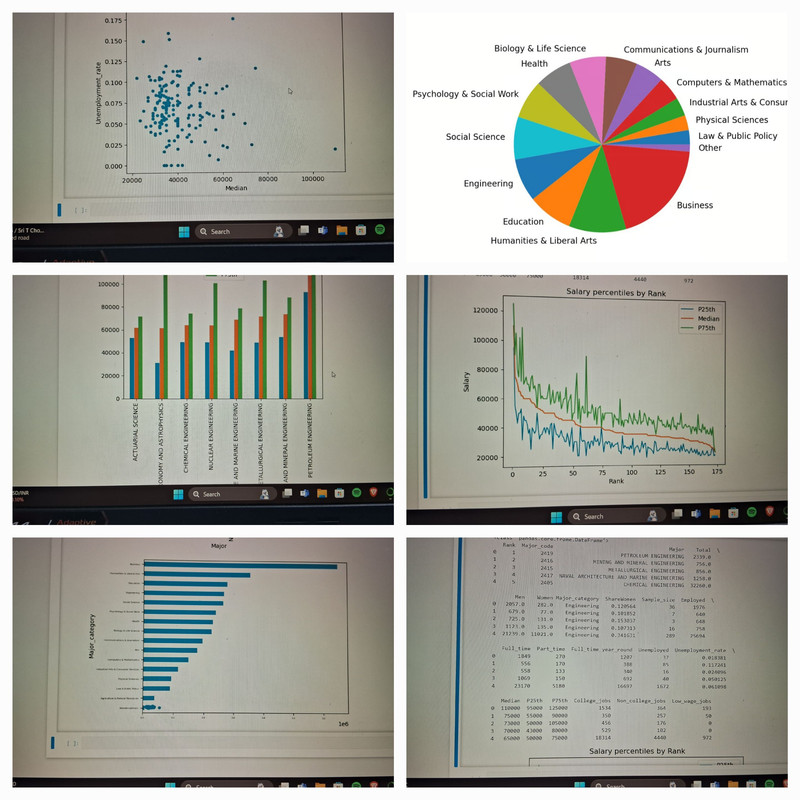
TASK 6.WORKING WITH PANDAS AND MATPLOTLIB
Our aim was to use python libraries and plot visual graphs .In Python, libraries like Pandas and Matplotlib are essential for data analysis and visualization. Pandas allows us to load, manipulate, and analyze datasets easily using DataFrames, which are like tables where each column represents a different variable and each row represents a different observation. Matplotlib, on the other hand, helps in creating visualizations such as line graphs, bar graphs, scatter plots, and more.This combination of Pandas and Matplotlib is powerful for data exploration, analysis, and communication of findings through clear and informative visualizations.
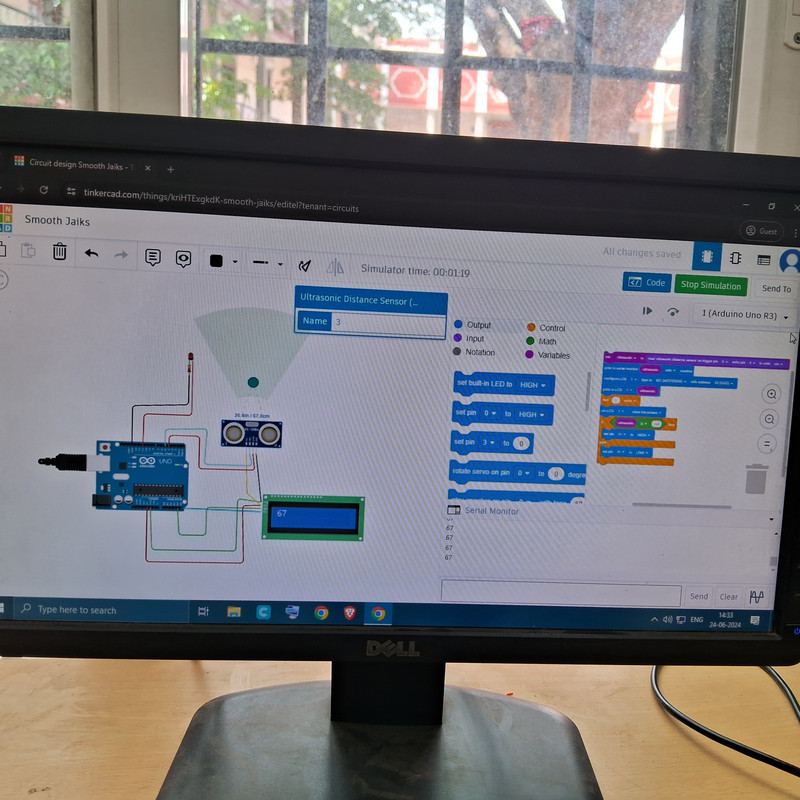
TASK 9.TINKERCAD
Tinkercad is a web-based 3D modeling platform that allows users to design, simulate, and prototype electronic circuits and 3D models.The project involves creating a radar system simulation using Tinkercad's circuit design capabilities. By utilizing an Arduino Uno, HC-SR04 ultrasonic sensor, and SG90 servo motor, the simulation aims to demonstrate how these components interact to estimate distances and detect objects. The ultrasonic sensor emits sound waves, and by measuring the time it takes for the waves to bounce back, it calculates distances to nearby obstacles. Meanwhile, the servo motor rotates the sensor to scan a wider area, mimicking a radar's sweeping motion. Through Tinkercad, users can build this circuit virtually, write and upload Arduino code to control the system, and simulate its operation. It's widely used for educational purposes and by hobbyists due to its intuitive interface and accessibility.
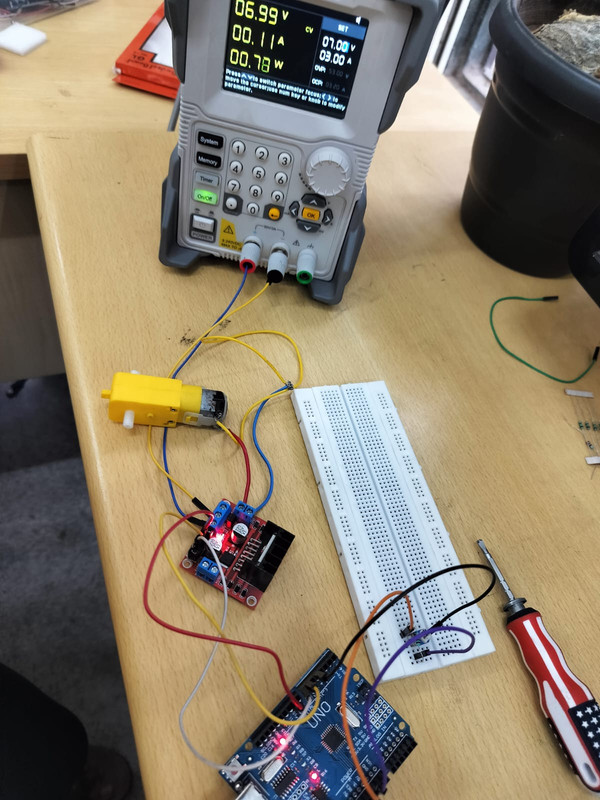
TASK 10. SPEED CONTROL OF DC MOTOR
This project focused on mastering basic DC motor control techniques using an Arduino UNO and an L298N motor driver. Initially simulated on Tinkercad, the setup involved connecting the Arduino, L298N driver, and a 5V DC motor to achieve bidirectional movement and speed control via Pulse Width Modulation (PWM). After verifying functionality in simulation, the design was implemented on physical hardware, ensuring proper wiring and power connections. Videos documented both phases, illustrating the simulated and real-world operation of the motor, showcasing its versatility for educational and hobbyist applications. The project's success highlights the practical integration of Arduino and L298N for motor control, offering a foundation for future enhancements such as advanced algorithms or wireless communication integration.
while running the code in arduino there were errors with the code and i approached a coordinator who helped me out with the execution of the code by installing the neccessary softwares for the processing
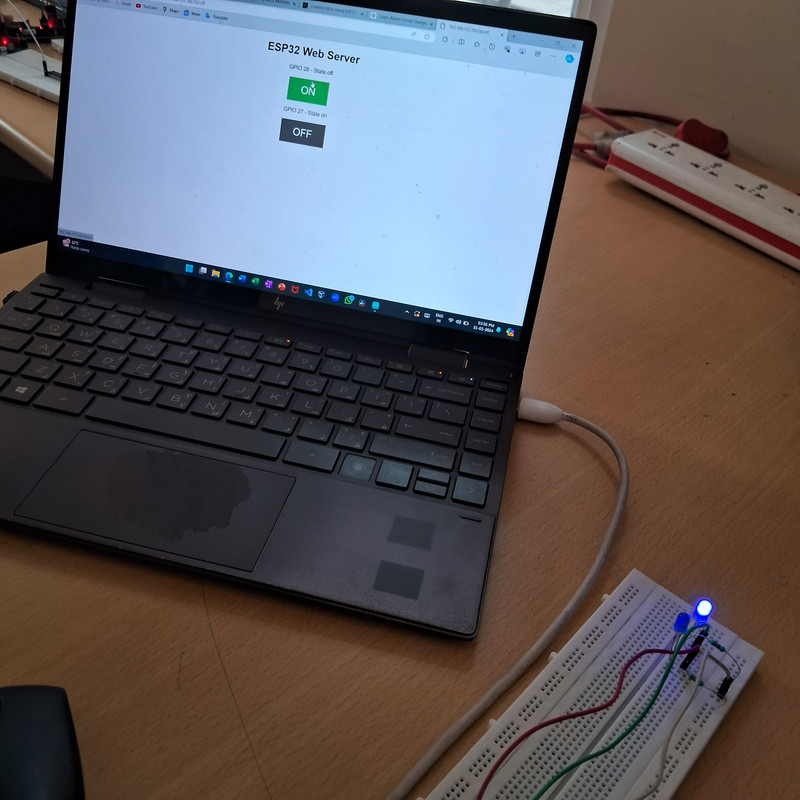
TASK 11. LED TOGGLE USING ESP32
The aim of this project is to gain a practical understanding of the ESP32 microcontroller by creating a standalone web server that controls an LED through GPIO pins. Using the Arduino IDE, we write and upload code to the ESP32, configuring it to respond to web requests to toggle the LED on and off. To set up, connect an LED to an ESP32 GPIO pin with a current-limiting resistor. In Arduino IDE, install the ESP32 board package via Boards Manager, select the ESP32 Dev Module, and write code to create a web server. Upload the code, selecting the correct port, then open Serial Monitor to find the ESP32's IP address. Enter this IP in a web browser on the same Wi-Fi network to control the LED remotely. This project showcases IoT principles using the ESP32 microcontroller.
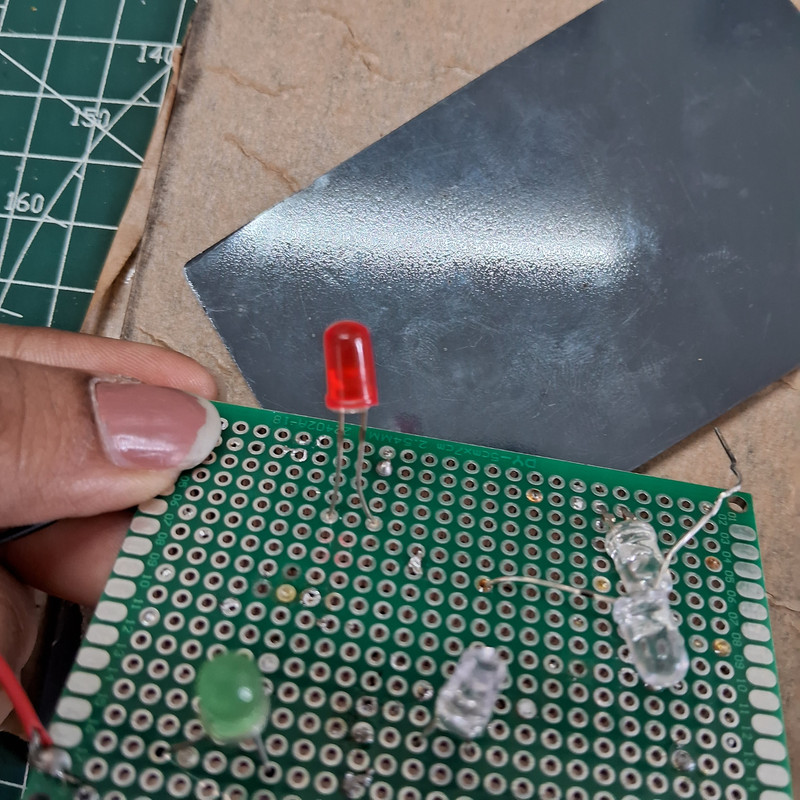
TASK 12. SOLDERING PREREQUISITES
Soldering is a fundamental technique used to join metal surfaces using a melted filler metal called solder. The process involves heating the surfaces to be joined with a soldering iron, melting the solder onto the heated joint, and allowing it to cool and solidify. This creates a reliable electrical connection or mechanical bond. Essential tools include a soldering iron, which heats up to melt the solder, and solder itself, which contains flux to improve the joint's quality. Regular cleaning of the soldering iron tip with a sponge or brass wire helps maintain its effectiveness. Mastering soldering basics is crucial for electronics assembly and repair tasks on components like LED circuits mounted on perfboards.
TASK 13. 555 ASTABLE MULTIVIBRATOR
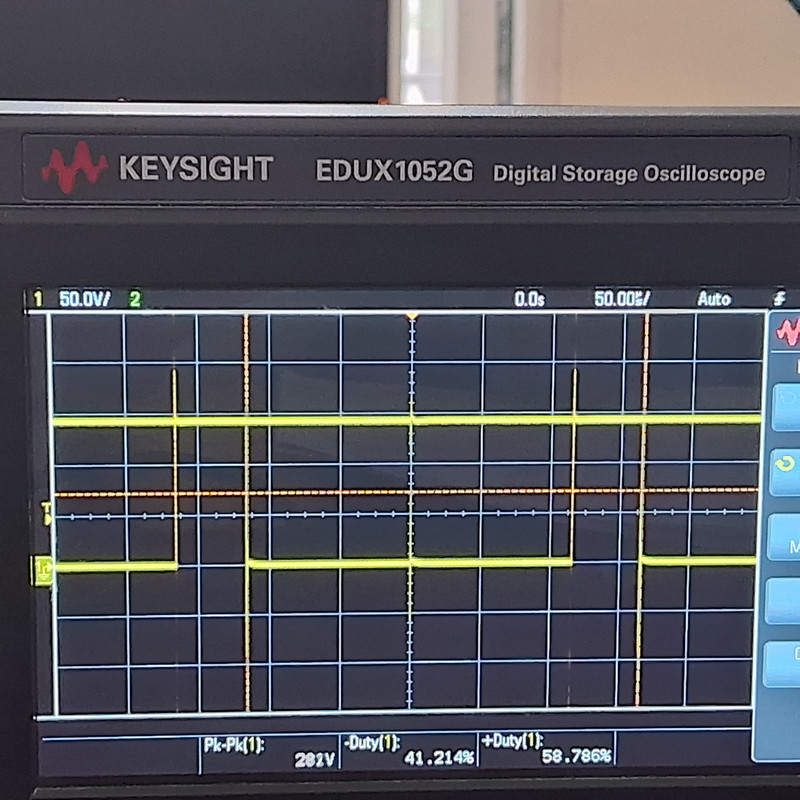
The project involved designing a 555 timer astable multivibrator on a breadboard with a specific 60% duty cycle. By selecting appropriate resistor values (R1 = 1kΩ, R2 = 2kΩ) and a suitable capacitor to determine the frequency, the circuit was constructed and powered using +5V. Using a Digital Storage Oscilloscope (DSO), the output waveform at Pin 3 of the 555 timer was observed and adjusted to ensure it met the desired duty cycle and frequency specifications. This practical exercise provided hands-on experience in analog circuit design and troubleshooting, showcasing the utility of the 555 timer in generating precise square wave signals for various electronic applications.
this was one of the few tasks which i faced major issues . after making the circuit and providing input voltage the output was not in square wave form ,after rechecking everything i found out that it was a faulty 555 instable multivibrator. after changing the multivibrator due to the oscillator picking up disturbancing the wave diagram produced was not precise but the duty cycle was precise.

TASK 14.KARNAUGH MAPS AND DERIVING LOGIC GATES
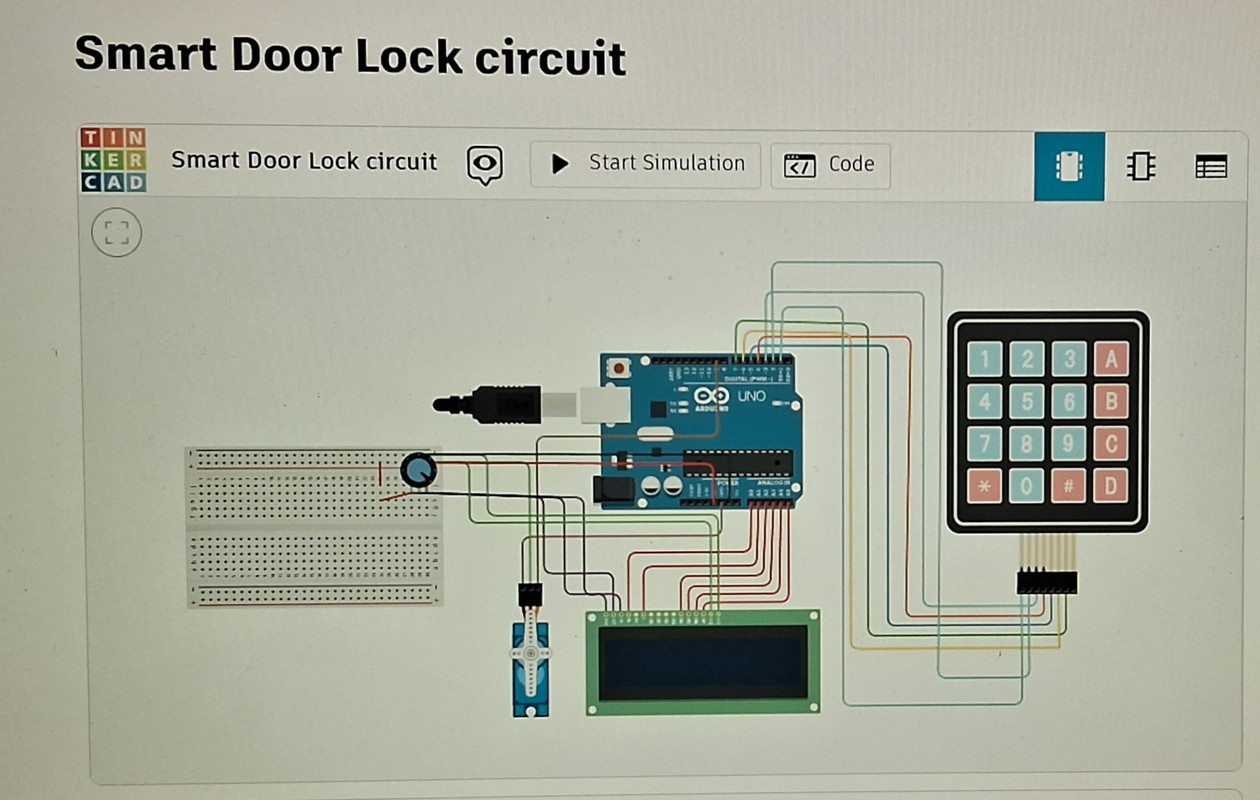
Task 14 involves creating a burglar alarm system using logic circuits based on door lock and key press states. You begin by defining conditions where the alarm should trigger: when the door is locked and a key is pressed. Construct a truth table and Karnaugh maps to simplify the Boolean expressions for these conditions. Design the logic circuit using basic gates like AND and OR, ensuring the alarm activates only when both conditions are met. Implement the circuit using physical components or simulation tools, connecting an LED or buzzer to indicate when the alarm is triggered. Testing ensures the circuit functions correctly by varying input states. This task demonstrates the application of logic gates and Karnaugh maps in designing a simple yet effective burglar alarm system.
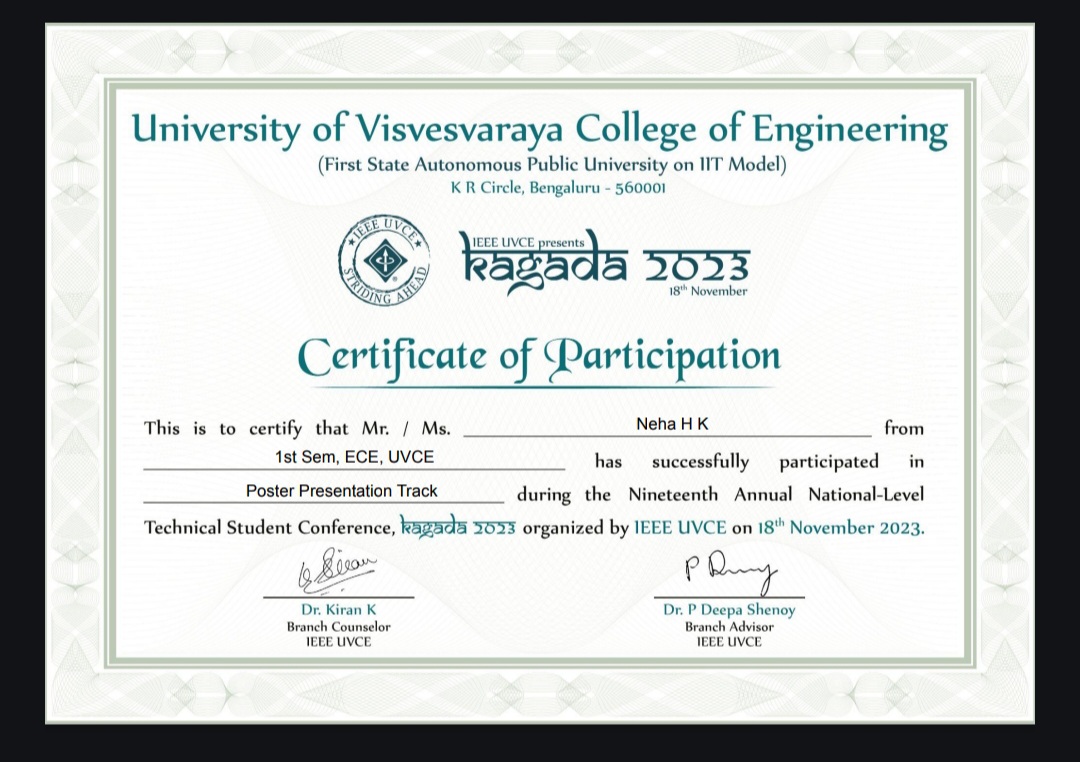
TASK 15.ACTIVE PARTICIPATION
Aim is to take part in any technical event, inter or intra college and submit the issued certificate of participation.
I participated in kagada event organized by IEEE UVCE at our college campus and i participated in the poster making competition and the topic was 3d printing which high lighted the probable advancement in the near future in medical industry by using a 3d printer.